Do you need a swimming pool in a bathhouse?
After a hot steam room, you definitely want to quickly and sharply plunge into ice-cold water; without this, the pleasure of the bath will be incomplete. This is a pleasant and effective way of hardening, especially if the procedure is carried out regularly. Besides? In this way, physical and mental fatigue is quickly relieved, the body becomes more stress-resistant and remains young longer. The procedures are recommended for both middle-aged people and children.
Some people are afraid to install a swimming pool at home because of the complexity of its manufacture or the high cost of maintenance. But now there are many options for a hot tub, many of which are inexpensive and can be built quickly.
You should only give up a pool if the bathhouse is very tiny and there is no space for a canopy on the site.
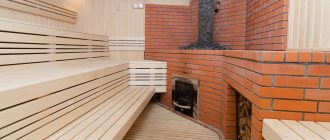
Photo gallery: options for arranging a bathhouse with a swimming pool
Winter forest image creates the illusion of outdoor swimming
Even in a small pool it is worth installing several handrails
Finishing the ends with pebbles is an inexpensive but effective technique
Stones can be used to decorate not only the end of the pool, but also the nearest wall
A mirror wall by the pool will make the room spacious
Rounded edges of the pool - an additional safety measure for families with children
Even in a tiny pool you can relax after a stuffy steam room
Rounding the corners made the pool much more impressive
A grate in the floor around the pool will prevent water from spreading throughout the room
Thanks to the wooden lining of the sides, the plastic pool fits perfectly into the interior of the bathhouse
What kind of pit is needed?
It should be 25-35 centimeters deeper than the maximum limit and 50 centimeters wider. The laying of drain pipes is carried out along a pit with a slight slope in the direction of the location of the sewer well or drainage pit. The bottom is covered with a layer of sand, the height of which, when compacted, should be 10 centimeters.
The next layer of the same height is compacted gravel. If a stationary installation of a swimming pool in a bathhouse is planned and the tank is large in size, then at the next stage the filling of the bottom holes is carried out. They will be designed to collect water for filtration. Pipes are laid to the holes, and places for installing screamers are determined in the walls. It is also necessary to provide an area for special equipment intended for water purification and filtration.
Since the tank is a permanent structure, care should be taken to ensure external waterproofing to ensure its protection from groundwater. For these purposes, special materials with good waterproofing characteristics are used: roofing felt, PVC films, roofing felt and others.
After the entire pit is covered with them, it can be filled with a layer of concrete mortar 10-15 centimeters high. To ensure maximum reliability of the bottom, it is recommended to use a solution of high grade cement and sand in a ratio of 2:1 (where two parts are cement). At the next stage, the reinforcing metal mesh is laid. Another similar layer of concrete mortar is poured on top of it.
But this material will require additional pressure protection: another layer of reinforcing mesh and/or geotextile will be required. In this case, the waterproofing is laid after the protective layer, and only then the concrete solution is poured.
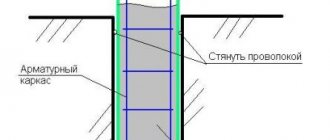
The walls of the tank are erected simultaneously with the construction of the bottom. It is recommended to provide a reinforcing iron frame around the entire perimeter and install formwork. The filling of the walls must be continuous and of the same thickness. For this reason, you should make sure you have a concrete mixer in advance.
Manual kneading is not suitable in this case, since we are talking about a large area. As an alternative to a concrete mixer, a ready-made solution delivery service can be considered. If the latter option is preferred, the solution class W8 should be indicated in the application. Pouring the walls and bottom with ready-made concrete takes no more than two hours.
To build a durable bowl in a bathhouse with your own hands, you need ordinary and well-known materials and special devices. We need to stock up:
- reinforcing bars used to strengthen individual parts of stationary pools;
- cement and sand;
- wood for formwork, construction and finishing of railings and steps leading to a pond;
- pipes of different sections;
- facing products (metal sheet, tiles, etc.);
- waterproofing film;
- tools for excavation and other work;
- pumping equipment for supplying and pumping out water.
The first stage of construction work is digging a pit for the planned structure in the bathhouse. We take the depth of the pit to be approximately 40 cm greater than the depth of the pool itself, and the width and length to be 50 cm greater. Important! The bottom of the pit is made with a slight slope. At the same time, in the lowest section of the pit, before the start of all construction work, we will need to install a pipe with a diameter of 8–10 cm.
We fill the bottom of the pit with sand. The layer of material is about 5 cm. We compact the sand and pour medium-sized crushed stone (about 10 cm) onto it. We compact this layer. It is advisable to perform the operation with a manual tamper made of wood. Now mix cement (1 part), crushed stone (5 parts) and sand (3 parts).
), add water, pour the resulting mixture over the prepared pie made of crushed stone and sand. Even better is to use ready-mixed concrete. We choose the grade of material W-8. It is characterized by high moisture resistance and density. The thickness of the concrete is 10 cm. After pouring, we install a reinforcing mesh on the bottom. We make it from reinforcement with a diameter of 0.8–1.2 cm. We connect the mesh into one whole with knitting wire. Fill the reinforcement with another 10 cm of concrete.
Next we move on to the construction of walls. We install formwork made from boards. We place reinforcing elements in it (in the form of the same mesh). We concrete the wall surfaces. Nuance. We bayonet the concrete with a shovel or an iron rod. Thus, we will achieve its ideal adhesion to the surface of the walls. In addition, the concrete layer (its thickness is about 25 cm) must be compacted with a tamper.
Another important point. Apply the concrete mixture with minimal interruptions. The more time passes between pouring individual portions, the less durable the wall surfaces become. After the pool is completely concreted, we must remove air bubbles from the composition using a vibrating hammer or deep vibrator.
Getting ready for construction work
If you prefer a prefabricated or hydromassage pool, you will not have to carry out construction work. You just need to choose a model that is suitable for the price and fits in the allocated room. In the case of a hydromassage font, the selling company often provides installation services and gives a guarantee for the entire system at once.
If you buy a hydromassage pool, entrust the installation to professionals.
But if you like stationary pools, you will have to work hard. In a private bathhouse, we recommend making a skimmer plunge pool, since an overflow plunge pool will take up an unreasonably large amount of space and will require significantly more effort and investment.
Specifying the parameters of the pool
First, let's decide on the depth. If the family has children under adolescence, the pool should not be deeper than 1–1.2 m. A depth of 2 m is needed only for swimming; any adult can plunge headlong into a font measuring 1.5 m. A pool depth of 1.5 m is considered universal. 1.65 m, but if there is a lot of space in the room, you can make a multi-level pool with deep and shallow areas.
Optimally, there should be 2 m2 of pool water per person. If the font is used by a family of four, the best size is 4x2 m.
The length of the pool depends on how it is used. You can just take a dip or splash around with your child in a 2x2 m plunge pool, but for swimming you need at least 5.5 m. In a shallow swimming pool you will also need to install a counterflow system.
The width of the font is determined by the parameters of the zone allocated for it. It is important that the edge of the pool does not come into contact with the walls, so the font should be 0.6–1 m narrower than the distance between the walls, but not less than 1.5 m.
A very impressive pool in the shape of a blot
The shape of the font is limited by the materials used. If you prefer a plastic font, you can choose an option with rounded smooth lines, or a simple round/rectangular bowl. Manufacturers offer a very wide selection of models of different depths, volumes and shapes. Be careful with the dimensions, take into account the required technological gap between the pool and the wall.
The more complex the concrete pool bowl, the higher the risk of cracks
Those who want to cast a concrete bowl can shape the pool as they wish, but the bends and turns should not be too sharp, otherwise the mosaic will have to be trimmed at the cladding stage. Since this is a labor-intensive operation, and the result often does not look aesthetically pleasing, concrete bowls are often made rectangular, sometimes with rounded corners or one of the sides.
With the right skill, blocks can be used to form a very complex pool bowl
Those who build the base of the structure from bricks or blocks have little choice: square, rectangle or trapezoid. Theoretically, it is possible to make a slight bend in such a pool, but this requires great professionalism of the craftsmen. In addition, you will have to apply an uneven layer of plaster, and this is an additional risk of delamination of the structure. Therefore, it is better not to take risks and give preference to simple forms.
Material
Swimming pools are made from different materials:
- Reinforced concrete. The largest water containers are made from this material and are buried in the ground. They are durable and reliable, but manufacturing requires a lot of effort and finances.
- Plastic. A popular material for the manufacture of collapsible containers and small fonts. Plastic is resistant to temperature changes and moisture.
For a temporary pool, it is better to choose plastic models. If it will be installed inside the bathhouse for a long time, it is better to build a concrete bowl.
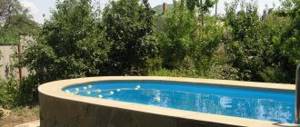
Above ground swimming pool with plastic bowl
For such a bowl you don’t even need to rebuild the rim
The easiest way to make a pool is to purchase a plastic bowl and place it at floor level. Then only the supply and discharge pipes will be under the floor, and all other appliances can be placed in the basement. Minimum excavation work, no risk to the foundation, no costs for waterproofing and no complex calculations. From the purchases: the bowl itself, facing panels (you can use the remains of the lining), water pipes made of cross-linked polyethylene or polypropylene, connectors for them, as well as additional devices: pump, filtration system, water heater, skimmer and pressure gauge. You can monitor the quality of water yourself, without automation.
Complex tools are also not needed. A standard gardener's kit will be enough: a jigsaw for trimming the front panels, a mallet for fitting them, the simplest soldering iron for assembling pipes, a sensor, a utility knife and a screwdriver for installing the electrical part of the system.
Those who want to have a built-in automated pool will have to look into excavation robots.
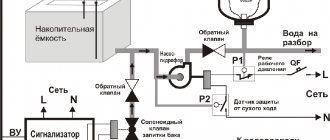
If you are planning to equip your first pool, you will not be able to provide for all the nuances. Therefore, it is best to use ready-made projects, which indicate all the necessary pipes, leads and components. Examples of projects are attached to the article. You can change the parameters of the bowl as you wish. But in no case should you reduce the power of filters or pumps without a reason, otherwise the system will not be able to cope with the load.
Waterproofing
In many ways, the choice of waterproofing type depends on the individual idea of the pool. If tiles are used as a finishing material, then it is advisable to provide liquid waterproofing of the bottom and walls. Only after this can you begin laying tiles on a hydrophobic composition.
It should be remembered that ceramic tiles cannot be used for such a tank, since they have a porous structure: they not only absorb water well, but are also an excellent environment for the formation of fungi and mold. You need to purchase porcelain tiles, which, of course, are more expensive, but more reliable. As an alternative, you can consider glass mosaic tiles.
If PVC film is used for finishing, additional waterproofing is not needed. If desired, you can treat once with a penetrating liquid composition. When choosing such a finishing material, preference should be given to more durable types - at least 3 millimeters thick.
To prevent slipping in the pool, you need to choose a rough film rather than a smooth one. You can choose any colors: plain, with a pattern, the effect of stone chips or mosaics and others.
Required Tools
Metal grater Crushed stone Cement Protective film Sand Mosaic Hammer Shovel Show all
The pool in the bathhouse gives you the opportunity to plunge into a plunge pool with pleasantly cooling water after a hot steam room. A real dream for any private home owner! And it is quite possible to build it with your own hands. The main thing is to know how.
- 2 Competent design is a guarantee of quality construction
- 3 Construction of the pool - start of work
- 4 Arranging the walls of the pool - tips
- 5 Subtleties of waterproofing measures
- 6 Finishing the pool - how to do it?
Subtleties of waterproofing measures
The surface (inner) of the pool must be waterproofed. In domestic conditions, this is usually done using PVC film. They simply line the pool with it. This waterproofing option is quick and very inexpensive. But it does not provide the highest protection.
Waterproofing the pool with film
A better result is achieved by creating a special cake from several layers of waterproofing materials, as well as liquid glass. Often, special adhesive solutions containing latex are used to protect pools from moisture.
You can also reduce the permeability of concrete pavement using a homemade mixture of ceresite emulsion, cement and sand. A liter of ceresite is diluted with 10 liters of ordinary water, and then the resulting composition is poured into a mixture of sand and cement (3 to 1). The mixture is spread over a well-wetted concrete surface and rubbed with a trowel. Then you need to use a grater to level the protective composition as thoroughly as possible.
