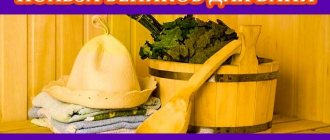
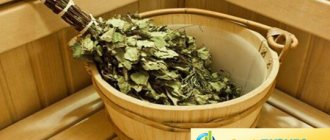
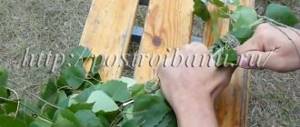
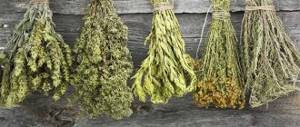
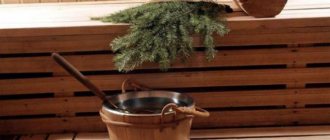
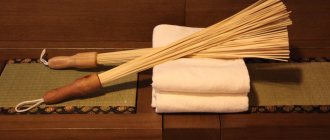
What item is most associated with the Russian bath? 90% of respondents will answer without hesitation that the most acceptable item for a Russian bath is Russian vodka. The answer is, of course, good and has the right to life. But we are interested in the opinion of the remaining 10%, who firmly believe that the first place in a bathhouse is a birch broom. Why a broom and why, of course, a birch broom? Let's figure it out.
When is the best time to cut and prepare brooms for a bath?
It should be remembered that this must be done at the beginning of summer. In the last days of May, approximately 50 days after Easter. After the rains, when warm and dry weather has already settled. By then the foliage becomes fresh, soft and fragrant.
A broom can be made:
- From birch.
- Duba.
- Linden trees.
- Juniper.
- Ate.
- Eucalyptus.
- Bamboo.
- Wormwood and other species.
It can be knitted from every tree or plant. For uninitiated people, this object is just a tool with which you can heartily whip your neighbor.
Photo from the website Krasnoyarsk-stroy.rf
You should not collect raw materials for knitting from the beginning of August, with the exception of oak products.
According to popular beliefs, at this time trees and plants begin to lose their beneficial properties and their strength, which is so necessary for the healing effect.
A few procurement rules:
- Choose trees that grow at higher elevations.
- Raw materials should be collected in the forest, but it is not recommended near the road, there are too many harmful substances there.
- Cut dry branches. If you do this in the rain, then during drying they will fly around and deteriorate.
- It is better to choose young rods located closer to the ground, under the age of three years.
- Try to cut branches of trees whose leaves are firmly held at the base, without falling from normal shaking. There is no need to touch thorny rods or those rods from which resin drips.
- It is a misconception to think that for a given attribute, the more branches, the better. About 50 pieces are enough. They contain the maximum number of useful substances, and they are also very flexible.
- The best samples are obtained from branches of young trees; they are more flexible and will last you longer.
- There is no point in climbing to the very top; the best examples are those that grow near the ground. For example, good birch raw materials come from trees growing near water. Weeping birches grow near rivers and lakes. They are called that because their branches hang down.
- The quality of the finished product is determined before harvest. If the leaves are uneven and rough, then such branches should be avoided. Tender, smooth shoots with rich color are considered the standard.
- The correct cut is made with pruning shears from the side.
- You should not put freshly collected material in bags or sacks; the leaves will wrinkle and become not as flexible as before.
- Carry them home from the forest, bandaged, but not very tightly, because they still need to be dried. You can carry the bundle home in your hands or carefully place it in your car.
Centuries-old traditions of harvesting birch brooms
Chopped birch branches
Broom preparation
In ancient times, bath brooms were traditionally prepared 1-2 weeks after Trinity Day. Typically, this holy holiday falls in June. Along with this, due to significant differences in climatic conditions in different regions of Russia, it is not worth relying on folk custom alone - in many zones the birch tree does not have time to bloom before Trinity, and a broom made from such branches is of little use.
Earrings have appeared, which means the harvesting period has been missed
The principle is this: we focus on the characteristics of the ripening of birch. Maximum strengthening of the leaf will indicate the imminent appearance of earrings. This short time period, when the leaves are the strongest and there are no catkins yet, is the most suitable for preparing the right bath brooms.
Choose a day with dry weather. The recommended harvesting time is after the dew has disappeared, i.e. in the morning.
Go to harvesting in warm weather in the morning
Bath brooms are traditionally collected from weeping birch. Typically, these trees have a fairly impressive height, while possessing long, strong and quite flexible branches. Beautiful brooms are made from the branches of young and previously unblooming birch trees - such trees have the most delicate leaves.
Helpful advice! When choosing branches, make sure that the upper side of the leaves is not rough, the branches are straight and rather thin, and the leaves themselves are velvety and tender.
Photo of a weeping birch near a pond - a suitable tree for collecting raw materials
The branches can be cut with a sharp knife or collected in another suitable way. For greater convenience, the collector can climb a tree, bend it down, tie it to some nearby tree and collect the required number of branches. Birch, as noted, is quite flexible and durable, so such manipulations, provided they are carried out carefully, will not cause harm.
Branches for a broom should have two or three branches
Important! There is no need to immediately tie the collected branches too tightly. The material is hung on a strong rope under a protective canopy so that direct contact with the sun is excluded. There should be a draft in the room. After a week, the brooms are drying out quite thoroughly. In this state, they can be placed tightly on shelves in a dry, ventilated room, for example, a dressing room or a barn.
It is better that the finished bath broom looks like a fan, and not looks like a broom. To follow this recommendation, a fresh broom should be laid out on the floor and turned over daily, repeating until the products are dry. Otherwise, the material may dry out or dry incorrectly.
Birch broom
For example, if the harvester tightly ties the birch branches from the very beginning, the leaves in the center of the broom will become dark and “burn”, which is why they will have practically no aroma.
Currently reading
Sauna plan 4x5 washing and steam room separately
How to line a stove - Building a bathhouse or sauna
The color of properly dried brooms is a concentrated green, pleasant matte. The branches should emit the aroma of balsamic birch oil, noticeably intensifying when steamed.
It is also correct to collect branches for brooms in June for the reason that during this period the leaves already grow to a fairly large size, but retain the required level of essential oil glands, which are present, at the same time, not only in the foliage, but also in young birch shoots. Young large shoots retain high elasticity, thanks to which whippings with such a broom are easily tolerated by a bathhouse visitor.
Birch brooms are harvested from early June to mid-July
Summarizing the above, we can draw the following conclusion: for preparing birch brooms, branches with strong and young leaves are used. Such foliage contains a maximum of components beneficial to humans. On the territory of Russia, depending on the climatic zone, the optimal time for harvesting birch brooms can range from early June to mid-July.
How to make a bath broom correctly
Procurement experts recommend stocking up on bath accessories for future use, using a fresh product each time. Because after the next trip to the steam room, the sample loses its properties, foliage and shape, turning into a tattered broom.
After collecting the raw materials, it must first be dried:
- To do this, leave it for several days in a dry and dark room where the sun's rays do not penetrate.
- After drying, collect branches of the same length; if there are none, they can be cut to the desired size.
- Remove leaves about 1/3 of the way through.
- Next, collect everything into one large rod and tie it. The strongest and thickest branches should be placed in the core (center), and the thinnest ones around it.
Photo from the site vitebsk.pulscen.by
As for the volume of the product, it should not be too large. The main thing is that it is comfortable to hover, and that the object lies comfortably in the steamer’s hand.
The length of the bundle according to the standard should not be more than 60 cm.
In the right product, the rods are bent inward. The matte side of the leaves should be adjacent to the center, and the glossy and smooth side should look outward.
Instructions for tying a birch broom with your own hands
Knitting a broom
The image shows the step-by-step sequence of knitting a birch broom for a bath. To better understand the process, please read the more detailed guide for this activity. The necessary information is presented in the table.
Table. Knitting a birch broom
| Work stage | Description | Photo |
| Preparing branches for knitting | First, lay out the dried birch branches on burlap and leave for a couple of days. Branches withered in this way are better suited for preparing birch brooms. | |
| Determining the optimal product size | At this point, everything is individual: some bathhouse attendants love massive brooms, others prefer small products. The only standardized recommendation is regarding length: keep it within 0.4-0.8 m. A shorter or longer broom will simply be inconvenient to use. | |
| Cleaning up branches | At the location of the handle, knots and foliage are removed. In general, approximately a third of the total length of the product is subject to cleaning. | |
| Assembling a broom | The cleared branches are collected together. At the same time, the product is given a flattened shape. The frame is created from thicker branches - they must be placed inside the future product. Thin pieces are laid out around the frame. Place them with the curve inward. The leaves should be facing in the same direction, and the branches should be fanned out. In this case, the broom will seem to “hugg” the body of the steamer during the bath massage. One thick and dense product is enough for an average of 2-3 visits to the steam room. After this, it crumbles and becomes unusable. | |
| Making a pen | The previously cleaned and collected branches are wrapped with twine: you squeeze the workpieces with one hand, and wind the rope with the other. There are no secrets here: the main thing is that the branches are tightly fastened. A strip of fabric is wound at the end of the handle - without it, there is a high risk of getting calluses in the future. Recommended handle length is 150 mm. The highest quality is ensured when tying branches with twine in several rows near the foliage, and not along the length of the handle - a handle with a free end is more convenient to use, it will not slip out even with the most powerful movements. |
Helpful advice! When assembling the broom, add some fragrant herbs to its composition. For example, thyme and chamomile are good, mint and black currant are also good. If nettle, spruce and other thorny plants are added, they should be placed inside the product to eliminate the risk of damage and discomfort.
Don't make the broom too heavy. At this point, be guided by your own feelings: the product should be comfortable and light just for you.
Don't make the broom too heavy
Methods for drying a broom
Creating the workpiece is still half the battle; then you need to dry it well.
Tying a bath bouquet is not that difficult; the hardest thing is to dry it properly while preserving its beneficial properties.
Fresh samples of hardwood, for example, birch or oak, do not require much preparation; they just need to be rinsed with warm water.
You should not brew fresh collection with boiling water; this is done for reusable use. Dry, on the contrary, requires special preparation. First, it must be rinsed with warm water, then immersed in cold water for two minutes.
There are several drying methods that bath attendants most often use: For example:
- In the barn.
- In the garage.
- In the bathhouse itself.
It is best to dry the workpieces in a suspended state, leaves down, twigs up. Don't hang the fans too close to each other, otherwise they won't dry well.
If you have nowhere to hang it, just place it on paper in a cool place. In this case, they need to be turned over every day, and if they lie on top of each other, then you will have to take out the undried ones from below and put the already dried ones on top.
It happens that the leaves become too dry. Don’t get upset and throw away the workpiece, it can still be revived.
Before the procedure itself, leave it to steam in hot water longer than the moderately dried attributes.
Next, hold it over a hot heater. When exposed to steam, a dry sample will quickly restore its original appearance, and it will be difficult to distinguish it from the one that was just collected.
Photo from the site obyavleniya-l-penza.ru
What is a broom for home made from?
That's strange. Everyone has this tool, but few people think about what a broom is made of. In general, if it is natural, it is most likely made from sorghum. This is a plant from the grass family with a panicle-type inflorescence. That is, many thinner stems extend from the stem, which branch again. The more branches there are, the fluffier the inflorescence becomes.
Brooms are made from broom sorghum
There is even a special variety that was bred specifically for making brooms. That’s why it’s called sorghum broom. It is grown specifically for making brooms. The plant is unpretentious and does not require special care. In some areas it is called “broom”.
Sorghum household broom
Sorghum is cut, leaves removed, dried, turning the panicle down. The seeds are removed from the dried stems. There is an old way of cleaning seeds - using a galvanized bucket. The whisk is clamped between the rim and the handle of the bucket and pulled towards you. Some of the seeds fall into the bucket, some still remain. This process is repeated until everything is clean. Parrots love sorghum seeds, and chickens do not pass by. So the benefits of growing this plant are double.
Preparing sorghum or millet
Next, the stems with peeled panicles are sorted - according to the thickness of the stem, the density of the remains of the inflorescence. Then the stems, according to certain rules, are tied into a bundle. The last stage is trimming the actual “sweeping” part and forming the handle. In general, the process of making a broom is not complicated, but it requires a certain skill - you need to tie it correctly. And how exactly - these are the secrets of a particular master. Previously, by the way, there was even such a profession. Now only old people knit brooms in villages. Most commercially available industrial products.
How to steam a broom for sweeping
In order for a sorghum or millet broom to serve for a long time, it must be prepared before use - steamed. You will need a bucket of hot water (boiling water or almost boiling water). You need to dissolve a glass of regular table salt in water. Dip a broom into the solution and leave for at least two hours. This simple procedure makes it more resilient and branches break less often. In general, a steamed broom lasts longer.
To make a broom soft and durable, you need to steam it in boiling water for two hours.
How to knit a bath broom
There are many ways to knit. Let us consider in detail the most unusual one, with the help of which you can make this item very durable and reliable.
- We take 2 parts of the future product, they should be approximately equal.
- We place two bunches with the bases crosswise, with a margin of about 10 cm in one of the parts.
- We tie the intersection tightly.
- We place the short rods on top of the long bundle.
- We press them together overlapping, twisting.
- We tie both parts again, but already 15-20 cm below the first dressing.
- You can make a third dressing, but it is better not to touch the tail of leaves.
Do not tie rods with wire. In a steam room at high temperatures, it becomes very hot, and a person can get burned. It is better to use cotton ropes or a regular medical bandage.
How to properly store a bath broom
After the twigs with leaves have dried well, it is necessary to provide them with proper storage conditions. With proper care, the product can last an average of 2 years.
To keep it in good condition, it is enough to place the product in a dark and cool room. For example, hang with leaves down in a dressing room or other ventilated room.
A balcony is a good place to store a broom in your home. But remember that there is nothing there to protect your product from the treacherous rays of the sun. If the loggia is glazed, you can cover the windows with foil, this will protect the product.
Some craftsmen practice storing tied branches in a barn or roof of a house. The samples are placed next to each other, covering them with a blanket of hay. Good idea, but only for dry weather.
Another option. You can take a cardboard box with holes and place several briquettes of raw materials in it in a layer at once. This is the best method after hanging storage. Because the leaves do not dry out and retain the correct fan shape.
Photo from the site obyavleniya-l-penza.ru
Typical mistakes when harvesting birch brooms
Typical mistakes when harvesting birch brooms
If a bath broom falls off due to repeated use, you can find an excuse for this - nothing lasts forever. Much more tragic are situations when the foliage instantly flies off after the first steaming. This state of affairs is direct evidence of a violation of the rules for harvesting birch brooms.
You can find a description of the most common errors in the following table.
Table. Mistakes when preparing bath brooms
| Errors | Explanations |
| Incorrect timing of collecting birch branches | A broom will inevitably fly around if it is made from branches collected too early or, conversely, collected too late. As noted, the best period for harvesting branches is June-July. In June, the foliage is already quite strong and dense. By the middle of the second summer month, the birch begins to prepare for the approaching autumn, which does not have the best effect on the characteristics of the foliage. |
| Violation of the rules for drying brooms | Often, inexperienced bathhouse attendants, trying to prepare as many brooms as possible in the shortest possible time, dry the preparations in the sun. Yes, the products will dry in literally a day or two, but the leaves in this case will not survive the first contact with boiling water. Remember: the broom must dry on its own and the heat of the sun does not help it with this. |
| Collecting branches after the rain | Firstly, branches cannot be collected immediately after rain. Secondly, the workpieces cannot be washed independently. If the issue of settling dust does not leave you alone, wait until you go to the steam room and then pour boiling water over the brooms - not a trace of dirt will remain. |
Practice shows that it is best to prepare brooms with a small supply. However, you shouldn’t be too zealous either: it’s much more pleasant to use a fragrant and fresh broom every time.
