- Foundation - standard size of the structure
- With analysis of floors
- Mounting tank assembly
- Advantages of the prototype with a remote channel
- Installation
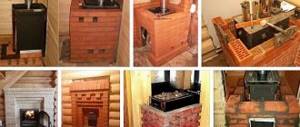
Steam room stoves are very popular among many homeowners. The market offers a large list of various modifications with different characteristics and sizes. But before installing a metal stove in a bathhouse, you need to know all the fire safety provisions in order to prevent a fire. Let's consider the main points of choosing and installing a heating unit with all the requirements and nuances.
Varieties
The model should not only warm the room, but also not pose a danger to people who will visit the bathhouse. There are several design options that differ in the location of the heating chamber door:
- The firebox opens directly in the steam room - this is the most common scheme. You can not only regulate the burning of wood, but also admire the flame if the prototype is equipped with fire-resistant glass. There are also negative characteristics - dirt, debris, and wood debris accumulate on the floor.
- Installing a stove in a bathhouse with a firebox in the dressing room is the safest option: it saves space, eliminates litter in the washroom, and allows you to warm up all rooms at once.
- The firebox is vented outside - an excellent solution for buildings with a minimum area, but not entirely comfortable - to maintain the desired temperature you will have to run out of the room and systematically add firewood.
There are several design options for devices:
- horizontal;
- vertical;
- oval;
- square.
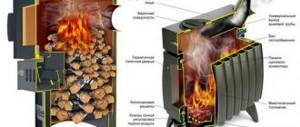
Modern models have a water tank and a compartment for stones.
Installing a stove in a bathhouse - step-by-step instructions
To save energy and time, you should divide the work into phases. Installation is carried out in five main stages:
- choice of location;
- pouring the base or laying the podium;
- heater device;
- chimney outlet;
- securing a screen that will protect from temperature.
Let's consider each point in detail.
How to choose the right location for assembly
Traditionally, steam rooms are a wooden structure with appropriate finishing. Before you begin installing an iron stove in a wooden bathhouse, it is important to choose the right zone.
Criteria for choosing a fulcrum during construction
You will have to take into account the material of manufacture of the heating device, its power, the design of the combustion chamber and the exit point of the chimney (the usual height is up to 1 meter from the roof to the end point of the chimney). It should be remembered that the heater must be located in a place that is safe for visitors so that no one gets injured. Also key is the proximity of the device to flammable surfaces.
There are rules that must be taken into account during installation.
SNiP requirements for installation
- distance to flammable surfaces – at least 80 cm;
- parameters to the ceiling from the heater - at least 80 cm when it is plastered and 1.2 m if it is made of wood;
- the wooden flooring is protected with a screen, but the height of the firebox is at least 13-15 cm from the floor;
- from the door to the opposite surface – up to 1.25 m.
DIY making
To reduce construction costs, you can do it yourself. To do this, you will need the help of one or two friends, prepare tools and supplies in advance. The stages of foundation manufacturing vary depending on the chosen type of foundation.
Monolithic
Execution of work:
- Calculate the depth and dimensions of the foundation. Dig a pit.
- Place a layer of 15–20 cm of sand at the bottom of the hole. Compact the layer further.
- Fill the hole with expanded clay, which will act as thermal insulation. Cover it with plastic film to create a waterproofing layer.
- Make formwork from boards. Reinforce it with wooden blocks to increase strength. Additional bars play the role of beacons, allowing you to pour an even layer of concrete.
- Cut the reinforcement to the required sizes to reinforce the base. The individual metal rods are connected with binding wire. To increase strength, you can weld the reinforcement using a welding machine, but this will require couplings.
- Slowly pour the concrete solution. When pouring, concrete must be evenly distributed throughout the pit using wooden rules. To make them, you need to select a flat board and nail a long wooden handle to it.
- After finishing filling, compact the solution. The procedure is best performed using a vibration machine.
- To prevent the concrete surface from becoming cracked during the hardening process, you need to periodically water it with water. After complete drying, the formwork is dismantled, the resulting voids are filled with sand or gravel.
Columnar with base plate
A columnar base for a sauna stove can be installed on an existing foundation. Execution of work:
- Mark 4 points on the ground that will mark the center of future pillars.
- Drill holes to the required depth. To do this, you can use a hand drill or use a bayonet shovel.
- Place a layer of crushed stone at the bottom of the holes, 15 to 20 cm wide.
- Make permanent formwork. You can use roofing material for this. It needs to be rolled up and inserted into the dug holes.
- Mix the cement mortar and fill the holes with it.
- Compact the concrete. Wait until the solution hardens completely.
- After 7 days, apply 2-3 layers of waterproofing to the frozen pillars.
Make a monolithic slab according to the dimensions of the furnace. Place it on the pillars.
On stilts
A variant of the foundation, which is similar in manufacturing to the previous version. Metal or concrete piles are placed into the drilled holes. A monolithic slab is laid on top of them. Its dimensions should exceed the dimensions of the oven by 20 cm on each side.
From rubble stone
Execution of work:
- Dig a pit, which should be 15 cm larger than the required dimensions on each side.
- Make a sand cushion 20 cm thick.
- Make formwork from the boards. Install spacers to strengthen it, which will act as beacons.
- On the inside of the formwork, attach a durable polyethylene film, which acts as waterproofing.
- Fill in the first layer of rubble stone, the thickness of which should not exceed 20 cm. Fill the remaining voids with crushed stone.
- Pour a thin layer of cement mortar over the entire base area.
- Wait for the cement to harden. After this, pour a second layer of rubble stone into the hole. Apply a new layer of concrete mortar.
- Check how evenly the cement layer is laid. To do this, it is leveled using rules. The sagging areas are filled with the remains of concrete.
It is important to take into account one point - you cannot completely fill the pit with rubble stone. You need to leave about 80 cm to the top of the formwork. Lay a layer of roofing material on top of the finished base, and pour molten bitumen on top of it. Wait until the bitumen hardens and begin laying the first layers of the furnace.
Brick
Stages of base manufacturing:
- Outline the dimensions of the oven. Add 30 cm to the area on each side.
- Mix cement with clay and make a solution. Make an even layer on the intended place, smooth it evenly using the rules.
- Carefully lay out the first layer of brick.
- Apply the solution again, lay out the second layer. The bricks should be placed across the first layer.
To strengthen the brick screed, you can use a metal reinforcing mesh.
For metal equipment
There is no need to make an expensive monolithic foundation for an iron stove in a bathhouse, but it is necessary to create one during the main construction of the bathhouse. Execution of work:
- Dig a separate pit 50 cm deep. If the bathhouse is wooden, the pit should be 50 cm larger than the dimensions of the stove on each side.
- Level the walls and the bottom of the pit. Fill in a layer of slag 30 cm thick. The surface must be flat.
- Compact the slag. Pour expanded clay on top, which is necessary for thermal insulation.
- Mix a solution of cement and sand. Place a layer of expanded clay on top of it. Wait for it to harden.
- Lay a layer of roofing felt to create waterproofing.
- Pour another layer of cement.
You need to lay out several layers of refractory bricks on the finished base. The base for a metal stove in a wooden bath should be located taking into account the distance:
- to the wooden floor - 14 cm;
- to the ceiling - 100 cm;
- to the walls - 70 cm.
To protect wooden surfaces from possible fires, you need to make special screens. For this, a fire-resistant material is used, covered on the front side with a layer of aluminum foil.
Stove base
Before correctly installing the stove in the bathhouse, you need to decide which base to mount under the heating device, taking into account the features of a particular model and the type of soil at the construction site. You cannot build shallow foundations if the soil is prone to swelling in winter; it can simply be squeezed out in cold weather.
Foundation - standard size of the structure
Everything will depend on the specific gravity of the heater and the type of soil on which the bathhouse is built. There are several varieties:
- monolithic, deep;
- pile-grillage;
- shallow slab.
Each type has its own positive characteristics and different arrangement methods.
Pouring a monolithic slab base
The algorithm of actions is as follows:
- dig a pit with a height of vertical walls of 50 cm. Compact the bottom, leveling the horizon;
- arrange a cushion of crushed stone and sand, in a layer of 25-30 cm. Sprinkle with water, level and compact well;
- to make a concrete base, for this purpose a liquid solution is mixed. Pour over crushed stone and allow to harden;
- lay a layer of waterproofing - roofing felt glued with bitumen or mastic;
- install formwork from old boards or panels so that the walls are strictly vertical and the angles are 90 degrees. Secure a plastic film on the inside of it so that the plywood does not deform from moisture;
- make reinforcement - the frame should be 10 cm smaller than the formwork on each edge, install a reinforced frame;
- distribution of the solution - you can prepare it yourself or order ready-made. All layers of the mixture are well compacted by piercing them with a sharp iron rod.
After pouring the concrete mixture to the level of the finished floor and allow it to harden for 3 weeks. After this time, the formwork is dismantled and backfilling is carried out - the distance between the base and the walls of the pit is filled.
If you plan to install a brick sauna stove with a firebox from a dressing room, then the installation of the base occurs by deepening it to the freezing line of the soil.
Pile-grillage
This method of arranging the foundation is much simpler and not as labor-intensive compared to the one described above. But it is ideal for unstable, water-logged soil. The execution technology consists of the following stages:
- make markings on the surface, first removing the turf layer;
- in the corners of the future foundation for installing a metal stove in the bathhouse, dig pits 10-15 cm deep;
- screw in piles with a diameter of 10 cm. Be sure to check the vertical;
- cut the posts with a grinder along the bottom line of the subfloor;
- weld a corner channel of the optimal size, arranging a place for pouring the solution;
- place a steel sheet on the beam and secure it with a weld;
- dilute the concrete mixture and pour it into the prepared frame.
Once the concrete has gained the required strength, installation can begin.
Shallow base
This is a simple foundation option for installing an iron stove in a wooden bathhouse.
The algorithm of actions is as follows:
- mark boundaries;
- dig a ditch 50 cm deep;
- fill the pillow with 20-25 cm;
- make a footing;
- arrange waterproofing;
- install formwork;
- pour 30 cm of concrete mixture and compact.
As soon as the concrete sets and dries, you can remove the formwork and lay a layer of insulation - the foundation is ready.
Note: if the base is below the planned level, you can lay 2 rows of brickwork on top of the roofing material. Such a podium will serve as additional thermal protection for the floor covering.
How to choose a stove for a bath
Furnaces vary in the material from which they are made, in the heating method and in design.
Based on the heating method, sauna stoves can be divided into two main classes. These include electric stoves and wood stoves. In turn, both electric and wood-burning stoves can be called heaters if they use stones to produce wet steam. But which stove is better to choose for a sauna? Read on.
Electric ovens
Electric ovens have the following advantages:
- fast heating;
- can be installed in various rooms, even in an apartment;
- ease of use, ability to set a timer;
- no waste from firewood and combustion products;
- no need to stock up on firewood
The main disadvantages of electric ovens:
- high energy consumption;
- create a powerful electromagnetic background;
- air that comes into contact with the hot iron of an electric heater changes its natural ionization, which is not very useful.
Wood stoves
Wood-burning stoves are divided into those fired “black” and “white”. In “black” stoves, smoke from the combustion of wood enters the steam room. White stoves are equipped with a chimney and the smoke is discharged outside the bathhouse to the street. Naturally, the costs of constructing a chimney significantly complicate and increase the cost of building such a stove, but still a wood-burning stove, which is heated “white,” is preferable and this type of sauna stove is mainly used.
The main disadvantages of wood stoves:
- massive and heavy, a foundation is required;
- the need to prepare firewood;
- the need to construct a chimney;
- high fire safety requirements;
- a certain complexity in controlling the combustion process;
- the need to clean the firebox and chimney from ash.
Wood stoves have the following advantages:
- give infrared thermal radiation;
- create the right atmosphere;
- are traditional for the Russian bath.
Also, according to the type of enclosing structure, wood-burning stoves can be divided into metal and stone. Metal furnaces are widely used because... they are smaller in size and weigh less than stone ones.
But the best stove for a sauna is a wood-burning stone stove. The best stove is one made from pot stone (soapstone). Such stoves are commercially available. But they are quite expensive. As an option, you can purchase a metal stove lined with soapstone.
As a reading break, we suggest watching a fascinating video.
What should a Russian steam room be like:
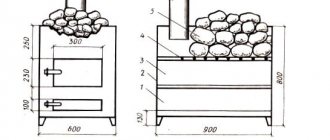
The principle of design and dimensions of a brick sauna stove-heater
In our conditions, they make a brick wood-burning stove. This is a fairly common option. The brick heats up and emits infrared heat from the surface of the kiln.
You can only use clay bricks for the stove and never silicate bricks.
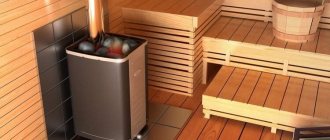
Sauna stove
Stove design options
The dimensions of the furnace, and accordingly the useful heat-emitting area, are determined by the dimensions of the steam room. The configuration and proportions of the furnace may vary. This also depends on the functionality of the stove, whether it will, for example, also have a tank for heating water. Approximately for a family bathhouse for 2-4 people, you can take the size of the stove 90x90x180 cm.
Preparing a Wooden Floor
Installation is not an easy process, especially if the floor is already covered. There are 2 options for solving this problem, let's consider them in detail.
Without disassembling the boards:
- mark lines along the dimensions of the structure directly on the surface. Back off 5 cm and draw an outer quadrangle;
- take a sheet of steel and fit it to the outlined square;
- prepare a layer of mineral wool;
- install a heat insulator on the floor (for example, a mineralite slab or non-flammable drywall), then metal and screw it on;
- soak a brick (preferably fireclay) in water and lay a podium out of it using fireproof mortar strictly horizontally.
Once everything is dry, you can begin further work. The platform can be left open or plastered. After this, you should begin installing a wood-burning sauna stove in a bathhouse with an external firebox on a wooden floor.
On the side of the door you need to screw a steel sheet, part of which will extend onto the brickwork.
With analysis of floors
This is a very labor-intensive process in which the podium for the device and the floor will not be interconnected. If the covering is already laid, it will have to be dismantled or a quadrangle cut to fit the size of the future pedestal.
Masonry is built on the foundation, 2-3 bricks above the floor. Next, actions are taken to isolate from overheating.
Ventilation. Its location and process of work
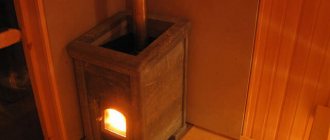
Before proceeding with the final installation of the stove installation, make sure that there is supply and exhaust ventilation into the steam room. The channel through which air is supplied is mounted below floor level. The stove is equipped with legs that will raise the structure above the floor, then the ventilation hole can be located under the stove. The optimal cross-section of the supply channel is 100 cm2, and its outlet must be covered with a metal grill.
The outlet of the exhaust duct is usually located at the farthest point of the steam room relative to the stove (under the ceiling). The cross-sectional diameter of the exhaust duct is also 100 cm2, and its outlet must be covered with a plastic or iron grille.
It is advisable to equip both supply and exhaust ventilation outlets with valves; in this case, you can regulate the operation of the system manually. There is no need to lay a foundation for the stove, but it is simply necessary to prepare a special foundation for the hot surface of the stove.
Preparation is carried out in two ways:
- the surface is sheathed with centimeter-thick asbestos, onto which a metal sheet 4 mm thick is attached;
- a brick platform is laid out, which is covered with a metal sheet or filled with concrete.
Ultimately, the resulting base will be at least twice the area of the furnace base.
Walls - preparation
If the load-bearing fence is made of wood, then the distance will be at least 50 cm. For a unit with an external firebox, you will have to cut out a niche.
How to protect partitions from fire:
- apply the plaster composition to a metal mesh previously screwed to the surface;
- install an iron screen with a non-combustible insulator;
- clad with artificial stone or porcelain stoneware;
- make a brick layout;
- adjust factory thermal insulation.
The best option is to lay the masonry on the side of the adjacent surfaces; it will not only protect them from fire, but also accumulate heat.
Construction of the foundation
for a metal furnace and limit yourself to fire safety shutoffs. However, if the weight approaches the maximum value (700 kg), and it consists of the weight of water in a completely filled boiler plus the weight of stones plus the own weight of the stove , it is better to equip a separate foundation for the metal stove. To do this you need:
- Dig a pit (to a freezing depth, but not less than 50 cm), fill it with crushed stone and compact it thoroughly.
- A concrete layer is poured on top, which must completely harden. The composition of the solution is cement with sand 1:4.
- Double layer of waterproofing (roofing felt or similar sheet material),
- Filling the main slab with a solution of cement, sand, fine gravel. While the solution has not hardened, the horizontal line is checked and adjusted if necessary.
The foundation for a brick oven requires a more thorough approach and is made as strong as possible.
- A pit is being dug. Most often, this is done simultaneously with a common foundation pit for the entire building.
- A layer of sand is added to remove the bottom of the pit. Sand is poured in layers of 15 cm, each layer is spilled with water to compact it. Subsequent layers of sand are added only after the water has subsided. This technology makes sand compaction easier and provides a dense layer. After this, a rubble layer is laid - broken brick, concrete, thickness - 20 cm. Again a layer of sand, spilled with water - and so on until a dense cushion is formed that does not settle when compacted.
- A layer of crushed stone 10 cm thick is laid.
- Formwork for the main foundation slab is erected on top.
- A reinforcement frame, welded or knitted, is installed inside the formwork.
- Concrete is poured to a height that does not reach the floor level by 5-15 cm. It is kept until completely dry.
- The surface is generously lubricated with tar, several rows of brickwork are laid on top to the floor level, on which the construction of the furnace itself will begin.
Options
The most common options for building a foundation are considered, proven by frequent use and quite reliable. In some cases, other types of foundations are used, for example, pile-slab . With this method, the monolithic slab rests on piles buried to dense layers of soil.
The good thing about this method is that the possibility of settling of the bedding and the butting layer is excluded, the piles stand firmly and motionless. Driven reinforced concrete piles or screw piles are used as piles, making it possible to independently screw them into the ground. The installed piles are trimmed (extended) to the required length and tied with a channel belt (grillage), which serves as a support for the slab.
How to install a heating device
Many home craftsmen ask how to properly install a sauna stove on an already poured foundation.
There is no need to attach the heater to the foundation, but sometimes experts advise attaching the legs to anchor bolts.
If you are installing a model with a protruding channel, then it is important to well insulate the portal from fire - this can be done using polyurethane foam or other material that does not ignite.
Setting up a chimney
You need to understand how to build a chimney so that carbon monoxide does not enter the steam room.
The furnace pipeline gets very hot and can cause a fire, so the place is prepared especially carefully:
- make markings in the ceiling and cut a window measuring at least 50x50 cm;
- install a passage unit with mineralite into it with a hole equal to the diameter of the pipe + 3-5 mm;
- secure the polyurethane foam with special fasteners and attach it to the ceiling;
- insert a pipe into the protective box and cover it with kaolin wool to a depth of 5-7 cm, no more, so as not to create the opposite effect of overheating;
- After completing the work, use a stainless steel protective screen to increase fire safety, as well as for decorative purposes.
Advice: no matter how well the installation is done, you need to know how to properly ventilate the bathhouse, otherwise the balance of air exchange will be disrupted.
Below is a link to a video where you can learn more about this system:
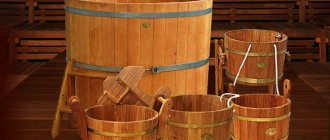
Mounting tank assembly
This mandatory element can be attached as follows:
- fixed on the side wall of the stove;
- placed on top of a single-wall chimney;
- at the end, the heat exchanger is connected to the tank for uniform circulation of liquid.
You can study the issue in more detail and visually examine the process in the video:
How to install a stove in a bathhouse
This process is a little more complicated than installing a conventional heating device - creating a niche in the wall to access another room.
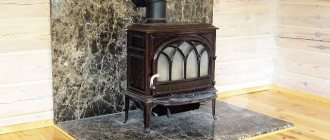
It will be easier to purchase a ready-made design, for example, the Atmosphere sauna stove, made of high-quality cast iron.
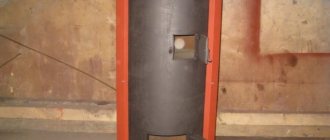
Advantages of the prototype with a remote channel
Models with take-away fireboxes are becoming more popular, as they have many more advantages:
- safety - there is no risk of gas poisoning from burning wood;
- comfort – two rooms are heated at once;
- cleanliness - there will be no chips, sawdust or dirt from the firewood. This is very important, since people usually wear it without shoes;
- space saving - as a rule, the oven takes up 1 m2 of space, and if the washing room is small, then this is significant;
- good, saturated steam - the firebox burns out oxygen, which makes the air dry, which has an adverse effect on health;
- there is no need to install a special ventilation system, which saves money and time.
Safety rules when designing a bathhouse
When organizing a plan for the construction of a steam room, it is important to immediately take into account the placement of the heater, using all recommendations and protective measures that prevent fire.
If the building is made of non-flammable material, then the partitions do not need to be thermally insulated; it is enough to protect the floor with a metal sheet.
If a metal heater is installed in a wooden structure, then carefully insulate the niche without fail - it is better to lay out the brick.
Installing a home-made system requires special attention - the distance from adjacent structures is at least 50 cm, if high-quality insulation from heat is provided, for example, with brickwork. Otherwise, the distance is increased to 1 meter.
It is important to understand that the distance from the firebox door to the opposite plane must be at least one and a half meters.
Installation
The main feature of installing a wood-burning stove for a bathhouse with an external firebox is the presence of a through hole in the wall between the steam room and the dressing room. A capital brick structure will require a lot of labor and expenses for the purchase of material. In addition, it is quite difficult to install such heating yourself - you need to have certain skills. Let's look at the step-by-step preparation instructions developed by experts:
- a niche is cut out, which should be 26 cm larger than the combustion channel;
- the floor is covered with a fireproof slab - this is done in the steam room and in the dressing room in front of the chamber door;
- lay metal sheets on top and screw them with self-tapping screws;
- the firebox is installed flush with the wall or with a small recess (it all depends on the thickness of the partition);
- insulate surfaces adjacent to the heating unit with metal screens;
- After the structure is completely installed, the distance between the heating chamber and the wall must be tightly sealed with any fire-resistant material. The ideal solution would be brickwork - it not only protects well from heat, but also has a beautiful appearance that does not require further processing;
- small gaps between the layout and the walls can be filled with polyurethane foam or basalt fiber.
Once the main work is completed, the metal screens should be decorated in accordance with the overall interior of the room.
Chimney installation
This is the last stage in assembling the structure by a professional; for this you need:
- Prepare the pass-through unit.
- Arrange holes for the pipe; they should be 25 cm wider than the chimney.
- For maximum insulation, take polyurethane foam with mineralite produced by FERRUM and fill it inside to 5-7 cm with kaolin wool, leaving the distance between the pipe and the sheet empty.
- Insert the assembly into the box, having previously protected it with mineralite sheets, fix it to the ceiling from above, and attach the base of the assembly to the lining only after finishing.
- When installing, make sure that the hole coincides with the pipe, because it is strictly forbidden to tilt the system (the maximum permissible error is 1 mm).
- To prevent the pipe from being covered with snow in winter and rain from getting into it in summer, a cap is attached.
Installing a stove in a bathhouse with an external firebox is not difficult; the main thing is to strictly follow the instructions and observe all safety measures, especially for a model made of metal. And if you have no experience in construction at all, then you can watch detailed video instructions.
Do you need a foundation for a stove if it is metal?
Many friends and acquaintances often ask: is a foundation needed for a metal stove? I can say unequivocally from my experience – no. Although many argue, citing information on the Internet. Well, please, do it if you want. But from my experience (I have entered my third decade) I will say: I will never “warm my head” about the foundation for a metal furnace.
Scheme of the foundation for the furnace
It is enough for her to make a good floor base. A weight of 200-300 kilograms is not that much. Good underfloor beams will handle this local load with confidence. Usually, instead of floor veins, I lay a metal channel 14-16 cm high. Two “sticks” of the channel, laid edgewise under the stove, create reliable support. It is almost impossible to bend and deform such beams.
A corresponding beam is laid inside the channel, and the wooden floor is secured with self-tapping screws at an angle to this beam. Just don’t put the boards on “bare metal.” It is best to lay two layers of roofing material on it. This will save the tree from rotting.
Directly under the stove, on the channel, you can lay a sheet of metal, and then place the “heart of the steam room” on it. That is, there is no point in laying a wooden floor under the stove, since it will still have to be replaced over time and an “iron heater” will not interfere with this in this case. Don't forget about fire safety. If there is a wooden floor near the stove, be sure to lay a sheet of metal on it so that accidentally falling coals do not work “miracles.”
I think my point is clear. If you have a small metal stove, then don’t worry about a separate base for it. Good beams under the floor and that's it. It’s another matter if the stove is large and heavy (there are models that weigh 200 kg + the stones weigh the same), and even more so if it’s made of brick. Here you can’t do without a solid foundation.
Although, in my house, which was built back in 1995, the brick stove is on the floor. The supporting beams of which are made of rails. The stove is large, five-turn, with an oven and a water tank. The chimney is also made of brick, 7.5 meters high. The weight of the entire structure is decent. There are still no cracks in the plaster and no cracks in the walk-through ceiling opening. They usually form there due to the different winter movement of the foundations of the house and the furnace.
All neighbors suffer from this very problem (the stove cracks and “comes off the ceiling”). Having looked at these “troubles” and analyzed them, you come to the conclusion: there are continuous errors in the construction of both foundations (the house and the stove). Especially in our Siberian conditions, and even on marshy soils. You shouldn’t commit them in order to then solve problems you’ve created yourself.