Requirements for structures
Before building a brick bathhouse, you need to study the requirements that apply to such buildings. They are described in government documents.
Requirements according to SNiP 2.08.01-9:
- When choosing a location, you need to take into account that the smoke from the stove should not disturb the neighbors. It should not create smoke in buildings. One option to solve this problem is to install an electric heater.
- For construction you need to choose an elevated place. It is important that it is not flooded with melt water.
- The distance from the bathhouse to the neighboring one should be more than 3 meters (minimum 2.5 meters). To residential buildings - at least 5 meters. To a reservoir, well, borehole - from 20 meters.
Fire safety requirements:
- In the place where the chimney passes through the ceiling, you need to make a hole with a radius of 65–75 cm. Along the edges it needs to be covered with non-combustible material.
- Wooden surfaces must be coated with fire retardant. This will reduce the risk of fire.
- You cannot assemble a chimney from asbestos-cement pipes, since the material quickly collapses with frequent temperature changes.
- It is necessary to make a high-quality ventilation system in the bathhouse and install a fire extinguisher. Doors must be installed so that the leaves open outward.
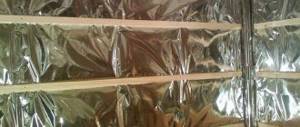
- Surfaces around the stove should be covered with reflective sheets. It is recommended to place a layer of basalt wool behind them. There should be a metal sheet on the floor in front of the firebox.
All electrical equipment in the bathhouse must have automatic switches and be grounded.
Painting rules
Painting a metal stove is quite simple. All you need is to follow a number of simple rules:
- Before painting an iron stove, it is necessary to carefully prepare its surface. There are many ways to perform this procedure. For example, you can resort to using a wire brush or sandblasting. The better the metal is cleaned, the higher the quality of the painting. To be fair, it should be said that there are compounds that can be applied over rust, but the aesthetic characteristics will suffer. If you want to paint your hot water tank, you need to do the same.
- Before painting, the sauna stove should be treated with degreasing agents. For these purposes, you can use an ordinary soap solution. It is prepared simply: you need to take a liter of water and 40–50 grams of laundry soap.
- The most important step is the coloring stage. Since you can use different paints and varnishes, the best solution is to follow the instructions on the package.
- To achieve the highest quality results from the use of heat-resistant paints and varnishes, you need to apply several layers of paint.
- Stove equipment, including the hot water tank in the bathhouse (if it was also painted), should be used after the paint has completely dried. Otherwise, it may begin to peel off.
Steel and cast iron stoves do not differ in terms of the selection of paints and varnishes. For both types, any high-temperature paint will do.
Registration
Before you start building a brick bathhouse, you need to clarify whether it is possible to erect a building on the territory of a summer cottage. Land plots are divided into certain categories depending on their purpose. Certain government regulations apply to them. Buildings can be built on several types of land:
- Summer cottages. Residential and utility buildings can be erected on their territory. These can be various cooperatives, SNT.
- Land plots for individual housing construction. These lands belong to a specific locality - an urban settlement, a village, a city.
- Private household plot territory. Such lands are allowed to be used for agricultural activities, construction of residential and commercial buildings.
If the land plot does not fall under any of the presented categories, it is prohibited to build a bathhouse on its territory.
When constructing a bathhouse, the owner of the site must:
- Obtain permission to carry out construction work.
- Design the finished building.
After drawing up, signing, and approval of all documents, the building will receive the status of real estate and will begin to be taxed.
It is important to remember that not all buildings need to be registered:
- Any capital buildings are subject to registration. Their main differences are the presence of a massive base, a second floor and living rooms, large dimensions, and the presence of communications - water supply, sewerage, electricity, gas pipeline.
- Buildings that do not need to be registered are sheds, temporary buildings, and utility buildings. Their main differences are the lack of communications, lightweight foundation, and low weight.
The classic bathhouse belongs to the auxiliary buildings.
If you need to register a brick bathhouse, you need to prepare a number of documents:
- Application for permission to carry out construction work.
- Drawing of the territory.
- Document on ownership of a land plot.
- Owner's passport. If it is not possible to obtain it, you can issue a power of attorney to another person.
- Plan for future construction.
It is important to take into account the availability of the required fire safety and sanitary standards. If they are violated, the application for registration of the building will be rejected until the violations are eliminated.
Advantages and disadvantages of buildings
Classic Russian baths are often built of wood, but they are in many ways inferior to brick buildings. Advantages of a brick bath:
- Service life more than 50 years.
- High level of fire safety.
- Reliability, durability.
- Environmental friendliness. The brick is made from natural raw materials and does not emit harmful substances during operation.
- Resistance to external factors - temperature changes, ultraviolet radiation, high humidity.
- Easy care.
- Attractive view. If a brick bathhouse was built by a person with practical experience, there is no need to do additional finishing of the walls on the outside. If the seams are located asymmetrically, you can cover them with decorative material.
Flaws:
- High heat capacity. Warming up a brick building takes longer when compared to a wooden bathhouse.
- High cost of building materials.
- Increased hygroscopicity. Without high-quality hydro- and thermal insulation, the premises will constantly have a high level of humidity.
You also need to pay attention to the base. A brick building must be erected on a strip or monolithic foundation. This increases construction costs.
Which bricks are best not to use when building a bathhouse?
The answer to this question depends on where exactly they are intended to be used.
- When constructing external walls and internal elements, sand-lime brick is not recommended. It absorbs moisture well, and its frost resistance indicator leaves much to be desired. If this type of product is still used in the construction of walls, then it is necessary to take care of high-quality interior and exterior finishing.
- When used in very hot structures, the use of ordinary, non-heat-resistant bricks is not recommended. This is unsafe and significantly reduces the service life.
- In the construction of external walls, materials with high thermal conductivity coefficients (the same sand-lime bricks, hyper-pressed bricks) are not recommended.
pluskirpich.ru
When constructing a sauna stove, materials with different physical properties are used, the most important of which are fire resistance and thermal expansion. When building a bathhouse and carrying out furnace work, the use of materials that support combustion, capable of melting at high temperatures, and also deforming when heated is not allowed. The main masonry material for stoves in Russian and Finnish saunas and Turkish hammams is brick. The modern building materials market offers a wide range of this material, differing in appearance, quality and price. Often, when carrying out masonry work, a combination of bricks from different manufacturers is used, which gives the stove an original appearance.
Brick selection criteria
Grade. There are three types of brick. The first grade includes well-burnt red brick weighing 3.2-3.5 kg. It has the correct shape, dimensions 25x12x6.5 cm, and does not contain cracks. When lightly tapped with a hammer, a ringing sound is heard. Unburned brick of the second grade has a pink color and, when tapped, makes a dull sound, like hitting an empty barrel. It can be used for laying less significant parts of the furnace. Zheleznyak is a dark brown brick of the third grade. It is burnt and can only be used to lay the foundation for the furnace. For the lining of fireboxes, refractory (Gzhel and fireclay) bricks are used, which can withstand temperatures of 900-1100 °C. Wedge brick is used only for the construction of vaults.
Brand by density. This indicator determines the strength of the brick under pressure. The following strength grades are distinguished: 100, 150, 200, 250, 500. When constructing bathhouse stoves, bricks with a density index of no more than 250 are most often used, since it is this that has optimal thermal conductivity. The denser the brick, the slower it heats up and cools down, and accordingly it is able to give off heat for a long time. However, lighting a stove made of such bricks (for example, fireclay bricks from JSC LODE) takes much longer than using a material of lower density.
Frost resistance indicator. It reflects the brick’s ability to absorb and release moisture, which, when frozen, can damage the integrity of the material. The frost resistance indicator is especially taken into account when laying pipes. Only those bricks that have a high frost resistance rating are used on its outer surface. As a rule, this is a facing perforated or other version of ceramic brick, instead of which cement-sand blocks of the appropriate size can also be used. Solid stove bricks are used to lay the inside of the pipe. If the pipe is laid in one layer of brick, it must be solid and frost-resistant. In this case, an “otter” should be installed above the roof - a stepped extension of the pipe.
www.its-sauna.ru
Calculation of building dimensions
Bathhouse project
When calculating the dimensions of a building, you need to take into account:
- Constant number of visitors. The more there are, the larger the bathhouse is needed.
- Number of separate rooms. There must be at least 3 rooms inside - a dressing room, a shower room, and a steam room.
- The thickness of the walls with insulation and finishing materials.
If you need to save space and create an additional recreation area, you can build an attic on the roof or a terrace near the bathhouse.
Insulation of a bathhouse made of timber from the outside
The insulation of a bathhouse made of timber from the outside is absolutely no different from the insulation of a bathhouse made of logs. The building must also stand, cracks also appear in it, which are sealed in the same way.
Insulation of a bathhouse made of timber
The need for external insulation depends on the thickness of the timber. If its thickness is insufficient for your climate zone, insulation will need to be done according to the following scheme:
- lathing made of timber or metal guides (be sure to align them in both horizontal and vertical planes);
- heat insulator (thickness depends on the climate zone, wall thickness, and type of thermal insulation);
- moisture and wind protection;
- counter lathing (not necessary, but there should be a gap between the protective film and finishing materials);
- Decoration Materials.
Insulation of a bathhouse from the outside The
outside of a bathhouse is usually sheathed from timber: clapboard of any type, edged board, siding, metal profile, block house, etc. After completion of the work, the wooden finish is coated with varnishes for exterior use, sometimes pre-treated with coloring pigments, but many modern compositions also have a tinting effect, which, of course, is convenient.
If siding is used as a finishing material, then the presence of a ventilation gap between the insulation and the finishing is mandatory. In this case, it is advisable to use special guides as lathing, which can be purchased in the same place where siding is purchased. The guides are mounted on special hangers.
Metal siding guides are mounted on special hangers
Design and drawing
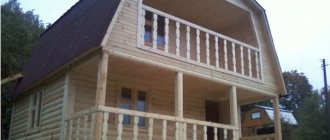
The most popular sizes of a brick bath:
- 3x4 meters - for 2–4 visitors. There are three rooms inside - a steam room, a shower room, and a small dressing room or vestibule.
- 4x6 meters - 4–6 people. Inside you can make 3-4 rooms - a steam room, a shower, a relaxation area, a small vestibule.
- 6x8 meters - for 4–10 visitors. Inside you can make a standard set of rooms for a bath and several recreation areas.
Bathhouse drawing
The drawing must indicate:
- Location of door and window openings.
- Door opening direction.
- Connection points for plumbing fixtures and water drainage.
- Places for installing large equipment and furniture.
- General dimensions of the building, wall thickness, room sizes.
Using the drawing it will be easier to calculate the amount of consumables.
Application of impregnation
Before treating the surface of walls and floors with a special coating, they must be prepared. For these purposes, the surface of the lining is carefully ground and sanded, removing all roughness.
This significantly increases the service life of the coating, and this treatment will also give a more neat appearance to the steam room room.
After careful processing, a special composition is applied to the surface, which was chosen in advance by the owner of the bathhouse.
The application of varnishes and oils can be done using a brush or a roller specially purchased for this purpose.
Preparation of materials and tools
To carry out the work you need to prepare:
- bricks, mortar for masonry;
- fittings;
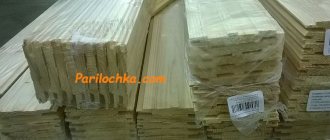
- boards, bars, rafters, beams;
- roofing material, insulation, waterproofing;
- sand, crushed stone, cement;
- trowel, large spatula;
- construction level, marking tool;
- grinder with discs for metal and stone;
- knitting wire;
- drill with whisk attachment;
- container for mixing the solution.
You will also need wires, sockets, switches, plastic pipes and faucets to carry out communications.
Construction of a building
The process of building a brick bathhouse consists of several stages, which must follow strictly one after another.
Making masonry mortar
Before preparing the mortar for laying bricks, you need to study what the working mass should be. Requirements for the composition for masonry:
- High strength after drying. The masonry should not deform, crumble, or settle.
- High plasticity. Only if this requirement is met, the masonry mixture will be able to fill all the voids between the bricks and securely hold them together.
- There should be enough time before the working composition hardens to lay the bricks on top of each other, align them horizontally and vertically.
The standard mortar for bricklaying is cement-sand. To prepare it, you can use cement m400 or m500. When using the second option, you need to take 1 part cement, 4 parts sand. For the first one - 1 part cement, 3 parts sand. Preparation:
- Pour the ingredients into a bucket.
- Mix them together with a drill and whisk. When stirring, it is necessary to add water.
The result should be a homogeneous thick mass without lumps or large inclusions.
Foundation and floor
Construction of the foundation:
- Prepare the area. To do this, it is necessary to indicate the dimensions of the future building using stakes with a thread stretched between them. Clear the designated area of debris. It is also recommended to cut the soil layer to a depth of 20 cm to get rid of holes and hills.
- Add pegs with string to mark trenches for the strip foundation.
- Dig trenches to a depth of 50 to 80 cm (depending on the freezing point of the soil).
- Make wooden boards from the boards and secure a thick plastic film on them. Install the shields along the edges of the trenches and connect them together with boards. Install spacers for the formwork so that it does not tear due to the pressure of the cement.
- Make a reinforcing frame from reinforcement. It is tied with knitting wire.
- Place a layer of sand 15–20 cm thick at the bottom of the trenches and compact it.
- Install the reinforcement frame inside the formwork. The height of the base above the ground is 50 cm.
Pour cement mortar into the formwork. Cover the base with film to protect it from precipitation. The strip foundation must harden for at least four weeks.
To prevent the cement surface from cracking, it is recommended to periodically water it with a small amount of water.
Walls
Features of building walls in a brick bath:
- Before you start building walls, you need to prepare the foundation. The formwork is dismantled, the voids between the ground and concrete are filled with expanded clay.
- Clean the cement surfaces from uneven surfaces. After this, they need to be covered with a layer of liquid mastic. When the mastic dries, spread 2 layers of roofing felt on top of it.
- The first row of walls begins to be laid out from the corners. It is important to check each brick for level so that further rows are level.
- The masonry should not be continuous. Bricks in adjacent rows should be positioned so that the seams do not coincide.
- Every third row you need to make a binding. To do this, you can use a metal mesh or small diameter reinforcement.
If the walls are laid in summer or late spring, it is recommended to wet the bricks before use. This action will help prevent the solution from drying out.
Windows and doors
You need to decide in advance where the windows and doors will be. To limit them from above, metal corners should be used. They must be laid in the top row that ends the window or doorway so that they overlap it. The next row of bricks is laid on top of the corners.
Ceilings and roof
The process of constructing a roof and ceilings:
- The walls must be strengthened with a reinforcing belt. To do this, a recess is made in the brickwork along the perimeter of the wall on the upper side, into which concrete is poured.
- On top of the production of the tightening belt, a mauerlat is fixed - a strapping crown made of timber.
- Ceiling beams are fixed on top of the Mauerlat in increments of 60 cm. The ends of the beams must protrude beyond the walls by at least 50 cm.
- Next, the rafter sections are assembled. It’s easier to collect them on the ground and then put them on the roof.
- All rafter sections are secured to the ceiling beams using rafter feet.
The rafter sections are fastened into a single structure using sheathing. A vapor barrier film is fixed on top. A counter lath is placed on top.
Communications
It is also necessary to pay attention to the laying of communications. These works must be carried out during the first stages of construction.
Electricity
Features of conducting electricity in the bathhouse:
- You need to draw a wiring diagram in advance, on which you should mark switches, sockets, and lamps.
- It is necessary to choose wires with additional protection from strong heat.
- Switches and sockets must be located in the dressing room.
Since most lamps operate on 12 volts, a transformer must be installed in the recreation area. You can hide it behind a metal shield.
Sewerage
Features of the sewer outlet:
- It is better to assemble sewerage from large-diameter plastic pipes.
- The drain should be located at the lowest point of the shower. To do this, during the construction of the floor it is necessary to make a slope in one direction.
- Water drainage points must be protected by gratings.
The sewage system must be discharged into a septic tank or drainage well. There should be at least three meters from it to the bathhouse.
Water supply
Features of water supply connection:
- The best option for running a pipeline for cold water is from a central water supply system. If this is not possible, a borehole or well will do.
- Pipes that run along the street must have additional insulation.
- If the building will not be used in winter, it is necessary to make points for draining water from the system.
Wall treatment
There is no additional need to treat brick walls. They are not destroyed by fungus, mold, insects, or exposure to moisture.
Thermal and waterproofing
To improve the functional qualities of a bathhouse built of brick, it is necessary to perform heat and waterproofing. Waterproofing methods:
- Pasting. It involves gluing brick surfaces with sheet materials.
- Painting. Liquid compounds are used for waterproofing. They cover brick surfaces.
The process of thermal and waterproofing walls:
- Leveling and covering walls with plaster.
- Installation of a frame made of wooden bars or aluminum profiles.
- Laying thermal insulation. Individual slabs are fixed in empty frame cells.
- Packing of moisture-resistant board material.
- Covering the slabs with foil film.
- Stuffing wooden slats to create a ventilated gap.
Roof diagram
For steam rooms and washing rooms, it is better to choose foam glass as insulation. For dressing rooms, vestibules, and recreation areas - mineral wool.
Types of products
- Red brick is the most commonly used material; walls, partitions and even stoves can be made from this material. For the walls, an ordinary hollow one can be used, since the walls in the bathhouse are made of two layers with a mandatory gap between the walls, which is filled with thermal insulation. Red cladding can be used for façade cladding. For laying brick ovens, heat-resistant grades M75 or M150 are used.
- Fireclay brick - refers to fireproof materials, made on the basis of fireclay clay. In the bathhouse it is used for laying furnace fireboxes, for arranging screens in wooden bathhouses and bathhouses with metal stoves. Also used for fireplaces, stationary barbecues or grills. The most suitable brands are ShA and ShB. Most often, ShB-5 is used for laying stoves.
- Salt bricks for baths are a material that appeared relatively recently, they are salt blocks, the best are those made in Pakistan from salt mined in the Himalayan mountains. Salt blocks in the bathhouse are used exclusively for healing and improving the indoor microclimate. Their price is quite high, but the health benefits of their use more than cover all costs.
- Aerated concrete and foam concrete are the product of new technologies. They are blocks of a fairly large size; the material is porous, so it is light in weight. Even an amateur can build a bathhouse from aerated concrete with his own hands if he really wants to, you just need good instructions plus material. The blocks themselves are good heat insulators, so such bath structures do not require additional insulation. The only weak point of aerated concrete is that it absorbs moisture, but with proper external and internal finishing this disadvantage is reduced to zero.
- Sand-lime brick is not suitable for arranging a bathhouse, as it absorbs moisture and can only be used externally for cladding.
Finishing
After the construction of the building, installation of windows, installation of the subfloor and ceiling, installation of heat and waterproofing, you can begin finishing. Different materials are suitable for finishing brick surfaces.
Internal
Features of interior decoration:
- For finishing it is better to use lining. It is easy to work with and is suitable for finishing steam rooms, showers, and dressing rooms. It is important to prepare the tree in advance. The boards must be coated with special antiseptics and antipyrine.
- You can combine finishing materials. In the steam room, the walls should be lined with clapboard with the lowest thermal conductivity. In the washing room, wood can be combined with plastic panels, natural, decorative stone.
- Floors can be covered with ceramic tiles or porcelain stoneware.
When purchasing tiles for a sink, you need to choose rough products. This will reduce the risk of slipping while visiting the bathhouse.
Areas of use
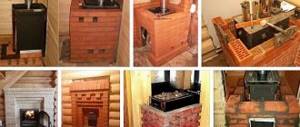
Furnace laying
Currently, a lot of different stoves for baths are being produced, but we will consider a classic heater stove made of brick.
It is rightfully considered the most durable and beneficial in terms of healing effects.
- The foundation for a bathhouse stove is laid similar to the strip foundation of a house. Somewhat below the freezing point of the soil. A blind area is made of sand and gravel, formwork is mounted on it, a reinforcing frame is laid and concrete is poured. Such a foundation will harden for at least 1 month.
Important: the foundation for the furnace must be laid separately from the main foundation, the distance to the nearest wall is made at least 50 mm and covered with sand. Plus, the size of the foundation itself should be 50 mm larger than the furnace around the perimeter.
- Only solid, monolithic bricks are used for laying the stove. The best option is to lay out the entire stove from fireclay bricks, but the price is higher, so it is allowed to use M75 red brick for laying the base and chimney, and the firebox itself is made from fireproof fireclay ShB-5. Before laying, the brick is soaked in water.
- Waterproofing made of roofing felt in 2–3 layers is initially laid on the foundation. Since the foundation is initially laid slightly below the floor level, a base of 2 layers of brick is laid on it using cement mortar. A metal sheet and another continuous row rest on the base.
- Starting from rows 2 to 4 inclusive, there is a blower zone. In the 2nd row we begin to mount the door; before installation, a metal wire is attached to it, which is subsequently sunk into the solution in rows. The door is also wrapped around the perimeter with asbestos rope, which provides a damping gap.
Important: from the metal sheet and above, the stove is laid on fatty clay or modern special fire-resistant solutions. The thickness of the seam is made about 3 mm, it is convenient to control it; initially, 2 wires with a cross-section of 3 mm are placed on the brick; after laying, the wire is pulled out.
- Next, the firebox itself is laid out; exclusively fireproof fireclay material is used here. Before installing the 5th row, cast iron grates are installed. The height of the firebox is 5 rows, the width is 1.5 bricks, and the length is 3 bricks.
- After the firebox, a chimney is installed up to the ceiling with a gradual narrowing; at the top point its cross-section will be 1 brick. In the interfloor ceiling around the chimney, a metal box of 40x40 cm is made and filled with expanded clay, otherwise the materials bordering the pipe can quickly deteriorate due to temperature or even catch fire.
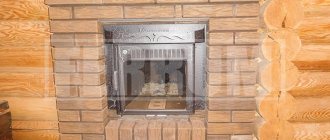
Screen in the bath
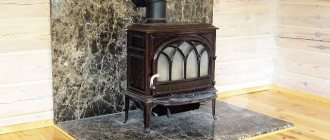
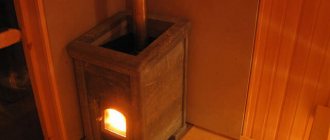
Quite often, metal stoves are used in the bathhouse. Modern metal stoves heat up the steam room quite quickly, but technologically many models require a brick screen.
The brick screen in the bathhouse acts as a case for the stove; it has channels for hot air convection and promotes smooth heating.
But when arranging the screen, you should take into account some of the design requirements.
- The laying should be done vertically at a distance of 40 - 60 mm from the main metal casing of the furnace; this gap ensures the free movement of hot air.
- Cast iron doors are installed in the lower rows of the screen; with their help, the air supply during convection is regulated.
- The thickness of the screen is, as a rule, half a brick; it is not recommended to make it thinner, since the screen can overheat, but thicker is possible.
- Since a brick chimney is not used for metal stoves due to its large mass, the screen can act as a support for the chimney. In this case, its heat transfer increases many times over.
- It is recommended to use refractory fireclay bricks, but this recommendation is not mandatory, the fact is that the heating temperature of the screen is not so high and, in our opinion, any solid material can be used, and the screen can be laid on ordinary cement-sand mortar.
- When firing a furnace from an adjacent room, tunnels are built in the screen panel for access to the firebox and ash pit.
- The screen, which serves as a brick partition in a wooden bathhouse, is laid out completely up to the ceiling. In this case, the distance from the screen to the wooden walls should be at least 40 cm.
Salt screens
Nowadays, everyone knows the therapeutic effect of salt chambers, lamps, and therapy in salt mines. By installing a small salt screen in your bathhouse, you will greatly increase the healing effect of visiting such a bathhouse.
To arrange the screen, special salt bricks for the bath are used. This is a natural material that is cut from a single monolith of salt and has a strictly defined shape. Salt blocks can withstand temperatures up to 500˚C, so they can be used to create protective screens around a metal heater.
It is possible to completely or partially lay out the partition between the steam room and the relaxation room from salt blocks. The blocks are laid using special fasteners or an adhesive solution based on caustic magnesite and magnesium chloride 3:5, initially salt is dissolved in the water, and then magnesite is added. It can be laid on liquid glass, but it is not durable.
Walling
A brick bathhouse is a structure that will last forever. But if you decide to build directly from brick and do not have practical installation experience, we advise you to turn to professionals, since the walls are laid in 2 layers, providing an air chamber between the walls, which can be filled with thermal insulation. For an amateur, this installation is quite problematic.
The most affordable material for building walls with your own hands is aerated concrete or foam concrete. The blocks are large and light and are fastened together using special glue. The blocks are easily cut with a hacksaw. In addition, their price is lower than brick or wood.
Important: aerated concrete and foam concrete absorb moisture, so during construction, the walls must be properly finished, and when finishing, the rule should be observed that the thickness of the interior decoration should be 2 times greater than the exterior.