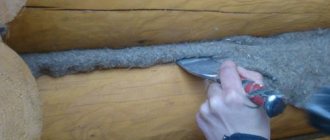
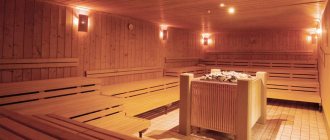
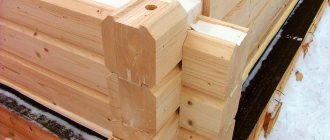
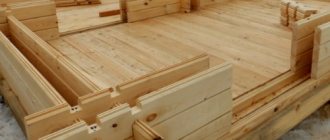
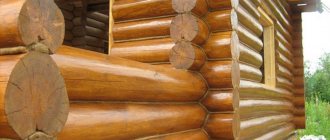
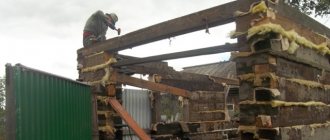
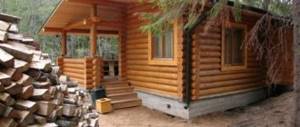
High-quality caulking of a timber bathhouse is one of the most important guarantees of its reliable thermal insulation. Neglecting this process is highly discouraged, because what is at stake is the comfort and healthy microclimate of the steam room. But how to properly caulk a log house in order to avoid even the possibility of the formation of voids, which can negate all the thermal properties of the structure? We will look into this in detail further: we will learn the features of materials for protecting a bathhouse - jute, tow and moss, we will get acquainted with the rules and technologies of caulking, and also watch a video of direct work with a log house.
Projects of houses made of timber
Number of projects 687
- 5 rooms
- 2 bathrooms
Taiga House Project
- To favorites
- 162.8² Total area
- 11 x 11m Construction area
from 2,483,000 rub.
Construction period 90 days
- 4 rooms
- 1 bathroom
Mirage House Project
- To favorites
- 114² Total area
- 9 x 8m Construction area
from RUR 905,363
Construction time individually
- 3 rooms
- 2 bathrooms
Project of the House "BK 13"
- To favorites
- 161.4² Total area
- 11 x 9m Construction area
from RUB 1,573,650
Construction period 50 days
- 2 rooms
- 2 bathrooms
Ilim House Project
- To favorites
- 41.2² Total area
- 8 x 6m Construction area
from 1,236,000 rub.
Construction time individually
- 4 rooms
- 1 bathroom
Project of the House "BK 24"
- To favorites
- 146.42² Total area
- 9 x 10m Construction area
from RUR 1,427,595
Construction period 35 days
- 7 rooms
- 2 bathrooms
House Project No. 16034
- To favorites
- 159² Total area
- 12 x 11m Construction area
from 7,160,074 rub.
Construction time individually
- 5 rooms
- 3 bathrooms
House Project No. 12027-KB
- To favorites
- 192² Total area
- 13 x 13m Construction area
from 6,917,250 rub.
Construction time individually
- 3 rooms
- 2 bathrooms
Florida House Project
- To favorites
- 127.9² Total area
- 10 x 9m Construction area
from 1,770,000 rub.
Construction period 90 days
- 4 rooms
- 2 bathrooms
Danna House Project
- To favorites
- 152.8² Total area
- 11 x 8m Construction area
from 3,496,000 rub.
Construction time individually
- 3 rooms
- 1 bathroom
Project of the House "BK 15"
- To favorites
- 78.4² Total area
- 10 x 9m Construction area
from 1,097,600 rub.
Construction period 21 days
Available at the exhibition
- 5 rooms
- 2 bathrooms
House Showroom Project
- To favorites
- 129² Total area
- 12 x 7m Construction area
from 3,500,000 rub.
Construction period 45 days
- 2 rooms
- 1 bathroom
Bathhouse project BB-144-1-81
- To favorites
- 81² Total area
- 10 x 9m Construction area
from RUR 2,425,349
Construction time individually
- 7 rooms
- 3 bathrooms
Mezhyhirya House Project 17.6*15.6
- To favorites
- 360² Total area
- 18 x 16m Construction area
from RUR 5,998,289
Construction time individually
- 3 rooms
- 2 bathrooms
House Project MPC-1816-F0040-0114
- To favorites
- 160² Total area
- 10 x 9m Construction area
from 2,017,000 rub.
Construction time individually
- 6 rooms
- 1 bathroom
Venus House Project
- To favorites
- 165.7² Total area
- 13 x 8m Construction area
from 3,795,000 rub.
Construction time individually
- 2 rooms
- 1 bathroom
Project of the House "Siesta"
- To favorites
- 64² Total area
- 7 x 10m Building area
from 1,424,200 rub.
Construction period 60 days
- 4 rooms
- 2 bathrooms
Project of the House "Anetta"
- To favorites
- 141.7² Total area
- 15 x 10m Construction area
from RUB 5,111,250
Construction time individually
- 6 rooms
- 4 bathrooms
Aziza House Project
- To favorites
- 235.7² Total area
- 17 x 13m Construction area
from 3,055,000 rub.
Construction time individually
- 3 rooms
- 2 bathrooms
House project No. 55
- To favorites
- 79² Total area
- 6 x 9m Construction area
from 1,066,500 rub.
Construction time individually
- 6 rooms
- 2 bathrooms
House project KD-177, Mikhnevo
- To favorites
- 177.7² Total area
- 13 x 11m Construction area
from 2,200,000 rub.
Construction time individually
View all projects
Living in wooden houses made of timber is considered to be as comfortable as possible, if you do not forget about insulation measures after the building shrinks, for example, caulking.
Knowing the technologies for caulking timber, the materials for them, and understanding which method can be used in your case, you will be able to do this work quickly and correctly. The result will be a warm and cozy wooden house that meets the requirements of heat conservation and comfort.
Read on and you will learn what and how to caulk a house made of timber, as well as when to do this work, and how to do it correctly.
Caulking a wooden house - necessary after shrinkage Source satom.ru
Tool
Caulking a wooden frame for a long service life is not one of those jobs that can be done with improvised means. In the old days, many temporary log buildings, for example, hunting lodges, barns, etc., were hastily caulked with an ax and a blunt chisel or a piece of wood. She went to dig - well, we’ll stuff more, God knows what. But now a log house is an expensive pleasure and an indicator of prestige. Caulking a finished, occupied house is difficult and greatly reduces its service life, so when you decide to build a log house, you need to purchase a caulking tool.
Caulking tool
The most commonly used caulking tool is steel, top left in Fig. Stacked and curved caulking is needed, as shown there, for both primary and secondary caulking (see below): wedge-shaped and narrow are the corners, and curved caulking is tucked into the cracks; It is better to also have two curved caulks: approx. 8 and approx. 3 cm. Using road caulking, install a ribbon of jute or a strand (bundle) of tow for secondary caulking. Breaking caulking tools are also called wedges (not to be confused with a wedge tool for punching caulking seams in the hulls of wooden ships); they are used to remove old caulking when re-caulking; sometimes they “trample down” the secondary, see below.
Note: it is very convenient to caulk with an electric caulking tool (bottom left in the figure) with replaceable tips. Electric drills are available for rent, but there is no need to attach homemade tips to an electric or pneumatic hammer drill - it hits too hard, it will tear the caulk and damage the wood.
A very important tool is the wooden mouchel mallet. The mushel is constructed in the same way as a wooden leopard sledgehammer, but lighter, 0.8-1 kg, for which reason its firing pin is made of a smaller diameter. The blow with a mouchel is strong, but soft, without noticeable recoil, which is especially important when caulking with flax and jute. But hitting the caulk with the butt of an ax or a blacksmith’s sledgehammer is unacceptable; With a carpenter's hammer, instead of a mouchel, it is possible to use for caulking the jute of a log house made from a solid rounded log, in the center in Fig.
If you are going to caulk with moss, it would be better to stock up on hardwood caulks, straight and oblique, and a mallet instead of a mouchelle: a steel tool tears up soft moss too much, and you won’t get a high-quality caulk. Wooden caulking tools soon wear out; for a frame of 12 crowns you will need 3-4 sets of caulking and 2-3 beaters, for which on the right in Fig. Their drawings are given: wooden caulking is not easy to find on sale, and buying them is expensive.
Is it necessary to caulk a house made of timber?
When constructing timber houses, insulation is laid on each crown. Under its own weight, the log house invariably shrinks. This is a natural process and cannot be avoided. The wood dries out and changes its geometric parameters: the timber “sits”, the insulation wrinkles in places, and cracks appear. This may not be noticeable to the eye, but on average a log house 3 meters high can shrink by 10-12 cm after a year.
Gaps in timber after shrinkage Source content.onliner.by
To improve the thermal performance of a timber house, the timber must be caulked. This procedure is needed for the following purposes:
- Prevent heat leakage . During shrinkage, cracks appear between the crowns of the log house, the so-called “cold bridges”. Drafts appear and heat is blown out. Caulking allows you to retain heat and improve the thermal performance of your home.
- Elimination of icing of walls . In the absence of caulking, heat will escape through the cracks formed when the timber shrinks. Due to the difference in temperatures during the cold season, moisture entering the cracks of the timber freezes, which leads to further cracking of the wood.
- Increased home performance . After caulking, a full thermal balance will be created in the log house. Heat conservation will save resources on heating your home. The log house will be in more comfortable operating conditions in the complete absence of icing on the external and internal walls.
This is what a caulked timber looks like Source 1brus.ru
Caulking is a mandatory step in construction. It will keep the house warm, save heating resources, and also increase the service life of the building as a whole.
How and with what to effectively solve the problem
But what to do when cracks have already appeared? There are many ways to help quickly and efficiently deal with this problem.
Sealing with putty
Of course, it will not be possible to completely get rid of the cracks that have appeared. But it is possible to completely seal them and prevent the risk of growth.
You can use one of the following sealing options:
Sawdust and PVA mass
This is a homemade sealing impregnation, which is the most affordable. Its components are mixed in the proportions necessary to form a thick base, similar to putty. The mixture is used to completely fill the cracks (if after drying part of the mixture falls off, this place is re-filled with homemade putty). For convenience, use a regular spatula.
wood chips
It is used to seal very deep and large cracks. It is better to select chips of the same length as the logs. The pieces of wood are first sharpened with a wedge and hammered tightly into the splits. The top is additionally reinforced with ready-made putty or homemade PVC putty.
Gypsum with sawdust or crushed bark
This mass is also called “arbogypsum”. This method of sealing provides the log with durability and reliability. To make the mass, dry gypsum powder is mixed with bark or sawdust. The mixture is thoroughly kneaded and diluted with water (the volume of liquid is equal to 1/2 of the gypsum mass). The finished putty is dense and very elastic; it must be mixed to destroy lumps. To enhance penetration, add a little regular shampoo. The crevices are covered immediately after the mass is made (it hardens instantly).
Moss
For larger splits, use moss caulk. Moss is an environmentally friendly and completely safe raw material. It will cover the cracks perfectly. It will also additionally retain heat in cold weather, blocking the access of cold air. Dried moss is used for putty. Before use, it is soaked for 20-30 minutes in clean water, squeezed out and rolled into strong rollers, which are placed in the cracks. Using a mallet, hammer it in more tightly until the layer springs back. After 3-4 days (during this time the moss dries out), the excess material is carefully trimmed off.
All these methods from folk craftsmen will ensure quick and reliable sealing of cracks using readily available means. But don’t forget about ready-made drugs.
Choosing putty
To carry out work on the surface of logs, it is necessary to use products that, in addition to reliable sealing of seams, will protect the surface of the log from frost and rain.
Expert opinion
Levin Dmitry Konstantinovich
Water-based putty, which is thick, will adhere much better and stronger to wood than liquid compounds that contain solvents. Such (liquid) putties are best used for sealing faults that are too large and deep.
There are three types of putties for processing log houses:
. With no odor and good environmental performance. It is easy to apply and dries instantly without allowing moisture to pass through. At the same time, acrylic putties also level the surface and, after drying, do not shrink (dry without cracks). They are best used for sealing small cracks.
Acrylic- Water resistant . It is famous for its high resistance to aggressive manifestations of the external environment (rain, snow, high humidity and temperature changes). Waterproof products are prepared on an adhesive, polymer or oil base, which guarantees good application and quick drying. They are best used when subsequent coating of logs with varnish or paint is planned.
- Plaster . It provides a good microclimate, is environmentally friendly and easy to use, it is better for sealing cracks in logs inside a building. After application and drying, the seam can be further sanded and painted.
- Non-shrinkable . The most durable and high quality of all other types. It is worth working with when sealing serious, deep cracks. By the way, you can choose the color of the non-shrink putty to match the wood being processed - it is available in a variety of colors.
Additionally, it is worth studying the rating of the best manufacturing companies producing putties for sealing cracks in log logs:
| Brand | Advantages | Flaws |
| Tikkurila (Finland) | resistant to temperature changes and humidity, cold-resistant, | high cost, |
| Extra (Russia) | allowed to be used to close faults, both internal and external | Almost all types of putties are acrylic, and they are not suitable for sealing deep cracks |
| Eurotex (Russia) | Nice packaging and packing, it’s easy to work with, the mixture fits perfectly and dries quickly | shrinks after drying, poor color palette |
| Parade (Russia-Sweden joint company) | increased water resistance, easy to apply, after drying can be sanded and sanded | excessively liquid composition, which is inconvenient when sealing cracks, spreads |
| Rainbow (Russia) | dries quickly, is moisture resistant and has low shrinkage | You can work with it only at a temperature of +15⁰С |
Choosing a sealant
Sealants are another common substance that helps to properly seal log cracks. They will additionally insulate the building and are guaranteed to stop the occurrence of new chips in the logs.
When applying sealant, pay special attention to the processing of the ends (they dry out faster than other areas). The ends can also be sealed using drying oil, varnish, oil paint or wax.
The main advantage of this material is the ease of application and the speed of filling cracks. When selecting a suitable sealant, take into account the composition, its technical parameters and color palette.
The following types are used to close splits:
. Resistant to temperature fluctuations and high humidity. This product is environmentally friendly and odorless. It is better to use it for filling internal cracks.
Acrylic- Silicone . A universal substance created for work both inside and outside buildings. Resistant to temperature changes and aggressive external environments. But they are not designed for subsequent painting, although this is not a problem, since manufacturers offer silicone sealants in an expanded range of colors, including transparent ones.
- Bituminous . The most resistant sealant to moisture. It contains rubber and bitumen. Similar products are used to close splits in wood roofing and drains.
- Polyurethane . It has high strength, is resistant to moisture, is a very elastic material, and is easy to work with. But take into account its harmfulness due to the presence of certain additives in the composition. Therefore, it is better to use it for work only on the outside of the building.
When choosing, you need to understand the manufacturers offering popular types of sealant:
| Brand | Description | Add-ons |
| Neomid (Russia) | has high elasticity, resistant to moisture and temperature changes | it is possible to seal fractures with a deformation of 15-30% |
| Eurotex (RF) | a particularly resistant and elastic substance, it can be used with end-side splits | acrylic appearance, additionally provides protection against insects |
| Remmers (Germany) | resistant to aggressive environmental influences, temperature changes, well compatible with paint and varnish coatings | designed for sealing cracks inside and outside buildings, available in transparent and colored versions |
| Ceresit (Poland) | resistant to humidity, temperature changes, gives minimal shrinkage | are produced in the form of silicone/acrylic compounds |
| Check Mate (America) | belongs to elite materials, perfectly protects wood from mold and moisture, gives little shrinkage | acrylic compounds with good elasticity |
When working with sealing compound, do not fill cracks to the brim with it. It is necessary to apply the mass so that it touches only in two places, connecting the opposite parts of the split. When it dries, it will fill the crack on its own.
When and how many times should you caulk?
In addition to understanding how to caulk a log house, you need to know when to do the work. Wooden houses are most susceptible to shrinkage during the first year and a half of operation, then over the course of 5-6 years the shrinkage occurs slowly and fades away completely. Caulking is carried out in three stages:
- Primary . Immediately after the construction of the log house is completed. Despite the installation of inter-crown insulation, the joints are additionally sealed with the selected material. Due to the upcoming shrinkage of the house, caulking can be done with a low density.
- Secondary . Produced one year after the construction of the house. The log house will shrink by almost 80%. It is necessary to tightly caulk the cracks that appear and prevent the remaining material from hanging down.
Secondary caulk Source ytimg.com
- Third caulking . Produced 4-6 years after the start of operation of the house. The log house is caulked tightly. All joints in which the insulation has been lost over time are filled.
Double caulking is an indispensable condition for creating an ideal thermal contour of a building. The third time it is necessary to caulk if there is no external cladding of the house. If the outside of the house is insulated with finishing material, there is no need to seal the joints a third time.
The process of filling gaps between logs
If the gap between the logs is even and approximately the same, you can push the insulation into the recesses with a special wide spatula - a road builder. This allows you to speed up your work. If the recesses are uneven, with narrow gaps, it is better to use a tool with a sharp tip. If the cracks are crooked and you have to drive the sealant into them at an angle, then it is better to use an oblique metal caulk.
You can process seams and gaps with jute in different ways. The choice of method depends on the size of the cracks and the desired aesthetics. There are 2 main approaches to laying the seal:
- Stretch. The compaction material is taken in individual strands and pushed with a thin tool along the gap between the logs. A roll is formed from the hanging remains of jute and forcefully compacted into the groove using a thin tool and a hammer. This method is suitable for processing small cracks and allows you to create good thermal insulation. But the wall does not look entirely aesthetically pleasing due to the remnants of insulation peeking out from under the logs.
- Into the set. This method allows you to process even the largest gaps. To do this, jute fibers of the required length are taken, which are then wound into balls. The larger the gap, the larger the ball you need to form. Then the formed balls are filled tightly into the cracks using a chisel and hammer. When using this method, the edges of the insulation do not protrude from the gaps between the logs, making the treated walls look more aesthetically pleasing.
Caulking should be done evenly, in a circle, level by level. You should move from bottom to top. If you treat each wall separately, the entire structure may become warped due to uneven distribution of gravity. One should take into account the fact that after caulking, the structure can grow in height by almost 15 cm.
Video description
Description of the stretch caulking technology in the video:
This technique is practiced both using natural traditional materials and modern insulation materials, and if the material is represented by a tape or roll, caulking is much easier and faster. When caulking, standard tools are used: a wooden spatula and a wooden hammer.
- “To set” method
This method is used if significant gaps larger than 5 mm in size have formed during the shrinkage of the house.
From the selected material, carefully twist the tourniquet and fold it into loops. The space between the logs is filled with rolled loops, filling wide gaps and minor cracks as tightly as possible. A special spatula and a wooden hammer are used.
Method “to set” Source galich-dom.ru
With this technique, it is recommended to use rolled tape materials, since twisting strands of fibrous materials with the subsequent set of loops is a complex matter. But in general, seams can be sealed with any materials.
Varieties of jute release forms and their application
Jute is available in the form of cord, rope, twine, rope or tape. The thickness and width of the material may vary. It is easy to caulk thin tow or jute in the form of a rope into old cracked logs with your own hands. Jute tape makes it easier to seal gaps around doors and windows. It is also used to fill gaps in building materials. A seal made from a harness and cord looks the most aesthetically pleasing and does not require additional processing. Thin cords and ropes are suitable for finishing not only walls, but also floors and ceilings.
The main producers of jute are India, China and Kazakhstan. The highest quality and most expensive product is produced in India. The width of the jute and its thickness directly affect its cost. The sealant is sold in the form of skeins and bobbins, which are gradually unwound during use. Working with natural material is quick, easy and does not leave excess debris, like synthetic sealants. Sealing materials made of jute reliably adhere to other building materials.
Jute tow has good elasticity, so it easily takes the shape of the surrounding space. Material made from wood fibers withstands frost and heat and does not crumble. The properties of jute made from wood fibers are similar to wood. Such material can be subjected to various treatments. It reacts to impregnation with resins and staining in the same way as wood: it does not dry out or crumble, and does not allow heat and moisture to pass through.
Regular jute is suitable for clogging walls that do not carry any additional loads. It is easy to install with your own hands, without any special skills. Some types of jute products have a special impregnation, which allows you to make the seal fireproof, waterproof, or turn it into sound insulation. For this purpose, special resins and synthetic sealants are used.
Technology of caulking a house made of timber
Caulking technology consists of a certain sequence and rules for carrying out work.
First, the lower crowns are caulked; work does not begin from the middle of the frame or the upper crowns.
The work is carried out simultaneously outside and inside strictly along the perimeter of the log house.
You should begin compacting the space between the second and third crowns only when work on all four walls between the first lower crown and the subsequent second is completed. This is done to prevent the house from skewing, because after the insulation is completed, the timber may become about 10 cm higher.
Caulking can be produced using fiber and tape insulation. When caulking with tape material, the work is carried out much faster, and it is much easier to perform.
Caulking with sealant
Caulking a timber house using sealant is the fastest way. To work, you will need the synthetic material itself, a cord for filling the cracks, a special spatula for smoothing the seams (you can use a narrow spatula), and a mounting gun.
Progress:
- Place the cord in the cracks and compact it tightly.
- A layer of sealant is applied on top by inserting it into the mounting gun.
- Using a spatula, level the product.
- After moistening a clean rag with water, wash off any sealant that has got on it from the timber.
Having learned how to properly caulk a log house and choosing the appropriate material, you can get to work.
Video description
Caulking timber: how it happens is shown in the video:
To understand how to properly caulk a house made of timber, we will consider in detail the methods of caulking with various materials.
Caulking technology with fiber insulation:
- Moss or flax tow is applied to the gap with fibers across it, then, holding the material, it is pressed deep with force with a special spatula.
Caulking tow Source fasad-exp.ru
How much tow do you need for a bath?
Any natural material for caulking is compressed many times during installation and a large amount of it can fit into a log house, even with good inter-crown insulation. No one can say exactly how much tow is needed for a bathhouse: it also depends on what material the log house is assembled from and how the grooves are cut out in the logs. When manually cutting grooves, as a rule, more material is wasted. Also, a sanded log requires more material compared to a rounded one. Less is required for a log house, but even here the amount of tow or moss that will be used to seal the cracks depends on the accuracy of the geometry of the beam and the depth/number of cracks that appear during drying.
Video description
Caulking with rolled material: you will see how to do it correctly in the video:
The corners of the timber are caulked using the same technology:
- If the gaps are wide, a cord is formed from the insulation tape. Roll it into a ball.
- Unwind part of the cord and weave loops from it. Then each loop is pushed inside the seam.
- Hammer the loops with a spatula, first from above the joint, then from below.
- After sealing the seams, final caulking is carried out if necessary. It involves residual filling of joints and is carried out if necessary.
- The density of the caulk is checked with a kitchen knife. The knife blade should not extend into the joint more than 1.5 cm. If this condition is met, caulking is done correctly. If not, then additional caulking is required.
Checking the density of the caulk Source 24aul.ru
Caulking corners is done using the same technologies using roll insulation, for this they move along the seam from the bottom up. To ensure uniform laying of the material, it is constantly tensioned and straightened.
Preparatory work
Impregnation of wood with antiseptic
Since jute is a durable material, there may be no need for re-caulking, which saves time and money. But still, in order for a self-made caulking to last a long time and reliably seal your home, it must be installed correctly. To do this, you need to prepare in advance, prepare your tools. You should choose jute of a width that matches the width of the gaps between the logs.
To prevent the logs from rotting and collapsing, the cracks should be properly treated before caulking. For this purpose, special wood antiseptics are used. The sealant should be placed only in dry cracks. It is best to carry out caulking in the summer, warm dry spring or autumn. The air temperature should not be below +10° C, there should be no rain. Too hot weather is also not suitable, as the logs dry out unnecessarily, which can result in overuse of jute.
Jute materials are easily torn by hand. Without using any special means, you can install the seal yourself quickly and easily. But such a finish will not have a completely aesthetic appearance, so it cannot be used for walls that carry a decorative load. To make caulked walls look neater, the pieces of insulation need to be identical and have smooth edges. To do this, the jute must be cut with a sharp knife or scissors. Therefore, the tools should be sharpened in advance.
You need to squeeze the sealant into the gap carefully, using a special metal caulk, which visually resembles a small chisel. If one is not available, it can be replaced with a thin chisel. To drive the seal into the gap, you will also need a hammer and a rubber mallet. If the gaps are small, then you can use a jute rope of small diameter. If the rope is narrow and the gaps are large, then it is better to fold it several times.
Briefly about the main thing
Caulking involves sealing cracks in a log house with insulating material. It is necessary to caulk the house after the timber shrinks. This must be done twice, and in the absence of outer cladding - three times.
Caulking is done using various materials. The main thing is that they meet the requirements of heat conservation, are environmentally friendly and durable in use. Traditional materials are represented by moss, tow and hemp. Modern ones - jute and linen felt.
Depending on the width of the gaps that appear after shrinkage, they can be caulked in two different ways using rolled or fibrous materials: the “stretch” method or the “set-up” method.
Ratings 0
Professional caulking in all weather conditions
ready to caulk a wooden house or bathhouse at any time of the year. Regardless of the season, the work will be done to a high quality level. The company employs professional caulkers who have special education, experience and work skills.
We guarantee excellent quality of workmanship, compliance with the deadlines specified in the contract, and cleanliness of the site. The first visit of a specialist for inspection and drawing up an estimate is free of charge.
You can leave a request and ask your questions directly on the website in the feedback form. You can also contact us in any way using the coordinates on the “Contacts” page.
Calculate the cost of painting and insulating your home right now
Select types of work:
Select materials:
Prevention of defects
The appearance of various wood defects is easier to prevent than to eliminate. An important task of prevention is the use of high-quality and well-dried logs with a moisture content not exceeding 22%.
Natural drying of logs in a dry and ventilated room for 2 years ensures uniform evaporation of moisture and almost completely eliminates the appearance of cracks.
The most effective methods of prevention are:
- Natural drying;
- Compensation cut;
- End sealing.
Natural drying
The best way to prevent the appearance of various defects on the surface of logs is to dry the material under natural conditions. Carried out before construction begins.
The drying speed should be the same for the top and inner fibers of the wood, which will ensure uniform evaporation of moisture.
When drying lumber for 12 months, the size of cracks formed can reach 10 mm, up to six months - up to 20 mm, within 2 years - no more than 2 mm.
Compensation cut
This method of prevention involves making a special cut using a chainsaw or milling machine along a log with a depth of 1/3 of its diameter. In this case, the ends are not cut.
The cutting width is 10 mm. The cuts help relieve tension in the wood fibers during its further drying.
When erecting a structure, the resulting groove is securely closed by the next element, preventing rotting and destruction of the log. Shrinkage leads to a slight expansion of the kerf, but the total number of cracks is significantly reduced.
End sealing
How to treat the ends of logs to avoid cracks? The answer is simple - sealant.
Sealing the cracks prevents the rapid evaporation of moisture from the internal fibers through the end face of the logs.
As a sealed base, it is recommended to use paints and varnishes with an oil component, drying oil, natural wax and slaked lime.
Natural interventional insulation
Moss is the oldest and still quite effective insulation material for log houses.
It has such necessary properties as:
- excellent hygroscopicity (capable of absorbing moisture in a volume 20 times its own);
- the presence of lignin in the structure of the fibers, which resists deterioration of both the moss itself and the logs;
- bactericidal properties - moss is able to destroy microorganisms.
Before caulking, dry moss is moistened in a solution prepared from 200 g of soap and 500 g of oil, dissolved in a bucket of water. Of all the types of moss, only two types are used as caulk: forest moss (cuckoo flax) and red swamp moss.
The moss is not laid after the frame is assembled, but during it. To do this, the moistened material is distributed in a layer of at least 10 cm along the crowns with the stems across. The ends of the stems, 10–15 cm long, are released outside for subsequent caulking. The disadvantage of this method is the high labor intensity of preparing the moss (it must be cleared of soil residues and dried) and the rather complex process of caulking.
tow , but it is not advisable.
There are several reasons:
- it is difficult to twist tow so that it does not fall apart;
- it absorbs water vapor well, so it is almost always wet and deteriorates;
- in the heat, the material crumbles into dust;
- Birds love tow and use it to build nests.
Thus, the log house will have to be caulked too often. The tow is first treated with a formaldehyde solution and then dried. This protects it from pests. Working with tow is not very convenient, because it is too hard and it is very difficult to achieve a dense filling of the seam.
Hemp is made from hemp stem fibers, which are highly durable and resistant to various influences.
Felt is a non-woven material made from felted wool. For caulking, it is cut into strips. It requires pre-treatment with protective compounds, as it is easily damaged by moths and other pests. Currently, you can purchase impregnated felt that has already been treated with bitumen or resin.
Flax - it is advisable to use dry wood or laminated veneer lumber to insulate the house. The material does not have a high density and is afraid of prolonged exposure to moisture, which can cause rotting processes in it. The shade of flax caulk is usually gray.
Linen batting is made from flax and jute, which together form a good insulation material. The material is resistant to external influences, has good density and the ability to restore its dimensions. After the wood dries, leading to the formation of cracks, the material reliably fills all the resulting voids.
Jute has properties similar to moss, but it is much easier to work with. The material has sufficient density to keep the cold out and keep the heat out of the house. Jute is a breathable, hygroscopic material. In addition to all these positive properties, jute has a beautiful golden hue, which greatly decorates the house.
Caulking order
Assembling a log frame with excess clearance to account for shrinkage
Good for the old days, i.e. Experienced and hardworking peasants caulked the log house, newly built from their own timber, twice: during the construction process, in rough form, and after its completion. They received timber for construction from the master or owner (monastery, land administration) selectively, and a smart man of that time, even before felling the timber, knew how it would settle and dry out. Therefore, when processing logs for a log house, the craftsman removed the excess on their edges (protruding ends) (item 1 in the figure on the right). The log dries faster at the ends and, under the pressure of the juices in the middle, tends to bend upward, as a result of which, already in the spring after winter, the crowns lay tightly on top of each other, pos. 2. Then the organic sap of the tree began to bituminize, the logs acquired additional elasticity and subsequently the log house settled evenly vertically.
If the timber was purchased externally, then no amount of experience will help you accurately predict the shrinkage of the logs. Almost all carpenters today are in this position, so the log house is caulked three times:
- Initially rough - in the process of construction;
- Initially outright - immediately upon completion;
- Secondary - after a winter or a year, the cracks that appear are caulked.
Note: under no circumstances should you remove excess logs from spans - as they dry out, they will tend to bend upside down, the corners will weaken and the entire structure will lose strength.
