Causes of wood rotting
Without special treatment, logs and floor boards begin to rot. Wood is an organic environment in which pathogenic microorganisms can develop very successfully. Most of them require two components:
- moisture;
- heat.
In a bathhouse, as a rule, wood is used to finish the floors, walls, ceiling, benches and shelves. That is why, without special treatment, logs and floor boards begin to rot. What are the main causes of rot in a room?
- poor waterproofing;
- lack of normal ventilation;
- high temperature and humidity;
- poor quality wood processing.
It is worth noting that certain wood species are more resistant to pathogens than others. For example, coniferous wood contains resins, which contain phytoncides.
Some wood species are more resistant to pathogens than others.
We recommend reading the Zen channel “zen.yandex.ru/vodakanazer.ru”, where you will find a lot of useful information for summer residents and gardeners.
This provides them with “immunity” against mold and mildew. For this reason, in order to prevent floor rotting, it is better to use the following types of wood:
- larch and fir;
- spruce and ash;
- cedar and pine.
The tree species most susceptible to moisture and, accordingly, pathogens are:
- maple and alder;
- aspen and linden;
- birch and elm.
Is it possible to protect wooden materials from rotting? To prevent the appearance of rot in the bathhouse, you can treat the wood with special impregnations and varnishes, which will be discussed further.
How to varnish a wooden floor?
What is rotting, what impregnations protect against it?
One of the reasons why we found it necessary to write this review was the widespread illiteracy of people writing about wood rot and means of protection against it. You read such rare nonsense that you become scared - what if in other areas where you don’t understand, they just as cheerfully tell you nonsense?
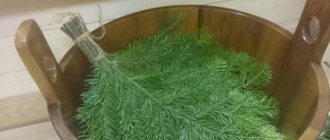
Composition for baths 2.7 l. Saunasuoya soup for protection against moisture and dirt. Banka Photos
In general, most of us think that rotting is caused by bacteria. This is true of a variety of protein flesh. It is decomposed by aerobic and anaerobic bacteria (those that need oxygen for life and those that do not). But wood is not so malleable. To decompose it, nature used not only bacteria (yes, there is bacterial rot), but also fungi. Fungi, more often than bacteria, cause wood rot, that is, its decomposition into simpler components.
Fungi that cause rot are not the only ones you need to protect against. In addition to them, there are also molds . They have little effect on the strength of wood, because they feed on substances dissolved in intracellular water, which their hyphae reach through various tubules on the wooden surface, practically without damaging the cell walls.
Mold is harmful due to its toxins and spores. Toxins are harmful if eaten - as some do when they cut off the moldy side of an apple, considering the rest healthy, but not realizing that the visible mold is its fruiting body, and the hyphae penetrate the entire apple. But we don't eat the tree, so spores are the main type of damage caused by mold growing on the tree.
spores in the air, they cover objects, but are activated only in the presence of moisture. In normal concentrations, our body copes with spores that penetrate it. But when there is a colony of mold in residential or bathing areas, the concentration of spores grows so much that this becomes the cause of mycotoxicosis, allergies and many diseases that at first glance cannot be associated with mold at all - migraines and heart disease, otitis media, rhinitis, bronchitis , etc. .P.
IMPORTANT! You shouldn’t believe Wikipedia that mold destroys wood, but you should definitely be afraid of it and fight it. It is also necessary to distinguish between rot and mold, because the means of combating them are different.
The third type of fungi that live in wood are staining fungi, such as blue fungi. Staining fungi, like mold, do not affect the strength of wood. Unlike mold, they do not harm humans. People just don't like their stained wood for aesthetic reasons, and they can also be a precursor to rot infection. We won’t say anything about the latter; such information came across only once and not in a scientific publication, but we took note of it. That is, it is also worth fighting staining fungi.
The very mechanism of wood destruction by fungi boils down to the fact that their hyphae eat away cell walls with enzymes, leading to their corrosion or destruction (they differ in the scale of dissolution - in the first case, holes are formed in the cell walls, in the second the walls dissolve entirely). The contents of the cells become stained, which leads to the darkening of rotting wood.
There are quite a few types of fungi that cause rotting, and they belong to different classes. Therefore, substances that successfully cope with some types are useless against others.
ATTENTION! There is no universal fungicide. Only compositions are possible that complement each other, affecting species over which the other has no control. But we have not found a single ready-made product that would work in this way. Only fungicides with limited spectrums of action are commercially available.
But what’s even sadder is that many fungicides that are sold specifically for baths are effective only against molds and staining fungi! And they sell them as a remedy for rot, taking advantage of the general illiteracy of buyers.
Why is that? Yes, because remedies for mold and staining fungi are simple antiseptic impregnations based on boron or chlorine. But the real remedies against rot are high-tech chemicals , expensive and imported. We simply have no other explanation. And that is why you will almost never see the composition on the label. The most you can count on is a streamlined statement that the composition contains “highly active biocides” or that the product “does not contain heavy metal salts.”
ADVICE! If you want something effective, look for imported products with clearly stated ingredients on the label and expensive ones.
Requirements for anti-putrefactive agents
The impregnation must necessarily include antiseptic components (phytoncides).
How to cover the floor in a bathhouse? The development of pathogenic flora in a “damp” room can be prevented with the help of special anti-rot compounds. Manufacturers of protective products produce various varnishes and impregnations, but not all of them have the necessary range of properties that would guarantee the absence of rot in the wood.
What properties should a high-quality impregnation have?
- Water repellent. It is water that makes wooden joists and boards vulnerable to pathogens. To prevent their development, the wood must be kept dry. To do this, use products that, after application, form a protective non-hygroscopic film on the surface of the floor and wall;
- Antiseptic. The composition of the impregnation must necessarily include antiseptic components (phytoncides). They prevent the proliferation of fungal spores and mold formation;
- "Repellent." Wood does not always suffer from rotting. Wood-boring insects can also cause damage to the coating. To prevent their appearance, you can use special formulations that contain insect repellent substances.
Bathhouse projects
Number of projects 687
- 3 rooms
- 1 bathroom
Log bathhouse project BO-030
- To favorites
- 80² Total area
- 6 x 8m Construction area
from 1,080,000 rub.
Construction period 90 days
- 1 bathroom
Log bathhouse project BO-022
- To favorites
- 35² Total area
- 5 x 8m Building area
from 472,500 rub.
Construction period 90 days
- 1 room
- 1 bathroom
Bathhouse Mylenka project
- To favorites
- 26.5² Total area
- 6 x 6m Construction area
from RUB 357,750
Construction period 30 days
Log bathhouse project BO-029
- To favorites
- 38² Total area
- 5 x 8m Building area
from 513,000 rub.
Construction period 90 days
- 2 rooms
- 2 bathrooms
Bani Harbor project
- To favorites
- 110² Total area
- 11 x 9m Construction area
from 1,100,000 rub.
Construction time individually
- 1 room
- 2 bathrooms
Bath Kamenka project
- To favorites
- 65² Total area
- 5 x 13m Construction area
from 815,700 rub.
Construction time individually
Log bathhouse project BO-001
- To favorites
- 17² Total area
- 4 x 5m Building area
from 229,500 rub.
Construction period 90 days
3m barrel sauna project
- To favorites
- 6.6² Total area
- 3 x 2m Building area
from 179,000 rub.
Construction time individually
- 1 bathroom
Bathhouse Pasechnik project
- To favorites
- 26² Total area
- 6 x 6m Construction area
from 351,000 rub.
Construction time 22 days
- 2 rooms
- 1 bathroom
Bathhouse Serduchka project
- To favorites
- 72² Total area
- 8 x 6m Construction area
from 972,000 rub.
Construction time 42 days
- 1 room
- 1 bathroom
Project Baths 6B-B
- To favorites
- 17² Total area
- 4 x 5m Building area
from RUR 259,529
Construction period 15 days
- 1 room
- 1 bathroom
Bani Lisa project
- To favorites
- 51² Total area
- 6 x 9m Construction area
from 674,000 rub.
Construction time individually
- 1 room
- 1 bathroom
Project Baths 14B-B
- To favorites
- 27.1² Total area
- 5 x 6m Construction area
from 334,065 rub.
Construction period 18 days
- 1 room
- 1 bathroom
Bathhouse Mylnya project
- To favorites
- 29² Total area
- 5 x 6m Construction area
from RUB 391,500
Construction period 30 days
- 3 rooms
- 2 bathrooms
Caravel Baths Project
- To favorites
- 107² Total area
- 17 x 11m Construction area
from 1,444,500 rub.
Construction period 50 days
Bathhouse project Standard No. 3
- To favorites
- 15.3² Total area
- 4 x 4m Building area
from 470,000 rub.
Construction time individually
- 1 room
- 2 bathrooms
Bathhouse project "Riga"
- To favorites
- 81.5² Total area
- 12 x 10m Construction area
from 1,630,000 rub.
Construction time individually
- 1 bathroom
Barrel sauna project 6m
- To favorites
- 13.2² Total area
- 6 x 2m Building area
from 259,000 rub.
Construction time individually
- 1 room
- 1 bathroom
Bath Sakura Project
- To favorites
- 80² Total area
- 11 x 7m Construction area
from 1,080,000 rub.
Construction period 35 days
- 1 bathroom
Log bathhouse project BO-005
- To favorites
- 20² Total area
- 5 x 6m Construction area
from 270,000 rub.
Construction period 90 days
View all projects
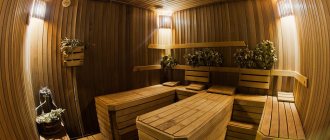
There are many different means to protect finishing materials. Let's figure out how to treat the floor in a bathhouse from rotting and fungus, what requirements certain compositions must meet, and what the dependence is on the nature of the decorative flooring. We will also consider what can be used for the walls in the steam room and washing room, and what will be useful for the area near the stove. Read to the end and communication with consultants will take noticeably less time.
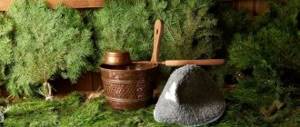
Assortment of protective compounds for baths Source bouw.ru
Important points
Some of the volatile components in the composition of impregnations can cause real harm to health, so they cannot be used in a steam room.
If necessary, you can carry out disinfection in a bathhouse with your own hands. However, many experts do not recommend using synthetic compounds for these purposes. Why? The temperature in the sink and steam room is often very high. It provokes the evaporation of antiseptic components from the surface of the floor or wall that has been treated with it. Some of the volatile components can cause real harm to health.
To prevent the negative effects of anti-putrefactive agents on the body, the choice of protective compounds must be approached with care:
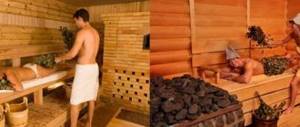
- In the rest room and dressing room, the air temperature, as a rule, does not exceed 27 degrees. They can be used without problems with synthetic compounds;
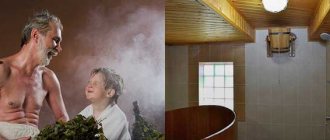
- In the sink and steam room both humidity and temperature are high. To eliminate the possibility of volatile substances entering the body, it is better to treat logs, floor boards and other wooden elements with organic-based compounds.
What kind of floors can be in a washroom?
The bathhouse, as you know, consists of several rooms at once. It has a steam room, a dressing room, and also a wash room, where after warming up we wash off all the released substances. Therefore, this room experiences the largest flow of water falling onto the floor. That's what we'll talk about now.
Many owners of suburban areas, starting the construction of a bathhouse, are wondering how to drain water from the building so that it does not cause any harm. And they begin to build complex hydraulic structures, trying to remember knowledge from the literature they read in their spare time. However, everything can be done much simpler and easier, and only with your own hands.
The tiles on the floor in the washroom are excellent at resisting moisture
To begin with, you should choose one of several options for the future floor. There are:
- Concrete-based tile floors;
- Wooden lattice;
- Solid with separate water outlet.
As you can see, you won’t have to rack your brains for a long time, because there are quite a few options. But choose the optimal way to install floors in the washing section of the bathhouse. The appropriate flooring option for a washroom depends on personal preference. The main thing is to prepare the basis for the future floor. And we will make it from concrete.
Types of anti-putrefactive agents
The fewest requirements are for compounds that will be used in the rest room and dressing room.
You can protect new wooden coverings from damage with your own hands if you purchase high-quality compounds. What types of funds can be used for these purposes?
- Lucky. Special varnishes contain antiseptic components that prevent the development of bacteria even in damp wood. They are used as a decorative finish, which at the same time prevents the materials from rotting;
- Impregnations. Impregnation is a colorless composition that contains phytoncides. These components protect joists and floor boards from the effects of biological agents - mold, bacteria, etc.;
- Antiseptics. Fungicide-based solutions are toxic. Therefore, they can be applied to walls, floors, joists and other wooden structures only if they are intended to be painted later.
The fewest requirements are for the compositions that will be used in the rest room and dressing room. In these moderately humid rooms, you can do disinfection yourself using impregnations both plant-based and synthetic-based.
Mistakes when arranging the floor for the washing compartment in the bathhouse
Floors in a washroom in a public bath
When deciding what to cover the floor in a bathhouse in a washroom, many of their owners choose wooden flooring. The work is carried out in stages (for more details: “Proper installation of a wooden floor in a bathhouse - a step-by-step guide”).
First they prepare the foundation. To do this, logs are installed using timber from pine or larch. It is advisable to make the flooring from boards, the material of which must match the lag wood. The floor covering (not leaking) is made with a slope, so that water flows into the drain.
The logs are installed along the width of the washing compartment, thereby choosing the smallest distance between opposite walls. If the room is square, they can be installed in any direction.
Installation procedure for logs:
- To make them stable, a support chair is made in the center of each of them from bricks, wood or using concrete pouring. When using brick or wood, you need to fill a special platform with a height of 20 centimeters with reinforcement. It should be sized so that it protrudes 5 centimeters on each side of the support being created.
- Foundation holes are dug 40 centimeters deep for each site. The bottom and walls are compacted. Sand is poured into the recess in a 10-centimeter layer and 15 centimeters of crushed stone. Formwork is made from edged boards; its height should exceed the ground level by 5 centimeters. Roofing felt is laid along the edges of the pit, a concrete solution is prepared and the formwork is poured with a layer of 10-15 centimeters. A reinforcing mesh is laid on top. From above it is again filled with concrete to the very top edge of the formwork (for more details: “How to fill the floor in a bathhouse - we make a slope to drain water”). The sites should dry within a few days.
- Heated bitumen is applied to the surface of the concrete base and a layer of roofing material is placed.
- When laying out a brick support, 4 rows are sufficient. Laying is done using a standard mortar. Each joist requires support.
- At the next stage, the underground is prepared, or rather the ground in this place of the structure. When constructing a leaking floor structure, when the composition of the soil allows moisture to pass through, crushed stone is poured into the underground in a 25-centimeter layer and compacted. As a result, water will seep between the flooring elements into the existing gaps, penetrate into the soil through the backfill and be absorbed. Crushed stone in this case will act as a filter.
- If the soil does not absorb moisture well, you need to install a tray in it to drain the water into the reservoir.
- When implementing a non-leaking design, you need to decide how to insulate the floor in the bathhouse in the underground washing room. It is best to use expanded clay, maintaining a 15-centimeter gap between the logs and the backfill.
- A pit 30 centimeters high and 40-50 centimeters wide is dug near the wall. Its walls are compacted and reinforced with clay. A pipe is led out of the pit at a slope, for example, into a sewer. It is necessary to use products with a diameter of at least 11 centimeters to drain liquid as quickly as possible.
- The installation of the logs begins and they are secured with anchors. In this case, you need to maintain a 30-40 mm distance between the walls and joists. Before installation work begins, the embedded crown should be covered with roofing felt. The timber for logs is additionally treated with an antiseptic composition.
- During the process of attaching the lags, you need to ensure their horizontal position. If necessary, they are trimmed at the point of contact with the support. It is also necessary to control the ratio of the lags to each other using a level.
Then they start laying the wooden flooring. The construction of the floor in the bathhouse in the washing room according to the leaking option is carried out using unedged boards. Flooring elements should be pre-planed. It is necessary to make the most even surface possible from the end of the boards. Better yet, buy edged products.
Floors are laid in a washing room in a wooden bath using a flowing method in the following sequence:
- The boards are cut taking into account the parameters of the room, maintaining a ventilation gap between adjacent flooring elements and walls of at least 20 millimeters in size.
- The floor surface is laid from any wall, placing the floorboards parallel to it. 20 millimeters are retreated from the selected wall and the first board is placed on the joists, nailing it. The length of fasteners is selected in accordance with the thickness of the flooring. For example, 4 cm elements require 8 cm nails.
- Drive in the fasteners correctly, retreating approximately 15 millimeters from the edge of the board. The nails must be set at an angle of 40 degrees. A minimum of two fasteners should be used to secure one board.
- When the first plank is fixed, begin installing the second. The recommended gap between adjacent boards should be at least 3 millimeters. All flooring elements are fixed according to the described technology.
- They begin the final treatment of the floor (for more details: “How and with what to treat the floor in a bathhouse - choosing the right impregnation”). Even two layers of drying oil will be enough. It is better to refuse coloring.
When installing a non-leaking floor, use a tongue and groove board. The flooring elements are laid with a groove inside the room. During the adjustment process, tap the end with the groove with a mallet. If you do not adhere to this rule, the tongue and groove may break, since it is 2 times thinner than the fabric of the product.
A non-leaking floor in a sink in a wooden bathhouse or other type of bathhouse building is equipped as follows:
- First of all, a rough foundation is made. Wooden blocks measuring 5x5 centimeters are nailed along the bottom edges of the mounted logs. Rough foundation boards are laid on them, for which grade 2-3 wood can be used. They are fixed with nails.
- Next, waterproofing of the floor in the bathhouse in the washing room is ensured. To do this, lay, for example, roofing material or a thick film on top of the rough base.
- Install thermal insulation. The optimal choice of thermal insulation material is expanded clay, which is poured between the joists. A second layer of waterproofing is placed on top of the insulation.
- At the final stage, they begin to create a finishing flooring from tongue-and-groove boards. Laying is carried out using the same technology as in the case of leaking flooring, but the floor elements are fixed without gaps.
- It is permissible to refuse to fasten boards with nails. Then they can be removed to be taken out of the washing room for drying. In this case, a special method is used: the floorboards are fixed at the edges with the help of bars, which in turn are attached to the joists with wood grouse screws. When the need arises, they are unscrewed, the bars and boards are removed and dried outside the garbage room.
The simplest method of solving the problem of ventilating the space between the rough base and the final finishing of the floor is to create holes to which pipes are connected that lead water out of the washing room.
There is another way to create ventilation - this is the installation of multi-level floors. Therefore, in each room they make a floor structure of different heights. For example, in the washroom the floor surface will be 3 millimeters lower than in the dressing room.
Option one is the most popular among developers, and the order of work is as follows:
- In the corners of the washroom at the base of the floor, holes are left for laying ventilation pipes with a diameter of 5-10 centimeters. The material used to make them may vary.
- Install pipes for ventilation after finishing the walls in the room. Products with a diameter of no more than 5 centimeters can be disguised under the casing. Pipes of a larger cross-section should be installed in bathhouse buildings that are visited more than twice a week. They are mounted in the corners of the room, attached to the surface of the walls using special clamps.
A floor covering created using a concrete mixture will last more than 25 years, while a wooden floor and logs will last only 6-10 years. But installing the screed is a labor-intensive process, since you will need to purchase or prepare a solution and pour it, making reinforcement. You will also need to install thermal insulation and perform other measures.
The procedure for pouring concrete floors:
- First, prepare a pit where water from the washing room will flow. To make it, they make a hole. A pipe with a diameter of 15-20 centimeters is laid in the pit and discharged into a drain, sewage system or other similar place. The dimensions of the pit depend on the area of the room.
- The soil is leveled and broken bricks are poured onto it in a 15-centimeter layer. Crushed stone is placed on top of it in a layer of 10 centimeters, after which it is compacted. In other backfill options, crushed stone is used first, and then sand or broken brick and sand. All methods are considered correct.
- For waterproofing, roofing felt or other similar rolled material is laid on top of the backfill in one layer, not forgetting the need to make a 10-centimeter overlap on the walls. To ensure complete sealing, joints and seams are treated with bitumen.
- Insulation – expanded clay – is poured on top of the waterproofing material. The thickness of this layer depends on the climate in a particular region. Most often, the backfill is made 5-10 centimeters high. A reinforcing mesh is placed on top of the expanded clay, preferably with cells of 15x15 centimeters, assembled from rods with a cross-section of 10 - 12 millimeters. At the intersections they are fastened with flexible knitting wire. For reliability, the mesh is fixed with cement mortar. Before pouring, guides are fixed to the base.
We invite you to familiarize yourself with a turnkey bathhouse with a barbecue.
At the end of the work, the pouring of the sand-cement screed is leveled, distributing the mixture evenly over the surface. For smoothing, use, for example, a piece of edged board. To prepare the solution, it is advisable to use expanded sand (perlite). When using it, it is important to maintain the correct proportions.
The solution is made as follows:
- Pour 2 buckets of perlite into a container (concrete mixer or trough) and pour 10 liters of water. Mix everything well.
- Then add ½ part of a 10-liter bucket of expanded sand, stir the mass for 10-15 minutes, pour in 5 liters of water. Kneading is continued until a homogeneous mixture is obtained.
- Then fill a bucket of perlite and add 2 liters of water. The result should be an almost free-flowing composition. No water should be added. After the mass has been infused for 10 minutes, it will become plastic.
Acrylic-based antiseptics
Acrylic products not only protect wood, but also give different shades.
Acrylic-based antiseptics help prevent the development of almost all types of pathogens. Before application, they are diluted with water, after which they are applied to walls, joists and floor boards. The distinctive features of such antiseptics include:
- Resistance to temperature fluctuations, which allows surface treatment not only in the rest room, but also in the washing room or steam room;
- Resistance to moisture, which helps prevent wood swelling, which subsequently leads to warping;
- High vapor permeability, thanks to which the wood can “breathe”.
If desired, this impregnation can be applied with your own hands. But before breeding and processing wooden surfaces, it is recommended to use protective glasses and gloves that will protect the skin and eyes from contact with the synthetic product.
How to paint bath floors: types of paints and which one is better to choose?
Drying oil for processing and floors
As a result of polymerization, drying oil forms a very durable protective film.
Drying oil is a film-forming composition that is made on a plant basis. Drying oil can be used to treat wooden coverings in the following rooms:
- washing;
- steam room;
- rest room;
- dressing room
As a result of polymerization, the liquid composition forms a very durable protective film that prevents moisture from entering the wood. Drying oil is used to treat coatings not only for disinfection, but also to prevent the appearance of splinters.
There are oil and natural drying oils. According to experts, it is more advisable to treat walls and floors in rooms where there is a significant increase in temperature with natural compounds that do not contain any synthetic ingredients.
Wood floor protection
Now it's time for specifics. We have already mentioned above that only those impregnations for the floor in a bathhouse against moisture and rotting that are marked “for interior use” are suitable for interior use.
We will not be able to cover the entire impregnation market. The most famous companies in Russia producing antiseptic impregnations are Neomid and Senezh. In their product catalogs you can find the following options suitable for floors:
"Senezh Aquadecor" is a tinting and antiseptic composition based on acrylates, alkyds, linseed oil and wax. In our opinion, it is a real chimera, consisting of incompatible parts. Alkyds dissolve in organic matter, acrylates - in water, oil and wax in water give a suspension... Nevertheless, the manufacturer allows them to cover indoor floors with the condition of further painting with abrasion-resistant varnish, promising protection against rot, mold and blue stains.
“Senezh Sauna” is an antiseptic impregnation with an antimicrobial effect, which simultaneously kills algae, fungi of all kinds, wood-boring insects... With such a list, one would expect that it would not spare the owners, but this is kept silent. We do not believe in such universal compositions, but we note that the manufacturer recommends using it everywhere in the bathhouse, excluding the shelves. That is, it is suitable for floors.
“Senezh Ecobio” is a floor primer with the same total protection from everything as the previous two options. Can be used on its own where there is no water washout. But since you will be washing floors everywhere, it is better to use it as a primer.
Antiseptic for baths and saunas NEOMID 200, 0.5 l., concentrate. Photo by Maxidom
“Senezh Ultra” looks like heavy artillery. It will do where the rot started. Judging by the pistachio color of the wood, it contains copper compounds. This is good. Nothing is said about impregnation of floors, but we think that this impregnation will be useful for those who have already started having problems with them. Hazard class IV – “low hazard”.
"Senezh" is an even heavier artillery for wood in difficult operating conditions. They are talking about contact with water and soil. Can only be used for joists and other critical structures, but not for the floor itself, at least not for finishing.
"Senezh Bio" - suitable for baths and tropical climates