How to make a sewer in a bathhouse
How to make a sewer in a bathhouse
In simple village baths, they did not think much about sewerage. Wastewater simply went into the ground through the slatted floor. In modern private estates this has long been abandoned. Now, when building a bathhouse, the disposal of wastewater is carefully considered, observing all the rules in order to protect both the building and the site from the effects of wastewater.
What to consider?
In order for the liquid removal system from the bath to work effectively and for a long time, several rules must be followed.
- It is necessary to plan and install the sewer system at the stage of laying the foundation and arranging the floor. It is important to leave a hole in the base of the building for the outlet pipe, and before pouring the screed, dig trenches and lay the pipes.
Planning the sewer system should be done long before the construction of the bathhouse
- Even if you plan to steam and wash in different rooms, you still need to install a drain in the steam room. After all, after each bath procedure, this compartment must be thoroughly rinsed from a hygienic point of view.
Drain hole with grate
- Since I most often use gravity-type sewerage in the bathhouse, when laying pipes it is necessary to maintain a slope of 2-3 cm per linear meter. Floors should also be made with a slope towards the drain hole.
- If a gravity sewer will drain wastewater from different rooms, then it is necessary to install a riser for ventilation.
- Where water enters the drain hole and enters the sewer pipe, there must be a water seal that prevents unpleasant odors from penetrating into the bathhouse premises.
SEWER. EXTERNAL NETWORKS AND STRUCTURES SNiP 2.04.03-85
SNiP 2.04.03-85
In addition, when designing external sewerage, it is necessary to take into account 2 natural parameters:
- type of soil;
- depth of soil freezing.
The last factor is important to know when laying internal drainage pipes. This point for some regions of Russia is indicated in the table.
| Regions | Maximum depth of zero soil temperatures, m |
| Moscow region | 1,2–1,32 |
| Leningrad region | 1,2–1,32 |
| Nizhny Novgorod Region | 1,4-1,54 |
| Oryol Region | 1,0-1,1 |
| Novosibirsk region | 2,2-2,42 |
| Astrakhan region | 0,8-0,88 |
| Arhangelsk region | 1,6-1,76 |
| Khanty-Mansi Autonomous Okrug | 2,4-2,64 |
| Sverdlovsk region | 1,8-1,98 |
| Chelyabinsk region | 1,8-1,98 |
| Saratov region | 1,4-1,54 |
| Samara Region | 1,6-1,76 |
| Omsk region | 2,0-2,2 |
| Orenburg region | 1,6-1,76 |
| Rostov region | 0,8-0,88 |
| Smolensk region | 1,0-1,1 |
| Tomsk region | 2,0-2,2 |
| Tyumen region | 1,8-1,98 |
| Republic of Bashkortostan | 1,8-1,98 |
| Stavropol region | 0,6 – 0,66 |
More detailed information taking into account the type of soil, as well as calculations, are given in SNiP 2.02.01-83 and SNiP 23-01-99. If it is not possible to lay communications deeper than this mark, then the pipes must be insulated.
SNiP 2.02.01-83. Foundations of buildings and structures
SNiP 2.02.01-83 Foundations of buildings and structures
Construction climatology. SNiP 01/23/99
SNiP 01/23/99
Let's take a closer look at the process of installing a system for removing and recycling wastewater from a bathhouse.
What standards should be followed?
The main document regulating the construction of country houses or private buildings is SNiP 30-02-97yu. It defines:
- norms and conditions for the construction of facilities;
- all tolerances, distances, gaps are given;
- standards for laying communications are indicated.
Many owners of dachas or country houses neglect these documents. However, any inspection will quickly reveal violations or discrepancies with current standards. Before making a sewer system in a bathhouse with your own hands, you need to study SNiP and take into account all current requirements. This will help eliminate possible disputes, orders and fines from employees of regulatory organizations.
It is also important to take into account the distances to buildings located in neighboring areas. Otherwise, disagreements with neighbors are inevitable, which is best avoided in advance.
Internal network and its installation
Concrete screed and drain
The type of sewage system running inside the bathhouse depends on the type of floor. Today, concrete screed is most often made. Tiles can be laid on it or a slotted wooden floor can be installed on the joists. The gap between the floorboards in the latter case will be about 5 mm.
The photo shows leaking floors
Note! For safety reasons, when choosing tiles, it is better to opt for a product with a rough surface that will not slip.
But, as mentioned above, before the floors are laid out and at the stage of laying out the foundation, it is necessary to begin the arrangement of the sewerage system.
Note! The sewage outlet from the bathhouse is made where the washing room will be located. It is in this section of the base of the bathhouse that a hole is left for the outlet sewer pipe.
All this must be taken into account in the design of the bathhouse and the drainage system from it, in accordance with which the entire sewage system is installed in stages. But first you need to prepare all the materials and tools.
Leak-proof bath floor
Criteria for selecting water seals
Heated floors, hot climates or, conversely, the use of sewerage during frosts, when the water in the siphon can freeze and even break it - these are indications for using a dry water seal. They are more advanced, do not allow odors to penetrate and prevent liquid from entering from the sewer, if the apartment is located on the ground floor of a high-rise building.
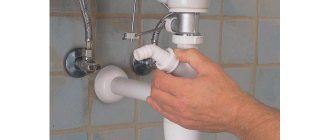
When choosing a water seal in a store, you should pay attention first of all not to the price, but to the type of plumbing for which it will be used. For bathrooms and saunas, the diameter of the drain pipe must be greater than 110 mm. A knee siphon with a large capacity that can withstand high pressure is suitable. The downside is that this is a non-removable structure; in this case, the blockage can only be cleared using a plumbing cable.
For the sink, choose designs with a collapsible siphon. The most convenient, according to consumer reviews, is the bottle type. It has a large volume, this will allow you to quickly and infrequently clean the sewer clog.
Laying the internal sewage system of a bathhouse
Step 1. Inside the bathhouse, trenches are prepared in the ground at least half a meter deep from the soil surface. The width of the ditches should be slightly larger than the diameter of the internal drainage pipes.
Trench for sewer pipeline (external)
Note! When digging trenches, it is recommended to take into account the places where the sockets will pass in order to make small recesses for them.
Step 2. Create a slope in the ditch towards the point where the sewage system exits the room. Check the angle using a construction hydraulic level.
Step 3. Fill the bottom of the trenches with sand and compact it. The layer thickness is 10-15 cm. At this stage, you also need to maintain a slope.
Step 4. Lay all the pipes. The horizontal pipeline should run 30 cm above the point of greatest soil freezing. It is recommended to insulate the pipes.
Slope of sewer pipes
Note! The section of the pipeline running in the foundation is mounted using a metal sleeve.
Step 5. Vertical pipes are also installed, to which drains or a tee for the toilet will be connected in the future. To do this, sticks or metal pins are dug into the ground, to which the pipes are fixed. The length of vertical pipelines must be taken with a margin. The excess will be cut off when installing water intakes.
You may be interested in information - mole septic tank
Step 6. Install the ventilation riser. It is attached to the wall using clamps. The vertical pipe is brought above the roof or cut indoors and a check valve is installed at the top hole of the riser.
Ventilation riser diagram
Step 7. While pouring the floor, drains are installed. If you plan to also lay tiles on the screed, this must be taken into account when installing water inlets. The screed should have a slope towards the ladder. The tiled or wooden covering is laid after the concrete has dried.
Sewage drainage
Sewage and water supply systems
Sewer drain
Shower drain assembly diagram
Step 8. If necessary, connect the toilet, washbasin and other equipment.
Bathhouse, bathroom
The internal sewage system is ready, but it is unacceptable to use it without connecting to external elements.
Types of structures
Types of siphons
There are several types of dry valves: membrane, pendulum, float, and with molecular memory.
The diaphragm valve operates on the nipple principle. The membranes are attached to the screw-on pipe by means of a spring. Under the pressure of water, the valve opens, letting it through. When the pressure in the system stops, the springs return the valve to its place, pressing it tightly against the tube. Thus, the smell does not spread and the liquid from the sewer does not spread.
The float valve is a combined design. When water is present in the siphon, a light, air-filled float floats, but when the water dries up, it sinks, blocking the sewer hole. This option cannot be used at low temperatures to prevent the liquid from freezing.
Pendulum shutter - operates according to the law of gravity. The pendulum is mounted in the siphon perpendicular to the opening of the sewer drain pipe. Its diameter should be equal to the diameter of the pipe, this will allow the sewer to be hermetically sealed. Under the influence of water flow, the pendulum deviates, opening the hole in the drain channel; after the liquid passes, the pendulum, under the influence of gravity, returns to its original position.
A water seal with molecular memory is a modern high-tech invention based on the ability of some elastic materials to restore a given shape after deformation stops.
It is advisable to buy a dry water seal for the shower, additionally equipped with a drain, concreted or built into the floor. It is equipped with a grille that prevents the entry of debris; it can be closed if necessary, serving as an additional barrier to the penetration of odors from the sewer. In addition, the drain provides a hermetic connection with the floor of the bathhouse or shower.
Wastewater disposal options and their implementation
There are several ways to dispose of wastewater after a bath:
- central sewerage;
- septic tank;
- filtration well;
- cesspool.
Each of these options can be used under certain conditions and for different purposes.
Connection to central sewer networks
Connection to central sewer networks
This is the most convenient way to dispose of wastewater. To implement it, you must obtain permission from the service organization and enter into an agreement with it. An inspection well is installed at the connection point to the main line.
Since the services of contractors can be expensive, and during the registration process you will have to deal with the Russian bureaucratic system, to receive a small amount of wastewater, it is better to use other methods, for example, soil filtration.
Filtration well
Filtration well
This is one of the most popular options for draining wastewater from a bathhouse that does not have toilets. But it is feasible only in conditions of low groundwater level and permeable soil.
To implement this, you need to purchase a container without a bottom, for example, a plastic pipe. It can be replaced with concrete rings and even old tires that are mounted on top of each other.
Filtration well. Plan, section 1-1. M 1:25
The construction of the well is carried out according to a simple scheme.
Step 1. Dig a trench for the pipeline, maintaining a slope to the site where the future well will be installed.
Step 2. They dig a pit at a distance of about 3 m from the bathhouse, the minimum area of which is 1 m2, and the depth should be greater than the freezing level of the soil. This will be the site for soil filtration.
Pit
Step 3. A bottomless container is installed in the hole.
Step 4. The bottom of the trench for the supply pipeline is filled with sand and compacted, not forgetting to maintain the slope.
Step 5. Lay the pipeline and connect it to the well. If necessary, the pipe is additionally insulated, for example, sprinkled with expanded clay.
Step 6. Filter material, for example, crushed stone, is poured into the resulting well. The height of the backfill should be slightly higher than the zero temperature point of the soil.
The photo shows the connection of the pipeline and backfilling of crushed stone
Step 7. Install the ceiling or neck with a hatch.
Filtration well cover
Step 8. Backfill the well and pipes.
Periodically you need to check the condition of the filter media, and if necessary, change it or wash it.
Septic tank
Septic tank
If a lot of wastewater is generated, and besides, a toilet is installed in the bathhouse, then it is recommended to install a septic tank to dispose of bathwater. You can also connect to an existing local sewer system. Moreover, the second option is much more profitable, since it does not require additional investments. But bath drains (their quantity) must be taken into account when choosing the performance of a septic tank.
Septic tank installation process
cesspool
Since the bathhouse is not used every day, not too much wastewater is generated, one of the options for collecting wastewater is a simple cesspool, which will have to be emptied periodically by calling a sewer truck.
Brick cesspool
A sealed catchment container is installed in a convenient place, and a pipeline coming from the bathhouse is connected to it. This method can be used where soils are poorly permeable to water and fecal contamination is present in the drains.
Sewage for a bathhouse, although it requires taking into account several nuances, can be installed independently. The main thing is to choose the right method for waste disposal, observe the slope for the gravity system and take into account the natural features of the area.
Drainage sewer system
Usually a bathhouse on a personal plot is built for a limited number of people, not exceeding 6-8 people. Therefore, the most suitable option for your own bathhouse will be the simplest drainage system.
To begin with, choose a convenient place on the site near the bathhouse for the drainage well. The depth of the well is calculated depending on the freezing of the soil in winter. If the ground freezes to 70 cm, then the well must have a depth of at least 1.5 m.
A drainage well is made according to the principle of constructing a drainage pit - they dig a hole of the required size and lay sewage pipes to it. The main difference is filling the well with drainage, which is used as gravel, expanded clay, crushed stone or broken brick. So, the procedure for constructing a drainage well:
- Place a 10 cm layer of clay at the bottom of the hole.
- Cover the trench that will be used as a drain with the same 10 cm layer of clay and give it the shape of a gutter. If, when digging a trench, you provide a slight slope towards the sewer pit, the water will flow down the gutter without stopping or accumulating in one place.
- Lay out 0.5 m of drainage (expanded clay, crushed stone or gravel mixed with sand) on a carefully processed clay cushion, then carefully sprinkle it with a layer of earth and compact it thoroughly.
- It is advisable to insulate the drain pipe laid from the bathhouse to the pit well so that the water does not freeze in winter.
If a mixture of gravel and sand was used as drainage, you need to remember that it quickly becomes dirty and will need to be cleaned periodically.