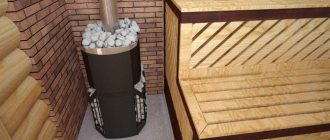
Metal stoves for steam rooms, assembled from stainless steel, require virtually no maintenance. Painting an iron stove in a bathhouse is necessary due to the conditions in which it is located and the characteristics of the material. The article describes the requirements for paint coatings, provides advice on surface preparation, and lists trusted manufacturers.
Is it necessary to paint a metal stove in a bathhouse?
A metal sauna stove is susceptible to:
- corrosion;
- thermal expansion;
- burnout.
The first occurs from exposure to water and steam, which leads to the appearance of pockets of rust that destroy the walls of the structure. Temperature deformations are caused by heating and cooling of the stove in the bath. As the metal expands, cracks form in weakened areas or become thinner. The temperature in the furnace rises above 600 °C, which is why the grates and walls burn out over time. Painting a sauna stove will extend its service life and improve its appearance.
Application of Certa
Certa is a heat-resistant paint that is specially created for painting stoves. It is the best option to solve this problem. However, before using it, it is necessary to prepare the surface.
It is performed as follows:
- use emery to remove rust;
- where this is not possible (there is a lot of rust), it is necessary to use a rust converter;
- using a solvent of the P-021 series, it is necessary to thoroughly degrease everything
- oven surface (remove metal chips that remain after using emery).
Read also: Navigator tracker for forests
Now you can proceed to applying Certa. It is recommended to start with joints, protruding and hard-to-reach parts. It is necessary to paint in perpendicular lines.
Multiple coats are highly recommended. In this case, you can guarantee a complete absence of rust in the future.
How to paint an iron stove in a bathhouse
When choosing paint for a stove in a bathhouse, they are guided by the following requirements:
- heat resistance;
- neutral to moisture;
- environmental friendliness;
- anti-corrosion properties.
It is important that the coating is resistant to the required temperature range. The latter ranges from 300 °C. This indicator is with a reserve, since the heating of the walls is 200 °C and above. The surface around the loading hole is covered with fire-resistant paint, as it can withstand exposure to open fire. Make sure that the dried composition has elasticity. The stove is not heated every day, so amplitude changes in the microclimate affect the uniformity of the paint film.
The composition should not be water-soluble and contain chemicals that remain active throughout its service life. If this is not taken into account, then emissions from heating will poison the body, negating the benefits of visiting the bathhouse. The anti-corrosion properties of the composition are an important aspect that stops the appearance of rust.
Attention! Do not use regular enamel to paint the sauna stove. At a temperature of 80 °C, it swells, and when heated, it releases solvent components that enter the body through the skin and respiratory tract.
Conclusion
Coloring is a simple procedure. It usually lasts several days due to the need to apply 2-3 layers, between which it is better to wait at least a day so that the material dries well.
It is important to use high-quality materials and tools - this will be reflected in the result. The main thing is to wait until each layer dries, clean the surfaces well, and work with gloves.
For painting, enamel paints that are resistant to high temperatures, lime, and varnish can be used. When choosing, proceed from the desired effect and cost of the material.
Paint for sauna iron stove
Thermal stability and fire-resistant properties of the paint are ensured by:
- silicone;
- oxygen;
- silicon base;
- aluminum powder;
- organic resins.
Some of these elements are contained in Thermal stove paint, which can be found under the Tikkurila brand. The shades of the composition are black and silver, because they do not accumulate, but immediately release heat from the heated walls. The base is alkyd resin. The manufacturer provides a 3-year warranty, during which the coating will not deform and will retain its appearance. Containers of 330 g are available for retail sale.
Heat-resistant compounds are produced by a Latvian manufacturer under the Hansa brand. The paint is supplied in containers for application with a brush and in aerosols. The second type of packaging is more convenient, because it is immediately ready for use and the surface is smooth. Available in 16 shades, each retains color when heated to 800°C. Suitable for use with stainless steel sauna stoves.
"Kudo" is a domestic company whose product range includes organosilicon-based enamels. Paintwork can withstand heating up to 600 °C and is supplied in aerosols with a capacity of 520 ml. Consumers appreciate Bosny products. The advantages of heat-resistant paints from the manufacturer: elasticity and resistance to fading of the pigment. Maximum temperature - up to 650 °C.
Fireproof paintwork from Hammerite is designed to withstand temperatures up to 600°C and is therefore suitable for use in saunas. The composition can be applied to a rusty surface, since there is a converter component. Use a roller or brush. Gasoline or kerosene, which affect the composition, is not suitable for degreasing. For greater heat resistance, choose a coating from Elcon. The paint can withstand temperatures up to 800 °C and sudden changes, does not burst or bubble. Supplied in aerosol cans with a capacity of 500 ml.
Of the available options, paint KO-8101 is used. The manufacturer provides a 15-year warranty on paintwork. If you want to choose a shade other than black or gray, purchase KO-8111. The enamel is environmentally friendly, without harmful emissions. The heat-resistant coating KO-8222 can be heated up to 800 °C. Cetra remains popular for painting iron sauna stoves.
Popular brands of paint for metal stoves
The best choice is considered to be organosilicate (or organosilicon mixture). It is labeled as KO, and the most popular is KO-8111. It has good performance characteristics and is inexpensive. Experts recommend CERTA paint because it is produced in the form of aerosols, which are most convenient to use. The service life of the coating exceeds 15 years.
Read further:
How to paint galvanized metal: an overview of paints and their characteristics
Pay attention to: How to degrease metal before painting: main selection criteria
Painting the inside of the microwave: what paint to choose, step-by-step painting instructions
How to degrease metal before painting: main selection criteria
Paints for heating radiators: types and varieties of compositions, popular brands of paints
Painting wallpaper not for painting: is it possible to paint paper wallpaper, what paint to choose and the technology of work
Painting the stove in the bathhouse
Before starting work, prepare the tools, location and surface of the iron furnace.
Necessary tool
For paint in cans, purchase a 15 cm wide roller or a brush with fine bristles. You will also need:
- metal brush;
- sandpaper;
- grinder with grinding disc;
- solvent;
- rags;
- newspapers or plastic wrap.
The grinder is used to speed up the processing of large surfaces. The roller and brush are replaced with a spray gun, provided that a compressor is available. Newspapers and plastic film are needed to protect walls and ceilings from drips and drips.
Surface preparation
Surface preparation depends on the condition of the metal and the type of paint composition.
- A dirty sauna stove is washed from soot with water and household chemicals. This will remove some of the fat.
- Large particles of rust are removed with a metal brush, walking along the edges. They do not achieve the shine of the metal.
- Using fine sandpaper, remove rust residue from an iron sauna stove and level the surface so that the paint lies evenly.
- Use a broom and a dry cloth to remove any remaining abrasive.
- The oven is washed, wiped and dried.
- The rags are soaked in a solvent and passed over all surfaces of the iron stove. After drying, blow off the lint or wipe it with a microfiber cloth.
Advice! If the structure has elements made of stainless steel or galvanized, then they are coated with grease to prevent paint from entering.
Applying paint
The perimeter floor and the walls near which the iron stove is installed in the bathhouse are covered with polyethylene or paper and the seams are glued together with regular or masking tape. Before painting, provide ventilation to avoid poisoning by solvent vapors. Use a respirator with carbon filters, gloves, goggles, a protective suit or old clothes.
After opening the bottle, stir the paint for 2-5 minutes to achieve a uniform consistency. This is necessary because during storage the suspension settles. If stove paint needs to be thinned, use solvents recommended by the manufacturer. For manual application, the composition is made thicker; for a spray gun, the thickness is reduced. The sprayer is filled through a filter, nylon stocking or paint sieve to trap solid particles that can clog the nozzle.
The surface of the iron furnace is visually divided into hard-to-reach areas and the main area. Large surfaces are treated first. Heat-resistant paint is applied in one layer, so the spray gun or roller moves smoothly. The speed is selected so that there are no drips left. After completion of the work, the room is closed, excluding drafts, which will cause dust and lint to settle on the fresh paint. A video of the dyeing process is below.
Lime painting: preparatory stage
An average-sized stove requires about three cans of Certa paint. However, we should not forget that just a black stove is unlikely to please anyone. The same manufacturer has a composition for patination of the furnace.
The result is not only a fully protected, but also an aesthetically pleasing cast iron stove. However, it cannot be used in this form. Operation is permitted only after three firings.
First, we heat the stove using wood chips, and then add firewood. A strong chemical smell will be immediately noticeable. This high temperature began to affect the paint.
It is necessary to fire the oven three times and after that the smell is guaranteed to disappear. The oven is ready for use.
The stove, known to many as a potbelly stove, is one of the most popular heating devices. Designs of this kind are found in many private homes. But the peculiarity of a potbelly stove, as well as any other stove, is that over time it loses its original appearance and there is a need for painting in order to restore its former aesthetic qualities. Therefore, today we will talk about how to paint a potbelly stove: what materials can be used, how to carry out this procedure in general.
How to paint a potbelly stove
Let’s immediately make a reservation that various finishing materials can be used to paint a potbelly stove. The choice of one or another of them depends on both personal wishes and financial capabilities. In addition, the material from which the stove is made is also important.
- Before you begin, add a little salt to the mixture to prevent streaking. Directly during painting, move the brush in one direction - either only vertically, or only horizontally.
- After applying the first layer of the mixture, give the potbelly stove some time so that it (the layer) dries sufficiently. Next, paint all surfaces a second time in the same way. It is important that layer No. 2 is thinner than layer No. 1.
As soon as all surfaces of the stove are covered with lime mortar, begin the next stage of work, which consists of finishing the cast iron elements of this heating device - that is, the doors and handles. Typically, neither paint nor a previously prepared lime mixture will be suitable for processing them.
- Before applying enamel, thoroughly degrease all working surfaces. For these purposes, as noted above, you can use either a solvent or ordinary alcohol. As for priming, there is no need for it in our case, since no primer is in any case capable of withstanding the elevated temperatures to which the oven will heat up. In a word, after degreasing, proceed immediately to painting.
- First, shake the can of aerosol enamel thoroughly and spray the paint from a distance of approximately 24-27 centimeters onto the cast iron parts of the stove. As soon as the enamel has dried, you can begin to actually operate the potbelly stove.
- heat resistance 200-900 degrees;
- you can choose low anti-corrosion indicators (high ones are needed for working with metal);
- lack of sensitivity to sudden temperature changes;
- dense coating in the form of a solid opaque film, it is better if it is enough to apply once to obtain the desired pigmentation;
- matte or glossy finish – it doesn’t matter.
If the heating device in the house is not finished with anything, but it urgently needs to be updated, then you are probably wondering how to paint the potbelly stove in this case. Let’s say right away that not just any paint is suitable for this. The fact is that during operation, the stove can heat up to a very high temperature, and, of course, not all finishing materials can withstand such conditions.
Having figured out how to paint a potbelly stove, all that remains is to give some tips regarding painting. As noted above, to paint brick structures, it is advisable to use enamel-based paints (it is better not to use oil-based compositions, since they have a fairly high heat transfer rate).
In order to prevent the yellowing effect, it is recommended to add a little blue to the coloring composition. If desired, the potbelly stove can be decorated with some patterns. For this purpose, it is most convenient to use special stencils, thanks to which neat and sophisticated designs can be applied to the walls. Obviously, this should only be done when the potbelly stove is painted.
Note! In the absence of lime, a mixture made of chalk can be used to finish the heating device. As a result, the surface will be just as high quality and just as aesthetically pleasing. Typically, this mixture is prepared in the same way as lime-based, only from chalk.
We invite you to familiarize yourself with Fruit trees - peach. How to plant a peach correctly, pruning, treatment for diseases and pests
When choosing the paint to be used for painting, make sure that it (the paint) is resistant to elevated temperatures, as well as whether toxic substances or fumes will be released when heated.
You can prepare leveling putty not only from crushed bricks and chicken eggs. If possible, eggs can be replaced with good quality latex-based paint. By the way, paint, as well as other consumables, should be purchased only from trusted retail outlets.
Finally, when painting, use high-quality brushes made from natural bristles. With the help of such tools, you can obtain a uniform and thin application of the finish, and of fairly high quality. You can see another way to paint a potbelly stove in the video below.
paint
How to paint a potbelly stove made of brick? Choose a product based on the information offered by the manufacturer:
An oil base is not the best solution. Enamel is suitable for you - it has a low level of heat transfer.
In dark colors, imperfections are less visible - unevenness, bumps, depressions. White, beige and derivatives produce errors.
If you need to get a pattern, use a mixture of gouache, protein and water to make images “on wet”. For this you need a thin soft brush. Additional pigment is applied to the still wet layer of paint to create neat, smooth drawings.
Here are the heat-resistant paint options:
- Thermika KO 8111 (Russia),
- Pyrolac 180 (Greece),
- Pyrolac 580 (Greece),
- Nobiles Termal 500 (Poland),
- Barpimo (Spain),
- High Heat Paint (UK),
- Elcon 600.
As soon as all surfaces of the stove are covered with lime mortar, begin the next stage of work, which consists of finishing the cast iron elements of this heating device - that is, the doors and handles. Typically, neither paint nor a previously prepared lime mixture will be suitable for processing them.
paint
- heat resistance 200-900 degrees,
- you can choose low anti-corrosion indicators (high ones are needed for working with metal),
- lack of sensitivity to sudden temperature changes,
- dense coating in the form of a solid opaque film, it is better if it is enough to apply once to obtain the desired pigmentation,
- matte or glossy finish – it doesn’t matter.
To prevent the paint from giving off a yellowish tint (this effect gradually manifests itself), you can first add blue to the composition.
Rice. 1. Potbelly stove made of metal.
A potbelly stove can be made of metal. This design is shown in Fig. 1. The oven can also be made of brick. Stoves can be painted using different finishing materials. Thus, for finishing brick structures, an affordable and fairly high-quality material called lime is often used. To paint a potbelly stove yourself, prepare the following required materials, fixtures and tools:
- Brushes and rollers;
- Bucket;
- Solvent (can be replaced with alcohol);
- Enamel in aerosol;
- Lime;
- Water;
- Dyes;
- Glue.
Construction of a potbelly stove made of metal.
Before painting the potbelly stove, you need to prepare a solution suitable for this. Take a bucket or other container, add lime and fill it with the same amount of water. After this, mix the mixture thoroughly and add animal glue to it. You can purchase this glue at a store that specializes in selling various painting supplies.
To understand whether a lime-based solution is ready, you need to do the following: take a small piece of glass, fix it vertically and apply a little solution. If the paint spreads no more than 3 cm, then everything was done correctly, you can begin finishing the stove.
What is the frequency of staining?
The manufacturer indicates the operating conditions and service life on the paint, so if they are observed, you can count on the established period. Bath stoves made of thin metal are often painted, since the walls heat up more, which leads to wear of the lacquer coating. Periodically, the enamel is inspected for damage to prevent rust. To eliminate the need for maintenance, the oven is made of stainless steel or galvanized.
Preparing to paint the potbelly stove
Scheme of a potbelly stove with a water heating tank.
If the potbelly stove installed in your home has not been finished with plaster, it must be painted. Not every paint is suitable for performing such work, because during operation the unit heats up to a fairly high temperature, and not every finishing material is able to withstand such conditions. In this case, you can only use heat-resistant silicon-organic based paints. Then the beautiful appearance of the potbelly stove will remain for a long time. To paint a potbelly stove yourself, you will need the following materials, tools and equipment:
- Container for preparing the solution.
- Drying oil.
- Hammer.
- Dye.
- Tassels.
- Red brick.
- Solvent for enamel.
- Milk and egg white.
Before starting work, it will be necessary to thoroughly clean the surface of the unit from dirt, various deposits and dust, and repair cracks, chips and irregularities. Putty will help you with this. Keep in mind that ordinary putty will not work for this type of work. You will need to prepare the solution yourself. Take a hammer, a red brick and crush it into small pieces until it turns into flour. Pour the resulting flour into a container, add 10 egg whites and beat thoroughly. The result will be a fairly thick mixture, which will need to be used to seal all the chips and cracks on the surface of the stove. To do this, use a hard brush.
Treat this step responsibly and you will get a smooth surface without defects. This putty guarantees reliable removal of defects. It is characterized by high resistance to heat and abrasion.
Before painting, treat the entire surface with drying oil. This will reduce the consumption of heat-resistant enamel and ensure better paint application. The drying oil layer should be thick enough, because... the brick will absorb a significant amount of this material.
Burnishing an iron stove
Burnishing is a method of giving a dark shade to an iron stove in a bathhouse without using paint. The surface is coated with an oxide that is resistant to moisture and temperature. At the first stage, the metal walls are cleaned with a brush, grinder or sandpaper until shiny, removing the oxide. Treat the device with a degreaser or solvent to remove any remaining abrasive and rust.
Prepare a solution in which 5 g of butyl alcohol and 150 g of phosphoric acid are added per liter of water. The composition is mixed and coated on the iron surfaces of the sauna stove. As soon as the metal is dry, it is washed with dissolved laundry soap. In order for the surfaces to acquire the desired shade, the oven is heated to 150 °C and caustic soda is sprayed from a spray gun. The cold method of bluing an iron furnace uses a mixture of olive oil and antimony III chloride. The composition is applied in two layers at intervals of 48 hours. The first layer is removed with a woolen rag.
Attention! When bluing, personal protective equipment for the skin, eyes and respiratory organs is used.
Painting a potbelly stove lined with bricks
paint
A metal furnace can be processed efficiently and quickly using the bluing procedure.
- Complete high-quality cleaning. Dirt and dust must be completely removed. The coating is washed, treated with a brush, and the localization of cracks in which dirt accumulates is established.
- Removal of oxides. Take a brush and dip it into a 5% sulfuric acid solution. The surface is processed completely, including cracks, gaps, and irregularities.
- Acid removal. A solution is prepared for subsequent treatment of the entire oven area. You need to prepare 50 grams of laundry soap and dissolve it in a liter of water. Using a brush, the composition is applied, all areas are well worked out.
- Surface treatment is the last stage. Take sodium hydroxide (50g/l). Operating temperature – 140 degrees. Treatment is carried out using a sprayer to which the product is added.
paint
The procedure lasts at least one hour. You need to be careful with the materials used - most are toxic and hazardous to health upon direct contact, especially with mucous membranes. Use gloves and a protective mask.
