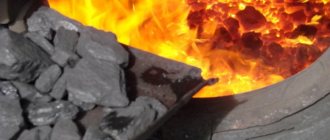
Stove heating continues to be a very popular method of heating private homes. Accordingly, all issues related to this process are very relevant today. Most often, the stove fails due to the presence of a large number of cracks, which make its operation unsafe, since carbon monoxide penetrates into the room through them.
Faced with such troubles, owners of private houses ask the question: “how and how to cover the stove so that it does not crack?” It is this problem that we will pay attention to in this article.
Reasons for furnace failure
Before looking for the best way to fix the problem, it is necessary to determine the causes of cracks. It could be:
• low quality of the solution used;
• violation of finishing technology;
• shrinkage of the brick structure;
• uneven heating;
• non-compliance with the rules for operating the stove.
If the stove sank due to an improperly poured foundation, smoke will pour out of all the cracks during the fire, the doors will no longer close tightly, and the brick will gradually begin to collapse. If such problems are discovered, you should immediately dismantle the entire structure, strengthen the foundation and lay it out again. However, in some cases you can do without radical measures.
The fact is that a slight shrinkage of the stove in the first couple of years is considered quite normal, and if we are talking about small cracks, they can simply be repaired correctly.
All other reasons can be easily eliminated; it is only important to figure out how to cover the stove so that it does not crack.
Why do cracks appear in furnaces?
Most often, problems appear in brick fires. There are 4 main reasons for violating the integrity of the masonry:
- prolonged absence of heating in the house; if the stove stood in an unheated building during the winter, then cracks cannot be avoided - and not only in this structure, but also in the walls of the building;
- ignoring operating rules; a “fresh” stove must stand – the masonry mixture should set and the structure should dry well; heating a damp hearth will certainly lead to the appearance of cracks;
- uneven heating of furnace zones; the structure must be made in such a way that heat is distributed evenly throughout it; otherwise, the thermal contrast boundary line will become clearly visible - the masonry will crack in this area;
- difference in thermal expansion coefficients of masonry mixture and masonry; the furnace material and the solution must have approximately the same thermal expansion rates, otherwise the surface will be covered with a network of microcracks; This is not the biggest problem - cracks are not visible on a cold structure.
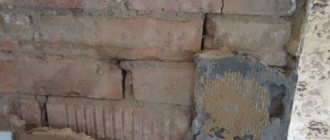
Figure 2. Formed cracks along masonry joints
These four reasons lead to troubles that can be relatively easily eliminated with putty. But there are more fundamental reasons:
- improper foundation design; if the latter, for example, does not correspond to the dimensions of the heat source, the stove monolith will be damaged; the oven will begin to crack even if the shrinkage of the base does not go according to plan;
- incorrect calculation of physical characteristics of materials; for example, without a reserve in thermal seams, the metal structure will “break.”
In these two cases, putty will not help. We'll have to move the oven. Therefore, the first step is to diagnose the structure. Once you are sure that the problem can be solved with little effort, you can proceed to the next steps.
Important! Before repairing, you need to make sure that restoration can be done. There is no point in sealing cracks if the cause is fundamental
It will be interesting - an article about sealant for stoves and fireplaces.
Determining the extent of damage
Before getting started, you should consider the damage and determine the scope of work. If small cracks appear on the surface of the stove (even if in large numbers), to eliminate them you will need to remove the lining and clean the brick from the plaster.
Once all the finishing has been removed, you can start caulking the cracks. At this stage, everyone is wondering what solution to cover the stove to prevent it from cracking.
For these purposes, you can use one of the following mixtures:
• made of clay and sand;
• from special grouts for ovens;
• made of fireclay clay;
• from oven glue.
Can’t decide what to cover the stove with to prevent it from cracking? Consider each option individually.
Causes of cracks in the stove
When laying or plastering the stove and its use, cracks and even cracks may form. There are several reasons for their formation:
- Poorly prepared solution.
- Improper finishing.
- Uneven heating of the oven.
- Incorrect use.
- Incorrect foundation construction.
Repairing furnaces is not a complicated process, but it is responsible. It doesn't matter which solution was chosen. The main thing is to do everything slowly and carefully, then the stove will last a long time.
Subscribe to our Social networks
A mixture of clay and sand
Sealing cracks with clay mortar is the simplest and most economical way to restore a stove. At the same time, the quality of repairs will be no worse than using newfangled and expensive materials.
For these purposes, you can take absolutely any clay, the main thing is that it contains as few impurities as possible. After soaking, high-quality raw materials should become oily, homogeneous and plastic. Before covering the stove with clay (to prevent the surface of the fireplace from cracking in the future), pay attention to the specifics of preparing this solution.
Causes and danger of cracks
Violation of the integrity of the top layer or brickwork occurs for several reasons. In general, we can say that this is the result of the master’s mistakes. With proper selection of bricks, mortar, finishing materials and professional performance of the work, the formation of cracks on the stove, and especially cracks, is unlikely.
Most often, cracking occurs due to the influence of the following factors:
- non-use of the fireplace for a long time, especially in winter (due to sudden temperature changes);
- haste, manifested in the heating of a recently made stove;
- performing masonry using a method that creates large temperature differences in different places of the structure;
- inconsistencies in the thermal expansion capacity of bricks and mortar for laying;
- overheating or using fuel that produces significantly more heat than what the stove is designed for (for example, burning a wood stove with coal).
If the stove begins to crack for such reasons, then it is easy to fix the problem with your own hands. You need to properly seal the cracks, coat the surface - and the job is done.
It is much worse if the stove begins to crack due to an incorrectly made foundation or an illiterate choice of refractory materials. In this case, it will not be possible to simply seal the seams; you will need to lay the entire stove again.
Repairs cannot be postponed because smoke and carbon monoxide enters the premises through cracks, which can poison residents. In addition, over time, the cracks increase, the stove can let flames pass through and completely fall apart.
How to make your own clay putty
Mixing the mixture is carried out in several stages.
1. Before mixing clay with sand, it should be soaked in warm water for at least 12 hours.
2. The wet solution should be thoroughly mixed and all lumps formed should be broken up. In this state, the clay combines with sand much better.
3. To prepare the working mixture, it is recommended to take 4 parts clay and 2 parts sand. The last component should be as clean as possible and pre-sifted. The volume of liquid depends on the degree of humidity of all components.
4. If you do not plan to whiten the stove, add lime to it at the stage of mixing the solution. All components are mixed until the consistency of sour cream. The finished mixture is covered with plastic wrap and left for 12 hours.
5. The settled solution is kneaded again. To check if there is enough water in it, take the putty in your palm and roll it into a ball. If it starts to crack when you squeeze it, add more water.
6. The oven should be lightly heated, water should be poured over the cracks, after which you can begin sealing.
7. To prevent the appearance of new cracks in the clay, you can add straw, but a more reliable way is to use a plaster mesh. If you apply a clay solution to a stove lined with such material, you can forget about the cracks for a long time.
Preparing tools and materials for work
Clay walls are plastered in 2-3 layers. Initial plastering of the walls is carried out using the following materials:
- Clays.
- Wood sawdust.
- Sand. Material with medium-sized grains is best suited; large inclusions are recommended to be screened out.
Tools for plastering work.
Special attention should be paid to sawdust, which will be used to plaster the walls. Only thoroughly dried sawdust can be used.
Under no circumstances should they be affected by fungal diseases. Fresh sawdust cannot be used for plastering clay walls. They must be stored for at least 1 year before use. In the process of preparing the mixture, sand is first mixed with sawdust and only then water and clay are added.
The 2nd layer of wall plaster is applied using sand, cement and clay. To work you will need a minimum set of tools, namely:
- Grater board. Instead, you can use 2 spatulas of different sizes. Work with what is more convenient for you.
- Building level.
- Rule.
- Trowel.
For plastering such walls, a special clay composition is used. You will have to select the optimal ratio yourself, because... the properties of clay from different areas, such as plasticity, “fat content,” etc., differ. The optimal proportions of the composition directly depend on this.
Take some sawdust, the same amount of clay and 3 times the amount of sand. Knead the mixture thoroughly, slowly adding water to it. To check the readiness of the plaster composition, you can use various simple and proven methods. Despite their simplicity, they will help you find out without any problems whether the mixture is ready or whether you still need to experiment with the ratio of ingredients.
Scheme for plastering a wall.
The first method is known as the “clay ball”. You need to bring the plaster composition to a state where it no longer sticks to the skin. Roll a small ball from the resulting mass; a diameter of 30 mm will be sufficient. Place this ball on some horizontal surface and crush it with your palm. If cracks appear along the edges, then the composition is not flexible enough, and the proportions will need to be reconsidered. Ideal when there are no cracks. This composition can be safely used for plastering clay walls.
Another method is based on checking the “flagellum”. Prepare a small amount of the mixture and roll it into flagella. There will be enough flagella with a diameter of 2 cm and a length of about 20 cm. Bend the prepared flagella. Check the quality of the composition again by the presence or absence of cracks.
To regulate plasticity, you will need to add less or more sand to the composition. It accounts for about 50-80% of the total mass of the finished mixture. It is more convenient if you have a concrete mixer to prepare the solution. If it is not there, you will need to dig a hole, add the components there and knead the solution with your feet. You can also use a trough for this. It is necessary to check the plasticity of the mixture. Otherwise, during the drying process, the plaster will simply crack and all the work will go down the drain.
If during the work you had to go somewhere and during this time the mixture managed to dry out, to return it to working condition you only need to add a certain amount of water. After this you can return to work. Such properties are an undoubted advantage of such plaster.
Fireclay clay
Fireclay clay is often used to restore old stoves. This material is characterized by fire resistance, so stoves finished with it are reliable and durable.
You can purchase this type of clay at any construction market. It is sold in 20 kg bags and is not expensive at all. The working solution is prepared strictly following the instructions on the packaging.
Plastering with clay
The principle of working with a clay mixture is essentially no different from working with conventional plaster:
- Beacon profiles are also placed for alignment.
- To obtain a durable surface without cracking, the thickness of each layer should not be more than 10-15 mm.
- In case of strong slopes and the need to apply a solution of greater thickness, clay-straw or sawdust mixtures are used, which can be applied to shingle-reinforced walls in a large layer.
- If necessary, a new layer is added on top of the first only after the surface has dried.
- After finishing with shingles, the walls are dust-free and moistened with water.
- The surface is moistened abundantly so that it does not take liquid from the solution and weaken the plaster.
- The solution is applied with force to ensure better adhesion.
- To reduce the formation of cracks, it is advisable to add fiber additives to the solution.
The video below shows how to plaster a wall made of clay or wood.
Grout
To seal a brick oven, you can purchase a special grout. In stores there are various formulations that are produced specifically for these purposes. It’s worth noting right away that this option will cost you quite a lot, however, it is optimal for lining stoves and fireplaces.
If you cannot afford to purchase a specialized composition, prepare it at home. To do this you will need the following components:
• clay;
• sand;
• water;
• straw;
• salt.
The clay needs to be thoroughly kneaded, filled with water and set aside for 12 hours. After the specified time has passed, the required amount of sand should be added to the mixture. In the process of kneading the two components, finely chopped straw and salt are gradually added to them. Clay and sand are taken in a ratio of 4:1, with about 50 kg of straw and a pack of salt added for every 4 buckets of clay.
The resulting composition can withstand temperatures of more than 1000 degrees.
Rules for grouting
To properly coat the stove with clay, you must follow these step-by-step instructions:
- The surface, cleaned of plaster, is generously moistened with primer or water.
- Using a chisel, knock out the gaps between the bricks.
- The oven is warming up.
- Using a trowel, apply the clay mixture into the cracks and spread it over the entire surface in an even layer. If you don’t have a tool, you can do the smearing by hand. The mixture does not cause irritation or damage to the skin.
- When the surface is dry, another layer of the mixture is sprayed. Particular attention is paid to cracks - there should be a dense layer of mortar between the gaps.
- Using a damp wooden trowel, grout in a circular motion to remove any unevenness.
- The last step is plastering the stove.
The process of sealing with fire-resistant adhesive is carried out according to the same scheme, but includes an additional step. After filling the cracks with plastic material, the entire surface is treated with a hard type of glue so that the stove no longer smokes. It takes half an hour to dry, which can be spent on decorating. It is important to remember that the structure can be used after the solution has completely hardened.
Oven glue
To prevent the stove from cracking in the future, you can use heat-resistant glue to repair it. It belongs to the category of ready-made materials for finishing fireplaces, which are sold on construction sites. Its main qualities include resistance to high temperatures and durability.
This adhesive mixture contains fireclay powder and fire-resistant types of cement. Today, there are two types of glue - plastic and hard.
The first option is used for sealing cracks, and the second is intended for plastering the entire surface of the stove.
The main advantage of oven glue is its very fast drying, so you should not mix the solution in large quantities.
How to cover a stove so it doesn’t crack from the heat - important tips
Every stove owner sooner or later wonders how and what to cover the stove with so that it does not crack from the heat. Even the most varied structures can crack over time. The reasons are as follows:
- masonry technology was violated;
- the surface heats up unevenly;
- shrinkage of brick structure;
- use of low-quality material.
Inspecting the extent of the damage
First, you need to determine how badly the oven was damaged. If small cracks have formed on the surface of the structure, in order to get rid of them, you will need to remove the cladding and clean the brick from the plaster.
Once all the trim is removed, you can start caulking the cracks. For this work, you can use various mixtures:
- special grout for ovens;
- oven glue mixture;
- composition of clay and sand;
- collection from fireclay clay.
Let's try to take a closer look at the best compositions for sealing a stove when cracks have formed on it.
Fireclay clay
This material is most often used for stove restoration. Fireclay clay has special qualities that can withstand high oven temperatures, so structures made using this material are quite reliable and durable.
You can purchase the material at a construction supermarket. Before starting work, fireclay clay is soaked in ordinary water and infused for about 2 days.
Composition of clay and sand
To restore the appearance and strength of the stove, you can use a mixture of sand and clay. To prepare the solution you need:
- Pour the clay with plain water in a ratio of 1:3 and leave for about 1 day.
- Stir the clay, gradually adding water, then strain it through a sieve, wait a few hours and drain the water.
- The thickness of the clay should be similar to sour cream; mix the material with sand in equal proportions.
- Mix the solution thoroughly until some clumps of the mixture begin to stick to the stick. If there is not enough of any material, you can add it in small quantities during mixing. Usually use 1 part clay to 2.5 parts sand.
Oven glue
Many craftsmen use heat-resistant glue to prevent the stove from cracking. This material is quite resistant to high temperatures and durable.
You can buy glue for the stove at construction sites; the substance contains fireclay powder and fire-resistant types of cement. Today there are two types of glue - hard and plastic.
- Hard is needed for plastering the entire surface of the structure.
- Plastic is used to seal cracks.
Furnace glue can dry quickly, so it is not recommended to use the solution in large quantities.
Grout
To seal cracks in the stove, you can use a special grout. It is worth noting that grouts in stores are very expensive, but they are quite effective at sealing various cracks on the stove.
If you cannot buy this product, then prepare it at home. Prepare the following components:
- plain water;
- sand;
- clay;
- salt;
- straw.
Knead the clay thoroughly and fill it with water for 15 hours. Next, add the required amount of sand to the solution, knead the mixture and gradually add salt and finely chopped straw to it. The ratio will be approximately this: for 4 buckets of clay - 1 bucket of sand, a pack of salt and several kg of straw.
How to coat a stove
After choosing the material for restoring the stove, we begin to fill the cracks. If you use a self-prepared mixture of sand and clay, then use the following method:
- Clean the brick from finishing material and plaster.
- Warm up the oven, then pour water into the new cracks. This is done in order to prevent moisture from being absorbed from the putty so that it does not lose its properties.
- Apply the solution to the cracks and begin the sealing process. It is recommended to carry out the work with rubber gloves, but in general this solution is completely harmless.
- After applying the putty, proceed to plastering the external surfaces.
Important! The stove should be lit only after the solution has completely dried.
If you chose oven glue, then the putty instructions will be as follows:
- Mix some plastic mortar and treat the cracks with water.
- Apply the mixture into cracks and all crevices.
- Mix the solid solution and coat your oven with it.
- After 30-60 minutes you can start plastering the stove, as the glue dries very quickly.
Also read - How to properly heat a sauna yourself - the best tips and methods
Repairing cracks on a metal surface
If cracks have formed on a metal stove, then specialists use welding to seal the cracks. If it is not possible to use this option, you can prepare a solution:
- A clay-based mixture using metal filings, salt, manganese dioxide and borax in a ratio of 30 to 4:1:2:1.
- Or knead in proportions 1.5:96:2.5 - colloidal sulfur, metal filings and ammonium chloride.
How to restore a stove-bed - video
This is interesting:
How to properly replant a cactus at home - important tips How to properly hard-boil eggs and how to clean them - important tips How to properly wash soft toys in the washing machine - important tips How to keep roses in a vase so they last longer - important tips How to care for perennials carnations in your garden - important tips How to pass the oral exam well - important tips and advice
How and why plaster cracks
To answer the question unambiguously, a small analysis of the circumstances and conditions of destruction of the plaster mass will be required. Plaster warps and cracks most often due to deviations in the technological process:
- Violation of the proportions of the main binders of the plaster;
- Exceeding the optimal layer applied once to the wall, incorrect drying mode of the plaster layer;
- Violation of mixing technology when preparing plaster solution;
- Using materials unsuitable for kneading;
- Settlement or violation of the integrity of load-bearing walls, “the foundation floats.”
Advice! If the plaster begins to crack, the first thing you need to do is immediately check to see if the load-bearing structures of the walls are being destroyed. Otherwise, behind the problem of plaster, you may not notice how the building itself begins to crack and collapse.
In such cases, the depth of the cracks is checked with a special probe made of thin steel wire. If the probe penetrates to a depth exceeding the thickness of the plaster, it means... the problems are more serious than poor-quality wall finishing.
Application area
Stoves and fireplaces have different designs. All home fires have a firebox, where organic raw materials are burned, and a chimney. Depressurization of any area is dangerous due to the possibility of carbon monoxide entering the room.
Carbon monoxide is often the cause of poisoning in residents because it is odorless and colorless. It is impossible to feel an increase in gas concentration. The integrity of the stove and chimney should be carefully checked; control traction in the system.
If cracks appear in the pipe or where it meets the roof, sparks and a heated flow of gases can enter them. This poses a risk of fire.
In addition to all the risks, due to depressurization, the efficiency of furnaces is significantly reduced. Part of the energy released during combustion evaporates uncontrollably into space.
Some modern chimneys are made from ceramic or metal fragments. Sandwich structures for removing smoke from stoves are gaining popularity.
When installing chimneys, it is necessary to ensure a monolithic connection of all components, preventing the leakage of hot fuel combustion products. You can gain confidence in the safety of using stoves and fireplaces only by correctly using fireproof sealant during initial installation and repair.
Advantages and disadvantages of the material
This type of finishing work, such as clay plaster, has a huge number of advantages:
- naturalness of the material;
- with its help you can adjust the ideal humidity level in the room;
- due to its absorbent properties, this coating will be able to absorb harmful substances from the surrounding space;
- clay is an elastic, fire-resistant and waterproofing material;
- the material is ideal for covering various surfaces: brick, wood, concrete, etc.;
- a clay-based solution is quite easy to apply with your own hands, even for beginners;
- is distinguished by its low cost.
This type of finishing work, such as clay plaster, has a huge number of advantages.
As you can see, the advantages are quite significant, but, of course, there are also disadvantages, albeit in small quantities. The main disadvantage is the difficulty in finding truly high-quality and environmentally friendly material that would not be contaminated with radioactive substances and other human waste. The second disadvantage is the long drying time of the surface treated with clay. At room temperature, such plaster (if its layer is no more than 1 cm) will dry for at least 5 days, and when the temperature rises to 350C - at least 2 days. Whether to use the lengthy process of applying clay plaster or use more modern techniques and materials - the choice is now yours.
How to remove old plaster from walls?
Volumetric plaster on the wall: features and application technique
Plastering drywall: what do you need to know before starting work?
Today, when we, having become saturated with modern technologies, again strive to decorate our homes with environmentally friendly materials that do not contain toxic and harmful substances, clay plaster is becoming increasingly popular again - its composition is completely natural, all the components were given to us by nature.
Unfortunately, there are fewer and fewer good craftsmen who perfectly know the technology of its preparation and application, but if you want, you can handle this matter yourself.
Almost all packaging with modern plaster mixtures (see) bears a mark about the environmental safety of the product. And in most cases it is true. And yet, their composition often includes synthetic additives that give the material plasticity, frost resistance, increased strength and other useful properties.
Clay plasters consist entirely of only natural materials: clay itself, sand and fillers such as sawdust, straw, pine needles, etc. They have a lot of advantages that even the highest quality and most expensive plasters on cement, gypsum (see) and, especially, polymer bases do not have.
So:
- Having an excellent ability to accumulate moisture from the air and release it back, clay provides climate control in the room;
- It also accumulates heat and gradually releases it when the air temperature drops. Even to the touch it is always warm and pleasant;
- This plaster perfectly absorbs odors and is a good barrier to extraneous sounds from the street and high-frequency radiation;
- Has antiseptic properties, prevents the appearance of mold on the walls;
- Another excellent property is the ability to “breathe”, passing through the vapors contained in the air. Wooden structures that have such protection always remain dry, do not rot and are not attacked by insect pests;
- Clay plaster can be reused by soaking it with water. The same is done with a frozen working solution, so no waste remains during repairs;
- It can be used on any base: wood, brick, concrete, cinder block, etc.;
Of course, an important advantage is the extremely low price of the material. It may not cost you anything at all if you use clay for plastering from a pit dug under the foundation, and bring sand from the river bank. But ready-made mixtures usually cost no more.
Causes of cracks
There can be several reasons for cracks in the furnace, for example:
- Poor quality putty.
- Failure to comply with the necessary standards when finishing the stove.
- Incorrect oven drying.
- Furnace subsidence.
The stove can sag due to an incorrectly installed, weak foundation or the use of low-quality material during installation. If it is better to re-lay a stove with an incorrectly made foundation, then in other cases putty for stoves will help get rid of the cracks.
However, smoke can enter the room from the furnace not only as a result of cracks, but also for a number of other reasons, for example:
- Clogging of the chimney with soot. Eliminating soot from the smoke duct will help here.
- Clogging of stove riser bricks with waste. The riser needs to be cleaned.
- Incorrect internal laying of the stove. Most likely, this cannot be done without a major overhaul of the chimney.
- Overcooling of the riser due to a long break in the operation of the furnace. Warming up the riser using lit paper will help.
Materials and tools
If, after all, cracks are the cause of smoke in the stove, then they must be coated. For this we need:
- sealed container;
- bucket;
- construction sieve;
- shovel;
- paint brush;
- putty knife;
- chisel;
- primer;
- clay;
- sand (cement, asbestos, lime, table salt);
- water.
Preparation of the solution
When all the tools and materials are ready, you can proceed to preparing the solution. Let's look at some of the most effective recipes:
- The most common and at the same time simplest method of coating a stove is plastering with clay. To prepare it you will need clay and sand in a ratio of 2:1. These ingredients must be thoroughly mixed and table salt (30 g per 1 l) added. Before use, the solution is infused overnight, covered with polyethylene.
- A solution containing asbestos is more flexible and fire-resistant. To prepare it you need to mix 1 part asbestos with 10 parts clay and lime (or cement) and 2 parts sand.
- To fill cracks in iron and tile stoves, the following ingredients are used: wood ash, table salt, a small amount of clay and water. All components are mixed until dough-like.
Before preparing any solution, all ingredients must be sifted through a construction sieve. To make the clay easier to mix with sand, it is pre-soaked in warm water. Before adding lime to the solution, it must be quenched with water. The prepared solution should have a thick, uniform consistency.
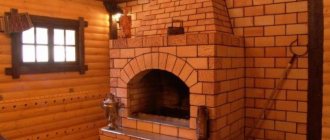
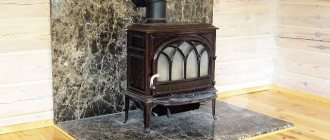
A stove, stove, Dutch oven, fireplace are devices well known to Russian people, thanks to which you can heat the house so much that no frost is scary! To this day, this is an indispensable way to keep warm in villages or holiday villages, so the problems that may arise with the stove are still relevant. One of them is how to cover the stove so it doesn’t crack?