Since the base base is not always ideal, before you start laying the finishing floor covering, you need to do a rough pour: floor screed beacons will help you do it efficiently, strictly according to the level. The floor beacon is a special device that can significantly simplify the leveling process. The number of guidelines used during the pouring process depends on the type of beacon, type of screed and area of the room. Screeds are made using various technologies: using self-leveling mixtures, concrete solutions and bulk materials.
Purpose of beacons for floor screed
Beacons for floor screed represent the actual level of the new floor, marked throughout the entire area of the room. Essentially, these are marks (markers) located throughout the room, which are at the same horizontal level. This horizontal level coincides with the pre-made marking of the floor screed level. Beacons for screeds must be installed according to pre-made screed markings and after preparing the base of the floor for the screed.
Is it possible to do without lighthouses?
It is impossible to make a level screed without guide beacons. Beacons are clearly necessary when constructing any type of screed and even some types of self-leveling floors, which, in principle, have the property of self-leveling, but cannot be made efficiently without the participation of guides. The screed is used everywhere:
- Even the most experienced and talented builders cannot install floors in such a way that they are located, so to speak, completely in the same plane. Level differences are inevitable. They also occur during shrinkage of the house.
- Concrete structures also lack the smoothness required for laying large amounts of finishing surfaces.
- The installation of hydro-, thermal and sound insulation, the installation of a “warm floor” system also involves the subsequent formation of a screed.
It is completely unrealistic to create a screed of the required thickness, focusing on your own perception. The work can only be done efficiently if the performer sets up beacons. They will play two roles:
- They will help you determine the scope of work and navigate the floor level to be installed.
- They will facilitate the labor-intensive process of backfilling and pouring the floor from a technological point of view.
Types of beacons for screeds
Beacons for floor screeds come in two types.
- The first type of lighthouses is all rack lighthouses. The following can be used as slats: a square pipe, a channel, a plaster beacon, a flat wooden lath.
- The second type is professional beacons in the form of tripods (benchmarks). They are placed throughout the room. Each tripod has a retractable rod, which indicates the level of the new tie.
- Rack beacons are often used for installing cement-sand screeds, lightweight concrete screeds, and levelers. That is, where the solution requires manual leveling by rule.
- Point tripod beacons (benchmarks) are very convenient for indicating the level of a cement-polymer floor, finishing screed and self-leveling levelers. The use of these beacons requires certain professional skills.
Let's look at each type of beacon separately.
Types of beacons for self-leveling floors
When installing self-leveling floors, performers in many cases do not use beacons, logically believing that the composition will independently level the surface. This judgment has the right to life and is suitable for small spaces.
If the filling area is relatively large, then it is still necessary to use beacons. For these purposes, a benchmark or its homemade analogue is best suited. Their installation and dismantling does not take much time and does not require work skills.
Benchmark
The benchmark belongs to the pin reusable beacons. Consists of a tripod and a central pin with marks at the bottom. The height is adjusted by twisting the pin down or up. This happens as follows:
- Benchmarks are placed a meter apart from each other in a checkerboard pattern. It is necessary to install 5-6 hours after puttying and priming;
- Using a level, the upper part of the pin of all reference points is aligned in one plane (instead of a level, you can use threads stretched between the walls). Since the length of the pin for all beacons is the same, the filling goes to the beginning of the pin if the distance between the fill line and the horizon is equal to the length of the pin, and to the mark coinciding with the fill line if it is less;
- After pouring and leveling the floor, the benchmarks are removed. The mixture independently fills the recesses left by the tripod.
Rapper.
Self-tapping screws
A very simple solution for self-leveling floors is beacons made of self-tapping screws and fishing line. In each corner of the room, 4 self-tapping screws are screwed into dowels. From the wall, parallel to which the fishing line will be stretched, it is necessary to retreat 0.2-0.3 m. At the ends of the lighthouse line, the retreat is 0.1-0.15 m.
The screws are aligned along the fill line (screed). A fishing line is stretched between them. Gets two parallel lines. Along them, at a distance of 30-40 cm, screws are screwed in again. Between them, across the room, a fishing line is also stretched. We get a simple but effective level. After pouring, the screws are dismantled.
Rack beacons to indicate the screed level
Rack beacons are installed after marking the level of the screed, which is applied around the perimeter of the room. Beacons are flat, long slats placed on the floor throughout the room from wall to wall, parallel to the length of the wall of the room or parallel to communications laid along the floors.
The distance between the slats is selected from 1000 to 1700 mm. It depends on the area of the room and on the tool that will be used to level the screed solution.
Note: The screed is poured in strips along the laid beacons. Even if you installed beacons one meter apart, it is better to fill several spaces between the beacons with mortar to install the screed. To level the solution, you need to use a long rule, 2-3 spans long between the installed beacons. This will not only reduce the work time, but most importantly, the quality of the screed will be very high.
Classification of lighthouses
Very often, the functions of beacons are performed by metal profiles, but in addition to them, other materials can be used, for example, pipes or wooden blocks. Depending on the type of screed, the type of beacon and the method of its installation are determined.
Metal profiles
These are guides, sort of “rails” along which the rule is moved, leveling the layer of solution, turning it into an ideal surface. If a thin screed is intended, conventional profiles for plastering work can be used. But remember that these products have a small margin of safety and the solution can deform them. It is better to use more durable U-shaped profiles, which are used for working with drywall.
Advice! In the case when we are laying heavy concrete mortar, we can increase the strength of the lighthouse by putting two U-shaped profiles together.
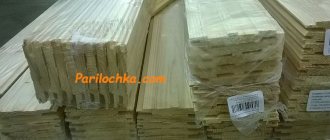
Wooden lighthouses
These are blocks of wood (30 x 30 mm), which are first soaked in water so that they do not subsequently absorb liquid from the mixture; Moreover, their evenness is checked before and after the “water procedure”. The leveling of the bars is done by placing pieces of wood or wedges, after which they are attached to the base with self-tapping screws.
Important! Since a humid environment contributes to the rotting of wood, it is recommended that when the screed hardens a little, remove the wooden beacons and fill the resulting cavities with concrete mixture.
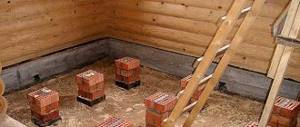
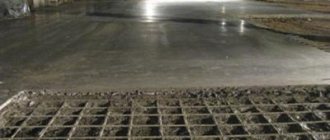
Landmarks made from concrete composition
This technology of placing beacons on the floor using only cement-sand mortar is quite painstaking, but it is worth it, since they do not have to be removed after pouring the screed, that is, the beacons become part of it. The process algorithm looks like this:
- We screw self-tapping screws into the floor along the entire length of the lighthouse, adjusting their height above the floor according to the level;
- We stretch steel wire between the screws (the number of rows of wire depends on the thickness of the screed), which serves as a reinforcing element;
- cover the entire line of screws and wire with mortar;
- As a rule, we give the structure the required height, focusing on the heads of the screws;
- We form a narrow concrete path, which will serve as a beacon.
Important! Beacons of this kind must be given time to dry completely in order to give them the required strength (about two to three days).
Benchmarks
A bench mark is a tripod with an adjustable central rod, which allows you to set the desired tie level. Benchmarks should be placed on the floor in a checkerboard pattern in 1-meter increments. After the fill begins to set, such landmarks can be easily removed.
About the floor screed tool
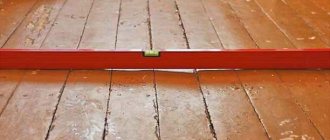
To work on the screed, you need a high-quality purchased tool. An aluminum rule is indispensable for this work. The rule is a flat aluminum profile, 15-20 cm wide, truncated into a cone on one side. The length of the rules varies from 50 cm to 3 meters. Bubble indicators of horizontal and vertical levels can be pressed into the rule. When installing screeds, it is better to use the rule of a length of 2 meters.
Let's return to rack beacons and consider which rack beacons are used for floor screed.
Other types of beacons
In addition to the types of beacons described above, string beacons are also used in practice. They are mainly used for plastering walls, since the strings sag when stretched horizontally. In small spaces they have undoubted advantages:
- reusable;
- easy sliding of the rule along the string;
- no trace after removing the string;
- easy to install.
The installation of such beacons comes down to attaching string holders to the wall at a given level. Properly installed beacons allow you to obtain a flat surface for installing the floor. High-quality smooth screed, high-quality floor.
Types of rack beacons for floor screed
Wooden rack beacons
Using straight wooden slats for screed beacons is an old and not entirely accurate way to set the screed level. The use of wooden lighthouses is practically not used now, so this will be short. If you still decide to use wooden beacons to construct a screed, be sure to remove them from the dried screed solution and, after the screed has dried, seal the grooves from the removed beacons with the same solution. Don't forget to prime the furrows first.
Metal rack beacons made of profiles for drywall
As beacons for screeds, you can effectively use a guide profile for plasterboard, PN 28×27 (or any other).
The first and last beacon should be placed at a distance of 20-30 cm from the walls. The distance between beacons is 1000-1400 mm.
To install beacons from the PN 28×27 profile, you need to screw self-tapping screws into the floor along the installation lines. The distance between the screws should be 40-50 cm. The length of the screws should be such that half the length of the screw is screwed into the dowel, no less. This is for durability.
It is better to install beacons from a profile with the base of the profile (shelf) facing up. That is, just cover the screws that are screwed in. To set the level of the beacons, from wall to wall of the room according to pre-made markings, you need to pull the rope tightly. You need to set the beacon profiles along this rope, lowering and raising them, turning screws in and out. Instead of self-tapping screws, the level of the beacons can be adjusted using spacers under the profiles.
After rough alignment along the rope, check the level of the laid profiles using a long rule with a built-in level.
Important! It is necessary to check the level of profiles laid on self-tapping screws not only perpendicular to the beacons, but at a variety of angles. For all checks, the rule level must show a zero horizon.
After setting the profiles, they need to be “frozen” to the floor with a solution. First, in the places where the screws are screwed in. After the next check of the level of the beacons and drying of the solution, the profiles of the beacons must be covered with the solution along the entire length.
Note: PN profiles for beacons should be placed with the shelves facing upwards. At the same time, when setting the level of the beacons, using gaskets or screws, do not forget to take into account the thickness of the profiles (2 mm).
Metal rack beacons made of steel pipes
Another material for rack beacons is steel metal pipes. Pipes can be selected from square, rectangular or round. Basically, such beacons are used in large rooms. Pipe beacons are indispensable when constructing a concrete screed.
Technology for installing rack beacons from pipes
- Mark the beacon installation lines. The first and last beacons should be at a distance of 20-30 cm from the walls.
- Along the marked lines for installing the beacons, you need to place slides of mortar every 40-50 cm. We will smear beacons made of pipes into them.
- Next, we lay the pipe beacons on the mortar slides and, using a rope and a long rule, set all the pipe beacons according to the pre-marked screed level on the walls.
We adjust the level of the beacons by pressing the pipes into the solution or placing additional ones. We check the general level of the beacons, usually parallel to the walls and at different angles. After setting and checking the level of the beacons, we cover the beacons with mortar along their entire length. You can start screeding after the mortar under the beacons has dried.
Note: If the screed is made after the mortar has dried under the beacons, then the screed can be poured immediately between three and four beacons, stretching the mortar using the general long rule.
Metal lath beacons made of plaster profiles
Very often, plaster perforated beacons with a height of 10 mm are used for floor screed beacons.
They are inconvenient for large screed thicknesses, as they are easily deformed and bent, especially at the edges. For thin screeds, plaster beacons are actively used as screed beacons. You need to work with them very carefully, carefully checking the level of the beacons in all directions. Because of their design they are very springy.
Installation technology for plaster beacons for floor screed
As with the installation of pipe beacons. Lay out slides of solution along the line of beacons. The smaller the distance between the slides of the solution, the less the likelihood of errors due to the springiness of the plaster beacons. Then, using a pre-marked level, pressing the beacons into the solution, or placing the solution under the beacons, the beacons are set to the “zero” general level. After the slides of the solution have dried, the beacons must be completely covered with the solution. After the solution has completely dried under the beacons, you can make a screed.
Pin beacons on tripods (benchmarks)
These are professional beacons used for self-leveling floors of various types. They require professional skills and a trained eye. They are a small tripod with a moving rod in the middle. This rod shows the level of the screed. The level is set along the caps on top of this rod.
Stages of preparatory work
Leveling the rough base assumes the absence of any floor covering. After dismantling work, various types of damage, lesions, differences in plane and level are revealed. If such defects persist, the subsequent leveling layer will correct the situation only for a short time. Therefore, the preparatory stage is not limited to just removing the finishing material and remaining debris.
Preparatory stage
Before installing beacons for floor screed, you need to correctly assess the situation regarding the level and evenness of the base along the plane. This is only possible after all loose materials and weak areas have been removed. The latter must either be dismantled or secured in the case of floorboards.
All damaged areas must be prepared for restoration. These include cracks in concrete. They need to be embroidered, dusted, and treated with a primer. Finally, fill with repair compound. To prevent further expansion of concrete, recesses are formed across the seam for reinforcing rods.
Reinforcement of cracks Source www.ivd.ru
The best option would be blanks with applied threads. In order not to look for them on sale, you can take galvanized self-tapping screws, from which the caps are then bitten off.
On a wooden floor, you need to dry the splits, prepare a chip that is as identical in nature and size as possible, and insert it into the gap. For reliable fixation, you can use wood glue or construction/universal PVA glue.
Grease and oil stains must be removed with alcohol-containing solvents or special construction degreasers. Protruding areas are ground with coarse abrasive. If iron fittings stand out, it is recommended that after removing the rust, apply an anti-corrosion compound to the metal.
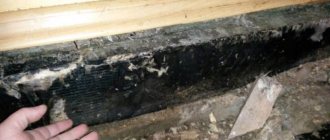
Often, regardless of the nature of the subfloor, after the finishing is removed, pockets of biological damage are identified. Before installing beacons on the screed floor, such a “disease” must be “cured”. Here you need to use two types of means: destroyers, protection. Some manufacturers offer to purchase both products at once, so as not to look for them separately.
Products in convenient containers Source stroyleto.ru
The first ones are applied to the affected area, wait for the time recommended by the manufacturer, and mechanically clean the base. If necessary, repeat the procedure. Finally, preventive treatment of the enlarged area is carried out with protective antiseptic compounds.
Next, the rough base is completely covered with a primer in order to strengthen, remove dust from the surface and reduce the absorbency of the floor if necessary. After the treatment has dried, waterproofing is installed. For dry screed, a technical film with a thickness of 150-200 microns is sufficient.
In a damp room, during any leveling, a layer of a coating-type hydrobarrier is applied. Additionally, polyethylene can be laid under the solution, extending onto the walls at a height equal to the thickness of the screed. The seams between the canvases are formed with an overlap of 20 cm; they must be sealed by gluing with plumber’s tape or universal double-sided tape (the most reliable is bitumen-based). A damper tape is laid around the perimeter.
Ready base for leveling Source vbud.in.ua
See also: Catalog of companies that specialize in finishing materials.
Zero level
Before setting up the beacons for screeding a heated floor, in addition to preparing the base, you need to set a horizontal reference point. The zero point means the highest section of the floor relative to the level. To determine it, it is easier to use a laser, or a hydraulic one. The reference unit is usually 1 meter. First, it is measured along the entire perimeter, reflecting the results on the walls. A solid line is drawn along the highest mark. It monitors the presence of protrusions throughout the floor. If they are not there, then the final landmark is applied below.
Here, in addition to the relief of the rough foundation, it is necessary to take into account the height of the leveling compound. For example, a dry expanded clay screed can be 40 cm, and a cement mortar only 3 cm. That is, the final result for installing beacons will be higher than the guideline for the height of the leveler.
Determining flatness with a laser level Source interpol16.ru
Should the beacons be removed from the screed after the solution has dried or not?
To answer this question, you first need to answer another question. Why is this necessary? If you leave metal beacons in a solution, over time they will rust and in their place, dips and cracks will form.
The classic advice is simple. All beacons need to be removed from the screed, or rather knocked out. Clean the resulting furrows from debris, prime them and, after the primer has dried, seal them with the same solution.
But many companies leave plaster beacons in the screeds, on top of which a self-leveling or finishing self-leveling floor is planned. Allegedly, beacons without contact with air will not corrode. The regulatory documents say nothing about such beacons, and discussions on this matter are not within the scope of this article.
After placing the beacons, all that remains is to mix the screed solution and you can begin installing the screed.
This article is all about screed beacons! Walk on level floors!
©Opolax.ru
Filling the floor using beacons
the surface must be . Compositions like “Betonkontakt” will be ideal for this, but other cheaper domestic analogues can also be used.
For arranging screeds, a classic cement-sand mortar . For three to four parts of sand you will need one part of Portland cement grade M400. You can also use ready-made dry mixtures for screeds, which additionally contain polymer components to improve their properties, but the price of the finished screed will then increase significantly.
It is better to buy washed sand for screed, since the clay that is part of quarry sand weakens the screed. To make a strong screed that will bear significant loads, you need to use sand and cement in a ratio of 1 to 3; with lower requirements, the share of sand can increase, but not more than four parts.
It is highly advisable to use special substances in the preparation of the screed solution - plasticizers, which greatly improve the properties of the solution, reduce the proportion of water and make the mixture more mobile. The drying time of such screeds is significantly reduced.
When installing screeds in “warm floor” structures, in addition to plasticizer, fiber fiber should be used: polypropylene or basalt. Fiber fiber ties do not crack and can withstand temperature changes. It is advisable to use fiberglass in all other types of screeds. Its price is low, and for 1 cubic meter of the finished solution only 900 grams of fiber are required.
How to fill a floor using beacons? To fill the screed you will need the following tool :
- For high-quality preparation of the mixture, it is advisable to use a concrete mixer or construction mixer. But if they are not there, then you can mix the solution manually in a special trough using a shovel.
- To level the screed you will need a construction rule, a spatula, a trowel and a grater.
- In bonded screeds, it is good to use a contact layer, which is applied with a notched trowel.
- To carry the finished solution to the work site, you will need buckets or a wheelbarrow.
To prepare the solution manually, mix the dry ingredients in the required proportions . Fiber fiber is immediately added, and the plasticizer is dissolved in water. After this, water is added at the rate of no more than 15 liters per 50 kg of cement, and even less with a plasticizer. The solution is thoroughly mixed with a shovel; the consistency should be the same as that of plaster solutions. With the mechanized method, everything is simplified and the quality of the solution will be better.
The finished screed solution is supplied to the work site and poured out between the beacons. Work should begin from the farthest corner and gradually move towards the door. First, one strip is made between the lines of lighthouses, and then they move to another. After the solution has been poured out, you should use a trowel or shovel to evenly distribute it so that its level is slightly higher than the level of the beacon. Using the sharp edge of the rule, holding it perpendicular to the beacons, starting from the farthest point, the solution “stretches” towards itself.
To make the rule move easier , it is swayed left and right and pulled at the same time. Excess solution is cut off, and its shortage is compensated with a trowel - the required amount is placed in the holes. The result should be a smooth surface without bumps or holes. In this way, a screed is sequentially installed on all lanes between the beacons. The process ends at the door.
The backing for the laminate is cork. You will read about this in our next article. And here is an article that will tell you about modular parquet.
Floor marking
Whatever type of beacon is chosen for work, it must be installed correctly, and this requires accurate markings. First, the planned level of the future screed is noted. Guidelines are made on the walls around the entire perimeter of the room. The more marks, the better.
Determination of the highest point
Method of marking the horizon with a laser level
Using a laser or water level, the highest point on the surface is determined. To do this, mark the first point on one of the walls, at a distance of a meter from the concrete floor. A horizontal line is drawn from it along the entire perimeter of the room. The best way to cope with the task is to use a ruler level: draw a line and check the horizontality.
Varnish for wood and concrete floors: types, characteristics and prices
Next, measure the distance from the line to the floor in different places. Where it is the smallest is where the highest point is located.
In addition to this, it is necessary to check the surface over the entire area. Nails are nailed along the line or screws are screwed in. A wire is pulled over them and, measuring the distance between the base and the lines, the highest point in the entire area is determined. Once identified, its projection is transferred to the wall and the height of the planned screed is added. Using a ruler level, draw a horizontal line. It is called the zero level.
An example of the method for calculating the top and bottom points of the floor can be seen in the video:
Important! The thickness of the final floor must be calculated in advance so that it does not later exceed the height of the threshold.
Defining lines for installation
Marks are made on the floor. They are exhibited according to the following rules:
- The lines should be parallel to each other (ideally and to the walls).
- First of all, mark the locations of the 2 outer beacons. To do this, step 20-30 cm away from the wall and draw a line.
- Marks for the remaining beacons are placed last. The distance between them depends on the length of the tie rule. 10-15 cm are subtracted from it and marks are placed (usually at intervals of 1-1.7 m).
- Self-tapping screws are installed on the lines that indicate the zero level of the floor. They are installed exclusively in places corresponding to the ends of the marks for beacons. They will come in handy in the future when pulling rope guides.
After marking the surface, you can proceed to the installation of beacons. For a quick way to install beacons on a concrete base, watch the following video: