Almost every modern bathroom has a shower. This is especially true for very small rooms, where there is simply nowhere to install a bathtub. But, if you have a large enough room, you can easily place both a shower and a bath there. With their help, water procedures will become more pleasant and faster. If you are planning a renovation in the near future, then it is worth considering a special finish for the space near the shower. After all, temperature changes occur here every day and high humidity reigns. And the surface of the shower stall requires frequent washing and cleaning. Therefore, it is important to think about what kind of finishing material you would like to see in your bathroom.
Ceramic tile
This material can rightfully be considered one of the most popular. The advantages of its use include: strength, durability, moisture and heat resistance, ease of maintenance, a larger selection of colors, and a fairly inexpensive cost. But the material also has its drawbacks. This is both the complexity of installation and the need for special care for the seams between the tiles. If the bathroom decoration is made entirely of ceramic tiles, then the interior can be quite cold. Most often, ceramic tiles have a rectangular shape. If desired, you can choose a matte or glossy surface of the material. When tiling, the grout can be chosen to match the tone of the tiles, or you can give preference to contrasting combinations. With its appearance, ceramic tiles can replicate various surfaces - stone, wood and others. If you choose this finishing material, you can create any interior with your favorite color and texture.
The surface of ceramic tiles does not require special care. You just need to periodically clean the tiles using store-bought detergents. Unfortunately, dust, dirt and various microbes quite often collect in the seams between ceramic tile elements. It is necessary to clean the grout from time to time, and also be sure to treat it with an antiseptic.
Read Combination of wallpaper in the interior
Walls
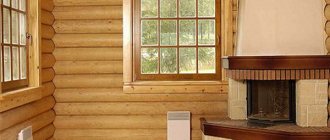
In order for the style of the bathroom to match the rest of the rooms, wood should prevail in its decoration. This option involves sanding and processing wooden surfaces, followed by impregnation of the wood with moisture-resistant paints and varnishes.
Modern antiseptic impregnations containing fungicides are effective against all types of fungus. When processing, special attention should be paid to places where the natural structure of the tree is disrupted: ends, locks, cross sections. This is where moisture absorption occurs most intensively.
Colorful bathroom in a cottage from PSG “Vyatsky House”
We can recommend special antiseptics and textured coatings intended for baths and saunas for treating wooden walls in the bathroom. So-called colored oils, consisting of several natural vegetable oils and waxes, are also suitable. All coatings based on colored oils are durable and perfectly repel dirt and water. Therefore, the paint does not crack, and the wooden surface retains its original appearance for many years.
The children's bathroom resembles a playroom ()
The walls in the bathroom can also be decorated in a traditional way - for example, using ceramic tiles. To prevent damage to the finishing layer as a result of settlement of the building, it should be mounted on a base, either connected to the walls enclosing the room, using sliding fasteners (sliding frame technology), or completely independent of the walls. Sliding frame technology comes in different types. A popular solution is a substructure rigidly fixed to the wall from U-shaped metal profiles with vertical grooves. Screws (with washers) are inserted into them to hold the base to which the finishing material is attached. The screws are not fully tightened, and then when the wall settles, they will move up the groove, due to which the finishing layer will remain in place. The main thing is that between the enclosing wall and the base for finishing it is necessary to provide a gap for ventilation of wooden structures in order to avoid condensation of water vapor on them. In the resulting gap, various communications are placed. A certain gap is also left between the upper edge of the finishing layer and the ceiling of the upper floor, which, according to calculations, will allow the ceiling structure to settle unhindered. As a rule, moisture-resistant gypsum fiber boards and sheets, special boards consisting of a cement-based core and reinforced on both sides with fiberglass mesh, as well as moisture-resistant plasterboard sheets are used as the base for finishing.
In one of the bathrooms of the house, built by the VSL Construction Company from structures, tiles and mosaics were used
The advantage of the sliding frame technology is that the false wall is lightweight and does not require increasing the strength of the floor on which it rests. This technology is suitable, in particular, for bathrooms located on the second or third floor of a building with ceilings made of wooden beams. But it also has a drawback - the possibility of misalignment of the substructure relative to the fastening elements, due to uneven settlement of the walls of the room. This can lead to deformations in the finishing layer (especially problem areas - corners), which will require dismantling it (partially or completely) and creating a new one.
The peculiarity of this project by Maria Berdnikova is its appeal to oriental motifs
If the foundation of the building is a reinforced concrete slab, then in the bathroom installed on the ground floor, independent wall technology is used: self-supporting walls made of ceramic bricks half a brick thick are erected at a distance of at least 25 mm from the wooden walls. They serve as the basis for the finishing coating. An independent brick wall should be smaller in height than the enclosing wooden structures. The height difference depends on the expected shrinkage of the building. In a house made of glued structures, it can be small, but in a log house made of natural moisture, it can be significant.
The highlight of the bath area in a house made of rounded logs is a round font made of moisture-resistant wood
Making a choice in favor of mosaics
Mosaic is a fairly ancient material. This is a great way to finish a variety of surfaces. Mosaic can be very different. It will help transform the interior of any bathroom. Thanks to the wide variety of colors and shapes, you can create a unique interior and even real panels. It is great for dividing space into functional zones and finishing individual parts of the room. Mosaic adheres perfectly to any surface. With its help you can veneer surfaces of any complexity. The durability of the material should also be noted separately. Installation of such tiles does not require detailed adherence to the image, so with its help you can achieve a unique pattern on the wall surface. This material has only two small drawbacks: the high price of the material itself, as well as the cost of installation services.
What is used most often
It is clear that taking water procedures is an intimate matter. It is necessary to close yourself from prying eyes. Many citizens do not rack their brains over what to cover a summer shower in their dacha, but use everything they can get their hands on.
Facing materials
The shower walls are made of oilcloth.
- Oilcloth is often used. Of course, this is not aesthetically pleasing, unreliable and impractical, only the price is attractive. In this case, it is comfortable to take water procedures only in hot and windless weather. It's a little bit windy or cooler - a cold is guaranteed. And a canopy noisily fluttering in the wind will not add positive aspects to the process.
- Boards or plywood stacked in sheds are popular. The summer resident, without thinking twice, hurries to quickly put together from all this something acceptable for all household members. The service life of the building is a maximum of two or three seasons, since the wood will quickly get wet from water and become unusable.
- A self-built shower made of plexiglass and slate looks good. The materials are waterproof and quite durable. But they do not hold heat well, so they are suitable for use only in the warm season.
- Galvanized steel lasts quite a long time, but is optimal either for the hottest days or for the southern regions. Since the weather periodically brings surprises in most parts of the country, taking a shower will depend entirely on it.
- The plastic left over after the repair will be very useful. It looks neat, is not afraid of water, but after winter and temperature changes it deforms and becomes brittle. With the beginning of the season you will have to change the covering.
Polycarbonate construction.
Note! If it is possible to use cellular polycarbonate, the question of how to cover a shower stall in a country house can be considered resolved. Both clear and colored sheets look great. The honeycomb retains heat well, it will be light inside, but it will be impossible to see the person in the booth.
Of all the listed cladding options, polycarbonate is the most practical for a cabin that is not additionally insulated. The table below shows the main technical characteristics of this material. They show that such cladding is optimal for country showers.
| Parameter | Sheet thickness, in millimeters | |||||||
| 4 | 6 | 8 | 10 | 16 | 20 | 25 | 32 | |
| Weight per square meter | 0.8/1 | 1.3 | 1.5/1.7 | 1.7/2 | 2.5/2.7 | 3/3.1 | 3.4/3.5 | 3.7 |
| Min. bending radius, meters | 0.7 | 1.05 | 1.2/1.4 | 1.5/1.75 | 2.4/2.8 | 3.5 | 3.75/4.4 | 4.8/5.7 |
| Sound insulation in decibels | 15/16 | 18 | 18/20 | 19/24 | 20/27 | 22 | 22/30 | 36 |
| Thermal resistance to heat transfer (R), m2∙ºС/W | 0.24/0.26 | 0.27/0.31 | 0.28/0.42 | 0.29/0.40 | 0.36/0.51 | 0.37/0.56 | 0.65/0.68 | 0.63/0.83 |
| Heat transfer coefficient | 4.1 | 3.7 | 3.6 | 3.1 | 2/2.4 | 1.8/2 | 1.6/1.7 | 1.4 |
| Light transmittance (colorless and transparent sheet) | 82 | 82 | 82 | 80 | 76 | 51/79 | 18/79 | 50/73 |
| Impact energy absorbed (H*m) | 21.3 | 27 | less than 27 | less than 27 | less than27 | less than27 | less than27 | less than27 |
Insulate your summer shower
It would seem, why use insulation if the name “summer” implies lightness, mobility and inconsistent use? But summer can be different, and at the dacha there is often no alternative to an outdoor shower for water procedures.
Independence from external factors will be provided by proper insulation and a properly sheathed perimeter. Then you can wash without fear from the beginning of April to the end of October. It is during this period that the most active work in the garden takes place.
So, how can you insulate a structure before covering it?
- Mineral wool . Environmentally friendly and easy to install material. It is recommended to lay the mats into the frame before covering the inside of the outdoor shower. Since it is undesirable for water to get on it, you will have to cover the internal walls with an impermeable film and only then continue finishing.
- Some people still use glass wool Its installation requires utmost attention, and in the future you can be injured by fibers that escape from the crack. Therefore, the instructions recommend taking all precautions.
Polystyrene foam is one of the best insulation materials.
Note! Polystyrene foam, especially waterproof foam, is best suited for outdoor showers. A sheet thickness of 5 cm is quite enough. The space will be reduced to a minimum, and inside it will be comfortable in any weather.
Porcelain tiles
Porcelain tiles are very similar to ceramic tiles. It is strong and durable. Most often, this material is used for finishing the floor, but quite often it can be found on the walls. The pros and cons of this material are absolutely identical to the properties of ceramic tiles, but there are also some peculiarities. Porcelain tiles are absolutely not afraid of impacts and cracks from heavy objects.
Modern stores offer a wide selection of porcelain tiles of any color, pattern and texture. If you want to create an interesting bathroom interior, you should pay attention to the combination of light plaster with moisture-resistant properties and porcelain stoneware. Caring for porcelain tiles is quite simple. It is necessary to acquire cleaning products that can be found in any store. But you should be extremely careful with the seams between the tiles. It is imperative to clean and treat the seams. To care for them you will also need antiseptics.
Terrace board in the bathroom
Natalya Viktorovna Ruzaeva, Quality Control Technologist
The bathroom is a small but very important room in the house. This is the place where we all relax and clear ourselves of everything that has happened during the day. This is where you want to feel natural and not think about anything. Agree that the furnishings and interior in the bathroom serve as assistants that bring us closer to the natural states of human nature.
Previously, the only option for finishing a bathroom was ceramic tiles; only color combinations, ornaments and decor were chosen. Today, modern wood processing technologies allow us to use this environmentally friendly material in the form of decking boards for finishing the bathroom. This is the case when in a modern home you can create a separate corner with real natural elements.
What will you learn about in the article?
- "Deck" board and "Velvet"
- Choosing wood for the bathroom
- If you have doubts about larch, then you should consider thermal wood
- Rules for laying deck boards in the bathroom
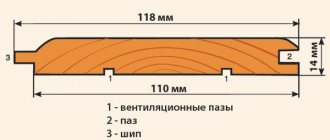
"Deck" board and "Velvet"
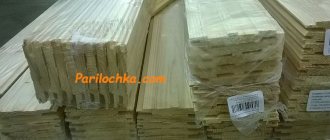
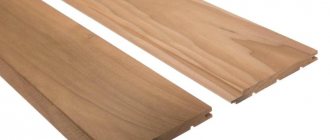
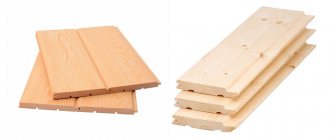
There are two types of decking boards: “Velvet” and “Deck” (smooth). They differ in that “Velvet” has a ribbed surface reminiscent of the fabric of the same name, while “Deck” has a perfectly flat surface. They are similar in size. The width is 140mm, the thickness is 27mm, and the length varies from 2 to 5 meters.
Photo 1. Corduroy decking board
Choosing wood for the bathroom
It’s no secret to anyone that this room is constantly under attack by large amounts of water. And you need to choose from wood that will cope well with such influence. Our online store provides you with wood that is affordable in price and its characteristics are not inferior to other species.
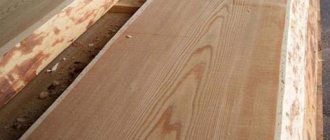
We are talking about larch. Any product made from this wood is durable, highly resistant to moisture and dampness, and can withstand temperature changes well. Larch also contains resins that serve as an antiseptic, both for itself and for what surrounds it. There is also a significant fact that will make your choice in favor of larch irrevocable.
Photo 2. Extra deck board
All buildings in drowning Venice stand on stilts made from this beautiful wood. Agree that the conditions for wood are very harsh, but it has been able to cope with them for centuries, and even more so in your bathroom.
If you have doubts about larch, then you should consider thermal wood
Thermowood
- This is wood of any species that is subjected to heat treatment at high temperatures and a certain pressure. Result: the material becomes almost like stone and slightly changes its shade towards dark, which makes the natural color of the wood even more noble. In fact, thermowood can be given a lot of praise. This is the topic of a separate article, which you can also read on our website.
Photo 3. Thermowood in the bathroom
Rules for laying deck boards in the bathroom
- correctly calculate the volume of wood that you need;
- prepare the site for installation. It should be smooth and clean;
- make waterproofing. For the bathroom, we recommend cast waterproofing, it is more reliable than others and will help to avoid unexpected “surprises”;
- level the surface using specialized mixtures. Don't forget to use a hydraulic level;
- For ease of installation, you can lay wooden logs and lay them directly on them.
Photo 4. Smooth decking board
Laying the panels starts from the door. Measure accurately, and then just cut the boards. The boards are not fastened tightly using self-tapping screws (SPAX or Gutters); you need to use hidden fasteners with an anti-corrosion coating.
The panels must be treated with protective compounds that will extend the life of your floor. Treatment is carried out at intervals from 1 year to 3 years. How often you do this will depend on what you do it with. We recommend Renner
.
Photo 5. Painted decking board
thanks for your attention. We hope we were able to inspire you to consider decking your bathroom floors. Call or come to the specified address to enjoy the natural beauty of wood and choose the right option for yourself.
See how we can
April 13, 2020406
Wooden terrace with decorative railings
Our carpenters make terraces very cool. Even from the lowest grades of wood, for example larch grade “C”
Wooden terrace with decorative railings
April 13, 2020
406
December 24, 2019286
WPC terrace with 3D wood effect for home
WPC boards are approved for use in areas with both hot and very cold weather conditions. The material does not support combustion and the spread of fire, which is of great importance for the safety of people.
WPC terrace with 3D wood effect for home
December 24, 2019
286
November 27, 20181484
Painted larch terrace with a plunge pool in the cottage village of Vankovo
Tree
a living organism subject to significant stress and testing in the form of temperature changes, dampness, UV radiation, and various kinds of pests and rodents are not asleep, but are only waiting for the right moment.
Painted larch terrace with a plunge pool in the Vankovo cottage village
November 27, 2018
1484
View other works
Marble finish
Natural stone is the strongest and most durable finishing material. One of the best is considered a beautiful stone - marble. It will add sophistication, elegance and a rich look to any interior. This material has many advantages. But the disadvantages can easily be attributed to the very high cost (of natural stone). It is best to use marble tiles in places where there is high humidity - the apron above the washbasin, the surface of the shower and bathtub. Marble is often used for flooring. It has incredible strength and durability. Even if sharp and heavy objects fall, the integrity of the material will not be compromised. But microscratches may well form. But it is quite possible to polish the marble and rub it with special wax. The durability of marble cladding is both an advantage and a disadvantage. A marble interior can be passed down from generation to generation. But some people like it, while others may simply get tired of such an interior. Therefore, if you know that you may get tired of such cladding after 5-10 years, then it is better to pay attention to artificial stone.
Read Bathroom finishing: rules for choosing tiles
Initial stage: primary waterproofing
As mentioned above, in wooden buildings it is strongly recommended to have two levels of waterproofing:
- in the transition zone from the ground (floor) to the floor;
- and as a base for laying the finishing coating.
Since subfloor joists in wooden houses are usually not removed, primary waterproofing in this case is best done using reinforced polyethylene film.
The film is laid overlapping and then sealing the joints with special tape.
Primary waterproofing
The finished base should look something like the picture on the left.
In cases where the logs are installed on subfloor boards, you can use a coating version of waterproofing based on bitumen mastics.
No special tools are needed to complete this stage: cutting the film can be done with a regular construction knife or scissors, and a wide brush is enough to apply bitumen mastic.
Please note that the edges of the insulation cover should extend onto the wall, forming a protective tray.
Use of decorative plaster
In such a room, decorative plaster is used quite rarely. This finishing method involves covering the walls using moisture-resistant plaster. You can completely decorate the walls yourself. The material itself is quite inexpensive, so if you want to quickly and inexpensively change your surroundings, you can afford it at any time. But this finish also has its drawbacks. The material's properties are quite short-lived and very sensitive to temperature changes. In addition, there is a high probability of condensation accumulating on the surface. Wall decoration with textured plaster involves the use of plain options. If you want to diversify your interior, you can use LED lighting.
Read Criteria for choosing a kitchen countertop
Construction
Let's look at the stages of building a summer shower.
Despite the apparent simplicity of a summer cabin, its construction requires a competent approach. This means that you need to start with preparation and design. You can find typical drawings of a summer shower made of wood with your own hands on our website, in addition, our instructions will help you.
The following tool will be useful for the job:
- Parquet saw;
- Jigsaw;
- Shovel;
- Concrete mixer or trough;
- Hammer;
- Construction knife;
- Level;
- Screwdriver;
- Set of keys and screwdrivers;
- File;
- Tape measure and pencil;
- Twine.
A wooden shower grate will also come in handy.
We will use oak timber for the frame and trim, and for the sheathing we will use pine boards, as it retains heat well.
Step-by-step work guide:
- We mark the site for the construction and remove the fertile layer of soil. In the corners we dig holes with a diameter of 30 cm and a depth of 70 cm, add a 20 cm layer of sand and gravel mixture to the bottom, tamp it down and cover it with polyethylene;
We mark the area and dig holes.
- We cut out sections of asbestos-cement pipe with a diameter of 150 mm and a length of 70 cm, install them in the pits, set them strictly vertically and cover them with earth;
We install permanent formwork made of chrysotile cement.
- We prepare concrete in a ratio of 1:3:5 from M400 cement and pour it into the pipes. Carefully compact and insert threaded anchors with a diameter of 10 mm into the solution so that they rise by 12 cm;
We fill the pillars with concrete and install threaded studs.
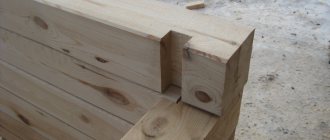
- We cut out 100x100 mm pieces from the timber for the bottom trim, which we lay around the perimeter on the posts through a roofing felt pad. We join it into half a tree, putting it on the anchors and tightening it with nuts hidden in the countersinks;
We assemble the lower trim.
- From the same timber we make vertical posts, which we place in the corners and at the doorway. We fasten with steel corners or plates on both sides;
We cut out and install the racks.
- We complete the main frame with the top trim. We also join it into half a tree and fasten it with two nails to each post. At waist level, you can make an intermediate stiffener from a 100x50 mm board or the same wooden beam;
We make the top trim of the racks.
- We cover the walls with edged pine boards. You can lay it like siding or lining, you can use tongue-and-groove joints or leave small gaps;
We cover the building with boards.
- Inside we make a frame or flooring to install the pallet. Installing a shower tray on a wooden floor is quite simple using clamps or special glue;
We install the pallet.
- We insert the door, install a flat plastic tank with a watering can on the roof, and hang shelves and hangers inside. We paint or varnish the outside of the board.
We place a flat water tank on the roof.
Important! It is better to place an outdoor shower in an elevated place away from the boundaries of the site, roads, neighbor's windows and barbecue area.
Arrangement of a shower room in an unusual place
Quite often, owners who have attic or attic space at their disposal use this space to furnish a bathroom. If the room has a strong sloping ceiling, then it is best to locate the shower in the place where the ceiling has the greatest height. The rest of the space can be used to install all the other necessary items for the bathroom.
To design a shower room, you can use a combination of different claddings. For symmetrical surfaces, you can use porcelain stoneware or ceramic tiles, and for surfaces with a large slope - mosaic. As for color design, for small rooms it is best to use a light palette. With the help of a snow-white finish you can visually expand a modest space. You can use the method of contrasting combinations. A black and white color scheme will look appropriate.
What kind of washing area should a bathhouse have?
The bathhouse sink can be of any convenient size.
The washing compartment in the bathhouse must be at least 4 m². Regular bathroom sizes, like those in an apartment, will not work. The washroom is used not only as a shower, but also as a place for massage or applying various cosmetic masks. It’s not bad if there are 1-2 benches in the room. In order to save money, you can make a bench for the washing room with your own hands from natural wood. The length of the benches must be at least 180 cm, so that the tallest member of the family can fit on it while lying down.
In large baths, the washing department is combined with a swimming pool. In this case, several cabins are installed, and the pool is used for relaxation and diving after the steam room. It is convenient to place the exit from the steam room directly into the washing room, only from there to the rest room. People take a shower not only to wash themselves, but also to wash off sweat and cool down after the steam room, before relaxing and drinking tea.
There will not necessarily be a shower in the washing section of the bathhouse. You can hang several tubs for running in cold water. But in this case, it is necessary to equip a separate place for placing basins for washing.
In small baths, the washing room can be combined with a bathroom. In such a washing room you can install a regular shower stall. In this case, the water will not come into contact with the wall decoration as much.
The material for finishing the washing room is chosen based on the main design in the bathhouse and a number of other criteria, which we will discuss below.
Exterior wall decoration for shower
After the construction of a brick summer shower for finishing the walls on the outside, the walls can be plastered. It is recommended to start plastering from the top. To do this, moisten a small area with water and, using a grater, carefully apply first a less thick layer of solution, and then a thicker one.
The thickness of each layer should not exceed 5 mm. The plaster must be applied evenly over the entire surface, otherwise it will not dry at the same time, and the layer will be uneven.
After a few minutes, use a trowel in a circular motion to grout the plastered surface until it becomes even and smooth. If the solution has already hardened and will not rub well, then it needs to be moistened with water by sprinkling the surface with a matting brush. This process must be repeated in the same sequence until the work is completed.
Plastering the corners of the walls must be done using a wooden strip attached to them. Approximately 7-10 minutes after applying the solution, the lath should be carefully removed, the corner should be corrected and rubbed.
Shower arrangement
Before you tile the outside of the shower at your dacha, you need to make a frame for it.
Frame installation
It is worth paying little attention to the base of the structure, in other words, the frame. The moment is very serious, since the user has a heavy container of water above his head. If you choose the right place, install racks and hang the tank, injuries and other troubles are excluded.
Only after you have built the base can you think about how to cover the outside of the summer shower and how to give it an external shine.
- Four holes are dug to install the pillars. Iron pipes with a diameter of 10 cm and above are suitable. If possible, dig the pipes deeper.
- Having aligned the supports with a plumb line, fill them with cement mortar and gravel. Once the mixture has completely hardened, it is possible to begin the upcoming work.
Choosing a color
Due to the fact that a bathroom with an area of 6 square meters is considered quite spacious, the finishing can be done in any color you like:
- Light shades create a cozy and calm atmosphere in the house. Many people do not like white because it is “sterile” and because it resembles the walls of an operating room or treatment room. In this case, it is quite possible to use all shades of beige or any other pastel colors. Finishing in light colors is good because it matches with any plumbing fixtures and furniture;
- the use of blue and blue colors in the bathroom interior is fully justified by the fact that the water element is dominant here. The main thing is not to overdo it with decor in the form of shells and images of sea creatures. The most advantageous option for a “marine” finish is blue mosaic in combination with white sanitary ware;
- The classic combination of black and white looks strict but aesthetically pleasing. Typically, walls and ceilings are finished in white and floors in black, which creates a visual increase in the volume of the room. If you use black and white ceramic tiles for horizontal and vertical surfaces, the boundaries between the walls and floor will be erased. White plumbing and black doors will perfectly complement the interior;
- finishing a shower in dark colors is a rarity due to the fact that such colors visually reduce the area of the bathroom in the house. Also, dark walls and floors require maintenance, as any dirt and splashes are very visible on them.
Bathroom in blue tones
Bathroom in black and white colors
Light colors in the design of a small bathroom
When choosing a finishing color, give preference to neutral tones; bright colors quickly become boring.
Advantages and disadvantages for different types of finishes
If the part of the bathroom where the shower is installed is finished only with tiles or panels, then the rest of the room can be decorated in other ways:
- moisture-resistant plaster: decorative plaster is a relatively new word in bathroom renovation; this material will allow you to create an unusual interior. It can be used to decorate walls, leaving them smooth or giving them relief;
- moisture-resistant paint: this material is affordable and combines well with ceramic tiles;
- vinyl wallpaper: has moisture-resistant properties and allows you to give the bathroom an unusually cozy atmosphere.
To finish the ceiling, stretch fabric, plastic and metal panels, and paint are used. The floors are laid with ceramic tiles or more durable porcelain stoneware.
Table - comparative characteristics of finishing materials for a shower room in a house.
| Type of finish | pros | Minuses |
| Ceramic and mosaic tiles |
| Expensive installation work |
| Plastic panels |
|
|
| Plastering and painting |
| Low resistance to moisture |
| Vinyl wallpapers | Beautiful design |
|
How to decorate the inside of a shower
In order not to disturb the interior of the summer cottage, it is recommended to decorate the cabin for the summer shower in the same style as the rest of the garden buildings. For external upholstery, you can use any material: moisture-resistant plywood, fiberboard, plastic or wooden lining, etc.
It is advisable to insulate the booth using polystyrene foam. They need to fill the entire space of the frame. The polystyrene foam pad must be covered with plastic film using a construction stapler. Interior finishing can be done on top of the film.
You can decorate the interior of a country shower with plastic panels, which are very easy to use. They are able to reliably protect wooden parts from rotting.
Recently, materials with waterproof properties, such as PVC film, oilcloth or linoleum, have become especially popular when decorating showers in the country. These materials can be fixed with slats coated with a protective layer of varnish.
The wooden parts of the shower stall should be carefully treated with drying oil and then painted. Thanks to this, you can extend the life of the entire structure. However, it is not advisable to paint the wooden walls inside the cabin.
These photos of the interior decoration of a summer shower show the whole variety of modern finishing materials:
DIY shower cabin design: exterior design
The interior of the shower is finished, which means we can move on to the exterior, because it is the most important part in terms of design.
Open shower with glass walls
For such a design, you will need to select glass walls in a special store, which will become the cabin partition. They are already available in certain sizes, you just need to choose the most suitable one. In addition to the size, you need to pay attention to the glass itself, its strength and thickness, level of transparency, glass pattern and its design.
If the glass for shower cabins does not suit you according to any criteria, you can always contact a specialized workshop, although the order will be much more expensive than the purchased option.
When it comes to installing glass, we recommend turning to specialists, but if you have experience installing such systems, you can do the installation yourself.
Shower cabin with partition
We talked about the partition in the bathroom in the article where we discussed the redevelopment of the bathroom. As you remember, you can build a partition from different materials, for example, plastic, wood, plasterboard. But if you need a major partition in the bathroom that will qualitatively separate the shower stall from the rest of the space, you can always lay it out of brick and line it with finishing materials in order to blend into the design of the bathroom. It’s easy to do this yourself; you just need to refer to the special articles on our website about partitions to make your work easier.
Glass block shower design
This type of partition is most suitable if you are choosing the design of a bathroom with a shower stall, where you need to correctly delimit the territory of the bathroom. Glass blocks will not become a “heavy stain” in the design, and on the contrary, they will complement the bathroom with some lightness. Glass blocks today are presented in a variety of options, and you can always choose dimensional characteristics, color, glass pattern, internal pattern, and even glass blocks for the bathroom with a special decor inside.
As you can see, even in the small number of options offered by us, you can choose a really cool and harmonious design of shower cabins, which will not be a problem to bring to life with your own hands. Of course, if you want to work with expensive materials, it is very advisable to involve professionals in the work, but if you need to form a shower space with a standard partition made of brick or from the same glass blocks, you can easily handle this work yourself.