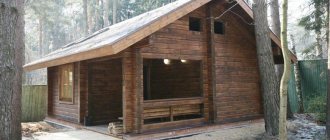
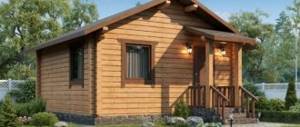
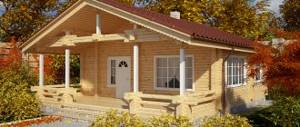
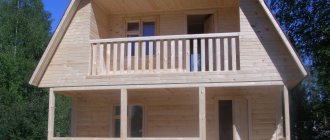
A bathhouse made of timber, built on a country cottage plot, can fit into almost any landscape design and become an element of its decoration. In addition, a bathhouse made of timber can become a relaxing place for both a family and a noisy company.
A timber bathhouse is usually small in size, and for better fire safety, it is built separately from the main house.
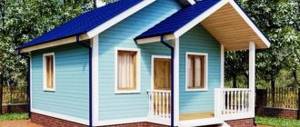
For many people today, the bath is an integral part of life. Many owners of suburban areas dream of building this facility. Building a bathhouse is a creative process, and a DIY building can save a lot of money and bring your own architectural ideas to life.
The most common types are log baths, built from various types of timber. For the construction of such a bathhouse, glued or profiled timber is used. The most common are baths with a size of 3.5x3.5 m. This size of building is enough to accommodate several rooms inside. The main premises of the bathhouse are:
- steam room;
- washing;
- dressing room;
- locker room
A timber bathhouse can be erected fairly quickly with minimal experience in construction.
House project
The first step with which you need to start building a house from timber or a bathhouse with your own hands is developing a project. This is the most interesting stage of construction, during which you can give free rein to your imagination and ingenuity. Developing a project from scratch in a special office will require a lot of expenses, so it is better to spend a few days on the planning yourself.
So, the project must include a diagram of the future house with all the details. You need to indicate where it will be located, what materials will be used for construction, where they will be purchased, at what cost, and much more. All, even unimportant aspects of construction must be indicated in it.
How to properly lay the foundation for a log house
Principles of strip foundation construction
Figure 2. Scheme of arranging the foundation with ventilation.
The first step from which the construction of timber begins is laying the foundation. Before carrying out work, a soil analysis is carried out at the construction site, which boils down to geological research related to searching for the level of groundwater and determining the soil composition.
Related article: How to install a Roman blind: step-by-step instructions
For each type of terrain with a certain soil composition, special types of foundations are provided that will serve for decades, and the presence of groundwater will not have a destructive effect on them. Before laying the foundation for a log house, it is necessary to dig a trench for the future structure. This is due to the removal of the fertile soil layer. First, sand is poured into the trench, which is compacted by filling it with water. After this, stone is poured into the trench to begin reinforcing the foundation.
Reinforcement using reinforcing bars can be done both in the upper part of the foundation and in the lower part. This will give the highest strength to the entire future structure of the log house. Reinforcement is carried out using concrete; if you do it yourself in a concrete mixer, it will not cost as much as if you buy ready-made concrete at a hardware store. Concrete delivery is carried out by such a type of transport as a mixer truck, and it can only enter areas with the largest area, otherwise the concrete will have to be unloaded in another way.
The best option would be to use a concrete mixer installed on the site. This will allow you to independently prepare a concrete solution for reinforcing the foundation, but the quality of the composition will not be as high as that of ready-made concrete. Reinforcement is placed at the bottom of the trench with sand and stones, and then this space is filled with concrete. The entire foundation strip, if it is a strip foundation, is filled with concrete to ground level. The foundation can also be constructed using formwork, and a columnar type of foundation is also suitable for a certain soil composition.
Figure 3. Diagram of the reinforcement cage for the foundation.
When using a concrete mixer, it should not be covered in the place where its motor is located, since it requires constantly circulating air to cool it after and during operation. Before the construction of a log house from timber begins, after the foundation is completely installed, it should take from a week to a month for the structure to fully stand.
For a certain type of soil, for example, swampy, it will be necessary to make a spatial frame. Only after this the formwork is created and a concrete solution is poured into it. If the foundation is laid in warm weather, then its surface must be lined with sawdust or other material, for example, moss or roofing felt. You can simply fill its surface with water. The thickness of the formwork boards should be about 40 mm. You should select formwork panels of the required height and length.
Related article: Lifespan of a water heater
Construction of the foundation plinth
The initial size of the shields is usually taken to be the distance between the center lines of the base. The shields are assembled directly on the ground using special pads. The assembly diagram of the panels for the plinth is shown in Fig. 1. The smooth side of the panels should face the inside of the base.
The foundation base should have special windows for ventilation, which are located at a distance of 15-20 cm from the ground surface. They are located on opposite sides of the base structure, each opposite the other. To create them, you can use asbestos-cement pipes adjacent to the ends of the shields, as shown in Fig. 2. This position of the pipes will prevent the ventilation holes from being filled with concrete mortar.
Figure 4. Methods for connecting timber.
The reinforcement frame of the plinth is located in the upper part, this is shown in Fig. 3, after this the concrete screed is poured. Reinforcing bars should be laid in an overlapping manner, tying them with wire.
Using this method, you can obtain a rigid structure that is firmly connected to the foundation of the future building. When starting to pour the concrete solution into the formwork, you should mark the pouring line at the top on the boards. When the base of the log house is ready, they begin to lay the first crown.
To ensure proper installation of the top trim, two layers of roofing material are laid on the plinth, taking into account the entire perimeter of the structure. To do this, a strip of roofing material is bent lengthwise and then laid on the base. To make the strapping, use smooth beams that are free of cracks, various jumps, and rot.
The foundation is the key to durability
The foundation is the basis of any house or bathhouse. The reliability of the building will directly depend on its quality. The foundation is the support of the house, which consists of:
- Sand pillow;
- Ground;
- Frame made of reinforced structure;
- Concrete;
- Holes for ventilation;
- Waterproofing.
There are several types of foundation:
- A strip foundation is a reinforced concrete strip that stretches along the entire perimeter of the house. This tape is laid under all walls of the building;
- A columnar foundation is erected in the form of pillars located at all intersections of walls and at points where there is a large load. This is an economical and reliable option that can only be used for houses with low weight, for example, the construction of a house from laminated veneer lumber is often carried out on this type;
- Pile foundation is a structure consisting of piles. Most suitable for large buildings.
Laying the foundation requires a lot of attention, as this is one of the main processes in the construction of a log house or bathhouse made of timber.
Basic information about the construction of a sauna log house
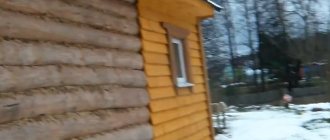
Building a bathhouse, especially the walls for it, can be quite expensive . The modern construction market offers a huge range of materials, both traditional and modern, which are widely used in the construction of buildings for specific purposes. But wood for a bathhouse is the most popular product for many reasons. These include long-standing traditions in construction, wide distribution, relatively low price, environmental friendliness and ease of use.
In this case, timber is a much simpler material to work with, and also does not require additional processing if you buy it and do not make it yourself.
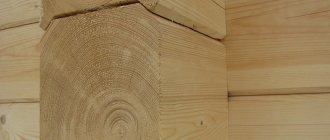
In order not to incur additional costs for wall insulation, it is worth taking timber with a cross-section of 150 x 150 mm. This thickness of wood walls is optimal and will allow you to use the bathhouse throughout the year. To make the connection between the beams more dense, and the appearance of the finished wall to be aesthetic and pleasant, each beam must be properly planed.
One of the main positive qualities of timber is that walls made of this material do not require additional external finishing; they look self-sufficient, you just need to carefully process the beams. If you plan to decorate the external sides of the walls, then it will be enough to plan the material only from the side oriented towards the interior space of the bathhouse.
The first step in building a bathhouse from timber is installing a strapping crown on the prepared foundation . The best option for choosing timber timber for the strapping crown is hardwood ash, oak and larch. Be sure to treat the building material with antiseptic substances.
Wall assembly
Laying the first crown of timber
Wall beams usually have cuts at the corners for proper installation. It is not so easy to build the walls of a log house from 150x150 timber, but on the Internet you can watch a video by professionals that shows everything. So, laying the walls begins with the first crown, which needs to be given great attention.
Firstly, be sure to take care of waterproofing. If it was not laid during the construction of the foundation, then you should think about it before laying the beams. It is necessary to lay roofing material on top of the base in two layers, and then lay longitudinal boards treated with bitumen. Only after this can the first crown be laid.
Options for assembling the walls of a log house 150x150 or a bathhouse made of timber:
Assembly in the floor of wood. To do this, you need to make holes in the timber for the dowel. A dowel is a spike made of wood or metal that can be used to connect beams to each other. Holes must be made in the corners and along the length of the beam, the distance between them must be at least 1 meter. Next, the first crown is laid, with insulating fiber on top of it, and then the laying of the next crowns begins. The dowels must be driven in starting from the third row of beams. You can watch a video on similar installation for better familiarization;- Connection of timber along the length. The standard length of the timber is 6 m. In cases where this is not enough to build a house, you can use a special assembly technology. The ends of the beams must be cut in a certain way so that they can be connected to each other into a locking structure. It will also need to be fastened with dowels, starting from the third crown;
- Assembly with main tenon. To use this technique, it is necessary to make a tenon on one of the beams, and a corresponding groove on the other. During connection, they must fit into each other, creating a corner of the log house or bathhouse. With this method, the first crown is still made into the floor of the tree, this way it is possible to achieve greater strength. The crowns are connected by dowels.
Construction of walls
Having laid the first crown and checked the existing bathhouse design, you can begin building the walls. Their construction is carried out according to the following plan:
The laid crown is covered with a layer of heat-insulating material; you can use tow, jute or moss. The first and last options are laid with an overlap to the extreme areas
The second crown is laid, which is fixed using a wooden dowel (holes for fastening should be made in advance). A sealant is injected between each layer, and the evenness of the crown is checked using a level.
The top two layers should not be fastened at the same time, as the building will cause shrinkage. Initially, you should fix the ceiling beams, and then raise the crowns.
Roof of the house
After the height of the walls has been brought to the desired level, you can begin to cut the roof with your own hands. This is a difficult process, which you can see with your own eyes in the video. The roof structure for a log house or bathhouse can be of any type. The best and most common option is a gable roof. It consists of two elements - the rafter structure and the roof.
The rafter structure is the basis of the roof. Rafters are its constituent components, the fastening of which is carried out using staples and nails. If you plan to install heating or gas in the house, then you need to provide holes for the pipes.
The next step is laying a vapor barrier film, on top of which you need to sew counter battens, after which the sheathing is installed. Afterwards, the material from which the roof will be made is selected, and then the process of laying it begins.
Stage 2. Timber processing
Processing a log for scraping
Step 1. After the consumables have been delivered to you (or you have cut and delivered them yourself), they need 25-30 days to rest.
Step 2. Next, carefully examine and sort through the logs - keep only the highest quality ones, and discard defective or damaged ones.
Step 3. Then start processing. First, peel the bark from the logs (do this carefully so that they do not crack), leaving a little of it on the sides - about a 15-centimeter strip on each side.
Step 4. After processing, place the logs in storage approximately 25 cm from the surface of the ground. You can stack it however you like - in stacks, packs, etc., the main thing is that the distance between the logs is 7-10 cm.
Scheme for preparing logs for building a log house
Floor installation
Building a log house with your own hands is not an easy task, and you need to be careful. Otherwise, living in the building will be inconvenient and uncomfortable. So, you should definitely consider installing the floor. Most often they are made double, with a heat-insulating layer placed between them. In the process of making the floor, edged boards are used.
It is hemmed from the bottom. When hemming, all stitches must be carried out evenly and accurately, otherwise after a short use, the boards will begin to tear off. Also, to install the floor, a cranial beam is used, which will be attached to the logs.
Modern coatings can be used to install the floor. They will cost a little more, but they can change the interior and design of the entire house.
How to properly build a log house from timber
To protect the gaps between the beams from water ingress, chamfer the upper edges, the size of which will be 10x10 mm. The corners of the log house should be connected using the tongue-and-groove method. It is possible to connect the timber with dowels and a main tenon, as shown in Fig. 4 in the form of a diagram. The corners of the initial crown can be connected using the half-tree method, and subsequent rows are fastened with dowels using root tenons. The main tools and materials for construction are:
- beam;
- saw;
- hammer;
- dowels;
- nails.
Related article: Sequence of work and choice of materials when decorating a balcony with your own hands
Figure 5. Different methods of fastening beams and logs.
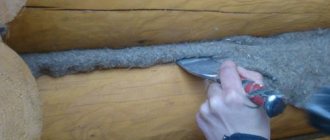
There may be gaps between the crowns of the beams, so they should be lined with heat-insulating material using caulk. As a heat insulator, they use felt or tow, cut into strips, the width of which is 20 mm less than the width of the timber.
For better drainage of water from the seams running horizontally between the beams, chamfer with a width of 20 to 30 mm is removed. It is possible to reduce the degree of conductivity between the beams by using grooves and stuffing slats in the shape of a triangle.
Using dowels that have a rectangular or round shape, you can join the beams in a vertical position, as shown in Fig. 5. To disinfect all the bars that belong to the first crown, this is done by lubricating each of the bars on all sides. The ends of the beams are left without treatment with the composition.
You should cut curved beams with your own hands by creating small sections of them that fit into window openings and door openings. The oil-treated beams are laid on the base, fastening them with staples. The construction of cobblestone walls can be similar to the process of constructing log walls.
Cobblestone walls have seams that are located in the horizontal direction, which is the main difference between log cabins and log buildings.
The seams are the most vulnerable areas of the log house walls, so they need to be not only insulated, but also covered with drying oil or oil paint.
You can protect log beams from biological effects on wood, as well as atmospheric influences, by sheathing the outside of timber walls with boards or facing bricks.
Plank wall cladding horizontally makes it easier to install the heat insulator. If the wall thickness is less than 150 mm, then additional heat insulators are used, and if the thickness is about 200 mm, then you can do without insulation.
Door and window openings in a log house
In order for a person to enter the future house, it is necessary to install doors. To allow light to enter a building, windows are needed. However, it is not possible to simply install both windows and doors - special openings are required.
Openings can be made in two ways:
- In the process of making a log house or bathhouse. This is a complex technique, since it is necessary to calculate in advance the correct location of the windows. The beams are selected in a special size and laid so that there is an opening;
- After the construction of the log house. This cutting method must be carried out with a plumb line to mark the places where the sawing will take place. The process is completed using a chainsaw. In a specialized video you can see all the nuances of the work;
The next step in the design of door and window openings is the frame. Thanks to it, you can strengthen the opening and ensure the free placement of the beams. The main purpose of the casing is to preserve the shape of the openings after shrinkage.
Dowel for timber
The crowns of the log house should be connected to each other along the entire perimeter, as well as in the corners at the locking joints using dowels or wooden round dowels. Such dowels should be made from hardwood, that is, larch, oak or ash. The process of making a dowel is as follows: take an inch board, cut it into square slats. Then cut them to the required length. Give the slats a rounded shape by trimming and chipping the sides.
There is a much simpler and less expensive, “lazy” way to make dowels. Buy ready-made shovel and rake handles at the store and cut them to the desired size. This can save a lot of money and especially time.
The installation of dowels in the timber is done at a distance of a meter and a half from each other, and without fail on each side of the log house in the corners. It is necessary to fasten the timber in those sections of the wall where windows and doors will be located, and the fastening should be done 15-20 centimeters before the cutout for the box. This will prevent the timber from subsequently being twisted out of the masonry mass during the drying of the wood and during the shrinkage of the sauna log house.
In order to install the dowel, holes are drilled in the top of the beam in such a way that the two upper beams are stitched through, and in the third there is a groove with a depth of 5 to 7 cm, no more. Strictly maintain the diameter of the dowel: it should be approximately 2 mm smaller than the diameter of the hole. If you do not follow this rule, then during the shrinkage of the frame the walls may “go wild”, which will lead to their significant distortion and affect the frames for windows and doors. The dowel should easily fit into the hole when driving and be recessed into the top beam by 5 centimeters.
This method of installing dowels is one of the most common, but far from the only one. Many masters have found their own method, which has become familiar. After all, the most important function of the dowel is to prevent the timber from moving inside the masonry and to ensure that the log house shrinks correctly during drying, during which the wood will move freely along the surface of the dowel.
The technology discussed above will make it possible to easily, without special professional skills, erect walls of the required height, while simultaneously taking into account the natural drying of the wood, and, accordingly, the shrinkage along the height of the frame of the building by approximately 7-8 percent.
Finishing a timber house
Finishing a house or bathhouse from a log house is an essential part of the DIY construction process. There are only two options for the development of events - leave the outer walls unchanged, treating them only with protective varnish or covering them with decorative elements. This is a difficult choice, because the wood texture looks beautiful and attractive, but I also want to try modern finishing options. For decoration, you can use clapboard, siding or block house.
The interior decoration of a log house comes down to two processes - mandatory and additional. The first option includes flooring, as well as installation of windows and doors. Additional features include the design of a certain interior and style in the house.
What type of wood is best to build a bathhouse from?
The durability of the bath will depend on the quality of the timber. You should pay attention not only to the quality of the wood itself, but also to the period of year when it was harvested. The timber used in the construction process must be harvested in winter. The tree is then set aside to have a resting period. Its duration is 1 month. Only after this can the material be processed in accordance with all requirements.
For a bath you should use timber that does not even have microcracks. The thing is that during the shrinkage of the log house they can cause the decay of the wood. Building material with bluish spots and a wormhole cannot be used to build a bathhouse.
The type of wood also plays an important role.
We suggest you familiarize yourself with How many bricks do you need for a stove for a home │ bricks for a Russian stove
Plumbing, electricity and heating
If you wish, you can take care of all the benefits of the modern world. The first of these is water supply. It can be of several varieties - autonomous or centralized. Centralized water supply will come from one main pipe. The advantages of such a connection are the ease of installation work, the disadvantage is the dependence on the central water supply. The autonomous option has several advantages, including the fact that water is supplied at will.
An important point, which includes the construction of a house from profiled timber or another type, as well as a bathhouse from timber, is heating. It can be presented in different forms - installing heating yourself, using portable equipment or installing heated floors. There are several options from which you can choose the one that suits your taste and budget.
Today it is impossible to do without electricity. Laying the wiring will not leave any difficulty, as well as installing switches and sockets. However, when carrying out this work, do not forget about fire safety rules.
Making a log house with your own hands is considered a difficult task, the execution of which will require a lot of effort and time. It will be more difficult to build a comfortable and convenient log house without special skills or little experience. It is recommended to use the help of specialists and always be prepared for additional costs.
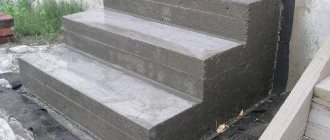
Construction of the foundation
When building a bathhouse from profiled timber, a strip foundation would be an excellent option. To build it you must perform the following steps:
- A trench is being dug. The perimeter of the pit should be slightly larger than the perimeter of the future bathhouse.
- A sand and gravel cushion and a reinforcing mesh are laid out.
- The formwork is installed and poured with concrete. The suitable foundation height for building a bathhouse is considered to be 0.7-1 meter. The height of the foundation is selected taking into account the degree of soil freezing.
The base should rise above the ground by no less than 50 cm. Thus, the lower crowns of the bathhouse will be protected from waterlogging.
Positive aspects of the “no finishing” method of building a bathhouse
- Reduced costs compared to complex arrangement.
- You can use boards and timber with natural moisture.
- The possibilities for choosing finishing materials are expanding.
- Guaranteed reduction in project delivery time.
The finished product of assembling a timber bathhouse “for shrinkage” is wall structures under the roof, located on a suitable foundation. In this form, the building is not yet suitable for use, but it can already stand in the open air for 2-3 years without negative consequences. If the budget is not immediately enough for the entire complex of work, then it is reasonable to start with the construction of the box.
New wooden buildings are subject to shrinkage deformations - changes in the shape of wood due to loss of moisture. Lumber with natural moisture content is the most affordable, but the active drying phase lasts longer. Which cannot be called a problem in situations where the construction process is initially divided into several stages spaced apart in time.
Finishing gives the bathhouse a complete look, which each person associates with different ideas about the “ideal” design of the facade and interior decoration. The construction of a log house “for shrinkage” provides a lot of unique opportunities for the client’s subsequent creative self-realization.