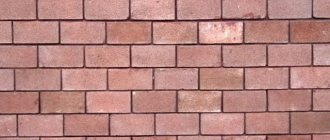
Installation of eurolining with your own hands, fastening of the sheathing, width and thickness, painting
If you want to make your own cladding with eurolining, installing it will not be difficult, because the planks made according to a single standard can be easily connected to each other and secured to guide rails. However, you need to be careful when purchasing material. Some sellers and manufacturers are trying to offer completely different products under the guise of eurolining.
Not every processed lath with a tongue and groove can be called eurolining, the dimensions of which are: thickness - 12.5 mm, board width with a groove 96 mm, without a groove - 88. The width of the groove 8 mm eliminates the formation of cracks when the wood dries. The length of the slats is 2; 2.2; 2.4; 2.5; 2.7; 3; 4; and 6m. These dimensions are obtained by processing wood using appropriate equipment. If you come across other sizes, you can be sure that such boards were made on outdated equipment, often restored after being written off.
No less interesting is the question of how much eurolining costs. The price of the material depends on several factors: the type of wood from which the board is made, class and length. On average, 1 m2 of class A will cost 7-8 dollars, class B about 6 dollars, and class C from 4.25 to 4.75. At the same time, a longer lining will cost a little more than a short one.
Eurolining is installed on pre-installed wooden guide rails or bars. The connection of the planks is carried out according to the tongue-and-groove pattern and is additionally fixed with small nails. Installation begins with the surface farthest from the entrance. First, all surfaces are covered, after which the joints are sealed with decorative corners and baseboards.
How much does the lining cost?
The cost of the boards depends on many parameters, including the type and type of wood, the length of the panels, the equipment used to make them, etc. Based on price, lining can be divided into three large groups.
- Expensive. High-quality material, made from soft hardwoods. As a rule, such panels are processed according to European standards. The cost usually starts from 310 rubles per sq. m. m.
- Average. Hardwood, which will cost 215-300 rubles per sq. m. m.
- Cheap. We are talking about boards made of coniferous wood. These cost between 100-215 rubles per sq. m. m.
If you plan to hire a specialist for sheathing, you can calculate the approximate cost of his services. Finishing one square will cost somewhere between 150-350 rubles (the specific amount depends on the complexity of the work and the qualifications of the craftsman).
Types of lining
Experts distinguish between several types of lining, depending on what the board is made of.
- The plastic board is made from polyvinyl chloride mass, which affects its functional features:
- long period of operation;
- moisture resistance;
- tolerance of various temperature conditions (from -50 degrees to +50 degrees);
- variety of colors.
But experts also note a small drawback of this type of finishing material: low mechanical strength.
- The wooden board is made entirely from wooden edged boards and is classified according to the profile: “Standard”, “Calm”, “Europrofile”, “American”.
For this type of lining, wood is used from species such as pine, spruce, linden, alder, the properties of which affect the characteristics of the finishing material. - MDF lining, or medium-density fiberboard, is made by pressing wood chips, which makes this type of building material different:
- environmental friendliness;
- hypoallergenic;
- light weight;
- Possibility of styling like marble, stone, granite,
etc.
Do-it-yourself finishing inside the house can be done from any of the named types of lining.
What is a lining
This is a wonderful finishing material that adds comfort to the room and creates a cozy atmosphere. It can be done:
- Made from natural wood (birch, pine, larch, aspen, linden).
- Made of plastic.
Plastic lining has the following advantages:
- Low price.
- Easy installation.
- Easy care.
- It is rich in colors, resulting in interesting color solutions.
However, it also has disadvantages - it has low environmental friendliness and is damaged even by minor mechanical influences, so it will not last long.
Only wooden lining made of natural wood, with which the room is sheathed, is capable of creating a unique microclimate in it. So, if funds allow, it is better to purchase wooden lining as a finishing material. In addition to additional costs, a lot of effort will have to be put in during installation, but all this will pay off remarkably. You can save a little money if you do the work yourself.
The positive aspects of wooden lining are good sound insulation, excellent heat retention, high resistance to rotting, durability, and a beneficial effect on the human body.
Finishing loggias with eurolining photo of balconies covered with boards made of linden, aspen, larch, cedar
The use of the material is quite wide. In the city, wood paneling can be found on a balcony or loggia, in the hallway, and in the kitchen. Eurolining is also used for finishing rooms. Wood is used more often for finishing country houses. Eurolining for a bathhouse is often used, and a material made from wood that does not rot, such as larch or aspen, is used.
Due to its properties, eurolining aspen is used for exterior finishing, for example, for a balcony or loggia. Aspen cladding can also be found in the bathroom. Of course, in conditions of high humidity, other types of wood can be used, but larch and especially cedar are less common due to their higher cost.
Euro linden lining is well suited for interior decoration. Soft and delicate linden wood will add light and warmth to the room. More “budget” materials are also used for interior decoration: spruce and pine. But lower cost does not mean poor quality finish. Each material has its own characteristics and it takes skill to discover and show its beauty. Pine wood has wonderful shades of yellow from soft lemon to golden red.
The use of euro-lining made of spruce will add a pink and reddish tint to the interior. It should be remembered that both pine and spruce contain a large amount of resin, which is released when heated. It is for this reason that it is not recommended to use spruce and pine for finishing steam rooms in baths and saunas. And when decorating balconies facing the sunny side, you need to monitor the condition of the wood and promptly remove protruding pine.
Material
Decorative lining is a type of molding - long-length lumber - and is a profiled board with a standard tongue and groove connection. A tongue and groove joint is a type of longitudinal tongue-and-groove connection with an open groove. Tongue piles come with locks (which do not necessarily require additional fastening of the boards to the base) and without locks. Lining for walls and ceilings is produced exclusively with lockless tongue and groove, because Locking tongues are reliable only in flooring. Laminate flooring is produced with interlocking tongues, which is much more expensive than lining. It is impossible to lay it on the walls and especially on the ceiling without additional fastenings. There are standard fasteners for laminate, similar to those for lining, but working with laminate is more difficult and it does not improve the microclimate of the room. The surfaces of walls and ceilings are subject to wear incomparably less than the floor, so there is no point in spending money on covering anything other than the floor with laminate.
Wood
Wall lining is made from various types of wood, both ordinary local and imported expensive ones. For budgets up to medium level, lining made of pine, spruce, oak, ash, larch and birch is available, see fig. Cedar, maple, beech, walnut and exotic woods are expensive. The dressing room and rest room of the bathhouse are lined with pine clapboard, the washing area with oak, aspen or alder; perhaps larch. Steam room - linden, aspen, alder; rarely - oak.
Cladding made from various types of wood
Note: wood paneling and wood for lathing under it must be acclimatized before use - kept in the room that will be finished for at least 24 hours, stacked with ventilation ducts.
Pine lining is either the cheapest or very expensive. The cheap one is knotty, and the expensive one is made from the trunks of mast pine trees without knots. Knotty pine lining nevertheless serves as an excellent decorative material in skillful hands. The breathing of pine is smooth and deep. Bactericidal properties and resistance to fungi and pests are excellent. To decorate residential premises, you need to take clapboard made of dry chip pine, cut down in winter. Pitch pine, cut down during the period of sap flow, holds up in the open air no worse than bog oak, but is too resinous and expensive. It is easy to distinguish resin from dry wood chips on sale: either streaks of resin are visible on the resin, or it stains your finger with it if you run it with pressure along the fibers. Interior decoration of a house with pine clapboard is the optimal option in terms of beauty, benefit and cost.
Spruce is similar in many ways to pine, but it is not necessary to cover the nursery and kitchen with it: spruce is not divided into dried wood chips and tar. The resin content of spruce wood is approximately the same all year round. Spruce paneling is light, but it darkens faster than pine under the influence of ultraviolet (UV) radiation, so it is better to decorate rooms with windows to the north and northwest with spruce paneling. A special feature of spruce wood is its excellent resonant properties. A conversation in a spruce-trimmed office turns out to be solid, thorough, and the music or sound of a movie in a “spruce” living room is clear, rich, and lively.
Note: on sale under the guise of spruce there is often lining almost the same color tone as pine. It is made of fir. There is more resin in it than in spruce, and the sound resonance is weak. Fir lining is well suited for the hallway, balcony, glassed-in veranda and other rooms where people enter in street clothes and shoes - fir lining retains bactericidal properties for a very long time.
Oak is famous for its strength and durability. With regard to decorative lining, the important thing about it is that the tone of oak wood differs within the same board.
This gives additional design possibilities. Ash is also uneven in tone, but is lighter than oak and breathes easier. The oak-lined living room with south-facing windows can be stuffy in summer; It is generally not recommended to decorate the bedroom and children's room with oak. The oak muffles the sounds; If from your musical neighbors, then oak paneling can reconcile them with unexpected joy. Oak resists rot and mold very well, but wood-boring beetles readily gnaw at it. The house beetle most often infests in oak houses. Larch is very resistant, breathes like pine. Not afraid of fungi and insects;
ants and cockroaches avoid houses lined with larch, even mosquitoes are reluctant to fly there. Larch wood has a wide range of tones from tree to tree; the texture of its layers is more refined and expressive than pine. Larch lining, selected by shades, is expensive, but re-grading it is much cheaper and you can achieve interesting effects in the cladding. There is quite a lot of resin in larch, but it quickly evaporates and (mostly) becomes bituminized: larch lining, aged for a year, in this respect is equivalent to pine made from dry chips. It is the bituminization of the main part of the resin that explains the high resistance of larch wood. Birch gives an exceptionally light, cheerful, positive interior and is aesthetically compatible with most modern design styles. Under the influence of UV, birch darkens slowly and weakly. Unfortunately, birch wood is very easily affected by fungi. The only 100% reliable way to guarantee birch sheathing against the appearance of colored veins and stains is underfloor heating combined with good external insulation.
Linden, alder, and aspen are of little use for cladding residential premises due to their low mechanical strength; clapboard made from these types of wood is used only for cladding bathhouses. Lining the steam room in a bathhouse with linden makes the bathhouse light and suitable for women, children and weak people. Steam room with alder or aspen paneling - regular, medium. The oak bath is vigorous. It is good to maintain heroic health and strength, but it will not benefit an ordinary person.
Note: it is unacceptable to sheathe the steam room and washing baths with knotty clapboard made of any wood, because in the bathhouse atmosphere the twigs soon begin to fall out. In the steam room, in addition, knots turn out to be sources of fire and burn hazards; heat is concentrated in them.
Profile and width
Cheaper and easier to install with your own hands (see below) is the Soft Line profile lining (on the right in the figure); if the design requires minimal visible gaps between the boards, use eurolining.
Wooden lining profiles
The Shtil profile lining differs from it not only in its smaller thickness, but also in its more rounded molding - shaped chamfers of the outer ribs. Shtil lining, as a rule, is expensive, made of wood without knots. Lining under the timber is used, in addition to purely decorative purposes, for cladding utility bath rooms, because due to its greater thickness, it conducts heat less well and is less susceptible to knots falling out. Larch lining for timber that is at least a year old from the time of sawing can also be used to cover a washing room, but not a steam room.
Note: Eurolining is also available with a ridge height of 16 mm. This is the so-called. wind-resistant, for external cladding. Whether or not to sheathe the walls inside is up to you.
Lining of any profile is produced in boards of different widths. If you intend to decorate the room(s) with clapboards with your own hands in an inexpensive, simplified way, as described below, then the width of the board becomes important: the last one in the installation order should be cut to the width as small as possible, and the trim should be no narrower than the baseboard + deformation gap. Let's explain with an example. Let's say the wall length is 4 mm (400 cm). We are trying to take a board 150 mm (15 cm) wide along the top surface for vertical cladding (see below). 400/15 = 26.67 boards will be used for cladding. So acceptable, 2/3 of the last remains in width; 4/5 or 5/6 would be better. With a 13 cm board you get 400/13 = 30.77 more expensive boards; a 180 mm board will not work, because... the width of the last one will remain only 0.22. A 200 mm board won’t work either: it seems like a whole number of them can be laid, but there is no margin left for trimming, see below.
American
American lining came into construction from wooden shipbuilding: there, cladding with overlapping boards is the only way to get seams suitable for waterproof caulk. American lining can be flat (item 1 in the figure) and stepped (item 2 and item 3 - profile with dimensions), to imitate herringbone cladding along its length.
American lining
It is believed that American women can only be sewn with horizontal belts. So, installing an American Christmas tree (like a blockhouse) with vertical panels is quite possible:
- Each panel will go 2, 4 (as on item 4), 6, etc. an even number of boards.
- The ridge is cut off at the extreme boards of the panel.
- Under the joints of low edges (with cut ridges) bars are placed perpendicular to the main beams of the sheathing, see below.
- High edges are connected with dowels (lamellas) - strips of wood or plywood. There is no need to cut them exactly according to the profile of the grooves; it is only necessary that the dowels fit tightly and the boards do not play relative to each other.
Sheathing made from vertical American panels looks no worse, if not better, than herringbone sheathing (see below), but it is technologically simpler.
How to make a frame
Smooth bars are ideal for making a load-bearing frame. To make the structure more reliable, the bars must be fixed at the edges. This must be done in accordance with the readings of the plumb lines and level. The markings on the wall are made in such a way that the sheathing elements are separated by the same distance. You need to know the approximate size of the bars: 1.5x3 cm, you can take 2x4 cm.
Installation diagram of the lining.
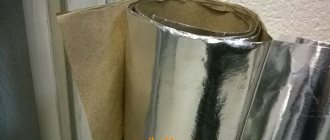
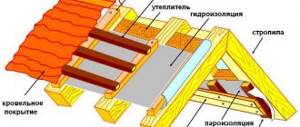
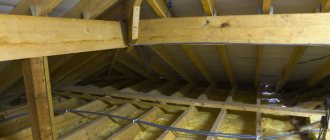
As for the insulation, the first thing you need to do is lay a waterproofing film so that the lining of the room is protected from moisture. The film should be applied with the smooth side to the insulation, and the rough side should be applied to the lining. The film and foil are overlapped by 5-10 cm; mineral wool can be used as insulation, but polystyrene foam should not be used for internal insulation.
If the walls in the room are smooth, it is permissible to use slats with a thickness of 1 to 1.5 cm; they can be fixed to the wall using nails or screws. For greater reliability, waterproof putty can be applied to the wall.
If the wall does not have the highest quality surface, then you need to use bars that are larger in cross-section, this way you can lay insulating material between the frame elements. The bars are fixed with screws or bolts; for this you need to use a screwdriver. As for the choice of fasteners, it all depends on the type of walls - brick, wood or monolith.
Features of clapboard cladding
As for the distance between the bars, it can be from 40 to 50 cm.
Whatever the covering, you should always make sure that the boards fit as tightly as possible to the wall. It is recommended to install the lining from the ceiling, and then begin sheathing the walls. Metal staples and screws are useful for installation.
The planks can be attached in several ways:
- With nails.
- Clips that are mounted near the groove.
- You can use a lining that has an internal latch.
Types of lining fastening.
If you are going to work with a hammer drill, then there should be no voids in the walls. If there are any, then you need to drive a wooden plug into them, then insert a screw or nail.
When covering walls, difficulties may arise near switches and sockets. Here you need to do this: turn off the electricity, carefully disassemble the socket body, attach a piece of lining to it, mark the place for the cut, cut out a hole with a jigsaw, attach the lining, then re-fix the socket and carefully mount the cover. Lamps and switches must be fixed directly to the casing. If you need to fix some interior details on the lining, you can do this using screws.
https://youtube.com/watch?v=eH7LWNMJZ78
Useful tips
- If you use stain, you can easily change the color of the lining. The material is painted with a brush; glossy varnishes should be abandoned, but semi-matte varnishes are perfect. After the layer of varnish has been applied, it should be rubbed with sandpaper (you must choose fine-grained sandpaper), after which an additional 1-2 layers are applied.
- If the lining is wooden, then before installation it should be treated with fungicidal agents.
- The lining can be given an attractive shine that resembles gold, for this it should be treated with wax, and you can also impregnate it with warm drying oil.
- The wood can be bleached if desired. To do this, take 1 part of a 20% ammonia solution and mix it with 10 parts of a 20% hydrogen peroxide solution. This mixture should be applied to the boards, and it should be washed off after 5-7 minutes.
- If there is any damage on the lining (for example, cracks), they can be easily removed with wood varnish and glue. You can also use special putties.
Thus, you can easily cover a room with clapboard. You just need to be careful and attentive, work with high-quality materials, take your time, then everything will definitely work out. The work can be done with your own hands, and the room will look perfect.
How to properly sheathe walls with clapboard with your own hands: let’s take it apart carefully
The construction of any structure is completed with interior decoration . The main criterion for interior decoration of a house is to give it a well-groomed appearance and efficient operation. One of the popular types today is finishing with eurolining.
The material is a thin board fixed around the perimeter of the room. Lining has been used for interior decoration for quite a long time. This type of interior decoration came to us from transport construction, when wooden panels were used to cover cars.
to contents
Material properties
The lining has a number of positive characteristics :
- high environmental friendliness of the product;
- pleasant appearance;
- resistance to extremes of high and low temperatures;
- increased sound insulation;
- lack of temperature coefficient.
Lining is actively used when covering walls:
- wooden houses, cottages, baths,
- terraces, balconies,
- as decoration for rooms,
- for a bright accent in wooden buildings.
With the right choice of finishing material, the durability of such finishing can reach thirty years.
For craftsmen who have experience in home wall cladding, attaching wide lining is not a difficult task. The cost per square meter of cladding is extremely low, with the exception of special surface decoration.
The lining is monotonous in appearance, but experienced designers are always ready to give it a universal look and find original fastenings for the walls.
Initially, only wooden finishing was used in the construction of houses, but modern trends and craftsmen are coming up with other materials for lining. Today, this type of finishing is widely used in modern construction and renovation.
This material has rightfully gained its popularity due to its cost-effectiveness. Construction markets and stores are overflowing with a wide range of linings for interior decoration.
to contents
Kinds
The main types of lining differ in the material from which they are made. Every year new products appear, presented by such materials as:
- Aluminum , it is strictly not recommended for interior decoration due to its lack of resistance to high temperatures and its unpresentable appearance.
- PVC panels will allow you to save on the purchase of material, but will lose in durability.
- MDF is a rather pleasant material that easily fits into any interior. Wiring can be easily hidden under the MDF, and room cleaning work can be done.
Despite innovative technologies in construction, wood is . Various types of wood are used, the most common are linden, cedar, ash, birch, and alder.
to contents
Which one is better to choose?
For the interior decoration of saunas, it is recommended to purchase deciduous wood , which does not allow moisture to pass through and does not release heat outside the room. A house decorated with softwood will be filled with a pleasant aroma.
There is an opinion about the fragility of wood and the influence of external factors on it. A few decades ago, one could agree with this opinion, but not today, when stores are filled with a huge selection of various wood care products.
When choosing suitable wood, its class is extremely important :
- Extra - has no defects or chips, is considered an ideal option for repair;
- A - has no core, knots and resin pockets are allowed on it (no more than two);
- B - material with two knots, two pockets, one spot of contrasting paint and two cracks can be classified;
- C - is already less suitable for finishing work, as it has a number of the above-mentioned disadvantages.
Two cladding options are especially popular
- horizontal cladding - fastenings are carried out from the ceiling to the floor, which prevents the ingress of debris and moisture;
- vertical sheathing is done from the corner, and on the back side of the board the clamp is placed in the groove, then attached to the sheathing.
to contents
How to cover a “block house” with decorative clapboard?
Particular attention should be paid to the decoration for the house - “block house” . This finish is suitable for the living room, kitchen, hallway, and will be an excellent solution for the attic.
An important advantage is that the “block house” technique allows the walls to breathe and create a pleasant microclimate for the inhabitants of the home. This type of fastening will create improved sound insulation compared to the above methods.
Read more about the “block house” in our
article.
Before performing work, the calculation of fittings and quantity of material is carried out. But an even more important process is to let the freshly purchased material sit without packaging for about three days in the room where it will be installed.
to contents
Preparing the walls
The panels are installed on dry and level walls, so the surface should not contain defects. The walls must be waterproofed using a special film or deep impregnation.
Without this procedure, wooden panels may not withstand the increased moisture content, and the work will have to be redone.
Areas with fungal infections on the wall are treated with an antiseptic. It is better to treat all the walls with it. After thoroughly impregnating the walls, they will become resistant to the negative effects of fire and mold. Impregnation with a water-repellent composition is required before starting such work.
Find out how to level walls with plaster from our article.
If desired, additional materials can be installed for thermal and sound insulating construction. Expanded polystyrene or mineral boards are installed as sound insulation.
A vapor barrier film can be purchased when purchasing facing material. The work begins with covering the walls with film, which in the future will serve as vapor insulation.
to contents
Frame making
The production of the frame occurs in the following stages:
- The selected vapor barrier material is attached to the wall with an overlap at a distance of 10-15 cm .
- Lathing bars are attached on top of the waterproofing material .
- Thermal insulating material is attached to the sheathing, and a waterproofing film is laid on top of it (see photo). The materials are secured with a stapler and staples.
- Another layer of sheathing is attached to the main frame, this time vertical.
Staples and a stapler will help create the desired fixation.
The sheathing will be more reliable if installed horizontally. The timber is fixed to the base using nails or self-tapping screws.
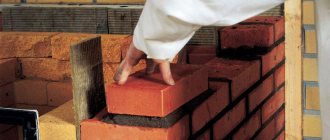
If the wall consists of brick blocks, fixation is carried out with frame dowels, and holes for fastening are made in the wall surface.
The second lathing is checked for level; it is on it that the blockhouse panels will be installed. To give the panels a smooth and finished look, a sheathing is created, since the panels are attached to it.
Wooden panels are heavy, so for high-quality sheathing you will need to make a reliable frame.
For a frame using the block house technique, a wooden base is suitable. The frame must be made of slats, the distance between which does not exceed 65 cm .
Before installing the frame, you need to mark out the places where sockets, switches and other electronics will be located. These marks are needed to make cuts in the cladding before installation.
The bars can be secured to the wall using either nails or mounting strips. After completing the frame manufacturing work, you can begin finishing it in the block house style with your own hands.
See the video for installation of the sheathing:
to contents
Panel installation
For accurate measurements, a plumb line, square and level are used. To calculate how much board will be used, you need to make simple calculations: divide the total area of the room by the area of one board.
By calculating the area of one board, it is easy to find out how much material will be needed to cover the entire surface. If there are not enough panels, additional clamps to eliminate the problem.
Fastening the wooden panels begins on the pre-installed sheathing. The initial strip is installed from below, with an indentation of up to 1 cm , this procedure is done to actively ventilate the walls and avoid further deformation of the material. A similar indentation is made at the top of the wall.
The block house is installed only in the horizontal direction. Sometimes craftsmen choose a vertical installation, but this method has a lot of disadvantages.
Fastening to the frame is carried out using self-tapping screws at an angle of 30-45 degrees. A hole is made on the surface of the panel with a thin drill, and then a self-tapping screw is screwed into it.
The screw head should not go deeper than 3 mm.
Next, the panels are gradually installed from bottom to top. The tenon should point upward when installing the panel. The wood is connected to each other using tenons and grooves. If desired, corner joints are fastened with corners.
Once the installation of the panels is complete, it is recommended to install skirting boards at the bottom and top of the walls. When the stage of fixing the main part of the sheathing is completed, you should disguise the screws to make the walls look beautiful.
There are several ways to hide screw heads:
- Using material left over from work.
- You can use “wood paste” made from PVA glue and sawdust.
- Special plugs, which can be bought at a hardware store, can easily cover the unevenness.
Plugs are formed from the scraps and secured in the recesses with PVA glue. Uneven places are smoothed with sandpaper.
The thick composition is poured into the holes. The disadvantage of this method is the possible discrepancy between the color of the composition and the wood.
Attached using PVA glue .
For detailed installation of the panels, watch the video:
to contents
Decoration of corners
Decorating corners using the block house technique makes it difficult to do it yourself.
You can purchase “boats” in advance for finishing internal corners and elements specifically designed for external corners. The finished baseboards will be in close contact with the block house only at the top point, as a result of which the cladding will have unclosed gaps, and this is unacceptable.
It is much more convenient to use planed timber measuring 5x5 . Its installation is carried out before the sheathing begins. The block house is attached to the timber and the finish will look much smoother and more professional. This method is effective for interior and exterior corners.
The final stage is grinding the surface, but such work should be done with caution. One awkward move can ruin the structure of the board.
How to carefully make corners, watch this video:
to contents
Which coating to choose: paint or varnish?
After successfully fixing the product, it is recommended to varnish or paint it. Indoors, the tree has every chance of being eaten by a tree beetle or covered with fungus. To avoid this, the following types of impregnation are used:
- alkyd;
- acrylic;
- linen
Impregnation will significantly extend the service life of the Blockhouse, reduce the occurrence of cracks on the surface, and, most importantly, give the wood fire-resistant and bioprotective properties.
In the event that naturalness is an important point, and you want to preserve the appearance of wood, an alternative to painting is varnishing. The surface for varnish must be perfectly clean and free of foreign irregularities.
To work on the walls you will need a roller or a regular paint brush. The coating is carried out in several layers , not counting the first tonic impregnation with stain.
Which covering method to choose will depend on the wishes of the owner of the premises. If he is a traditionalist and wants to preserve the natural look of his walls, he will need a varnish solution.
If the room is planned as a youth room or the walls should become a bright accent, of course, preference should be given to paint.
If the finishing is done at the highest level, the room will look noble and presentable.
to contents
The cost of installing the lining
Installing wooden lining is a labor-intensive process, consisting of many operations: preparing the walls, installing the sheathing, attaching the material to the walls and final impregnation.
If you have difficulty installing it yourself, it is recommended to contact a specialist. The approximate cost of one square meter varies from 800 rubles.
The detailed cost of the work looks like this:
- Assembly and preparation of the sheathing costs 180 rubles.
- Wind protection device 150 rubles.
- Coating structural elements with an antiseptic costs 30 rubles.
- Installation 400 rubles.
- Impregnation with varnish or paint 70 rubles.
For a more accurate answer to the question about the cost of work, you should contact representatives of the construction company.
Advantages
Lining has many advantages:
- low thermal conductivity;
- good air exchange;
- easy care;
- service life – 30 years;
- installation is simple and fast;
- UV resistant.
If you use plastic material (PVC panels) to cover the walls, the room will be visually much more spacious. In addition, electrical wiring can be hidden under the board, which is aesthetically reflected in a modern home.
Wooden lining has different lengths from 1.5 to 6 meters. Thanks to this, anyone can easily select the right material, while using it sparingly.
In order to cover the walls with boards, you can use simple tools that a good owner always has available.
Lining in the steam room: vertically or horizontally
There are two ways to solve the problem of how to line a bathhouse with clapboard quickly and efficiently:
- With horizontal planks;
- With vertical slats.
With the horizontal method, the lining is installed parallel to the floor surface. In a vertical position - perpendicular to the floor.
The horizontal position more effectively protects the lining from water penetration. This ensures good ventilation of the space between the wall and the panels.
The choice of method affects the technology of work and the final cost of repairs. For lining the inside of a bathhouse, they prefer the horizontal method. In this case, the wooden panels are installed with the tenon facing up.
We invite you to familiarize yourself with Projects of two-story baths made of foam blocks
Paint for lining
Staining radically changes the color of the wood, but the coloring must be repeated at least twice. Various compositions are used.
Oil paints are well absorbed and very resistant to moisture. Usually used for external work. It is recommended to give preference to light colors, since lamellas painted dark quickly lose their brightness.
- Acrylate ones are more durable, but create a vapor-proof film, so they are also not used for interior decoration.
- Acrylate scuba tanks are the most popular option. The water-based composition is easily absorbed into the top layer of wood and does not create an impermeable film. The lining painted with aqualac does not need protective varnishing. The photo shows lamellas painted white.
Design solutions
The surface of a wall covered with wooden slats does not seem attractive to everyone, while the quality of wooden lining is much higher than that of plastic. Painted slats successfully solve these difficulties. But when choosing a color, you should take into account not only personal preference, but also other considerations. The walls and ceiling make up the majority of the room, so obviously their color will be the base color. This means that the rest of the color scheme depends on the shade of the painted lamella. Therefore, you need to approach your choice responsibly.
- White is a universal color that visually increases the size of a room and “brightens” it. Despite its neutrality, white-painted lining does not fit well with warm tones, and therefore further decoration and furniture should be kept in cold tones. The photo shows the interior of a room lined with white clapboard.
- Golden and beige also expand the perspective and visually raise the ceiling. Refers to a neutral range, allowing combination with almost any color, but only cold tones. When choosing or dyeing yourself, you should achieve a complete absence of reddishness.
Red-red color – the wood has a bright warm color, very vibrant and rich. However, the choice of appropriate shades for the interior is quite limited: orange, red, brown, possibly green, but always in warm colors. This palette is extremely demanding. The photo shows a design in the “autumn” style with painted slats.
Tips for decorating the inside of a house with clapboard, how to do it yourself
If the room inside the house has high air humidity, then the finishing should be done with plastic lining.
When installing wooden sheathing, it must be treated with special primers, which will avoid damage in the event of moisture accumulation.
Each joint between elements must be treated with a sealant, especially indoors in a house with high humidity.
For plastic boards, use construction adhesive or liquid nails. Remember that an air cushion is needed between the wall surface and the wooden board. To hide the ends in the finishing, you can adapt decorative elements with your own hands (for example, external and internal wooden corners).
If you are not confident in your abilities and a positive end result, seek help from qualified builders who will help you carry out all the necessary finishing work inside the house.
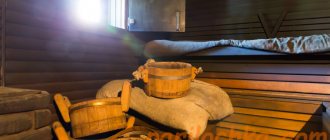
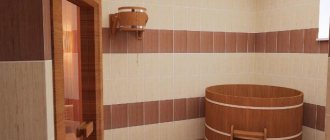
Interior decoration of the bath
Interior decoration of a bathhouse with clapboards
A bathhouse is usually built from pine logs. Coniferous wood is not suitable for interior decoration of the steam room. When it heats up, it releases resin. With a small amount, the aroma of the Christmas tree calms and puts you in the mood for relaxation. The sauna creates an atmosphere of strong smell and heavy air. It is better to line the walls in the steam room with alder, which emits a healing aroma, or birch. The peculiarity of the bathhouse lining is the use of wooden nails. The metal has high thermal conductivity and will leave burns on the body upon contact.
Material and tools for work
First of all, you need to buy unedged boards about 3 m long, their width should be about 100 mm, and their thickness should be at least 20 mm. You can choose any type of tree, the main thing is that it does not have mechanical damage, knots or rot. Oak, linden, cherry or pine are suitable for this. Before work, check that the wooden lining is well impregnated with special antiseptic compounds.
Required tool:
Tools for working with lining.
- milling machine or surface planer;
- color pencil;
- ruler;
- set of cutters;
- mounting stapler;
- mineral wool;
- wood screws;
- perforator;
- nails;
- plumb and level;
- waterproofing film;
- hammer;
- polyurethane foam (slightly expanding);
- wooden planks with a section of 4x5 cm.
What determines the price
The cost of such material as eurolining depends on many factors. This includes the size of the board, the type of wood from which it is made (pine, linden, etc.), and the quality of the board itself. Therefore, when you need eurolining, buying it will not be a problem, but the price may be different.
Of course, you can buy non-standard lining, for example, a length or width different from the established one, its price will be lower, or a class C board, with holes for knots. In this case, the price will also be lower. Knot holes are sealed with either wooden plugs or foam.
| Thickness x Width x Length | Grade | Price per m2, rubles |
| 12.5 x 96 x 2000 – 4000 mm | A | 250 |
| 12.5 x 96 x 6000 mm | A | 230 |
| 12.5 x 96 x 2000 – 6000 mm | B | 220 |
| 12.5 x 96 x 2000 – 6000 mm | C | 160 |
| 12.5 x 96 x 2000 – 6000 mm | Extra (glued) | 455 |
| 12.5 x 96 x 2000 – 6000 mm | Extra (solid) | 660 |
| 12.5 x 96 x 2000 – 6000 mm | Calm | 240 |
| 12.5 x 120 x 2000 – 6000 mm | Calm | 260 |
| 12.5 x 140 x 2000 – 6000 mm | Calm | 250 |
Technology of clapboard façade cladding
In addition to the lining itself, additional materials will be required:
- Metal profile or timber for forming the sheathing;
- Insulation to retain heat. It is advisable to use sheet mineral wool;
- Self-tapping screws on which the sheathing will be attached;
- Clamps used for installing lining;
- Vapor barrier providing ventilation of the facade;
- Waterproofing.
Tools you will need:
- Hacksaw (for metal or regular), depending on what material is chosen for the sheathing;
- Screwdriver;
- Jigsaw for cutting lining. If you don’t have one, you can get by with a hacksaw;
- A construction stapler that is used to fasten waterproofing material.
Tape measure - an important measuring tool
The technology of cladding a façade includes the following steps:
- Formation of vapor barrier;
- Fastening the frame;
- Laying thermal insulation;
- Fastening waterproofing to the sheathing;
- Formation of the second frame;
- Installation of lining on the facade.
Formation of vapor barrier
The purpose of the vapor barrier is to ensure ventilation of the façade. It can be polyethylene film, roofing felt or aluminum foil. To ensure ventilation, the vapor barrier material is attached to a pre-formed sheathing of 25 mm wide slats. After the vapor barrier layer is fixed to the slats, it is necessary to make small holes at the bottom and top between the slats. With their help, ventilation will be carried out.
Laying thermal insulation
Thermal insulation is placed on the facade, taking into account some features:
- Mineral wool slabs must be laid in such a way that there are no gaps between them;
- It is necessary to lay two layers of mineral wool;
- The slabs are laid offset. That is, the joint of the slabs of the lower layer should be closed by the middle of the slab forming the top layer.
Mineral wool slabs have sufficient elasticity that they can be held between boards without fastening.
Securing waterproofing
The waterproofing film is fixed on top of the heat-insulating material. It is capable of letting steam through, but retains water. The film is secured with staples to the frame boards. It is advisable to lay the film overlapping, gluing it with tape. The waterproofing film has a smooth and rough side. The rough side should be facing the lining, and the smooth side should be facing the insulation.
Formation of the second frame
The slats of the second frame are attached to the slats of the first, perpendicular to them. To do this, take slats 0.5 mm wide and 2–3 cm thick. The presence of a second lathing is necessary to provide additional ventilation and removal of moisture that forms on the film in the form of condensation.
An empty space is formed at the bottom, which must be covered with a metal mesh. Otherwise, there will be rodents in the wall, which will be very difficult to remove.
Installation technology
Finishing material can be installed in a hidden or open way.
The first stage of finishing consists of thoroughly treating the material with antiseptic agents. Next, it is better to dry the material. The difference between eurolining and lining is that the tenon size is not 4-5 mm, but 8-9 mm. This makes it possible to more securely join the boards. The photo shows the most common installation methods.
- The most popular method is to fasten the boards with self-tapping screws. You can start installation from both the ceiling and the floor. In the locations of the tenons, drilling is carried out to the size of the screws to a depth of 10 mm. When decorating a house with your own hands, you need to stock up on a screwdriver or screwdriver. With their help, self-tapping screws are screwed into the boards, after which the caps are cut off and the surface is sanded.
- Another way to decorate with eurolining inside a house is by concealed fastening with nails. The cladding starts from the top. A hammer is used as a tool for screwing in nails. A prerequisite is the use of galvanized thin nails.
- The next method is to install the boards with hidden fastenings using staples. The facing material is installed to the sheathing one by one, and fastening is carried out using a stapler. The peculiarity of this method is that the tenon of the next board can easily fit into the groove. So that the tenon of the bottom board can fit freely, the staples need to be recessed into the wood.
The hidden fastening with dowels looks perfect. You need to start laying with your own hands from the bottom:
- Using self-tapping screws installed in the upper tenon, the first board is secured.
- The boards are stacked on top of each other, thereby hiding the screws or staples.
- The screws on the first and last boards are ground.
All of the above methods are suitable for horizontal cladding. It must be remembered that the installation of boards is carried out with the tenon facing up. Throughout the installation, the horizontal position should be monitored using a level. The last board is fastened with nails at a distance of 1 cm from the floor. The gap is closed with a plinth.
Vertical cladding
Vertical installation should begin from the corners of the wall. Just as in the previous method, clamps are installed on the back of the board, which are attached to the sheathing. Corner boards are fixed with nails. It is recommended to cut off the nail heads with side cutters. If the ceiling is covered with eurolining, you need to take care of joining the boards. For this you can use decorative slats. The joints are made in one line.
Second option: use the entire board without any residue. In this case, the joints are made with seams staggered. The material is installed from the window towards the opposite wall. This will help avoid shadows appearing between the panels. Experts recommend leaving small gaps at the top and bottom for free air access.
Preparatory work
Preparation for the installation of lining can be considered the production of wooden sheathing, which is designed to level the walls and create space for air circulation. In addition, this installation method allows you to hide a variety of communications, thereby significantly increasing the decorative effect of the wall covering. For example, you can throw wires or polypropylene pipes.
The pitch between the slats is determined by the size of the room, but should not be more than one meter. It is best to make a distance of 50-60 centimeters. All these bars must be aligned in one vertical plane for the walls and horizontally for the ceiling. All this is controlled by level and plumb. It will be much better if you treat the bars twice with an antiseptic. Fungus and mold in this case are not scary.
If finishing with wooden lining takes place in a steam room where the walls are lined with foil, then the thickness of the bars should be 20-25 mm. This air gap between the foil and the lining is an ideal insulation. The sheathing must be fastened here carefully so as not to damage the foil layer. In the rest room or in the dressing room, you can use bars 50 mm thick. The resulting gap between the wall and the lining can be insulated with heat-insulating materials.
All window and door openings around the entire perimeter are sheathed with bars in the common plane of the frame. This is done to more rigidly fasten the edges of the lining.
Well, the frame has been assembled, now we proceed directly to the installation of the wooden lining.
Shalevka manufacturing technology
Before you start making a shalevka, you need to decide what tools you have available. The most important thing is to choose a machine for the job, which should be large in size and have excellent power.
You shouldn’t pay attention to cheap machines, of course, a good machine will cost you 15 thousand, but this money will pay off quickly, and you will be left with an excellent mechanism with which you will do more than one useful thing. When purchasing a machine, be sure to choose the right methods for cooling the engine, as it heats up quickly
Ideally, for this reason, it is better to work on two machines, renting one. Proven in practice: the machine heats up faster than a person gets tired.
You shouldn’t strain yourself and choose a multifunctional machine, the main thing is that it saws and joints. The presence of aluminum parts has a bad effect on the appearance of the shalevka, since stripes from this metal remain on it.
The choice of material must also be approached with calculation. It is better to make the lining according to the size of the unedged board you have. Experienced craftsmen warn that you should not tackle a two-meter-long panel on your own - it is very difficult, and it is not profitable.
You can see how to make lining on the Internet, where you can choose a photo of the machine, the material, and see the stages of work.
Dimensions
Installation methods
Each subsequent lining board is inserted into the groove of the previous one, and a galvanized clamp is placed on the inner lip of the groove.
Assembling lining on the wall with your own hands is not difficult; it really resembles assembling a construction set (a board with a tenon is inserted into the groove of the previous one).
Let's make a convenient utility tool with our own hands. Let's take a piece of wood and cut a groove from it. With the help of such a device we will trim and join board after board. Insert the scrap into the lining, gently press it with your hand, and you’re done.
You can lightly tap on top to eliminate inconsistencies, but you need to do this very carefully so as not to split the board
Attaching to the sheathing varies in methods. If design is not that important, you can use nails with small heads.
The chaotic arrangement of these hats is not so striking. This is appropriate to do in those rooms where design does not play any role. The advantages of such a material as lining: sheathing can be done using a stapler, decorative nails, clamps, and self-tapping screws. One of the most common sheathing methods is to drive a screw into the groove of the board at a 45-degree angle, recessing the head.
After installation is complete, you can attach skirting boards for beauty.
When joining the next panel, the cap will be hidden.
The use of a stapler depends on the cross-section of the finishing board: the smaller it is, the more effective this method is. It is also better to drive the staples at an angle, making the fasteners invisible. When deciding to use clamps, keep in mind that they are not able to withstand a lot of weight, so the fastening should in no case occupy a large working surface.
Once you understand the finishing technology, choose the installation method and properly prepare the wood, sheathing the surface will be quite simple.
Decorative elements such as baseboards will help complete the interior.
Decorating your home with your own hands is a fun activity.
The paneling will look very cozy, be it in a nursery, living room, pantry or kitchen. Natural, eco-friendly material is appropriate everywhere: from walls to ceiling.
Sheathing schemes
Incorrect and correct installation of sheathing from horizontal lining belts
The easiest way to install lining boards on walls is to either mount them upright or lay them on horizontal belts. Horizontal cladding is generally more beautiful, but it is necessary to correctly cladding walls horizontally, always laying the boards with the ridges up. Otherwise, micro-reservoirs will form in the grooves (item 1 in the figure on the right), from which rot and infection will occur. If the sides of the groove of the bottom board (the first in the installation order) are trimmed correctly, they are cut off, pos. 2 in Fig., so that the groove does not become a pocket - a trap of capillary moisture. As for the vertical cladding, whether and where to cut the tongue/groove depends only on the installation method. Vertical cladding is used in damp rooms or with a high probability of condensation (bathhouse, hallway); here, the correct installation of horizontal cladding will not save it from getting stuck.
Diagonal clapboard cladding is rarely used, because is complex and results in a large waste of material, but aesthetically has almost no benefit. There are many shaped clapboard coverings; you can notice that, for example, sheathing with a flat herringbone (on the left in the next figure) is labor-intensive, but not as complicated as it seems: the fragments are cut according to a template in a miter box and mounted on a vertical sheathing. They look great, but are more complicated than the lining diamond panels on the right in Fig. The sheathing for them is a cross with a frame, in the quadrants of which bars for the diagonal sheathing are attached, see below.
Herringbone and diamond clapboard paneling
American lining
American lining
In cross-section it has a beveled quadrangle. The resulting structure is quite heavy, so it is installed only on the frame. Externally, the appearance of overlapping boards is created. American lining is installed in horizontal rows. Installation can be done from top to bottom or bottom to top. The main thing is that the thin edge of the lamella is at the top to prevent moisture from entering the lock. Softline literally translates from English as “soft line”. Just like the Shtil lining, it has rounded bevels. A distinctive feature is the presence of a wider tenon, due to which a distance is formed between the slats. In this way, Softline is similar to eurolining. The types Taiga, Land House, Volna and Finka have become less popular. They all differ from each other in profile cross-section.
Advantages and disadvantages
Probably the most important advantage of this building material is that its installation is quite simple and this work can be easily done with your own hands. You just need to carefully study all the nuances of the upcoming event, after which you can safely begin covering your house with clapboards.
If we consider each type of this building material separately, then we need to pay attention to the quality of the plastic product, such as the variety of colors. In addition, walls dressed in this outfit are quite easy to clean
However, significant disadvantages of this type of material are its instability to mechanical damage and low level of environmental friendliness. If you decide to decorate your bedroom or children's room with clapboard, this criterion cannot be ignored.
This photo shows building materials made of spruce and pine. These types of wood are used with low humidity.
Here you can see the walls, the cladding of which is made of linden and alder. This type of material can be used at a humidity of 100%.
This photo shows a house whose facade is covered with larch clapboard. It is suitable for use at 100% humidity.
Peculiarities
Wooden lining is panels of certain dimensions with tongue-and-groove fastening. Coniferous and deciduous wood species are used for production. The most popular materials for the production of wooden lining are pine, spruce, ash, alder and linden. You can rarely find oak lining, which is explained by its high price.
Larch paneling
Standard board sizes:
- board thickness can vary from 12 to 25 mm;
- width - up to 150 mm;
- length – up to 6000 mm.
Siding sizes
Eurolining, which is one of the types of wooden lining, is distinguished by higher strength and better workmanship. It belongs to class A, the quality standard regulates the presence of no more than one knot for every one and a half meters of the board. Higher demands are placed on its production, and accordingly the price of such material is much higher. Eurolining "Extra" class eliminates any knots and cracks and is one of the most expensive materials.
Standards for wood defects and processing defects for the front side of the product
The dimensions of eurolining have more stringent standards:
- width comes in four types: 80, 100, 110 or 120 mm;
- board length varies from 500 to 6000 mm;
- thickness can be 13, 16 or 19 mm.
The stage of laying wooden boards is preceded by a special antiseptic treatment to prevent the occurrence of mold and mildew. Antiseptic treatment significantly increases the service life of the facing material and increases its strength and wear resistance.
Antiseptic for lining
Colorless antiseptic for lining
Prices for wood preservatives
Impregnation for wood
What should you consider when choosing wooden lining?
When choosing wooden boards as cladding for a building, you need to pay attention to the following criteria:
- type of wood (pine, spruce, larch);
- wood class (extra, A, B, C);
- wood drying method. The strength of the material and its service life depend on this. For high-quality drying of the lining, special drying chambers are required. This, of course, increases the cost of the product, but such material will also last much longer.
Metal clapboard is often called metal siding. This material has a smooth surface that does not require additional processing or painting.
Metal siding
Metal lining has a long service life (about 50 years), withstands strong temperature changes, and does not corrode. But this material also has disadvantages. Metal lining is not flexible. The variety of colors, wood or stone imitation makes this type of lining quite versatile and in demand building material.
Siding “L-Bruce” (metal, “Ecosteel” coating)
Prices for lining
Lining
Production process
At the beginning of production, you need to properly prepare the raw materials by making jointed blanks from untreated boards. You need to remove one side panel for now; to do this, mark a mark with a pencil, boldly draw a line on the side on the future lining and saw along the mark. Instead of a ruler, any long element with smooth edges will do, which is often a ready-made sample of shalevka (photo).
If this is your first time sawing, then these instructions are for you:
- We place the wooden part on the machine table, aiming to cut along the outlined line.
- We rest our torso on the end of the board. Pushing the future panel is done not with the hands, but with the body.
- Ideally, it is better to work together. One will serve the board, the other will receive it. Working together, you can monitor the entire cutting process: one watches the exit of the board so that it is located exactly in the grooves of the machine, the other looks after the material that moves directly during planing.
- So, following all safety rules, we saw off a certain number of boards on one side. It’s better to have more, because you won’t have to reconfigure the machine often. The main thing is not to get too carried away, as monotonous work can cause injuries.
Homemade machine
- When jointing with millimeter precision in width, you won’t get much, but you can achieve the same size by counting the number of passes along the cutter. It is difficult to repeat the same width of the board the next day, but experts advise leaving a piece of the finished part, using it for re-installing the ruler tomorrow.
- After our boards are sawn off on one side, we proceed to processing the second side. You will have to reconfigure the machine, setting the ruler to the required width. Using a ruler we will saw off the second side of the board.
- When sawing, scraps remain that will be used for connecting slats.
- After the boards have been processed on both sides, preparations begin for jointing the material. We reconfigure the mechanisms of the jointing machine - leveling long surfaces of wooden blanks.
- As before, we process and plan the board on one side for now. Sometimes the board may curl up - feel free to get rid of it, good material will not come out of such a sample.
The final stage
The final stage is the grooves in our boards. You can make the whole process easier by using a milling tool or a small sawing circle. We set the elements of the ruler, the planned depth of the groove, lowering or raising the table. And we begin to make grooves on each side of our board. After this processing, we will get a groove along the edge into which we will fasten each subsequent part of the shalevka.
As soon as our wonderful lining is ready, we begin processing the waste, making slats out of them with our own hands, which are simply sawn.
We can safely say that without special equipment it is not possible to make shalevka with your own hands. So, if you want to start producing shalevka yourself, learn to operate a machine.
How to cut boards
Diagram of incorrect placement of the board on the sawing machine.
The workpiece is placed on the work table of the machine, and the disk must be positioned so that it strictly follows the marked line. During operation, it will no longer be possible to move the board, so all fastenings should be provided immediately. When the workpiece is positioned correctly on the work surface, you need to start cutting, but you can’t rush if you don’t have enough experience in such work. The cut must be carried out strictly along the marked line. During operation, you must ensure that the saw blade does not get caught in the wood, as this can lead to its breakage.
First, the workpieces are sawn off on one side only. The more of them are prepared, the faster the work will be organized in the future.
Care must be taken when cutting to avoid injury. Boards are processed on both sides
The entire mass of boards is processed in the same way.
Scheme of jointing boards.
They will be needed in the future for the installation of sheathing during the installation of the lining. This will avoid the financial costs of purchasing such material.
When all the workpieces are there, you need to reinstall the machine yourself to perform jointing. It will be possible to work only in one direction. The number of passes on the work table and the pressure applied should be the same throughout the entire jointing process. This is the only way to obtain the same thickness for the entire product. If this simple condition is not met, then fastening the boards during sheathing will be difficult, and the coating itself will turn out to be extremely unattractive.
When the boards are processed on all sides, you can make locking grooves. Wooden lining can have grooves of different shapes and depths, so even before starting work, you should consider the shape and dimensions of the grooves, and take into account exactly how the processing work will be carried out. To make grooves, you can use a saw wheel or a milling cutter. In this case, the circle must be placed with a slight distortion. In order for the grooves to be the same, the workpiece must constantly touch the ruler. Then all the holes will be symmetrical and even, installation will be simple. The depth must be carefully adjusted and it is recommended to constantly check the resulting dimensions so that the machine can be readjusted if necessary.
The last stage of manufacturing is not mandatory, but it allows you to give the board an aesthetic appearance. To do this, you can remove small chamfers from both sides; after installation, the surface will turn out beautiful and stylish. After the board is ready, it can be treated with special antiseptic agents. To ensure a smooth decorative surface, the finished boards must be sanded.
Lining is a material that has become widespread today in finishing premises for various purposes. This is a board processed in a special way; it is attached to the sheathing using staples, nails or clamps. It is quite possible to make such a lining with your own hands, but you must immediately be patient, since this work will take a lot of time.
Brief technology
Installation of the board is very simple.
Even an inexperienced person can manipulate this material. An important point is the preparatory work. They include cleaning the surface from dirt and dust.
If the level of the walls varies greatly, you can slightly level the surface.
The next step is to install the sheathing. Both wooden beams and metal profiles are suitable for this. Using lathing, you can level out slight slopes of the wall. The lining will also help hide the unsightly appearance.
Finishing with clapboard inside the house requires the presence of an assistant. You can't do it alone. Attached with clamps. It is secured to each other by placing it in a groove.
Video - interior upholstery of a house (with insulation inside):