A DIY camp sauna is one of the easiest options to implement. Having built a small sauna tent, you can take a steam bath while hunting or fishing, as well as while hiking. If desired, such a structure can be built even on a suburban site, if the traditional option is still at the design or construction stage.
DIY camp sauna
Do-it-yourself camp sauna – photo
There are many manufacturing options. You can purchase a ready-made portable tent - entirely or in parts (stove, awning, frame).
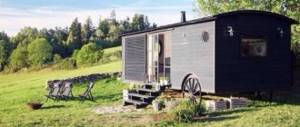
Mobile sauna
Mobile portable bathhouse Mobiba
Mobile sauna Mobiba
Mobile sauna inside
There is an alternative option - to make a bathhouse from a tourist tent, but exclusively of the Soviet type, that is, made of tarpaulin. This is explained by the fact that modern tents are made from fabrics that are not only not designed for high temperatures, but are also capable of releasing harmful substances when heated. As for the old canvas models, they are quite suitable for this: there are no harmful fumes and the thermal insulation is good.
Canvas tent
If we talk about creating a camp bathhouse from scratch, then this will require a frame, thermal insulation material and a stove.
Features of the design of a camp bath
| Features of the design of a camp bath | Description |
| Frame | It is better to make it from aluminum posts (for example, from a sales tent), since this material is safer than wood. In the absence of such, you can make supports from young trees, but in this case you will have to carefully ensure that the wood does not ignite. To fix the frame elements, you can use both rope and soft wire. |
| Covering material | The simplest option is thick polyethylene film, but due to its disadvantages - low thermal insulation qualities and density - it is preferable to use tarpaulin. It is important that it is a large and solid piece of material. The size of the covering material depends on how many people will be steaming at the same time, but if there are no more than four or five people, then a piece of 6x6 m will be enough. |
| Walking heater Portable metal heater | Here the choice is also quite wide: you can install a factory-made stove-heater, you can make it yourself in the form of a mesh metal box made of metal rods or thick wire, or you can simply build a well of rounded stones and line it with firewood. |
Note! A camping sauna can be made “white” (that is, the heater is built separately, and the hot stones are transferred to the tent) or “black” (the stove is installed directly in the steam room). Today we will take a look at each of the options.
Procurement of necessary materials
There are several options for constructing camp baths:
- Ready-made sauna tent. Similar to a regular camping tent (only the material is slightly different). Equipped with a special oven. It can be purchased at a specialty store. All that remains is to install the “bathhouse” in the right place in the lap of nature.
- Special awning for camp baths. All that remains is to build the frame and buy or build a stove.
- Homemade camping sauna. A structure made entirely by hand from a frame, covering (polyethylene or a Soviet-style tent will do) and a homemade stove made of natural stones.
Advice. If you plan to use a tourist scarf as a bath structure, then in no case should it be of a modern type. The fact is that such tents are not designed for high temperatures; moreover, when heated, they can release toxic substances. But the tent “originally from the USSR” will cope perfectly with such conditions.
In order to build a reliable and convenient structure, we will need the following elements:
A simple frame for a camp sauna
- Frame. As supports for a future structure, they can be used as wooden poles, collected directly in a place of rest (we are talking about rest in the forest, forest plantations, in general, places where there is a lot of wood). Racks made of carbon fiber/aluminum will also do a good job. Some believe that they are not suitable for bath temperatures, but in practice the opposite has been proven.
- Bake. You can use a ready-made stove for a self-built field bathhouse, or you can also make it yourself, especially since it will not be difficult. It is enough to have stones and wood on hand.
- Covering material. Typically, polyethylene, commercial tarpaulin, or an old tent are used.
Advice. Prepare round, slightly elongated stones for the sauna stove, without any delamination (other stones may simply burst under the influence of high temperature). River/lake boulders with a diameter of about 20 centimeters are ideal (those that are too small in size will “give off” very little heat, those that are too large will simply not have time to heat up).
Important Terms
A camp sauna can be made only under certain conditions. The resting place must meet the requirements below.
| Photo | Conditions | Description |
| The presence of a body of water is an important factor | First of all, there must be water there. | The ideal option is to choose a place on the bank of a river or other body of water. |
| Stones for the stove | There should also be stones there. | Layered cobblestones should not be used, as when heated, they can fly apart into pieces, causing serious injuries to steamers. The stones should not be too small or too large, the optimal size is 100-120 mm, the shape is somewhat elongated. If the stones are smaller, they will not be able to accumulate the required amount of heat and will cool down very quickly; Large specimens will take a very long time to heat up. Although, if you have time, you can build a kind of foundation from large stones for a future fire. If there are no boulders, then it is quite possible to use pebbles. As for the quantity, for each person who will steam, you will need 1 bucket of stones. Therefore, each participant is required to collect a bucket of boulders for themselves. |
| Frame material | Near the resting place there should be thin young trees (or better yet, dead wood), which will be used to construct the frame (if the aluminum posts were not prepared in advance). | From these trees you need to make poles with a diameter of about 30-40 mm, and you should also think about the method of attaching them in advance. |
| Firewood | A fire will require firewood, and in large quantities, because it will burn for at least 3-4 hours. | Excessively thick logs are not suitable for this, as they do not burn well. The maximum diameter of the firewood should be 100-150 mm - this way they will quickly burn out and transfer all the heat to the stones. |
What you can do yourself for comfortable washing
A mobile sauna is an opportunity to take a steam bath with friends directly while fishing or at a rest stop during a hike. With her, your tourist holiday will become simply unforgettable. But if we talk about a camp sauna made by yourself, then for this you will need a frame, special heat-insulating material, and, of course, a stove.
Many people buy a ready-made stove for a camping trip, but you can make it yourself. There are several options for homemade stoves, each of which has its own advantages and disadvantages. Masters distinguish three types of heating devices.
- Heater with periodic heating.
- Improved hiking heater.
- Long-burning camping stoves.
To take a steam bath in nature, a pyramid of stones is built inside the unlined frame of the tent. They line it with firewood, which will heat the stacked stones. Only after the wood has burned out are its remains removed and the tent covered with a tarpaulin or cellophane film. The main disadvantage of such a heater is its one-time heating.
The improved camp heater is represented by a small design in the shape of the letter “P”. To do this, bricks are placed on the sides and covered with a lattice, on which stones are laid out. Wood is placed under the grate and set on fire. Firewood is added periodically to maintain the temperature in the tent. Despite the primitiveness of the design, this type of bath is quite effective.
You can also build a device for long-term burning with your own hands. It is a metal structure made of profiled pipe. Inside there is a hole for storing firewood, a chimney and even a water tank. This type of stove will give you the opportunity to have a good steam in nature.
We suggest you familiarize yourself with Ventilation in the basement - doing ventilation correctly
Making a camp sauna “white-style”
First, we will consider the simplest option, for which only adhesive tape and film (and possibly clothespins) will be required from special materials. We are talking here about a sauna-tent “in white”, i.e. the stove will be located separately from the steam room.
Making a camp sauna
We start with the construction of a camp bathhouse.
Stage one. Frame making
There are several ways to make a frame, let's look at them.
Method No. 1 (suitable only for white baths)
To work you will need:
- axe;
- film, 10-15 m; you can use the thinnest film - it will cost less and weigh less; experience shows that the film is almost never used more than once;
- wide tape (1 roll);
- stationery clothespins (20 pieces, they can be replaced with the same tape).
After preparing everything necessary, we begin to create the frame.
Step 1. First, we prepare 8 poles with a length of at least 100 cm (more is possible, but warming up the steam room will take longer). We construct a parallelepiped or a cube from poles, depending on the number of people who will be steaming. If there are a lot of people, then it is preferable to steam in groups of four people - this is the best option.
Frame assembly
We connect the poles with tape. You will need a lot of tape - it is intended not only for fastening, but also to protect the film from the sharp ends of the frame.
The main frame of a wigwam for a bath
Step 2. Having finished with the frame, we build a place on the side for stones, using 3 more poles, each 300 mm or 500 mm long.
The result should be something similar to the design shown in the image below. The base of the heater is lined with stones.
It's worth noting that a lot of things here are optional. Thus, the design of the frame can be significantly simplified and made in the form of a wigwam. The frame in this case will consist of 3 poles connected at an angle.
Arrangement of a place for a heater
Step 3. Next, the frame needs to be covered with film. The width of a standard film sleeve is 1.5 m. We cut it and get 10 m or 15 m of film 3 m wide. We cover the finished frame with film, we do this extremely carefully so that sharp ends or knots do not pierce it.
Note! The dimensions of the frame can be made such that the width of the covering material (3 m) is enough not only for the walls, but also for the roof. In this case, the tightening procedure will be significantly simplified; there will be no need to cut the film and make additional seams.
There will be no problems at all with tightening the wigwam.
Stretch the film Tree trunks were used as stands. The film is fixed between them
Option for a camp bath in the form of a hut
Bathhouse from the inside
Step 4. Attach the film to the frame using clothespins or regular tape.
Film fastening
Step 5. On the entrance side, leave enough film for the “door”. The entrance must be securely closed so that steam from the tent does not escape outside. This can be done in one of two ways:
- fasten the film with clothespins from the inside;
- leave a person at the entrance who will hold the “door”.
Almost finished bath
Step 6. Using heavy stones, press the film to the ground along the perimeter.
The photo shows stones laid around the perimeter
Step 7. To cover the floor, you can use spruce branches, which not only smell nice, but are also good for health. You can sit directly on the spruce branches, although there are other options: lay out a small tourist rug, bring folding chairs or hemp.
Film prices
film roll
Method No. 2 (can be used for a black bath)
We use available materials - for example, four willow branches 1.4-1.5 m long. Using tape, we tie two branches in length and install them crosswise. Of course, you can try to find a couple of long branches to cross, but it will be quite difficult to find ones that are the right size. You can also build a square structure, as described above, but this will require more time and effort.
Frame made of willow branches
Similar design
Note! It is recommended to try the film on the finished frame in advance, so as not to cut or glue it later when the stones begin to cool.
If the bathhouse is large, and the standard 3 m width is not enough for this, you can connect two pieces together using office clothespins.
Attaching the film to the frame
Film try-on
Method No. 3 (can be used for a black bath)
A prefabricated frame can be welded from profile pipes. It only takes a few minutes to assemble it at the resting place. The image below shows that metal tubes 60-70 cm long were used to make such a frame (a total of 16 pieces are required).
Table. Elements for connecting the frame
| Elements for connecting the frame | Quantity |
| Metal tubes 60-70 cm long | 16 pieces |
| Special tees | 4 pieces |
| Direct connections | 8 pieces |
For this, larger diameter pipes were used.
In this case, the thermal insulation material is an awning, pre-sewn in accordance with the dimensions of the structure.
Collapsible pipe frame
Awning tailored to the dimensions of the frame
Used camping sauna made of polyethylene and tent frame
Method No. 4 (can be used for a black bath)
A simpler way is as follows: you need to purchase a regular two-person tent, cut off the tarpaulin, and use the tent poles as a frame.
Often tents are set up entirely, but for the reasons described at the beginning of the article (unpleasant odor, possible release of toxic substances), it is better to use film.
Assembling the bath frame
Installation of frame arches
Having finished with the frame, we proceed to making the stove.
Stage two. Stove
To create a stove you will need:
- river stones of the sizes indicated above, approximately 25 pieces (can be taken not from the river, but from the shore);
- a sapper shovel or a slingshot made of branches (for transferring cobblestones to the steam room);
- firewood.
Note! We remind you once again that you should not use brittle stones (such as sandstone), as they can crack at high temperatures.
Step 1. From the collected stones we build a well about 10 m from the bathhouse. It is important that the well is stable, so it is better to use flat stones. It may not work out the first time, so you should be patient.
Stacked stones for a camp sauna
Future heater
Step 2. After this, we cover the stones with firewood so as to completely hide them. We set fire to the wood.
Lighted fire
By the way, the film on the frame can be additionally covered with the same spruce branches or branches (as shown in the images below) so that the steam room retains heat longer.
Camping sauna covered with spruce branches
Step 3. While the stones are heating, prepare a mining shovel or slingshot. It will take approximately 1 hour for the stones to heat up to the required temperature. During this entire time, the wood should burn intensely. After heating, we transfer the stones to the bathhouse.
Carrying stones to the bathhouse
Using a Mining Shovel to Carry Stones
Note! It is advisable to carry the stones together to prevent them from cooling down. You should also place several plastic bottles with warm water inside the tent in advance, which will be poured over the hot cobblestones.
It’s convenient for two people to take a steam bath in a camp sauna
Using a camp sauna
Prices for a camp stove
camp stove
Video – Portable sauna
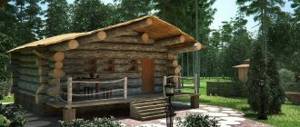
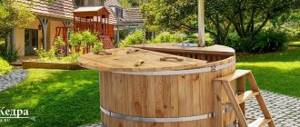
Mobile sauna made of timber
One of the most reliable options is a type of mobile bathhouse built from timber. The scheme is simple:
1. Prepare the necessary material:
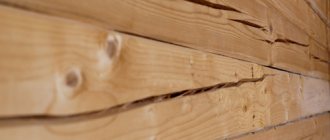
- wooden beams or boards for constructing a bathhouse frame;
- a metal perforated box with a grate that will serve as a container for coals. This is necessary in order to pour water on the hot stones, and hot steam will come out through all the holes in the box;
- bricks for laying an improvised stove with a firebox;
- an awning or oilcloth with holes for entry and ventilation to cover the prepared frame.
2. Assemble the frame from the prepared boards and lay out the stove with space for firewood.
3. Place a container with coals on the stove and cover the structure with an awning or film.
By following these instructions, you will get the ideal budget option for a holiday in the country.
An ordinary camping sauna with a stove is the simplest and most tourist-tested option. It is not only reliable and convenient, but also not expensive: sewing a tent and purchasing accessories will cost several times less than a ready-made structure purchased in a store. Use the money you save to buy a good camping stove, stones and other pleasures.
This type of bathhouse is very spacious: it can easily accommodate a group of 8 people and still have some room left over. It can serve as a canopy in rainy weather. A store-bought bathhouse will not provide such comfort.
Such a bathhouse is 2 m wide, 2 m high, 2.5 m long. Its weight is approximately 2 kg, if folded - 40 * 20 * 20 cm.
To build such a bath you will need the following materials:
- a set of slings 50 mm thick and 0.5 m long, as well as blanks 25 mm thick, 2 m long;
- 2.5 m of tape 15 mm thick;
- elastic band 2 cm wide approximately 2 meters;
- spool of thread (nylon or lavsan);
- zipper with a dog on both sides 2 meters long and 7 mm wide;
- polyester cord – 16 meters.
All parts cut out according to a special pattern are sewn together with thread using a double seam (first of all, the walls of the future bathhouse, then the dumps, which do not need to be sewn in the corners).
Lastly, we attach the roof, zipper and tape. In order to make guy loops, we fold a cut piece 50 cm from a 25 mm wide sling and 12 cm of a board, the width of which is 5 cm. Then we attach a cord for subsequent stretching and installation of the awning. We attach it to the outer loop.
We make loops on the lower corners of the tent using elastic that needs to be folded in half. When installing the bathhouse, insert the ends of the pillars into the middle upper loop. Rubber bands can be attached directly to the pegs.
To be finally ready for a hike, make a cover for your new camping sauna for ease of movement.
Making a sauna tent “the black way”
The main difference between this option is that the heated stones will not need to be transferred from the fire to the steam room. In this case, a large frame will be placed directly on top of the hot cobblestones after removing the coals. The manufacturing procedure begins with the construction of the furnace.
Making a sauna tent “the black way”
Stage one. Bake
There are two possible options here, let’s take a look at each of them.
Option #1
We put a pile of stones and make a hole in it for loading firewood (in the image the hole is on the back side - where the smoke comes from). You will need much more stones than for a white bath, but neither the shape nor the size play a special role.
It is worth noting that this option is quite difficult to implement, so you should be prepared for the fact that the heap will constantly collapse.
Stones for the stove
Option No. 2
Using a welding machine, we make in advance a small frame (40-50 cm high, similar width) from reinforcement rods with a diameter of 5 mm. Once in place, we cover the finished frame with stones. The main advantage of this design is that the stones will rest on the frame, so they will not fall apart. However, they will take longer to heat up than in the option described above.
The principle of laying stones on a frame
Small welded structure for a camp sauna
Note! In addition to its direct purpose, such a frame can serve as a kitchen stove, and if you put a sheet of plywood on top, it can also serve as a table.
Camping sauna stove
A camping sauna stove that can easily be converted into a teapot stand or table
Option #3
Here, on a pre-selected site, it is necessary to lay the foundation of the heater with sides of 100 cm, having previously dug a small hole under it, 50-60 cm deep. We make a base of flat stones, on top of it we lay rectangular stones measuring 0.4 x 0.5 m in increments of 25 -30 cm.
Fire pit and heater
Kamenka
Warming up the heater
We install stone slabs on top of the boulders so that there is a small through hole in the center of the structure, through which the fire will reach the top of the heater. At the end, we lay another plate (it could even be a mesh or a sheet of thick metal), which will close the central hole.
Having completed the construction of the stove, we load the wood and set it on fire. The stones, as noted above, will heat up for quite a long time. We maintain an intense fire all this time, periodically adding firewood. While the cobblestones are heating up, we begin building the frame.
Stage two. Frame
We make the frame using one of the possible methods (in the images below there is a structure of 4 poles). When the stones heat up to the required temperature, remove the coals and cover the frame with film. We press down the film along the perimeter with large cobblestones, and if possible, cover the floor with spruce branches. That's it, you can proceed directly to the bath procedures!
Mobile camp sauna in a tent: types, review of popular models
The tourist bathhouse includes a frame tent made of moisture-resistant fabric with low thermal conductivity and a prefabricated stove. This is a type of mobile sauna that can be moved to a place of relaxation without a truck. Therefore, the “bath tent” is a convenient device:
– For single travelers or a small group of tourists, hunters, fishermen;
– For day trips;
– For camping travelers who change their parking place every day;
The Russian companies Mobiba, Teplodar, Terma, Bereg, NOVA TOUR are engaged in the production of portable baths adapted to the climatic conditions of our country. The design of the sauna stove depends on the preferences of the future owner:
- Wood stove with heater. Creates conditions for a bath with “dry” steam;
- Oven with water heating tank. Allows you not only to take a steam bath, but also to warm water for hygiene procedures;
- Oven with steam generator. Eliminates the need to buy special stones for the stove. There are wood-burning and electric models;
- Electric stove with heater. Works without firewood, from the network or a mobile generator;
An important feature of the “sauna” tent is the presence of an adjustable hole for the chimney in the “roof”. The awning around the pipe is made of a special heat-resistant material that is resistant to prolonged exposure to fire and sparks.
The main disadvantage of a “portable steam room” from stationary and transportable structures is the lack of high bath chairs and other comfortable furniture. Despite this, a mobile sauna tent gives additional comfort and allows you to get complete rest after a long journey.
For comparison: how much does a factory sauna tent cost?
Today, camp baths are produced by both Russian and foreign companies. The price of the finished model ranges from 25,000-30,000 rubles. (the set consists of a heater, a hood and a thermal tent). The amount is considerable, but you can save money: build the frame yourself and buy only a small metal heater. In this case, the costs will be about 9000-10000 rubles.
Factory-made mobile sauna
Options for mobile baths
Prices for a camp sauna
camp sauna
Making a portable stove
For this work, the performer must have the skill to perform welding operations. A camp stove for a bath is made of a steel sheet with a thickness of at least 3 mm. To increase rigidity, it is recommended to use a supporting structure made from angle iron measuring at least 35×35×2.5 mm. The design of the stove is classic with a blower, a combustion chamber, a grate and a chimney with an air damper - damper.
It is welcome to have a built-in container for heating water, which should preferably be made of stainless steel. As shown, it is quite easy to find stones for heaters at the camp site. It is necessary to weld a side on the stove where they will be placed. Particular attention should be paid to the quality of welds; their leak testing is carried out with kerosene.
Now all the elements of the camp bath are ready, you can start testing. We assemble the frame, stretch the canopy, and carefully secure everything. We install a stove in the steam room and take the chimney outside. The photo shows that it turned out quite neat and functional. Now you can begin full-scale testing of the product. When disassembled, it fits quite easily into the trunk of a car, and can be assembled quite quickly.
Tips for using a camp sauna
Tips for using a camp sauna
- Despite the fact that making such a bathhouse requires a lot of time, you still won’t be able to steam in it for a long time, since the stones will quickly cool down, especially if you water them.
- Stones with visible defects at high temperatures can shoot off small pieces, so you need to stay as far away from the stove as possible. It is worth knowing that after watering the stones with water, the risk of cracking is minimized.
- The stove should be installed in the part of the tent opposite from the entrance - this will make it safer to enter/exit.
- The main disadvantage of a sauna tent is the low temperature near the ground. Therefore, you need to put something under your feet, otherwise you can catch a cold.
What are camp baths for and what do they look like?
Hiking saunas are an ideal way to “steam” in conditions where there is no access to a full-fledged bathhouse/sauna.
Fans of long hikes especially appreciate the opportunity to not only wash themselves after a hard day on the road (if they’re lucky), but also to relax their tired body in the bathhouse and feel refreshed. Summer residents who do not have baths, as well as builders who have to work for a long time far from civilization, but close to forests and reservoirs, will not remain indifferent to this type of relaxation and cleansing.
Camping sauna based on a tent
So what is this, a mobile sauna? In simple words, this is a small isolated structure (akin to a steam room in a real bathhouse), inside or outside of which there is a stove. Stoves can be either ready-to-use or made from scrap materials, usually stones. With the first, everything is simple, but with the last option it is somewhat more complicated, but more on that later.
And of course, the fuel is firewood (you can’t live without it). They will help maintain a consistently high temperature in an improvised steam room.