DIY plywood doors
If you have the necessary skills in working with plywood, you can make interior doors with your own hands. Firstly, it is cheaper than buying a ready-made structure or ordering a door from a manufacturer. Secondly, you can make a door that exactly matches the required dimensions, choose your design and decoration. Thirdly, you will be 100% confident in the quality and reliability of the design.
In what cases is it better to install
Sliding doors and sliding doors are installed between rooms. They are especially relevant in the following rooms:
- Kitchen where there is never enough space
- Interior space when two rooms are separated from each other
- Toilet and bathroom
- Dressing room, mirrored doors are often installed here
Doors can be made not only from plywood, but also from solid wood. However, plywood is preferable if you need to make a door leaf of a curved shape. Such designs are in demand mainly for dressing rooms. Plywood bends well, so giving it the desired shape will not be a problem. Radius doors are attached to the same curved profiles.
In addition, plywood is lightweight, it is resistant to high humidity and temperature changes, and is not afraid of direct sunlight. Plywood is easy to care for, as the material tolerates synthetic detergents well.
Sliding
The sliding door opening mechanism has the following advantages over standard swing structures:
- Doesn't take up extra space
- Do not accidentally open when there is a draft
- They do not slam shut on their own, which is important in families with small children
Plywood sheets are also lightweight, so the load on the walls is minimal.
Coupe doors
A sliding door is one of the options for sliding doors. Before you begin its manufacture and installation, you need to study the main features. The structure consists of the following elements:
- Door leaf
- Rollers for moving the web along the guides
- Profile
- Stoppers limiting door movement
Sliding doors have all the advantages of sliding structures. The difference is that the sashes remain outside and move along the walls, rather than being “recessed” inside. The main advantage compared to swing models is the saving of space in the room by using the usable area that is usually left for opening the door.
Compared to sliding structures, sliding doors are easier to install. For those who plan to install doors on their own, this is an important advantage. For such doors, only guides and rollers are needed. Complex work on installing the box, which is usually planned at the repair design stage, is absent here.
Required materials and tools
Installation of sliding plywood doors begins with preparatory work. You need to stock up on the necessary materials and tools so that nothing later distracts you from your work. To create a simple door you will need the following materials:
- Beams in the amount of 5 pieces, length 3 m and cross section 45 x 20 mm.
- Waterproof plywood, coniferous varieties are suitable. The dimensions of the sheet depend on the size of the door leaf.
- Insulation or filler. For a regular interior door, you can choose an inexpensive option that does not have noise and heat insulation properties. But even in interior structures, inexpensive mineral wool or expanded polystyrene can be used as insulation.
- PVA construction adhesive
- Rail
- Profile to be used as guides
- Rollers
- Wood putty
- Acrylic sealant for wood
The tools you need to prepare are:
- Circular saw, hand or electric
- Jigsaw
- Sandpaper
- Spatulas of different sizes
- Screwdriver
- Electric drill
- Fraser
- Ruler
- Pencil
- Masking tape
- Tassels
If you are planning decorative surface treatment, then a milling machine and a miter box will be useful to you.
Making interior doors: step-by-step instructions
1. Start by determining the size of the door leaf. Usually doors are produced in standard sizes (600x2000, 800x2000, and so on). Accordingly, the width of the existing door frame will be 5 mm larger. Based on the required dimensions, markings are made on sheets of plywood. Next, they cut out the parts, making sure that the hacksaw blade moves along the edge of the drawn line, otherwise, due to the width of the cut, the door will become slightly narrower, which will lead to an increase in the gap.
2. Then they begin to make the binding. You will need two longitudinal slats 2000 mm long and four transverse ones (their size should be 80 mm less than the width of the web). Holes for screws are drilled in them. Since plywood is a fairly strong material, there is no need to make a frame using tenon joints, which makes the work much easier.
3. Assembling the door leaf. The plywood is laid on the workbench and slats are glued around the perimeter, additionally securing them with self-tapping screws through the prepared holes. The screws are screwed in from the side of the slats, so that there will be no heads on the surface of the canvas and they will not have to be hidden with putty. In the same way, two internal transverse slats are attached, giving rigidity to the structure.
4. At the place where the latches with handles are inserted, two short bars are additionally glued and a piece of wood is cut out in a long longitudinal strip according to the markings. This will further eliminate the time-consuming operation of gouging out a hole for the latch, which is shown in the photo below.
5. Existing voids are filled with polystyrene foam slabs of appropriate thickness.
6. Coat the slats with glue and apply a second sheet of plywood. Self-tapping screws are screwed into the prepared holes, making sure that their heads are slightly recessed. The resulting depressions are carefully puttied. After drying, the surface is cleaned with sandpaper.
A paneled door consists of a frame made from solid wood. The internal plane is replaced with some decorative finishing material (but it can also be natural). Fastening is carried out using tenons and grooves, but sometimes installation using glazing beads is also practiced.
Today, a hand-held electric tool is in the arsenal of any master. Therefore, assembling the doors does not seem to be a difficult task. If any of the devices listed below are not available, you can always rent them for a few days. This will save money and have a positive impact on the quality of the final product.
- Manual router with a set of shaped cutters.
With its help, grooves are machined for installing hinges and locks. It is advisable to have several small-diameter cutters for making smoothly rounded recesses and a long cutter for the key socket. When making a panel door, grooves for installing the panel are cut using a router, and decorative elements are also made. A set of standard cutters allows you to make grooves for fittings - Circular saw with a disc for cutting wood.
Materials are cut using a special ruler included in the kit. The ruler allows you to make straight cuts according to specified dimensions - Electric drill with a set of drills of different diameters. With additional attachments, the drill performs the functions of a screwdriver.
- Grinder (angle grinder) and grinding wheels.
To polish and grind parts, you need three types of sandpaper: grade 40, 80 and 120. Processing begins with rough “scraping” and ends with a fine highlighting of the wood texture. The sandpaper is attached to the workbench using Velcro - Measuring tools. Tape measure or ruler, square, caliper, hydraulic level or construction level for installing the door, pencil, marker.
Materials
Craftsmen today have a huge variety of materials at their disposal, the prices of which are quite affordable. You can choose them to suit every taste and color, from the simplest waterproof plywood or laminated fiberboard to natural boards made of oak or mahogany.
Here we will look at an example of manufacturing an interior panel door with a swing design. This is the most labor-intensive option in terms of preparing components. Having understood the principle of assembling such a door, you will be able to install door blocks from other materials without any difficulties.
When preparing material, you should pay attention to the following points.
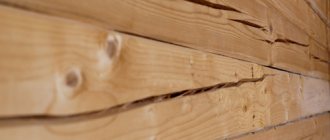
- Moisture content of lumber. Even well-dried wood, when in a humid environment, absorbs moisture. Materials should be stored in a dry, ventilated area at room temperature.
- When wood is exposed to sunlight, the surface quickly darkens and turns gray. It is advisable to protect the workpieces from direct exposure to ultraviolet radiation.
- Mechanical impact causes chips and dents to form on the wood surface, which are difficult to sand. Boards prepared for the door leaf must be protected from impacts and bends.
For a door with a leaf width of 70–80 cm, you will need the following materials.
- 6 linear meters of dry boards with a thickness of 35 to 40 mm, preferably tongue and groove, without a large number of knots, resin pockets and cracks.
Healthy knots are acceptable no more than one per 30–40 cm. Signs of wood defects are blue or pink spots on the front or end surface; such boards are rejected. The optimal width is 10–15 cm. Grooved boards are sold with a planed surface, which makes them much easier to process - Laminated chipboard for making panels.
The color is selected according to the texture of the wood, but other options are possible depending on taste preferences. Some artists use different shades to create a certain contrast. The thickness of the chipboard is 16–18 mm. The area of the panel is calculated in advance according to the design drawings. Sometimes waste from cladding panels of the required size is used. A wide range of colors of laminated chipboard simplifies the decoration of the door leaf - Euroscrew, confirmant, or single-element tie.
Thanks to the screw thread shape, the single-piece tie securely connects wood parts - Water-based varnish or paint for finishing.
The quality of varnish is determined by its resistance to external influences
When dry, PVA glue becomes transparent, which is why it is widely used in furniture production.
At the first stage, preparatory work is carried out.
- Processing boards.
Coarse defects are removed from the surface. Planed boards are sanded with sandpaper No. 40 or 80, depending on their condition. Using an attachment on an angle grinder, sanding will not take much time. However, this work is dusty, so to ensure safety it is better to use a respirator and a vacuum cleaner or go outside. It is better to grind boards with a grinder outdoors, in open space. - The door leaf frame parts are cut. These include two vertical and three horizontal racks. To do this, use a circular saw. All cuts are kept strictly at 90°, then the outer edges are carefully chamfered. If the connections at the corners are diagonal, the posts and crossbars are cut at an angle of 45 degrees.
- Cut out the panel parts.
Dimensions are taken from the drawing. A square is used for proper cutting. All parts are cut in accordance with the calculated dimensions in the drawing
Then milling work is performed.
- Grooves 20 mm deep are cut at the inner ends of the boards.
A margin of a few millimeters will provide the ability to adjust the position of the panel. The recess is located strictly in the middle of the end of the frame. Width - according to the thickness of the laminated chipboard with an allowable play of 0.5 mm. The groove is made using a milling cutter with a large working diameter. - The recesses for the hinges and the lock are selected. To distribute the load evenly, it is customary to place the hinges at a distance of 20–25 cm from the corners of the door. The lock is installed at a height of 90–110 cm from the floor (if, of course, it is provided). A cylindrical cutter is used to make a through hole for installing a door handle (100–110 cm from the floor).
- Small chamfers are removed at the ends of the panels.
This will make it easy to assemble the structure into a single whole. The chamfer is removed in the form of a smooth rounding - When all the parts are ready, preliminary assembly is carried out. In this case, a mallet is used, but without strong blows - in such a way that the door will have to be disassembled again. “Tight” areas are identified. Where necessary, adjustments are made with a file or a sharp chisel. It is important to maintain the geometry of the door leaf. After assembly, the parameters are carefully measured: length, width and diagonals of the rectangle. They should have the same meaning throughout the entire canvas. Right angles are controlled using a square.
- The door leaf is disassembled and the parts are polished. It is necessary to achieve uniform texture, smoothness and color.
- Final assembly is in progress.
The panel is placed on PVA glue, which is applied into the recess of the grooves. The corners of the door frame are fastened with confirmants. It is necessary to wait a certain time for the glue to dry. During this period, it is advisable to tighten the entire structure with clamps. Clamps will fix the shape of the door while the glue dries
After this, it is necessary to give the doors the planned appearance. Most often, such structures are coated with water-based varnish. But you can use various stains to give the wood the desired color.
An insert made of laminated chipboard significantly saves money and at the same time decorates the door. The outer surface, covered with a waterproof film, is easy to clean and does not collect dust. The material copes well with the task of sound and thermal insulation of the room.
If making a panel door seems complicated to you, there are simpler options for assembling interior doors yourself. For example, it can be made from moisture-resistant plywood. For this, a wooden beam (preferably glued) measuring 0.5 x 0.25 cm is used. Plywood is selected with a thickness of 0.5–0.7 mm.
Assembly is carried out as follows.
- The frame of the door leaf is mounted from wooden blocks.
In the inner part, to increase the rigidity of the sash, from one to four transverse crossbars are added. The frame of the canvas is a regular rectangle with stiffening ribs - A sheet is cut from a whole piece of plywood to the shape of the frame. You can sew up the fabric in pieces, but to do this, you need to place the internal crossbars at the joints of the sheets.
- The space inside the doors is filled with insulation or sound-absorbing material.
In this role, you can use mineral wool, polystyrene foam, foam rubber, or even a dry layer of foam balls. To ensure that the filler is evenly distributed throughout the cavity of the leaf, the door is placed in a horizontal position. Mineral wool scraps can serve as filler for interior doors. - Sew up the other side of the sash in the same way. Plywood is secured with nails or screws. To prevent the formation of cracks around the perimeter, the door is coated with glue.
- Finishing of the canvas is carried out.
For this purpose, all kinds of self-adhesive films, paint and varnish coatings or sheets of decorative veneer are used. When finishing an interior door made of plywood with laminate flooring, the perimeter of the door is reinforced with screws or rivets
DIY plywood doors. Step-by-step instruction
If you follow the detailed instructions for installing a sliding door, then installing it yourself will not be a problem. It is quite possible to do without the help of specialists to make a plywood door yourself. This does not require extensive experience; basic repair skills and the ability to handle tools are sufficient.
Making a single-layer plywood door
- A sheet of plywood with a thickness of at least 1 cm must be cut according to predetermined parameters
- Slats or wooden planks are attached along the perimeter of the sheet. This is necessary to give rigidity to the door leaf. You can fasten the planks with screws, small nails or using wood glue.
- To increase the strength of the structure, horizontal jumpers are needed, for which the same rail is used. First they are installed on one side of the sheet, then on the other.
- To give the door a more aesthetic appearance, you can smooth out the transition from the slats to the main panel using glazing beads.
- Next, the door needs to be sanded, putty and painted in the desired color. You can simply coat the plywood with varnish.
- Fittings are installed on the finished door
Making a frame door
This product will require two plywood sheets, which will be attached to a frame made of bars and planks. The frame is made according to the dimensions of the doorway. Wooden parts are fastened into one structure with self-tapping screws or metal plates.
The first sheet of plywood is fixed on one side of the frame using self-tapping screws. Then a layer of thermal insulation material or simply filler is laid so that the door is not hollow. Next, a second plywood plate is attached to the other side of the structure. All that remains is to treat the canvas with putty and paint it in the desired color, fasten the fittings - and the sliding door is ready for installation.
Installation of the structure
- Attaching the rollers to the door leaf depends on the system used. Manufacturers' recommendations must be followed. Most of them recommend retreating a certain distance from the edge and attaching the plates under the rollers there. They are fastened with self-tapping screws, the length of which should not be less than 70 mm. They need to be screwed strictly perpendicularly. Supports for the rollers are installed in the plates, and the platforms themselves with wheels are already attached to them.
- The guides are installed from above the doorway. The best option is to first hang the profile on a dry beam using self-tapping screws, and then secure this structure above the doorway.
- Hanging doors on guides. It is important to leave a distance between the floor and the door leaf so that the door does not shuffle across the floor when opening and closing.
- Installation of stoppers. They are mounted from above directly into the profile, starting from the sides. At the bottom, the stopper is needed at the same level as at the top.
Article on the topic: Which lever lock to choose
The final work is finishing. The top beam can be covered with a strip that matches the color of the door.
Types of products
You can make any door from sheets of plywood, you just need to decide on the type of future structure. Depending on the installation location, a single-layer or frame plywood structure can be made.
Single-layer options are very easy to manufacture. They consist of one thick sheet of plywood at least 1 cm thick, upholstered with planks along the contour on both sides.
Such products are called paneled and, as a rule, are installed on doorways in the apartment.
They transmit sound, do not retain heat and are not resistant to mechanical damage.
Frame structures using plywood are stronger and more durable, have a relatively high level of sound insulation, and if necessary, the product can be manufactured with a high-quality insulation layer to preserve heat in the room.
The manufacturing process for frame options differs from single-layer ones. First, a frame is assembled from slats, which is sheathed with plywood on both sides. Due to the additional stiffening ribs, the frames are more durable, which allows them to be installed at the entrance to an apartment or to a building in a private house.
Based on the type of structure, you need to measure the doorway and prepare a drawing. It should be taken into account that the size should be slightly smaller than the door frame.
The finished door leaf requires finishing - painting or varnishing. If desired, you can purchase laminated plywood, which is covered with a special protective film.
Advice from professionals
- If the doorway is smooth, then the canvas can be measured strictly according to size. When opening with a curvature, take the canvas with a margin so that it covers all deviations.
- Sliding doors are hung after renovation, that is, the walls must be covered with wallpaper, and the opening itself must be plastered or painted.
- When installing the decorative beam, place it so that it covers the rollers. The design will look more beautiful and neat.
Thus, even a non-professional builder can make and install a sliding door with his own hands. The main thing is the ability to work with the tool, strict adherence to instructions and the desire to make a truly high-quality product.
An example of sliding door installation can be seen in the video.
Instructions with photos and videos on how to make plywood doors with your own hands
Making plywood doors with your own hands is not as difficult as many people think. And this activity is very inexpensive and will save the family budget on purchasing ready-made doors. Both entrance and interior doors, including sliding ones, can be made from plywood. How to do this will be described and shown in this article.
Plywood door
Preparing tools
Anyone can make a door out of plywood with their own hands, but to do this you need to acquire not only sheet material, but also special tools and equipment. To create a simple panel version of doors you will need the following materials:
- Bar 3000x45x20 mm (5 pcs.).
- Rail 50x30 mm.
- Waterproof plywood grade FSF 3/3 (can be coniferous). Sheet parameters 1220x2440x9 mm.
- Insulation (for the entrance structure) or simply filler (expanded polystyrene).
- Self-tapping screws 30x3 mm (about 200 pcs.).
- PVA construction glue.
- Putty for wood products or acrylic-based sealant for wood.
- Dye.
You will also need various tools:
- Sandpaper;
- Spatulas;
- Brushes;
- Masking tape;
- Hand or electric circular saw;
- Jigsaw;
- For decoration you may need a miter box and a milling machine;
- Screwdrivers, screwdriver.
- Ruler, pencil.
Creating an entrance door from plywood
First of all, you need to create a drawing, then make a door casing, for this you will need a block. The easiest way is to make a U-shaped structure for the doorway, the diagram of which is presented below. After this, you can proceed to creating a frame for future doors from the slats. It is also possible to make connecting jumpers for plywood sheets.
Slat door frame
You can connect all the sections of the rail using screws - this is the easiest way and does not require much time. Then, using centering, we make a countersunk hole and screw the prepared plywood to the frame with screws. Each fastener is located at a distance of 20 cm from each other.
Tools for screwing in self-tapping screws
Note!
The hole under the putty is made in such a way as to hide the head of the self-tapping screw to a depth of 1 mm, but if a wooden plug is intended, then 3 mm.
We cut the plywood for the frame with a saw (manual or electric).
Now we need to insulate our door. To do this, you need to put mineral wool or other insulation inside. This will also eliminate extraneous sounds from outside and keep you warm.
Insulating a plywood door
We screw a second sheet of plywood on top, thereby covering the insulation. The door as such is ready. Decoration can be done using a hand router.
Decorating a plywood door
Now you can sand the surface with a machine and then with sandpaper (120 grit). The drawing is sanded entirely by hand.
All possible defects and holes must be filled with putty.
Puttying cracks and other holes
All that remains are decorative measures, cutting in locks and handles, priming the structure and painting it.
Embedding a lock with a handle and the finished door
How to make such doors from plywood with your own hands is demonstrated in more detail in the video.
Creating a sliding interior door from plywood
As an internal partition in the house, you can make a sliding door from plywood with your own hands. To do this, you will need guides, which can be purchased at a hardware store. Choose the length you need for your room and doorway. Mostly they already come with the mechanism, but if not, then you need to purchase the mechanism as well.
Sliding door kit
Note!
Rollers in a steel mechanism are more durable than rubber ones.
A plywood partition will be lightweight and to create it you will need, in addition to sheet material, wooden slats and glazing beads. From the slats we make a frame for the future partition, which is connected using glue and spikes. In the finished frame, you need to fix the plywood sheets using glazing beads and that’s it, the structure is ready.
All that remains is the decorative side of the process. Here, whatever you want, you can glue a special decorative film over the plywood, cover it with fabric, or simply varnish it, and paint it. You can create a more complex design with inserts from other materials: plastic, glass, etc.
Important! When calculating the materials for creating sliding doors, you must remember that it is recommended to make the canvas wider than the opening by 5-7 cm, and also 10-15 cm higher in height, unless of course the opening is the entire height of the room. This is necessary to avoid the appearance of large gaps around the perimeter.
Manufacturing a single-layer interior door
This design is suitable for residential premises and utility rooms where sound and heat insulation is not needed. It is a timber frame structure with slats nailed across a plywood sheet. For a single-layer door, any brand of grade 1-2 plywood is suitable so that there are fewer defects and chips on its surface.
Related article: How to tighten a door closer
You can also choose the thickness of the plywood at your discretion from 3 to 21 mm. If the room has high humidity, then you can purchase moisture-resistant sheets. Laminated material will not require subsequent decorative finishing. The main thing when choosing is not to take plywood that is made using phenol-formaldehyde adhesive mixtures.
The creation of the structure itself is similar to a combination of the two previous procedures, that is, the frame and the door itself are made like a sliding one, only a lock and handle are also embedded into it, and hinges are hung, as is the case with the entrance structure.
There is also an option for a multi-layer plywood door, an example would be the entrance structure presented above, where thermal insulation material is also laid between the layers of plywood. This door can also be installed in a steam room. But in this case, it is necessary to use moisture-resistant material.
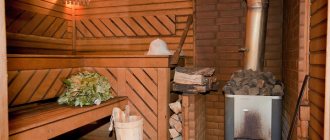
Wooden doors to a bathhouse or country house
Doors made of wood can have a complex design. Beginners should not immediately take on such work: they need to learn from simple things. Doors to a bathhouse, a summer house, etc. are ideal in this regard. They rarely come in complex designs. The main thing here is reliability and functionality. Attractiveness is also important, but even simple DIY steam room doors are a result you can be proud of. If they are well processed, they look very decent: the material is beautiful, it does not need any decorations. It is important to properly process and varnish.
Materials
Good commercial wood is used for the manufacture of joinery, without knots or with a minimum number of them. If there are knots, they should not be black. You also need dry wood with a moisture content of no more than 12-15%. Ideally, take chamber-drying boards - they will definitely not be damaged. Also look at their geometry: “propellers” and “waves” do not suit us. The boards must be level.
You can buy sanded boards with a molded tongue and groove - there will be less work
Thickness - from 25 mm to 50 mm. Depending on the purpose and design of the door. Before use, their surface is brought to a perfectly smooth state - with grinding machines or manually using sandpaper, attached for convenience to a small block.
A simple option made from planed boards
The simplest wooden interior door can be made from one row of boards 30-40 mm thick, fastened together with transverse strips. Planed and sanded boards are stacked close to one another. There should be no gaps, the match is perfect.
The dimensions of the door leaf should be 4 mm smaller in width and length of the manufactured door frame. Only in this case will it be possible to close them without problems.
To avoid drafts, the boards can be made with profiled edges: make a tenon half the thickness or saw the edges at 45o. This option is more labor-intensive, but the room will be warm.
The edges of the door boards can be made curly
According to the rules, grooves are cut out in the boards for transverse strips - dowels. The dowels are driven into this groove, fastening the boards together. Having a special wood saw - a reward - is easy to do:
- Make two cuts at 45o. To prevent the saw from slipping, the angle was kept even; a block with the same angle was nailed to the edge. By sliding the saw along it, you will make an even cut at the desired angle.
- On the other side, at a distance of 30 mm, make a similar cut in the other direction.
- Use a chisel to select wood between them. The result is a trapezoidal groove into which a key of the same format is driven. For greater reliability, you can use wood glue. It is better not to use PVA glue. Moreover, for the doors to the steam room: it will not withstand such temperatures. For steam rooms and wet rooms, glue is chosen with a high moisture resistance class (from D3 and above).
As a result, you will get doors to the steam room, assembled with your own hands, without nails.
You can make wooden doors without nails
You can assemble a similar door easier: by screwing the transverse and oblique strips 25-30 mm thick onto self-tapping screws. If you are installing it in a steam room, it is advisable to recess the caps into the wood, or screw them in from the side of the washing and changing rooms. So, when you touch the door, you will not get burned by the heated metal.
You might be interested in: “Do-it-yourself barrel sauna”
Entrance door made of two rows of boards
If the doors are made from two rows of boards, and insulation is laid between them, you will get a good entrance door or an excellent heat-saving option for a steam room. But then the steam room will need good ventilation - with such a device, air does not pass through the doors.
The first row is assembled in exactly the same way as in the previous version: the boards are tightly fitted to one another and fastened with transverse strips.
Doors made of two rows of boards are already entrance doors
Another row will be laid on top, and the gap can be filled with heat insulation. It is selected depending on the installation location: for the front door it is important that if moisture gets in, the insulation does not lose its properties and is not afraid of freezing. A good option is polystyrene foam; polystyrene foam is cheaper. Mineral wool is not suitable - they are afraid of moisture, unless they are protected with a layer of moisture insulation. Then they will keep warm well.
Having laid the heat insulator, it is pressed with a second layer of boards, which are attached to the transverse planks with self-tapping screws. If you have a door without nails on one side, you can turn this side towards the street: this way you won’t have to worry about unsightly dark streaks coming from the caps during use.
The final stage of manufacturing a wooden entrance door is finishing around the perimeter. In principle, it was possible to fill (screw with self-tapping screws) slats onto the first layer. This is a more correct option. But you can, having assembled both layers, attach thin - 5-7 mm - strips around the perimeter from the ends, covering the insides.
The very last thing: cut in the hinges and install the handles. Then you can install the doors in the doorway. How to do this, read the article “Installing door frames with your own hands”
The final stage is finishing the doorway. This is, firstly, the installation of door trims - if the width of the door frame is not enough, and platbands, which give a finished look.
See the video for one of the options for such a door.
Plywood doors: design, tools and materials, production of frame and single-layer products
Nowadays, beautiful doors are quite expensive, however, you can make them yourself from plywood, and thereby save money. The only thing is that you should first familiarize yourself with all the nuances of this work. Therefore, next we will look in detail at how to make a door out of plywood with your own hands.
Related article: How to paint a wooden door with your own hands
The first stage of work - we design and stock up on tools
Having decided what kind of door you will make, start drawing up a project. To do this, you need to measure the parameters of the existing door frame and, based on them, draw up a drawing of the future design. There is an important thing to remember at this stage. The geometric parameters of the created product are always taken to be a couple of centimeters smaller than the dimensions of the box. If you do not comply with this requirement, the doors will not close tightly after installation.
Door opening measurement
Now you can purchase materials. You will need wood strips 11–15 cm wide and plywood sheets directly, as well as insulation (if you make frame-type doors from plywood with your own hands). Professionals recommend using polystyrene foam or inexpensive mineral wool as a thermal insulation material. It is advisable to take only first grade plywood sheets. Especially for cases when you plan to cover the finished structure with colorless varnish. It is allowed to use second-grade material, but be prepared that the appearance of the door will not be the most attractive.
All work on the construction of the door structure is carried out using simple tools. You need to stock up on an electric drill, sandpaper, a hacksaw (it is better, of course, to use a jigsaw, with it the process of cutting and fitting wood goes much faster), a pencil, a screwdriver, a tape measure, wood glue, and a screwdriver. It is also advisable to prepare an electric router. It allows you to make a lock socket in the door with the highest quality possible, as well as cut grooves and tenons for assembly into a single strong structure of the frame being created.
Making a door
Project
The process of making a door is not as complicated as it might seem at first glance. The most important thing is to prepare the project correctly. It will serve as a kind of instruction for further work and will prevent errors during work. The only thing is that you first need to decide on the type of construction.
Most often, plywood doors are made of two types:
| Construction type | Peculiarities |
| Panel | They are a frame structure, which is sheathed on both sides with plywood. As a rule, insulation or stiffeners are located between two sheets. This type of door can be used in cases where good noise and heat insulation is required. |
| Single layer | They consist of one sheet of plywood, which is reinforced along the contour on both sides with strips. This design resembles paneled doors, however, it has low noise and thermal insulation rates. Therefore, it is usually used as interior furniture. |
Frame door design
Having decided on the type of construction, you should measure the door frame and indicate the size of the future product. After this, you need to draw its main details on paper and indicate their dimensions.
Note! The size of the doors should be slightly smaller than the size of the frame, otherwise they will not close well.
Tools and materials
When choosing plywood, first of all, you should pay attention to its brand. If you plan to manufacture an external door, you need to purchase material with increased moisture resistance, for example, FSF brand. True, its price is quite high, so for the manufacture of interior doors you can use cheaper FK plywood.
If you plan to open the product with transparent varnish, you should also pay attention to the type of sheets. It is desirable that they correspond to the first or, in extreme cases, second grade.
Plywood sheets FSF
In addition to plywood, you need to prepare wooden planks 100-150 mm wide. The thickness of all materials is selected taking into account the fact that the total thickness of the product should be 35-40 mm. To make a frame structure, you will also need insulation, which can be mineral wool or expanded polystyrene.
Advice! You can increase the moisture resistance of plywood yourself by impregnating the sheets with PVA glue, drying oil or other protective compound.
As for the tools, you will need the following set for work:
- jigsaw or regular hacksaw;
- electric drill;
- screwdriver or screwdriver;
- tape measure and pencil;
- sandpaper;
- wood glue;
- varnish or paint.
In addition, it is advisable to have a router that will allow you to make tenons and grooves for connecting frame parts, as well as a socket for the lock.
Option for connecting bars to a wooden floor using tongue and groove
Making a frame door
After preparing the project, you can proceed directly to the manufacture of the product. First of all, let's look at how a frame door is made.
So, the instructions for its manufacture are as follows:
- First of all, the frame is made, which is a frame with several jumpers. There are several ways to connect the frame strips. The most reliable is through tenons and grooves using wood glue. You can also use metal corners and screws;
- the locations of the locks should be reinforced with additional bars;
Door frame with insulation
- Next, you need to cut a sheet of plywood to the size of the door leaf and secure it with self-tapping screws to the frame. In this case, the caps must be recessed below the level of the sheet;
- then you need to lay heat-insulating material into the space in the frame and cover the second side of the door with plywood;
- The next step is to mortise the lock. To do this, you need to mill out a socket for it and drill holes for the handles;
- At the end of the work finishing is done. The product must be sanded, the screw heads and other defects must be filled, and then the surface must be varnished.
This completes the process of manufacturing the frame structure. It must be said that the product can be decorated at your discretion in different ways, for example, by gluing false panels or a wooden figure cut out with a jigsaw. You can also apply a design with a router or come up with your own version of decoration.
Single layer plywood door
Making a single-layer door
A do-it-yourself single-layer interior door from plywood is made in the following sequence:
- work should begin by preparing a sheet of plywood according to the size of the door. It is advisable to use a fairly thick sheet, at least 1 cm;
- Then, along the perimeter of the sheet, strips are attached, which can also be made from plywood. To fix them, use self-tapping screws and wood glue. It is also necessary to secure the lintels like a paneled door. To connect the planks to each other, you can use a tongue/groove or furniture tongues;
- Next, you need to attach the strips on the back side of the door in exactly the same way;
The photo shows the finished door leaf
- then you should mill out the space for the lock and the holes for the handles;
- to give the structure a complete and attractive appearance, the transition from the planks to the plywood should be decorated with profiled glazing beads;
- Now the product needs to be sanded and puttied. If you plan to open the door with varnish, then putty should be used to match the color of the wood;
- To complete the work, you need to open the product with varnish or paint.
Advice! To give the structure a certain color, but at the same time preserve the texture of the wood, it should be treated with stain before opening the varnish.
Here, in fact, are all the most optimal ways to make a plywood door yourself.
Door panels. Kinds
Before deciding which door you need, you need to decide what room it is intended for.
In fact, most doors, both expensive luxury ones and the simplest ones, are made from boards: but this material is processed differently and can have different qualities. Different types of wood also have very different functional characteristics.
Door leaves can also be divided according to the type of construction, of which there are several:
- massive,
- paneled,
- panel (solid and hollow),
- frame.
You can choose to purchase here: https://169.ru/mezhkomnatnye-dveri/
Let's look at their quality characteristics in more detail.
Massive
They are made from thick planed or tongue-and-groove boards, which are joined into one plane, forming a single, flat base.
On a shield made in this way, there should be inclined or horizontal jumpers. They provide the entire structure with higher rigidity. To make doors, you can use wood of different qualities and different species: it depends on where it will be located. If, for example, it will be an entrance door, then it is recommended to use dense, dried wood of excellent quality from valuable species: oak, larch, cedar and others.
The structure of this wood is quite dense, and the texture has a beautiful pattern. If you treat it properly, it will serve its owners faithfully for a long time. Its canvas will not be subject to damage or various deformations.
A massive door can have a wide variety of designs. This could be a simple, unpretentious door for a steam room in a bathhouse, or a complex one, with carvings and a relief pattern, the entrance door to a cottage or apartment. In the first case, you can take less valuable types of wood: pine, linden, spruce and others.
Main! Do not forget to subject the structures to mandatory treatment with water-repellent and antiseptic preparations.
The design of massive doors may differ noticeably, but one thing remains basic and unchanged - a durable door made of wood.
Paneled
It must be said that a well-made paneled door is almost impossible to distinguish externally from solid wood.
Paneled doors are also made from timber or boards, but in this case the glued version is used. Individual pieces of wood, called lamellas, are glued together to form thick beams or boards. The resulting parts are finished with natural wood veneer of different species, as a result of which they become more attractive in appearance.
Glued laminated timber is a rigid frame for the canvas. Centerpieces, transverse and vertical elements are made from it. Previously, such elements were connected using spikes, but now dowels have begun to be used for this. When making a door, you need to know that the more crossbars it contains, the stronger it will be.
Original frames are made of timber, then panels made from thinner boards are inserted into them; or covered with natural veneer or MDF imitation plastic. The thickness of the panel is usually one third of the thickness of the laminated veneer lumber itself. In frames, these panels are fixed with natural or veneered glazing beads, which smooth out sharp frame edges and give the entire product a more aesthetic appearance.
Paneled doors are manufactured in a variety of colors and designs. Since the main part of the door leaf is quite thin, they are most often used as interior doors. The entire paneled structure is made of fairly durable materials that are not so inferior in wear resistance to solid wood. It happens that paneled doors turn out to be more expensive than noble solid wood. The price of the product will depend on what type of wood was used to make the bars and boards, as well as on what kind of veneer was used for the door. It must be said that completely wooden panels that are made according to a similar pattern can be paneled.
Panel
Compared to the two previously mentioned models, panel doors can safely be considered a budget option: they are much cheaper. For their manufacture, inexpensive material is used - low-quality wood and fiberboard, lined with laminate or veneer.
A high-quality design has a fairly aesthetic appearance. If you veneer it with natural veneer, it will look like a solid wood door.
Panel doors are different:
- solid,
- small-hollow,
- hollow.
What are their differences?
In the first, the entire space inside is filled with unedged timber fastened to each other, in the second, such filling is only partially completed, while the third consists only of outer cladding and trim.
A panel hollow door usually consists of a pair of side and two transverse (lower and upper) beams, covered with clapboard, fiberboard or other materials.
Often, cross members - vertical and horizontal - are inserted inside such a structure to enhance its rigidity. Such a product can be considered a frame product.
Small-hollow panel structures are filled inside with various materials (plywood, cardboard, MDF boards, foam plastic and even shavings), and the degree of this filling can also vary.
Solid doors are those that represent a kind of shield made of timber well fastened together. It can be either edged or unedged.
The panel door frame is lined on both sides: fibreboards, laminate, plywood, melamine or veneer are used for this. If high-quality plywood with a pleasant textured pattern is used for cladding, such a door can be finished with profiled overlays.
If you need a panel door of improved quality, then it is better to line it with laminated alder or linden plywood, laid in one or two 2-3 mm layers.
The material from these rocks is not subject to deformation, providing a solid basis for subsequent finishing. Its role can be played by special plywood for finishing, made from valuable wood.
The direction of the fibers of the decorative coating should be perpendicular to the guides of the glued layer.
Often, instead of plywood, natural veneer made from noble species is attached to the glued layer. All its layers, which can be from three to five, are placed perpendicular to the previous ones.
The end sides of the shield itself must be solid and even. Therefore, if the door does not have a frame, then high-quality, even bars are used for them, matching the texture and color of the finishing of other surfaces of the door. The end beams are connected to the shield with glue and dowels.
Such products can play the role of interior doors, but can also be used as entrance doors. But such doors have absolutely no protection, so for the role of entrance doors they are more suitable as apartment doors, in a warm, closed entrance.
Conclusion
Making plywood wooden doors is beneficial from an economic point of view, and in addition, doing something yourself is always interesting. However, for this you need to stock up on time and patience, since the work must be done carefully and slowly. Only in this case the product will turn out beautiful and durable.
The video in this article contains some additional information on the topic discussed. If after reading the material you have any questions, you can ask them in the comments, and we will be happy to answer them.
We make a single-layer product - subtleties for craftsmen
Interior plywood doors are made according to a simple design. It is given below:
- Take a sheet of plywood 1–1.2 cm thick. Cut it according to the parameters of the door.
- Attach the slats around the perimeter of the sheet using wood glue or. Instead of slats, it is allowed to use planks that are made of plywood.
- Make jumpers on one side of the structure. You add additional slats to the door leaf to increase the strength of the door, and fasten them with furniture tongues or using a tongue-and-groove connection. Do the same with the second side of the single-layer product.
- Use a router (if you don’t have one, use a chisel) to make holes for installing door hardware (handle and lock).
- It is advisable to smooth out the transitions from planks to plywood by installing putties (profiled). Then the appearance of the product will be much more attractive.
- You sand the finished door, putty it, paint it in the desired color or varnish it.
As you can see, everything is quite simple. A dedicated home craftsman can handle this type of work in just a few hours (maximum per day). You will have to suffer longer with a frame door. But the reliability of the finished product will be much higher.
Constructions made from two plywood sheets take longer to make. First you need to make the frame itself. It is made from wood blocks and planks. You should have a strong frame with a sufficient number of jumpers. They are connected, as in the case of single-layer products, with wood glue or through a groove/tenon.
Plywood for frame door
After this, cut out sheets of plywood according to the parameters of the canvas, fix one of them on the made skeleton with self-tapping screws. The next step is laying insulation. Now you can attach the second plywood sheet and begin installing the lock on the door. Using a milling cutter (chisel), you hollow out holes for the handles and the locking mechanism itself.
With patience and great desire, you can easily make a plywood door yourself. The main thing is to take your time and perform each operation carefully and responsibly. And then you will absolutely have a durable and beautiful door, different (and not for the worse) from standard (and, note, expensive) factory designs.
Making interior doors in a home workshop is a fun and creative process. If you have the necessary tools and materials, the simplest door can be assembled in two to three hours. More complex designs, combining practicality with design sophistication, are installed in two or three days. Doors decorated with artistic carvings, stained glass windows or forging elements can only be built by the most diligent and patient.