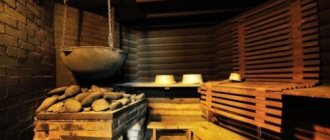
The iron sauna stove is characterized by its pleasant appearance and excellent thermal conductivity. However, if it is operated incorrectly from a technical point of view, there is a risk of fire. It is because of this that you should know certain nuances.
The simplest homemade structures for a bathhouse are “potbelly stoves”. They consist of a box with a pipe and a door; they give off an insufficient amount of heat, but at the same time they require a significant consumption of firewood. At the moment, it is already a relic of bygone years.
Now, metal bath units are much safer than their predecessors. Most of them are made from sheet iron, with a chamber provided for filling the stone.
Often, a container for liquid is also provided, the capacity of which can reach up to seven tens of liters. However, it is important that the unit is necessarily lined with special refractory bricks, since this eliminates burns and ensures uniform heating of the air.
Design features and types of furnaces
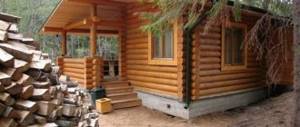
The classic Russian bathhouse is close to many people and is very popular among owners of private houses and summer cottages. This is not only entertainment and relaxation, but also great health benefits. This is why so many people value it, trying to provide themselves with such an attribute in their own home.
Typically this design weighs about 800 kg. This makes preparation necessary for its installation. The foundation must be at least half a meter deep and 5 cm larger than the dimensions of the stove on each side. If an iron sauna stove of a simplified version is not so heavy, then a foundation is usually not needed. It can be installed on a concrete floor.
If the stove is wood-burning, you will need a grate. You can make it yourself or order a ready-made version in the store. The grate is set in height as the level of the firebox door itself. From the side of the fuel compartment, 30 cm from the door.
The outer wall is half the thickness of a brick. Inside the fuel chamber, the following trick is often used: they make bevels for the coal that has burned, so that it eventually ends up on the grate.
Any oven will still consist of the following main parts:
- Ash pan. This is the space under the firebox for collecting ash, which will need to be cleaned out periodically.
- This door is needed to allow air flow into the structure so that the fuel flares up better.
- Chimney damper. Needed to provide the required draft in the stove. When it is fully open, the fuel burns hotter and, accordingly, burns faster. When the wood burns out and coals remain, the valve is closed. which helps keep you warm. But this should be done after they have cooled down, when they stop burning. Otherwise, to avoid harm to health, leave a gap of about two cm to allow air to pass through.
- Boiler (coil). Here the water is heated, due to the steam of which the bathhouse “works”.
Each oven has its own characteristics. Types of ovens:
Wood-burning sauna stove. This is the most popular oven option. It consists of a firebox, chimney, ash pan and grate. Such stoves are made of metal or stone. They so often become the choice among bathhouse fans because they have advantages: even the small dimensions of the device can provide enough heat to warm up a large room. Such furnaces are used even when there is no gas supply at the site. This type of oven is the easiest to use. It also has a calming effect - the sound of crackling firewood.
Cast iron stove. They, in turn, are divided into temporary and permanent combustion furnaces. In the first case, firewood is used for the firebox. You can use the sauna when all the wood is burned. For a continuous combustion furnace, liquid fuel or gas is used as fuel. In the second option, the steam room is suitable for use already when the stove is just being heated. This type of stove will warm up the rooms faster and distribute the steam more evenly throughout the entire area of the room.
Electric oven. It comes in different sizes, has different characteristics in terms of efficiency and power. Like the previous one, it heats up quickly and lasts a long time. The advantage is that an electric stove does not require a chimney. They are also not expensive.
Finnish sauna stove. They produce dry steam combined with high temperature. Such stoves come in both electric versions and those using wood as fuel. You can make such a stove with your own hands. All you need is special drawings and instructions.
In order to use the stove to its maximum, it is advisable to know some features. For example, a wood-burning sauna stove can also be heated with other solid fuels. Coal and briquettes are allowed. If you approach the task of making a stove for a bath correctly, it will serve for a long time and will delight you with its reliable operation.
a8036fda206dc9ae23b336cf6cd695a2.jpe
Cast iron stoves are connected to a central gas supply for operation. The use of gas cylinders for these purposes is not recommended due to the increased risk of explosion.
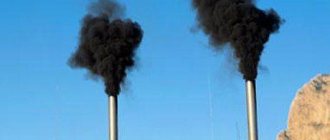
Stoves that use liquid for combustion emit a specific odor.
When choosing an electric furnace, it is better to check the wiring first. Such stoves are not very economical for large rooms, which is also worth considering.
The cost of assembling the stove itself will depend on many parameters, primarily its size.
Making a metal stove with your own hands
When starting to manufacture metal stoves, you need to purchase:
- Sheet steel having a thickness of 8 mm or more;
- A pipe with a diameter of 50 cm and a wall thickness of 1 cm;
- Rod, 10mm thick;
- Grate bars;
- Chimney pipe;
- Welding machine and grinder.
Types of stoves
The unit must efficiently heat the entire steam room, but not interfere with or pose a danger to visitors
It is worth paying attention to the design of the stove that you plan to install in the steam room. If we classify products according to the location of the fuel door, we can distinguish the following options:
- The firebox door opens directly from the steam room. This option is the most common. Firewood is loaded from the steam room. It is very convenient to adjust the draft by opening the door slightly. If the door is equipped with tempered glass, then the opportunity to admire the flames while vaping is added. However, it is worth remembering that when loading firewood, dirt remains on the floor, and oxygen in a small room is burned out too quickly;
- the firebox door opens into the dressing room or rest room. Fuel is loaded from the same room. This option is considered the best and safer, because the oxygen in the steam room is not burned out by the flame, it is easier to maintain cleanliness, space in the steam room is saved, and it is not necessary to install a separate heating system in the relaxation room. If, during the construction of the walls, a technological hole for an extended (remote) fuel channel was not provided in advance, then the partition will have to be partially broken;
- The firebox door faces the street. Perhaps an acceptable option only for the smallest baths or baths with seasonal use. Loading and reloading fuel and traction control will have to be done by constantly running outside, which will cause discomfort.
The furnaces themselves, by their design, can be vertical, horizontal, in the form of a barrel and other shapes. There may be a grid for stones and a hot water tank. Chimneys from metal stoves are discharged through the ceiling or wall.
Metal wood-burning stoves for saunas
Brick chimney design
Brick chimneys
The main material for the construction of stoves/chimneys is, of course, brick. Despite the significant consumption of materials, the construction of a brick chimney requires minimal cash costs: sand, clay, water and brick. It should be remembered that not any high-quality brick is suitable for laying a brick chimney duct - only solid clay, fired.
Steel chimneys
Currently, metal pipes, especially pipes made of heat-resistant stainless steel, are increasingly being used as a material for chimneys. Stainless steel chimneys are much lighter than brick chimneys and do not require an additional foundation, they are much easier to install - they are a kind of easily installed “constructor”, they are resistant to corrosion, durable, and are suitable for working with various modifications of boilers and furnaces.
Metal pipes have an optimal cross-section for removing flue gases. In smoke channels with a round cross-section, unlike square and rectangular ones, there are no local turbulences that impede the movement of the main gas flow. Soot does not deposit on the ideal smooth walls of metal chimneys.
Steel chimneys are easy to install in already built houses, where at the construction stage the possibility of installing heating units was not provided and, accordingly, there is no chimney. Metal chimneys are quite widely represented on our market. Moreover, not only well-known foreign manufacturers, such as Selkirk (England), FF
Bofill (Spain), Raab (Germany), Hild (France). Domestic manufacturing companies have also established production of metal pipes for chimneys. Some of them also produce modular chimney systems (a complete set of necessary elements for installing chimneys of any complexity) - these are the companies Elits, NII KM (Moscow), Rosinox (Klin), Baltvent (Kaliningrad). Certified for the Russian market and not inferior in quality to Western analogues, domestic products are often much cheaper.
Chimneys based on stainless steel, produced by various manufacturers, are very popular in modern construction. There are good reasons for this: optimal channel shape, high corrosion and temperature resistance, smooth walls, low weight and long service life. There are few disadvantages - relatively high price and low self-supporting capacity.
The range of offers for these products is divided into thermally insulated chimneys - “sandwich” and “hot” pipes. The word “sandwich” is usually understood as a structure consisting of a round metal chimney placed inside a special fire-resistant thermal insulation, which in turn is located inside an outer metal pipe.
Heated combustion products move inside the pipe, and it is the inner pipe that bears the main impact of high temperatures and chemically aggressive compounds. The material for it is high-quality stainless steel. Thermal insulation is also not simple, it not only does not burn and has low thermal conductivity, but also does not emit vapors and gases when exposed to high temperatures that could harm health or comfort.
It can be convenient when laying one or several chimneys at once, for example, inside an existing stone or other shaft, the walls of which are not suitable for direct contact with fire and combustion products or do not provide tightness. “Hot” flexible pipes can be called universal, since they allow the removal of gases from the firebox without the use of various rotary structures and intermediate connections, and are also supplied in pieces up to 30 meters long!
In 2004, chimneys made of ceramic fireclay pipes in a shell of lightweight concrete or stainless steel from the German company SCHIEDEL appeared on the Russian chimney market.
Having all the advantages of steel chimneys, they are also highly reliable and durable. The elements of such chimney systems consist of an internal fireclay pipe, an insulating layer based on basalt rocks and an external casing - lightweight foam concrete or stainless steel (Shiedel KERASTAR system). The cost of fireclay chimney elements is slightly more expensive than steel ones. But everything pays off over long-term use.
Glass chimneys
The following facts should be considered alarming signals when assessing the condition of the duct and the suitability of the chimney:
- the presence of several inclined sections of the chimney;
- the presence of an area with an angle of inclination from the vertical of more than 45°;
- masonry mortar squeezed into the channel lumen (for brick structures);
- concrete fragments of interfloor slabs or metal reinforcement protruding into the channel;
- insufficient distance between combustible building structures and the internal walls of the channel;
- suspicions of a partial lack of tightness of the chimney;
- the presence of certain communications in dangerous proximity to the chimney;
- questionable waterproofing of the chimney head.
In general, damage to pipes and chimneys occurs most often in their under-roof part. Repairs are carried out by dismantling the damaged layers and replacing them with new bricks, concreting the pipe head, jointing new and repairing old seams, which are scraped to a depth of at least 3 cm. If the concrete head of the chimney is damaged, it is replaced with a new one made of high-quality reinforced concrete.
When cracks form in a chimney built in the masonry of the walls of a house, smoke can enter the living quarters. In these cases, the masonry is dismantled and put back together. Since this is a very labor-intensive job, it is more convenient to make a new chimney. It is carved into a wall at least 30 cm thick or attached to the wall, which is much simpler, especially with the use of a chimney insert, which is attached to the masonry with steel strips and lined with brick or wrapped with mesh and plastered.
Only a few aspects related to assessing the conditions for installing a fireplace and the correct installation of a chimney were considered here.
If you have any questions related to the choice of model, installation and proper operation of your home fireplace, you want to build a brick wood-burning fireplace, fireplace stove, Russian stove, heater stove, heating and cooking stove or any other stove or stove, and, of course , to equip your desired property with a high-quality chimney, if you want to know the price/cost of work, or make an estimate of the costs of building a fireplace - write or call us. We will answer all your questions and try to help you.
PS For the most fruitful communication, it is advisable for you to prepare information about the height of the building, the material of the floors and roofing.
For masonry, you can use high-quality red brick of the M100 brand, without cracks or signs of warping. Fireclay is usually used in superstructure pipes and in places where gas flow turns around. The temperature at the entrance to the pipe can rarely rise above 800 o C, so in most masonry, from the base to the top, they are made with ordinary bricks. Coal or combined stoves are another matter; in this case, the lower tier of brick is supplemented with inserts made of dinas or fireclay.
You cannot use sand-lime and clinker bricks, materials with the addition of organic fibers, natural stone fillers, all of them crack under the influence of temperature, and sand-lime brick, even at low temperatures, is susceptible to corrosion due to the large amount of carbon dioxide.
- carrier. One of the walls of the chimney will be the wall of the room;
- separate.
Freestanding chimney in the attic of a house
Regardless of the type, the masonry is done the same way.
Conventionally, a chimney for a brick fireplace can be divided into several sections:
- foundation. The main and obligatory section of the chimney duct, which is recreated from full brick or stone. The height of the foundation is made 30 centimeters, and gives it the appearance of a rectangle. Parameters such as width and length are selected based on the fact that it should protrude by more than fifteen centimeters. But also the size of the foundation depends on the main mass and bearing capacity of the foundation;
Place prepared for a foundation for a brick chimney
- brick chimney channel. It is made in a square, but the best option would be to lay it out in the form of a rectangle. The optimal channel dimensions are 14 by 14 or 14 by 20 centimeters. Such a chimney is most often laid by bandaging the seams using spoon or bonded rows. The surface of the chimney channel should be made perfectly smooth without protrusions or depressions. For this, specially prepared templates made of steel or wood are used. As the masonry is created, they should be lifted up.
Advice! The outer side should be plastered to its entire height. It is better not to touch the inside, since the chemical reaction that occurs as a result of combustion can lead to destruction in the shortest possible time.
Laying a brick chimney using a wooden template
- The chimney head or cap requires protection from precipitation getting inside it. It is usually made of concrete and reinforced with steel reinforcement bars. Such a cap is usually installed five centimeters outside the chimney and thereby prevents rain or melt water from entering the lining. Also, when constructing the masonry, it is necessary to leave holes on the cap for gas exhaust and smoke channels.
↓ Be sure to study the recommended material on the topic ↓
Do-it-yourself chimneys for solid fuel boilers: how to calculate correctly
Advice! To prevent problems with draft, the smoke exhaust pipe should be located higher than the roof ridge. To do this, install the nozzle. They can be made of concrete or sheet steel.
- On the furnace, it is necessary to install a top pipe equipped with a valve, after which it must be lined with bricks using a special specialized dressing method. At the end of the nozzle, the chimney passage should be expanded only from the outside by twenty-five to forty centimeters, the cross-section inside remains unchanged;
- the chimney section, located in the attic or riser, will rise to the roof itself. After this, an expansion of at least ten centimeters is made on each side. It's called otter. Due to the expansion, precipitation - snow or rain - does not fall into the slot between the roof and the chimney into the attic;
- "neck" - part of the smoke duct at the top of the roof, which is laid out after the otter.
- In this case, you need to use a solid one made of clay, but it’s better to forget about ceramic or hollow ones. For example, the latter option is not able to accumulate heat, as a result the chimney quickly cools. Sand-lime brick is not able to withstand the processes that occur during the removal of exhaust gases from fuel for a long time, and soon becomes unusable.
- Using bricks, you can lay out a system of channels in the chimney and adjust the thickness of its walls. It must be said honestly that no other material can cope with this.
- The binder is a mortar of cement or lime. The first one is necessarily used for external work, the second one copes well with internal work. Moreover, this provides significant overall cost savings, since the price of lime is much lower.
- Chimneys differ from each other in height, cross-section inside the trunk, and size of the firebox.
- The main parameter is the correspondence between the height and cross-section of the pipe. For example, a fairly high brick chimney with the same large cross-section will not be able to fulfill its intended role, since the hot air will rise upward slowly, which will cause condensation. It will begin to flow down the pipe, causing a foreign burning smell in the room. In this case, the draft will also be insufficient, causing smoke in the room.
- Another important parameter is the ratio of the internal cross-section of the chimney and the dimensions of the firebox. The larger the latter, the larger the cross-section should be. Otherwise, exhaust gases will not be able to quickly leave the chimney; as a result, smoke will accumulate next to the heating device.
Long-burning boiler principle
Before reviewing the unit, you need to understand the principle of its operation. The bubafonya stove runs on solid fuel - wood. Before you start burning it, you need to prepare the wood. In the boiler it is heated to 250 degrees Celsius using paper ignition.
When charring, wood decomposes into simple chemicals: gases and vapors. When the temperature reaches 300o Celsius, the gaseous components ignite, accelerating the thermal reaction.
To protect against fire, and also to prevent it from spreading throughout the entire container, a protective screen is provided on the fireplace. A damper is used to regulate the temperature. When turned off, the air supply stops, as does the combustion process.
e73a5161b278f1b9b6cce9d093acdbd7.jpe b91f0cbcde1d75943e45664645a35bcc.jpe c66866520f2ead98723282e8dfc82f03.jpe c3e999ec2fa9779517be1a04935 82877.jpe
Necessary conditions for chimney operation
A fireplace or stove operates properly if the appropriate conditions are provided inside the firebox: vacuum for closed chambers and speed of gas movement for open ones. The minimum height of the fireplace chimney is about 5.5 meters from the combustion surface to the mouth of the chimney. But the height condition alone is not enough; there is a complex relationship between the shape and cross-sectional area of the chimney, its height and the geometric parameters of the fireplace insert. Errors in assessing all conditions can cause unsatisfactory operation of the fireplace - smoking, difficulty igniting, etc.
One, two and done
Currently, there are drawings of potbelly stoves with round and rectangular sections. The figure shows a diagram according to which a potbelly stove can be made with your own hands from an ordinary milk can; a similar design can be made from a metal barrel.
Potbelly stove from a can
In order to make a potbelly stove like this for a summer house or garage with your own hands, you will need a minimum of tools and materials:
- An old milk can (if you chose the option of making it from a barrel, then the barrel is made of metal);
- Metal rod with a diameter of 6 mm;
- Retraction. If you have the skill, you can make it yourself;
- Hammer;
- Chisel;
- File.
You can start working with your own hands. We specifically did not indicate the dimensions so that the master would base it on the diameter of the barrel or can used.
First you need to make a blower. To do this, a rectangular hole is cut below the neck of the can (barrel). The edges of the hole are processed with a file.
After this, it is necessary to cut a hole in the bottom of the can (barrel) of such a diameter that you can subsequently insert the outlet tightly (see the article Chimney for a potbelly stove). This is done as follows:
- At the site of the future chimney, markings are made at the bottom of the can or barrel. The diameter should be 2 mm less than the diameter of the outlet
- Using a chisel and hammer, cut a hole according to the markings
- The hole is leveled using a file. A round file is best for this.
- The outlet must be pressed tightly into the hole. If the outlet does not fit, the hole is finished with a file. In any case, the outlet should fit tightly
- A snake is bent from a metal rod; it will act as a grate
- The finished grille is bent so that it can be inserted into the neck
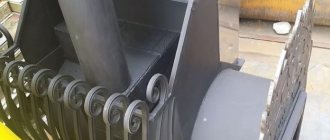
- The inserted grate is aligned inside the can (barrel). The grate is made from reinforcement and welded to the body. As can be seen from the picture, there are two doors installed here for the blower and firebox. Such stoves can not only warm up a room well and quickly, but they can also be used to successfully cook food.
The potbelly stove is ready. If you wish, you can make a stand for it yourself. If you install a damper damper, you will get a stove with adjustable draft. Setting up such a damper is quite simple.
As you can see, a potbelly stove can be made with your own hands without special tools and materials. Simply install a stove made from a barrel or can in the desired location and connect the chimney. Your potbelly stove made from a barrel will regularly warm the room until you install stationary heating.
Choosing material for work
The most important thing for a stove is the choice of brick, because how can you lay a stove without good quality material?
The brick for these purposes must be well fired. This can be determined both externally and by tapping on it. Heavily burned brick has a glassy film or dark coating on the surface. If it is lightly burned, it has a pale pink color. Also, unsuitable material will make a dull sound when tapped, and when dropped, it will break into many small pieces. When tapped, a normal-fired brick makes a metallic sound, and when dropped, it breaks into large pieces. It should also be easy to split for further processing. To line the firebox, it is necessary to use refractory refractory bricks. This is due to the fact that in this place the temperature is highest, and the material should easily withstand it.
Note! The type of fuel plays a role in determining the type of brick needed to lay the firebox. So, if peat or firewood will serve as fuel, then it is necessary to use white Gzhel brick, and if coal will be used, then fireclay brick.
The main stages of making a potbelly stove
1. All the details are marked on a sheet of metal: 6 steel rectangles for the walls of the oven, 1 rectangle for creating a smoke reflector, plates for the grate and latch for the door. 2. Cut
sheet metal can be found at any metal depot. The guillotine, unlike the grinder, allows you to cut (chop) it more accurately. In this case, there will be no need to do straightening (alignment of sheets).3. The furnace body is made in the form of a rectangle. Their sides are joined together at an angle of 90° and welded together.
4. To avoid mistakes, the furnace box is first only tacked by welding in several places, and only then, after checking its horizontal and vertical positions, its seams are welded.
Important! All connections in the body are thoroughly welded; To check the seams for leaks, you can coat the joints with chalk or kerosene. 5
Welding seams are cleaned with a wire brush.6. The internal space of the potbelly stove is divided into three parts: the firebox, the smoke circulation chamber and the ash pan. To separate the firebox from the ash pan, a grate is laid between them, on which the fuel will be placed. To do this, at a height of 10-15 cm from the bottom of the stove, 5x5 cm corners are welded on the sides and on the back of the box. On which the grill will be located
5. Welding seams are cleaned with a wire brush.6. The internal space of the potbelly stove is divided into three parts: the firebox, the smoke circulation chamber and the ash pan. To separate the firebox from the ash pan, a grate is laid between them, on which the fuel will be placed. To do this, at a height of 10-15 cm from the bottom of the stove, 5x5 cm corners
. on which the grille will be located.
Advice.
It is better to make the grate from 2-3 detachable parts. Otherwise, when replacing a burnt grate, it will be difficult to remove it from the firebox.
7. The grate is welded from thick steel rods or strips 30 mm wide. They are attached to 2 stiffeners - rods with a diameter of 20 mm. Since the grates burn out over time, it is better to make such a grate removable.
Manufacturing of grate
8. At a distance of 15 cm from the top of the box, two strong rods are welded, on which one or two removable reflectors
– thick-walled sheets of metal that will delay the flow of hot gases and send them for afterburning. However, they should not completely block the oven. To allow hot smoke to enter the chimney, an indent of about 8 cm is made from the front (for the first sheet) and back of the stove.
Diagram of the passage of gases in a simple potbelly stove and stove with an installed reflector
9. Next, the upper part of the box is welded, and then a hole for the pipe
.
7b322d8423a7dadf138a51c55e6975c2.jpe b7cefa9acf3137f0016fdbcbaff2b0fa.jpe 9f6cac380670ce1bd8016126517b4cb8.jpe
5c442439af9dde1c6eab9f7923ded6d5.jpe
fd2d612e384629fa06d7f9f58324af72.jpe
Pipe hole
10. The front part of the stove with holes cut in it for the firebox doors and ash pan is welded last. 11. The size of the firebox door must be sufficient to allow fuel to be added and grates to be changed without effort. The hole for the ash pan is made a little smaller. 12. The hinges are welded first to the door, and then to the body of the potbelly stove. They can be bought ready-made or welded from two tubes of different diameters. Door handles can be made from a strip of metal or rod.
Important! When attaching the doors, you should fit them to the body as tightly as possible; To do this, they are straightened (leveled) and cleaned with an emery wheel. Wedge latches closing the doors are adjusted to the body as tightly as possible
13. You can cook food or heat water on such a stove. To do this, a hole of the required diameter is cut in the upper part of the box. Stove burner
.
which will be inserted into this hole can be purchased at any hardware store.14. For ease of use, the structure is installed on legs
or a welded stand made of pipes.15.
The chimney pipe is connected to the stove using a sleeve
.
16. For inserting a gate valve
. to regulate the smoke output, two holes are drilled in the pipe. A metal rod is inserted into the holes and bent at 90°. A metal “penny” is attached to it in the center of the pipe - a gate, the diameter of which should be slightly less than the diameter of the pipe itself by 3-4 mm.
Gate valve for adjusting smoke output
Water heating oven
Made of metal
Thanks to the design, which will be described below, it becomes possible to heat water located in a separately installed tank. We will need the same material as in the previous version.
- We make two blanks measuring 60x39 cm - this will be the base and the top cover. The side walls will measure 60x57 cm, the back - 60x40 cm.
- We make a cutout in the side walls - it will be 20 cm from the top, 17 cm from the edge. This way we will constructively highlight the firebox.
- We weld the side and back walls around the base.
- In the upper plane we make a hole for the pipe, stepping back 5 cm from the back wall. We weld a sleeve into the middle for the chimney.
- We make a shelf from a 30x30 cm corner at a height of 39.5 cm. We install the top cover on the profile and carefully process the seams.
- We weld the front wall, its size should be 40x40 cm. We cut out a door for the firebox in it, its width and length are 26x23 cm (it should be at a height of 7 cm from the base of the stove). We attach hinges to it, as in the previous version, and a locking mechanism.
- Under the door, we drill holes with a diameter of 8 mm in two rows. They will serve to bring in fresh air.
- We cut out a blank 20x40 cm and cover the front wall of the stone compartment with it.
- We make a container in which the water will be heated. To do this, you need to cut a side with dimensions of 43x35 cm, two of 10x44 cm and two of 10x35 cm. A metal box is assembled from them. All seams are carefully welded so that there are no holes and liquid does not leak out.
- Two ¾” pipes are welded into one of the 10x35 cm walls at the top and bottom; at the base of this module, another ½” pipe is attached to drain water.
- Now the entire box is welded onto one of the side walls of the stove. A careful approach to the quality of the seam is also important here.
It is better to approach each stove as an individual project. Only in this case can all wishes be taken into account. Now you have some idea. You can add something of your own to the above diagrams. We will be interested to know what happened for you. Share your ideas in the comments to the article.
Construction of a potbelly stove: features, principle of operation, arrangement of heat exchangers
A potbelly stove with a water circuit works as follows:
- Firewood is loaded into the firebox.
- They light a fire, the heat is transferred directly to the water tank or the recuperator coil.
- Hot water enters the heating or water supply system.
- Remaining heat and flammable gases are removed from the room through the chimney.
- The ashes fall through the grate into the ash pan.
The design of the water circuit unit uses two energy harvesting principles:
- Direct thermal energy collection. The heat exchanger circuit is located inside the stove. Heat transfer immediately begins from the contact of the open flame and the boiler tubes. The water in the radiator boils and enters the heating system. From there it is sent to water supply pipes. The heat exchanger experiences large temperature differences (the contrast between the temperature of the water and the heat inside the oven).
- Collection of secondary heater radiation. The boiler circuit is located outside the heater. Being outside, it collects secondary thermal radiation from the heated metal surface. The degree of heating of the heat exchanger is lower than in the previous case, temperature differences are not so significant. The water in the device circuit begins to heat up after the stove warms up.
Photo gallery: common types of heat exchangers
Mineral salts form inside the boiler. Therefore, instead of water, it is more advisable to use antifreeze or antifreeze, which contain additives that prevent the formation of mineral deposits. The most common heat exchanger designs:
- a water tank built into the stove - a capacitive boiler;
- tube boiler - a tank in the form of a water jacket around the stove or chimney - capacitive heat exchanger;
- main boilers - a coil spiral or a water conduit passing through the active heat transfer zone.
Calculation of the main parameters of a potbelly stove with a water circuit
To calculate the dimensions of a stove with a water circuit, you need a drawing, drawing or sketch of the future device. This will help avoid manufacturing errors.
Having chosen a suitable project, we determine the parameters: length, height, width. We calculate the dimensions of the combustion chamber, the length and diameter of the pipe, and the height above the floor. A potbelly stove is characterized by high temperatures inside the boiler, so metal with a thickness of more than 3 mm should be used. Or carry out scheduled repairs every 2-3 years.
Thick-walled alloy metal is used in the manufacture of potbelly stoves
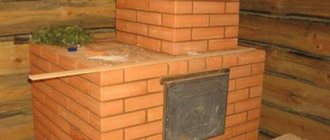
Independent laying of stoves for a bath
Before laying the stove, it is necessary to pour the foundation, and then put waterproofing on top in the form of a piece of roofing felt. Next, you can begin laying the first row of bricks, on which you also need to lay roofing felt. This will prevent moisture from penetrating into the brickwork, which could cause the oven to collapse.
When laying bricks, keep in mind that you will need to install ash doors, grates, and fire doors. It is also necessary to organize a chimney through which smoke and carbon monoxide will be removed from the stove. It can be made from a pipe (metal, expanded clay or asbestos) or laid out from fire-resistant bricks. If desired, a water tank is installed above the heater.
Important! Laying bricks must begin from the door in order to firmly and securely fasten it into the structure.
Installation and connection
When installing the stove, you must strictly follow the fire safety rules:
- The distance to walls and surrounding objects must be at least 800 mm. The walls can also be covered with ceramic tiles.
- All parts of the chimney must be tightly connected.
- The room must be equipped with a supply and exhaust ventilation system.
The chimney is installed like this:
- We fix the first piece of pipe above the chimney opening.
- We increase the pipe bends to the ceiling level.
- We make holes in the ceiling with a diameter of 170 mm. We remove a layer of thermal insulation around the hole to prevent fire.
- First, we mount the pass-through glass, then insert the pipe into it.
- Next, we connect the pipes to the external chimney.
- We apply bitumen to the pipe and insulate it.
If you need to heat a large area, you can connect the stove to a heating panel. This will increase the heat flow and allow it to be retained longer.
Pipe arrangement
Although fuel combustion occurs inside the heater, without a chimney, a metal stove will fill the interior with smoke. Therefore, the need for smoke removal is always relevant for a bathhouse. In order for a chimney to heat water, there must be draft, which is facilitated by:
- Bringing the chimney out so that it rises above the highest point of the structure;
- The absence of tall trees and other characteristic objects nearby;
- An umbrella at the end of the pipe (deflector), which allows the latter not to get wet;
- Large pipe diameter - at least 100 mm.
Moreover, the pipe can pass through a tank for collecting water, and the container itself can be located in the attic. The main thing is that the openings for the chimney at each level should be provided with fire-resistant basalt lining. The section of the roof with the hole for the chimney outlet is finished with a sheet of metal.
If the design of a metal sauna stove does not include covering the heater with steel sheets (the design is open), then the stones are placed close to the pipe.
In this case, it is better to arrange the latter in the center so that as many stones as possible are in contact with the hot line. In closed furnaces, the pipe can be located either in the center or on the side.
What can a Bubafon cauldron be made from?
Half of the entire structure is the boiler, which can be made of any material, suitable shape and characteristics. These may be the following items.
- Do-it-yourself bubafonya stove from gas cylinders. Welding cylinders are the best basis for a boiler. Just adjust it to size and you can use it. Since the gas is under pressure, it is held back by thick metal walls, which will prevent burning in the stove.
- Old fire extinguisher. Large volume industrial fire extinguishers are convenient for boiler making. Despite the fact that their diameter is smaller, they are able to withstand thermal stress.
- Metal barrel. Manufacturing instructions are similar to the previous options. To prepare, you need to cut out the top and use it as an air vent.
- Pipe. A wide sewer pipe with wide walls is suitable for the boiler. But to do this, you need to cut two circles from sheet steel yourself and weld them as a bottom and a lid.
- Homemade body made of sheet steel. You can make your own boiler from a steel sheet by rolling it into a cylinder and welding it.
One of the simplest barrel designs
One of the easiest ways to assemble is from a tin barrel. It has thin walls, which reduces efficiency and low heat transfer. The advantage of the method is the large loading volume and on one tab it can work for more than twelve hours. Barrels are standardized sizes. If the walls burn out, it will be easy to replace it with a new one.
Assembly instructions:
You need to remove the weld that secures the cover. It is best to do this with an angle grinder to prevent the formation of burrs. To ensure a perfectly even seam, you can use a diamond-coated disc. The edges of the barrel are beaten with a mallet or hammer. On the lid, on the contrary, they are flared. As a result, the lid should fit tightly onto the barrel. A hole is drilled in the center for installing the chimney. The distributor will require a lid from a similar barrel. If this is not available, the part can be made from sheet steel. Air vents are welded to the lower part. They can be made from sections of U-shaped profile or channel. This is necessary to increase the performance of the stove. If you need low efficiency for a small room, you don’t have to do this. A damper is mounted on an axle on top of the hot air pipe. To increase ease of use, it is better to provide a “wing” fastening method. A hole is made on the body for the chimney pipe
a32e90f082c6ee15780523adacd52837.jpe
It is important that the seam is sealed.
For added convenience, you can install a screen made of a solid metal sheet.
Cylinders and pipes
Do-it-yourself bubafonya stoves made from a gas cylinder are relevant. The principle of manufacturing from a cylinder and a pipe is similar. The main difference is that the pipe will need to be prepared. Two circles in diameter are cut from a sheet of steel and the bottom is welded.
You need to cut several steel disks to fit the diameter of the cylinder. In each of them you need to cut out a small segment to make it larger than a semicircle. They are installed inside by welding
It is important to weld them so that they are mirrored to each other. This results in a multi-stage system for lifting air. At the level of the first floor, you need to make several holes in the wall with a diameter of 5 millimeters. The end of the channel is connected to the outlet of the pipe. In the middle of the wall there is a door for a rectangular firebox. A grate is mounted below the door.
Brick or iron?
The period of warming up the sauna room with a brick stove will take from three to five hours. This means that it must be melted in advance, which is not very comfortable.
Basically, brick ovens operate on the principle of periodic operation. This means that you should initially light the bathhouse, and only after the fuel combustion procedure is completed will it be possible to use the steam room. An iron stove operates on the principle of constant operation.
A good iron stove can heat a sauna in 1 hour, but it will cool down quickly - in half an hour. Therefore, combustion should be constantly maintained.
During installation, care should be taken to take certain additional protective measures for the bathhouse against fire. The difficulty is that the walls are made of thin material and get very hot, which can cause a fire in nearby elements or wall decoration.
You can install the device in a bathhouse of a decent size, but this will not be a rational solution. In this situation, for high-quality warming up, you will need to increase fuel consumption several times. And for a modest-sized bathhouse this will be the ideal solution.
By purchasing an iron stove, you will spend much less money compared to building a brick version. The main issue here is not the cost of materials, but the payment for the work of a professional stove maker. To build a brick stove with your own hands, it is not enough to have only masonry skills; you will need special knowledge.
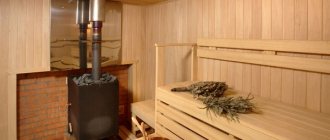
Description of a metal sauna stove and its main characteristics
You can, of course, buy a metal stove for the bathhouse. However, the best option would be to make it yourself. A simple option is a potbelly stove, which is a metal structure equipped with a door and a pipe. Low heat transfer and significant financial costs for purchasing fuel do not allow the heating installation to be used effectively, so it can be seen in rare cases.
Another thing is modern iron stoves. Their attractiveness, high efficiency and highest fire safety rating are impressive. They are made from sheet iron, more than 0.4 centimeters thick. The structural components are:
- It is customary to use a thermal chamber for filling and storing stones;
- There is a tank designed to store water with a volume of 30-70 liters.
An iron sauna stove requires lining with refractory bricks. This makes it possible to evenly heat the air in the room and makes the structure completely safe for use.
Installing a stove in a bathhouse
Since a proper steam room is always built of wood, the main requirement when installing a wood-burning heater is fire safety. To survive it, follow simple rules:
- the stove cannot be placed directly on a wooden floor, but only on a sheet of iron protruding 70 cm in front of the firebox;
- wall cladding made of flammable materials also needs to be protected from fire with sheets of roofing iron or mineralite;
- when installing a heater with a remote firebox, the opening in the wooden partition is also sheathed with non-combustible materials, as is done in the photo;
- the distance from the insulated chimney pipe to wooden building structures is 38 cm.
It is recommended to make a channel for venting combustion products outside from a double-walled sandwich filled with basalt wool. Often, the same square-shaped water tank, built directly into the ceiling, is used to insulate the chimney. How to properly install a stove in a bathhouse is shown in the diagram:
Installation of a metal stove
Installation of a sauna stove takes into account strict rules.
- Potbelly stoves made of metal are mounted from the walls at a distance of at least 1 cm.
- If there are wooden walls in the bathhouse, the one closest to the stove is additionally protected with special bathhouse foil that has a layer of insulation. This will prevent overheating and possible fire of the wood.
- It is imperative to insulate the chimney;
- After you install a potbelly stove for a bathhouse with your own hands, if you wish, you can cover it with bricks, which will significantly transform its appearance and also save you from accidental burns.
Types of fuel and types of stoves
Bathhouse stoves are divided into 2 main groups: metal (cast iron) and brick options. Brick sauna stoves are heat-intensive; they take longer to heat up, but also take a long time to cool down. An iron stove is an economical heating item due to its multitasking, simplicity and convenience of equipment. When choosing a stove or fireplace, you need to look not only at the design of the heat source, but also at the type of fuel. When burning the same mass, different fuels will release different amounts of heat. There are many variations of the energy carrier.
According to the aggregate content and type of fuel, all fuel groups are divided into solid, liquid and gaseous fuels. Solid is a common class of fuel, it includes: coal, peat, briquettes, firewood, pallets. They are used only in ordinary ovens as they burn quickly. Liquid fuels are kerosene, fuel oil, diesel, boiler, and coke liquid.
They have significant calorific value. The first type of gaseous fuel is natural gas, obtained from gas reservoirs, or associated gas from naphtha production. It has good calorific value.
Advantages and disadvantages
Metal sauna stoves have undeniable advantages:
- The most important thing is that the steam room heats up in a short period of time , approximately in an hour or two. The metal is characterized by excellent thermal efficiency.
- The likelihood of carbon monoxide poisoning is practically reduced to zero. Specific design features provide for the removal of all harmful substances that are formed during fuel combustion through the chimney.
- Very compact dimensions are very useful in modest baths.
- To build them, a lightweight foundation is required , which will significantly save time and money.
With all its positive qualities, we should not forget about the disadvantages of such units:
- Significant energy consumption with low efficiency.
- They cannot accumulate heat and soon cool down.
- They do not have the ability to heat overly large areas.
- The fire safety level of an iron stove is significantly lower than that of a brick stove.