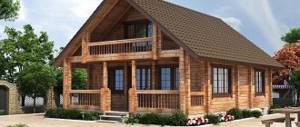
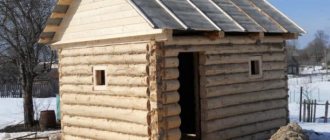
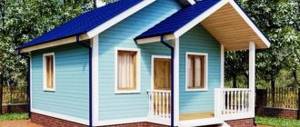
The bathhouse is one of the main buildings on the plot. Here you can not only enjoy steaming, but also significantly improve your health, because the healing properties of bath procedures have been known since time immemorial.
A standard bath building measures 6 by 6 meters. However, most often there is not enough space on the plot to install it. And then home craftsmen resort to tricks, constructing bath extensions to the house, altering standard building plans in order to reduce their size.
>
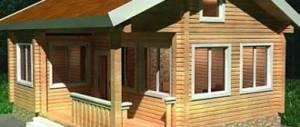
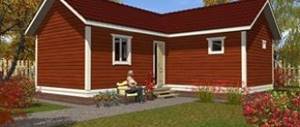
In the photo there is a bathhouse building 5 by 5 meters.
The best way out of the situation is 5 by 5 bathhouse projects. We will talk about them in this article.
5x6 bathhouse layout and its advantages
A 5 by 6 bathhouse is a fairly large-scale structure with a large usable area. In such a building you can create spacious rooms that will be comfortable for a large group. Moreover, it will fit even on a medium-sized plot.
The 5 by 6 bathhouse design gives room for creativity. You can not be limited to standard rooms and equip additional areas for a comfortable pastime. The dimensions of the building make it possible to expand and implement different design ideas.
Building a 5x6 m bathhouse can be quite inexpensive, especially if you choose cheap materials, for example, building a bathhouse from aerated concrete or a frame.
Choosing material
The service life of the building and indoor comfort depend on what the bathhouse is made of. The following materials are most often used for its construction:
- brick;
- tree;
- foam concrete;
- aerated concrete;
- wood concrete (wood concrete).
A brick bathhouse is considered one of the most durable buildings due to the strength and frost resistance of this material. Calculations, which are confirmed by GOSTs, show that, taking into account all the subtleties of construction, such a building can stand without repairing the facade for up to a hundred years. Large two-story buildings can be built from brick, since this material is resistant to natural disasters, aesthetically pleasing and environmentally friendly.
Bathhouses made of lightweight (cellular) concrete are usually cheap and quickly erected. To make foam blocks, a cement-sand mixture with a foaming agent is used, which allows them to be produced directly on the construction site. It has air in its structure (40–80%), as a result it is light in weight. This indicator allows you to save on the foundation.
To produce aerated concrete, a mixture of lime, cement and sand is used with the addition of a gas-forming agent - aluminum powder. They are made only in factory conditions. In terms of technical characteristics, this material is similar to foam block, but is much more expensive in price. These two building products do not emit harmful substances; they are safe for building a bathhouse.
Arbolite, or wood concrete, is a mixture of cement and organic filler. The disadvantages include its ability to absorb moisture (75–85%). However, if the block is immersed in water and then removed, the liquid will flow out of the pores and the wood concrete will dry quickly. This property allows the use of wood concrete in the construction of a bathhouse, despite the high humidity of these rooms. According to its characteristics, the material resembles wood, but at the same time it does not rot, does not crack and is completely resistant to combustion. In addition, mold never appears on arbolite walls.
Wood is one of the traditional materials for building baths. The Russian bathhouse was originally built from logs (a felled tree cleared of branches, bark and twigs). A beam is the same log, only sawn on two or four sides; has a square or rectangle in cross section. They have unique properties: they absorb steam while maintaining temperature and humidity. It takes from six months to two years for the tree to completely shrink. A frame bath is the lightest and most inexpensive, even cheaper than one made from foam blocks. For its construction, sawn timber and boards are most often used.
The advantages of a bathhouse made of bricks and blocks include reliability, fire safety and the possibility of construction of varying complexity.
Bathhouse 5 by 6: layout, project options
The building area is quite large, so the layout of such a bathhouse may be different. You can order a project developed taking into account your needs and the characteristics of the site. This is true, for example, if there is a pond on your site. You can provide a terrace leading directly into the water, or make an additional exit to the pond from the premises. The price of the project will depend on its complexity and the prices of the company you contact. You should not save on a project; before entrusting its preparation to any company, carefully study its work, read reviews - this will help you make the right choice.
If you don’t want to spend money on drawing up a bathhouse project, then you can do it yourself or find a ready-made option on the Internet. The network offers a wide selection of different drawings, so it’s easy to choose an option to your liking. If necessary, you can also make minor adjustments to it.
We recommend reading:
Corner bath projects: features, advantages, types, layout options and photos
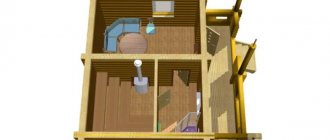
The simplest project consists of only three rooms: a steam room, a washing room and another room that serves as a dressing room and a relaxation room.
The size of the steam room must be at least 5 square meters; this area will comfortably accommodate a stove and shelves for a bath.
From the steam room you enter the washing room. It can be small in size, for example, 2x2 m - this is quite enough to accommodate a shower stall. Some people prefer to make a more spacious option, the size of a steam room; in this case, benches and tubs are usually placed in the washing room.
From the washing room you move to the rest room. It should be as spacious as possible, i.e., if people usually go to the steam room and washing room in groups, then everyone sits in the room together. In addition, you need to place at least a table and benches here so that all guests can sit comfortably.
The dressing room is an optional room, but it is still better to provide it. It protects the rest room from the cold from the street, which is especially important in winter; you can leave outerwear, dirty shoes in it, and even make a small place to store firewood for the bathhouse.
Traditionally, most people prefer to build a one-story bathhouse. But a more spacious option would be a two-story building or a bathhouse with an attic. In this case, you will have an additional room in which you can make a bedroom and stay overnight. This option is especially suitable for those who do not have a home on their property, as well as for large families and groups of friends.
We recommend that you also provide a terrace. It will be indispensable in the summer, when the last thing you want to do is spend time in a stuffy room. You can sip aromatic tea between visits to the steam room and enjoy the beauty of nature, and it will also be convenient to prepare barbecue.
Among the other amenities that many provide in a bathhouse, they especially highlight a bathroom and a swimming pool. They make going to the bathhouse much more comfortable. If you plan to steam all year round, then a bathroom in the bathhouse is a must, otherwise you will have to get dressed and run in the cold to the toilet, which can lead to a cold.
The project of a bathhouse with a swimming pool comes to the rescue of those who do not have a natural body of water on or near their site. It is not only pleasant, but also useful to plunge into cool water after warming up in the steam room.
We recommend reading:
Projects of a house with a bathhouse under one roof: features and nuances
Many people are put off by projects with a swimming pool because of their complexity and high cost, but do not think that having one leads to huge costs. You can limit yourself to a small pool that can easily fit in the recreation room or on the terrace. You can find ready-made bowls in stores; they are quite easy to install.
Project of a one-story bathhouse 5x6 m
This project is a fairly standard and popular option: the steam room and washing room are the same size and are located nearby, the bathhouse has a spacious relaxation room and a small terrace where you can put a narrow table and several benches.
The project is easy to implement and quite budget-friendly, the premises have good capacity - the best option for a summer cottage.
Design of a 5x6 m bathhouse with a bathroom
This bathhouse project is suitable for a small family. It is convenient in that it provides not only the main premises, but is also complemented by a porch, vestibule and bathroom. The bathhouse has a small steam room - only 3.4 square meters, so a large company will not fit in it, but for a family or a small circle of close friends it is a good option.
Bathhouse project 5x6m with a pool and terrace
A comfortable and convenient option for those who do not have a body of water nearby. There is a spacious steam room, a compact washing room (the width of a shower stall), a cozy relaxation room, a small vestibule, and a terrace where the pool is located.
What’s also convenient about the project is that the pool is under the roof, so even in the rain you can cool off in it.
Project of a two-story bathhouse 5x6 m
The two-story bathhouse has spacious rooms. There are no extra rooms in this project, only everything you need. This option is suitable for large companies, as many people can easily fit here.
The first floor is occupied by a steam room, a washing room, a relaxation room, a vestibule and a narrow terrace. The entire second floor is a guest room where you can put a massage table, beds, sofas, and make a children's corner.
Designs of 5x6 m baths can be different; they differ in the number of rooms, the presence or absence of a terrace. Such a bathhouse is suitable for a middle area; it will have good capacity, but will not take up much space.
Construction
Laying the foundation
Since a bathhouse made from 6x5 timber turns out to be quite large, the base for it must be made appropriate:
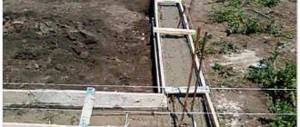
- The ideal option is a strip foundation. To do this, we dig a trench up to 60 cm deep and 40 cm wide along the perimeter of the future building.
- If we plan to install a heavy stove (cast iron or brick), then we need to lay a separate support under it.
- We fill the trench with a sand and gravel cushion, lay reinforcement and install the formwork.
Advice! The sides of the formwork should rise above the ground level by at least 25-30 cm.
- We pour concrete into the formwork. You can prepare it yourself, or you can order it from a company specializing in this type of building materials. The second option is a little more expensive from a financial point of view, but it saves significant time.
- We leave special channels for communications.
- We lay wooden beams impregnated with a water-repellent composition on top of the poured base - they will serve as the basis for constructing the walls.
Tape base with trim crown
Construction of load-bearing structures
Do-it-yourself installation of bathhouse walls made of timber is carried out according to the principle of the designer:
- We place the first crown on the base, the corners of which are connected either into half a tree or into a “warm corner” (shown in the diagram below). Six-meter beams don’t even need to be cut to length!
- We attach a strip of sealant – jute tape – to the upper part of the crown.
Corner decoration
- We install the second crown on top, matching the profile of the beams. We connect the parts using wooden dowels, driving them into pre-drilled sockets.
- We gradually increase the height of the structure, laying crown after crown.
- We cut out window and door openings in the walls or lay them in separately.
Intercrown insulation
In the upper part we install beams for the ceiling. We attach the ceiling sheathing, attic floor boards and rafter system to them. We nail the sheathing to the rafters and install the roofing material, having previously laid one or two layers of waterproofing.
Also at this stage we install communications, which will then be hidden under the casing.
Finishing
Next, the instructions for building baths from timber provide for the structure to stand for final shrinkage. As a rule, shrinkage takes from several months (if dry glued raw materials were used) to one and a half tapes (when erected from raw logs or timber).
Caulked cracks to sheathing
After installation, we proceed to sheathing and insulation:
- We caulk large cracks on the outside using sealing material.
- From the inside, we fill the walls with sheathing, in the cells of which we install heat-resistant heat-insulating material. We place the thickest layer of heat insulation in the steam room.
- We fix a foil film on top of the thermal insulation, which not only reflects thermal radiation, but also serves as a vapor barrier.
- As decorative cladding we use lining treated with a moisture-proofing compound. You can decorate the dressing room and attic using other materials, but you should still avoid using plastic.
Internal insulation
After completing the work, we connect plumbing fixtures, install lamps, sockets, etc. We separately install the stove for the bath (if a portable version is used).
