Today, the issue of comfortable living and health is of great concern to each of us. Bad habits, poor quality food, dirty air, all this negatively affects our health. However, today there is a good way that will help solve all the issues related to our well-being - a do-it-yourself infrared sauna.
Anyone can install an infrared sauna with their own hands in an apartment, house or cottage. You don't need any special knowledge here, just know the basics of installation. If all installation work is carried out correctly, you will ensure yourself quality rest, excellent well-being and good mood for a long time.
Operating principle of an infrared sauna
The radiation spectrum of the heating elements is such that when it hits the human body, it is deeply heated. As a result, blood flow improves, fluid circulates better throughout the body, metabolic processes are restored, and cells are better supplied with oxygen.
An infrared sauna makes a person sweat no worse than in a regular bath. Together with sweat, fats and toxins are removed from the body, and the process itself is 2-3 times more effective than in a regular steam room! This type of sauna is universally recognized as so beneficial that it is used for athletes in the preparatory stages for competitions, as well as as a restorative measure after their completion.
Stage 3. Assembling the structure
During the assembly process, haste is unacceptable, as it can lead to the most unexpected consequences. To ensure that work goes smoothly, it is necessary to plan all stages of assembly in advance. In short, you need to make a plan.
Step 1. First, a strong and reliable timber frame is created. The dimensions of a sauna designed for two people should be approximately 2x2x1.1 m. The shape, as already mentioned, is rectangular.
First, a strong and reliable timber frame is created
The racks are attached to the lower base and reinforced with jumpers. Another rectangle similar to the base is installed on top. At this stage, the door hole is also formed. All work is carried out carefully, with utmost precision.
Step 2. Next comes the sheathing of the frame. The inside of the sauna is lined with natural wood, and for the exterior you can use fiberboard or OSB.
First, the frame is sheathed from the inside, electrical cables are supplied, and only after that the outer cladding is carried out.
Step 3. Next, IR emitters and a bench are installed, and the remaining space is sheathed with natural wood (lining). All formed joints are sealed with sealant and covered with decorative elements.
Infrared emitters
The distance between the heaters behind a person’s back should be 50-60 cm, the height of those on the back wall is 7-12 from the shelf
Step 4. The door is inserted. Regardless of the chosen design, the door should stand level and without any gaps. The food is also decorated with decorative elements.
Step 5. Upon completion of the carpentry work, remove all debris and connect the electricity.
Due to the fact that the IR sauna is installed indoors, it does not lack any insulation. Moreover, there is no need to worry about possible heat loss, because infrared rays act directly on the body of the person in the cabin and do not spread throughout the entire structure.
Advantages of infrared saunas compared to a conventional sauna
Before you build an infrared sauna with your own hands, it is worth studying its main advantages compared to a Finnish sauna.
In Russia, infrared saunas are loved because:
- Such a sauna has significantly lower energy consumption, because there is no need to warm up all the air. Heating elements are very economical.
- There is no chance of getting burned, because all dangerous elements are hidden in the wall of the cabin.
- The minimum number of contraindications, unlike the Finnish sauna. This is especially true for those who were previously unable to steam and enjoy this process - in an infrared sauna you can pamper yourself with warmth for a long time. This is because wave heating has a better effect on the cardiovascular system, in contrast to incredible humidity and air that burns the body and internal organs.
Three basic requirements for installing an infrared cabin
It is very important to observe them at the stage of equipment installation, since the quality of its further operation and durability may depend on this.
- Dryness. The room and place where you will install the infrared sauna must be completely dry, so if you are in doubt or see that there is increased humidity or dampness, it is better to change your mind before it is too late.
- The floor on which you will place the cabin should not have nicks, roughness, swelling or other irregularities, otherwise even the most skilled equipment assembler cannot vouch for the stability of your sauna. However, the nature of the surface can be anything. Linoleum, parquet or tiles, it doesn’t matter.
- Do not install the booth in a musty room. This is not only unpleasant, but can also be harmful to your health. The room should be well ventilated. And it is better to take care of this significant circumstance in advance.
That's all. As you can see, nothing particularly complicated. And everything else, as they say, is a matter of technique!
Building an infrared sauna with your own hands
There are, of course, ready-made cabins of this type, however, due to their exorbitant cost, it is better to make an infrared sauna at home with your own hands. You just need to decide on a location and start assembling. The good news is that all the necessary equipment is already built into it, and the temperature in it warms up to 40 ° C in a modest 5-10 minutes.
The finished system will consume 1.8-2.2 kW, which is comparable to an average iron, so you will always fit into the requirements of the electrical network.
Alternatively, you can make an infrared sauna with your own hands - you can always get the drawings. The main thing is that it can accommodate 1-2 people, and its dimensions, as a rule, are 110x213 cm.
Sauna material
Together we build a sauna with our own hands, video and ready-made projects are ready to help at every step.
But what materials are best to take for such work? Here is a list of materials and wood species that are often used for such products:
- Linden;
- cedar;
- alder.
Moreover, choosing from such a list helps not only taste preferences, but also a person’s financial capabilities. Read more about each type of wood below:
Linden - accepts a small number of knots, smells quite pleasant. At the same time, wood is easy to process and has the advantage of a beautiful appearance.
Siberian cedar - has high antibacterial properties, is distinguished by a rich and pleasant smell, and is endowed with a beautiful texture and color.
Canadian cedar - somewhat overpriced, pleasant texture, elegant color.
Aspen has the lowest price of all the species presented, but its qualities are quite similar to linden.
Alder - differs from the rest in its high resistance to deformation, only its low hardness and low resistance to fungi, its attractive thin and fairly uniform structure delights.
Calculation of the electrical network for a sauna
Arranging an infrared sauna in an apartment with your own hands should begin with laying out the wiring, which must first be correctly calculated. The most important thing is the wire; it must be double braided. This rule is described in the relevant documentation for the operation of electrical installations.
The wire must withstand 400 V at a current of more than 15 A. It is better if it is single-core and has a cross-section of 1.5 square. If you are going to lay stranded wire, then a cross-section of 0.75 square will be enough. The length of the cable is determined individually, depending on the dimensions of the booth - as a rule, it is 15-30 meters.
Installation technology
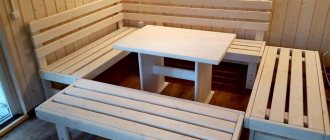
Design: inside the cabin there can be either lying or seated seats, or a combination of both. Quite often, the calculation for seats is made in such a way that the booth has approximately the following location: two seats and one lying down. There are many location options. It is also worth calculating how many people the sauna will be intended for. If the sauna is in an apartment, then it is most acceptable to make it for one person, and not for a crowd, but to make money you can create it for many people at once.
Selecting a location: it is important to choose a convenient location where there will be no difficulties connecting to wiring and communications. The location opposite the window helps to fit in harmoniously; the play of colors will be ensured and aesthetics will always be at their best.
Communications: this option requires either installing a water supply and sewerage system or simply creating direct access to the open air. Moreover, the latter option also provides good ventilation and access to fresh air.
Mounting infrared emitters
Special emitters for saunas can be purchased separately at one of the hardware stores, and then installed in a regular sauna. Thus, therapeutic measures can be carried out alternately. The only condition is that they cannot be combined, since moisture is a barrier to such rays. Therefore, we can only talk about building a sauna on our own, and not a bathhouse, because infrared heating is used only for arranging saunas.
It is best to place infrared heaters vertically, because in saunas people are usually in a sitting position. If the sauna is designed for one person, then installing five heaters is enough, the main thing is that in the end they emit a single favorable field. To do this, it is better to place them in the following sequence: 2 pieces on the back wall, 2 in the front corners, and the fifth under the bench, so that the lower extremities are heated, but horizontally.
The gap between the heaters on the rear wall should be 50-60 cm, and their distance on the rear wall from the ceiling should be 7-12 cm. It should be taken into account that all emitters, except for the one located at the feet, are installed at the same height.
The lower heater should be positioned so that the canopy rises slightly less than 2 cm above it. The emitter must be placed clearly in the middle of the side paneling of the canopy. Regarding the emitters in the front panel, they are usually installed at 45°, which corresponds to the middle part of the cabin.
The determining factor in the correct installation of infrared saunas is the correct installation of the heaters themselves.
What kind of sauna is installed in the apartment?
According to the law, it is possible to install an infrared sauna in monolithic and brick residential buildings with floors made of reinforced concrete slabs. The area of the entire one-room apartment must be thirty-eight or more square meters, for a two-room apartment - fifty-four square meters, for a three-room apartment or more - sixty-eight square meters. A wood or gas stove is out of the question! Only electric is allowed! The wiring for such a furnace must be three-phase . In addition, the stove must be equipped with a safety shutdown unit - when heated to the desired temperature, the stove will turn off on its own.
Regarding the location of the sauna in the apartment, based on building codes, the equipment cannot be placed in a living or kitchen area; in addition, the equipment cannot be installed in the basement of a multi-story building. That is, if you live in a multi-story brick building with reinforced concrete floors, your entrance has three-phase wiring, the square meters of the apartment are thirty-eight or more, you can place the sauna in the bathroom, pantry or hallway.
Installation technology
- Design . If it is planned that several people will simultaneously take procedures in the sauna, then in this case it is necessary to correctly calculate the capacity of the room. On average, it is calculated from one to six people, but there are saunas that are more spacious, allowing them to accommodate eleven people at once. Of course, this option is not suitable for an apartment, and it is extremely rarely considered for a private house , but in order to make money, this option is ideal. As soon as you decide the issue of the number of people who will be in the sauna at the same time, you should think about arranging the sauna inside, or more precisely about the location of the seats. It must be said that this is a rather important aspect, because indoor spaces can be reclining or sitting. A cabin for one person is usually equipped with either a seat or a lying one. In the double cabin, you can install one lying and sitting place. A triple room has two or three beds and one seat. The four-seater cabin can accommodate all recumbents or three recumbents and one seat. More often they choose this ratio of seats: two sitting and one lying.
- Choosing a location . The location for installing the sauna must be chosen so that there are no difficulties when connecting it to electrical wiring and communications. To give the interior aesthetics, it is better to place the cabin opposite the window - a beautiful finish, plus good lighting will allow it to fit harmoniously into any interior.
- Communications . For a sauna you will need to install a sewerage and water supply system. If you plan to use a shower, then it is better to place the sink and toilet next to each other. If you can arrange direct access from the sauna to the open air, that’s just great. Firstly, the cabin will be well ventilated, and secondly, you will always have access to fresh air.
Swimming pool – to be or not to be?
A sauna with a swimming pool is the dream of every modern person. True, you can make such a dream come true only if you live in a private house or on the first floor of an apartment building. In other cases, it is better not to even try to implement the option with a swimming pool, because even the slightest mistake in the calculations can then lead to big problems with your neighbors living on the floor below - they are unlikely to be grateful to you for the universal flood. However, if you have a greater desire to splash around in the pool, then it is better to buy or make wooden swimming pools yourself. It is practical and inexpensive, and most importantly, completely safe for your neighbors.
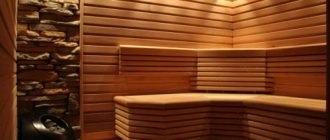
Finishing the infrared sauna from the inside
It is not necessary to painstakingly insulate the walls of this type of sauna, since the radiators will generally heat only the human body, without heating the walls and air. The sauna is traditionally lined on the outside and inside with wooden clapboard, which, when heated, will release beneficial phytoncides that have a beneficial effect on the body and produce an antiseptic effect.
The best species are pine, linden and Canadian cedar. The material for the shelves in the sauna is not so important; everyone chooses it for themselves individually, based on their preferences.
And at the last stage, before making the infrared sauna completely, you need to install a modern glass door. The result will be very beautiful and impressive, and the IR sauna will look 100 percent, and it doesn’t matter where it is located, in a bathhouse or in an ordinary apartment.
What does an IR sauna heater look like and work?
All devices with infrared radiation can be divided into three groups according to wavelength:
- shortwave;
- medium wave;
- long wave.
Equipment with short-wave radiation generates light fluxes of yellowish-red color in the range of 0.74-2.5 microns. It can heat up to 1000 °C. Therefore, such equipment is advisable only in rooms with high ceilings of 8-9 m, in particular, in workshops or production and warehouse premises. At the same time, you cannot stay under such waves for a long time.
Heaters with an average wave range of 2.5-5.6 microns are most often used to warm up a certain area of the room. Their heating element reaches a temperature of 600 °C. It is acceptable to use such heaters in rooms with ceilings 3-6 meters high. It is advisable not to stay in a room with such devices for more than 8 hours.
Floor-mounted IR heaters have the simplest and most convenient installation. However, they take up a lot of space and can be accidentally knocked over by children, for example. Therefore, units of this type must have an automatic shutdown function if they fall.
Wall-mounted infrared heaters are somewhat more difficult to attach, however, this disadvantage is compensated by their compactness, safety and organic appearance.
The most difficult thing is to install ceiling structures that can evenly distribute heat waves throughout the room.
Very often they buy an infrared stove for a sauna, which can be built into the corner of the steam room. As a rule, such devices can open 90° or 120°.
To equip an additional heating source, it is advisable to use infrared film. A 1 micron layer of carbon paste is applied to it and carbon fibers are glued on. The film insulation is made of polyester, permitted by electrical insulation and fire safety standards. The emission range of the film is 5-20 microns, and the heating intensity is from 30° to 110°.
This film can be laid under absolutely any coating, including ceramics or stone. Although in the latter case, installation must be carried out by specialists.
Thanks to decorative lamination, infrared film can be mounted on the ceiling or walls.
Depending on the type of control, infrared heaters are available in two versions:
- With the ability to adjust the temperature. This method involves periodically turning off the heating when a certain air temperature is reached and turning it on as the room cools down. In this case, it is not possible to achieve complete heating of the human body, because the device turns off every now and then.
- With power regulation. Heaters of this type can change the radiation intensity, so you can choose the optimal indicator for a person. With this approach, a smooth, gradual and deep heating of the entire human body occurs, so the effect is very beneficial.
Power control is carried out using the following system elements:
- Control panel located outside the cabin. The duration of the procedure and the power of the waves are entered into it. The program allows you to set the procedure time, after which the device will disconnect the system from the network. The remote control can control the operation of two power control units.
- The operation of the heating elements is controlled by a special unit. With a power of 1.1 W, it is capable of controlling 6 heaters, so it is often used in mini-steam rooms for 1-2 people. For large saunas, it is better to use a 1.5 kilowatt unit that can control the operation of 8 heaters.
- An internal remote control is installed in the cabin itself, which allows you to adjust the microclimate to comfortable levels.
In general, we can say that infrared heaters meet all safety standards, they are quiet in operation and provide soft, delicate heating of the body, which promotes maximum relaxation. In addition, the price-quality ratio of these devices is one of the best among all other options.
Principles of exposure to infrared radiation
Infrared waves are a spectrum of light radiation that is invisible to the eye. This is a thermal effect that warms the body tissues to a depth of four to five centimeters. Infrared heating acts directly on the body without affecting the air around it. This procedure is easily tolerated by people for whom a regular sauna is contraindicated. Comfortable warmth is safe for heart patients and hypertensive patients, children and the elderly.
For your information! The sauna has infrared radiation sources that transmit waves in the range of 4-14 micrometers, corresponding to the natural background of the human body. That is why warming up in an infrared sauna is safe and eliminates the possibility of burns.
Sauna doors
This element of the cabin design can be made either solid wood or glass. In the first case, the door frame is assembled first. Then, just like the frame, it is sheathed with clapboard. Each sash should be hung with at least two hinges.
You can also make a glass door for an infrared sauna yourself. In this case, the design will look even more presentable. This door is assembled as follows:
- install the floor rail;
- install glass on it and make a mark on it in the area of the top trim;
- cut using a glass cutter;
- cut the second glass in exactly the same way;
- install the top guide;
- they put the glass into the rails.
Cabin assembly
Installing an infrared sauna with your own hands is quite simple. The frame is made as follows:
- Assemble the lower trim. The timber can be joined using the half-tree method or using corners. The latter method is considered more convenient.
- Install corner posts. Their length should be 20-25 cm less than the height of the ceilings in the room. The racks cannot be raised all the way to the top. The sauna must have its own ceiling. You can also attach the racks to the corners.
- Once the racks are installed, you can begin assembling the top trim.
- At the next stage, the racks are connected to each other with wooden slats. If desired, you can further strengthen them with jibs. If the ceiling height in the room is 2.5 meters, two such tiers reinforcing the frame will be sufficient.
- Installing the lining. It is not necessary to fasten it to the crossbars with nails. This will greatly spoil the appearance of the structure. To fix the slats, it is best to use special hidden fasteners.
The cabin roof can also be made from clapboard. The bottom is usually filled with a floorboard. When assembling the cabin, you should carefully ensure that there are no gaps in it.
Do-it-yourself installation of a finished booth
As you can see, assembling an infrared sauna yourself is not that difficult. But, of course, it’s easier to purchase a ready-made model. Installation of factory infrared baths is carried out as follows:
- Unpack boxes with components. It is better to carry out this operation at the place where the sauna is supposed to be installed.
- Place the back panel vertically on top of the bottom panel.
- Place side panels to the right and left.
- Install backrests and seats.
- They are assembling the cabin.
- Mount the front panel.
- Screw fuses under the heaters.
- Install a ceiling lamp.
- Mount handles on the door.
How it works
Actually, infrared is called completely harmless thermal radiation. This is exactly what comes from a heated stove or a running heater. That is, an infrared bath, in fact, can be called simply a dry heat bath. The main element of such a sauna is a heater of a special design, powered by a regular household network. Once turned on, this device becomes a source of electromagnetic radiation with wavelengths within the infrared spectrum. Such equipment is usually installed in a cabin made of natural wood or some other environmentally friendly material.
Infrared heaters for baths are relatively inexpensive devices and can be purchased today in almost any specialized hypermarket. The main feature of this equipment is that it transfers heat directly to the human body without heating the air. To better understand the principle of operation of such heaters, you can simply imagine a room into which the sun shines through the window. Those objects that are hit by its rays will become very hot. In this case, the temperature of the air in the room will change only slightly.