Analysis of the state of the bath structure
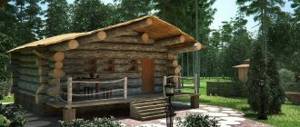
At this stage, before restoring the bathhouse, you will need to identify all the defects that have arisen during operation, choose ways to eliminate them and draw up a list of repair work.
The inspection is carried out in the following sequence:
- First, the walls are inspected. Check the quality of the insulation, whether cracks, cracks and other defects have appeared on the walls.
- Next, inspect the foundation. If subsidence and significant cracks have formed in it, then in this case repairing the foundation may not be practical. The bathhouse will have to be dismantled.
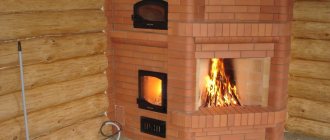
- Now you can inspect the ceiling, roof, chimney and stove. There should be no gaps in the ceiling and roof, and the insulation should be intact. The chimney and stove must also not have cracks, chips or other similar defects.
- Windows and doors are inspected; they must be hermetically sealed; distortions and other damage are unacceptable.
- There should be no fungus on the floors and walls inside the room, and the floor boards and partitions themselves should be checked for strength.
- And finally, you need to check the condition of the bath drainage system, shelves and bath furniture.
Once all the building sites in need of repair have been identified, a work plan has been drawn up and all materials have been purchased, you can proceed directly to the repair work.
When is restoration necessary and does it make sense?
Cosmetic and major repairs of the bathhouse should begin immediately after the first signs of destruction appear. The reason for reconstruction of the premises may be:
- roof leak;
- formation of condensation on the walls;
- the appearance of a burning and musty smell;
- frequent drafts;
- the appearance of mold, mildew, rot on the walls, floor and ceiling;
- rapid cooling of the room;
- visible destruction of finishing materials.
If several problems appear simultaneously, repair work must begin as quickly as possible.
Foundation repair
Restoration of the foundation in the bathhouse will be required if such defects appear: a slope of the base of the floor was discovered, traces of destruction began to appear on the walls. It will be necessary to drain groundwater using drainage devices, high-quality blind areas and storm sewers.
After you have gotten rid of the cause of the subsidence and other shortcomings, you can proceed to restoring the foundation of the bathhouse.
You will need to perform a number of these steps:
- Preparatory work to move the bathhouse is being carried out. To do this, its internal space is freed from all objects without exception, even from the stove.
- To raise a small wooden bathhouse, you need to stock up on several jacks and beams to fix the bathhouse in a new position. This process must be carried out carefully, slowly, so as not to disturb the geometry of the walls. If this happens, it will be very difficult to give it its original proportions. The bathhouse is raised with jacks in stages, starting from one corner, which rises to a small height, and moving to the opposite, raising it to the same height. Each new height must be fixed by placing beams. Such actions are repeated until the bathhouse is raised to the desired height.
- At the next stage, the area under the bathhouse is cleared to lay a new foundation.
- Now they are installing formwork and making frames from reinforcement.
- After this, cement mortar is poured into the formwork. To save it, it is allowed to add a certain amount of stones to the formwork.
- After the cement mortar has hardened, the resulting foundation is covered with a coating or rolled bitumen water-repellent layer.
- After three weeks have passed, the formwork is removed, and the bathhouse is lowered onto the finished foundation. The lowering process should also take place carefully and step by step, moving from one side to the other.
Bathroom floor restoration work
When checking the floor, the condition of its finishing, embedded beams, joists and the lower crown of the frame is determined. Based on the unpleasant smell coming from under the floor, one can conclude that it is rotting. It is difficult to determine by eye whether the material is spoiled, because outwardly it may look normal. The easiest way to determine the condition of the board is with an ordinary awl. If the tree is rotten, it is pierced very easily.
The destruction of the joists occurs from the end part. If a moisture-repellent layer has not been laid, then destruction occurs much faster. Rotting of the floor can be very dangerous for frame baths and log houses, since the destructive process can spread to the walls.
If spot repairs of floors are required, then pieces of damaged wood are cut out in the right places, and new boards are driven in their place. After this, the entire surface is leveled, and unevenness is removed with a plane.
If logs, embedded crowns, rough or finishing coatings have rotted, they should be replaced immediately. In this case, the entire floor will need to be jacked up, the lower part of the frame removed in parts, and the old embedded beams replaced with new ones.
After the new embedded elements are installed, the logs can be secured to them, and a new wooden floor can be laid on the logs. The floor will also need to be insulated. In the washing room you can lay one of the types of extruded polystyrene foam, sheets of which are 15 cm thick. In the dressing room, polystyrene foam of the same thickness is suitable.
Experts advise: in order to determine the degree of deterioration of the wood, you should hit the board with a hammer. If the sound is muffled, you can judge that the boards are starting to deteriorate. To find out about the condition of the joists, you should hit the nail that secures the flooring. If the sound is dull, then the tree is already rotten.
Lower crown
Features of operation
After the foundation is ready and completely settled and hardened, the first logs or beams of the future log house begin to be laid on it. It is this part of the building that takes on the maximum load from the gravity of the entire building, and also the lower frame is closer to the ground than others and is in contact with concrete or brick.
Rainwater, under the influence of the Earth's gravity, flows down and accumulates, again, in this area. In addition, there is capillary suction of moisture from concrete and brick, which are in direct contact with the wood of the casing.
No less dangerous is the moisture that is released by the bathhouse itself during its operation. There is space between the floor and the ground where this moisture can settle and accumulate. If there is no good ventilation of the underground space, then the problem of rotting of the lower ceiling, beams and floor boards, as well as lower logs is guaranteed.
As a rule, in Russia, pine is used for the construction of log houses and timber houses, which is quite affordable and of sufficient quality.
However, even pine is not able to withstand constant moisture, as it carries the following dangers to wood:
- Water dissolves most chemicals, changing the composition and structure of materials;
- Salts and other compounds dissolved in water can react with wood components, thereby causing chemical corrosion;
- Water is a necessary condition for the development of life, and this is its main danger: with water it brings fungal spores and insect larvae, as well as plant seeds. As a result, wood becomes the object of culinary interest for a number of organisms, such as fungi, bacteria, wood-boring insects, etc.;
- Under the influence of bacteria, a process such as rotting or decomposition of organic compounds occurs. Wood is a completely organic material, so bacteria can destroy it completely;
- Wood is a common nutrient substrate for a number of molds and other types of fungi. Over time, the mycelium completely permeates the structure of the wooden part, gradually digesting it from the inside with the help of special enzymes that it releases during digestion. As a result, the wood itself turns into useless dust.
Important! The greatest danger to wooden products are fungi and bacteria, which cannot survive without the required level of humidity. Therefore, the fight against wood damage is a fight, first of all, against moisture.
Naturally, damage to the bearing crown can lead to the most unpleasant consequences. This includes a change in the geometry of the log house, the transfer of destructive processes to other structures, and the complete destruction of the building. The only way out in case of damage to this section of the structure is to replace the lower crown of the bathhouse with a new one.
This is quite hard and complex work, which is not easy to do with your own hands. If you hire a team of professionals, the price of such work will be on the order of the average monthly salary in Russia for a large city, plus materials. In a word, it is much cheaper to prevent damage to the lower crowns of a bathhouse than to repair them later.
Correct installation is the main protection against damage
The bottom row of beams is laid using a special technology.
To prevent rapid damage to the bottom row of beams, they should be laid correctly.
To do this, just follow the rules contained in this instruction:
- Spare no expense and time, and purchase for the first crown not a log or rounded beam, but laminated veneer lumber or larch beams for a bathhouse. Larch is a very expensive material, but for one crown you won’t need much of it, and the effect will be excellent;
- If the beam is placed on a foundation, then a gasket made of euroroofing material must first be laid. This material is reinforced with fiberglass and made on the basis of soft bitumen, which allows it to retain its qualities and structural integrity for a very long time. The gasket is placed in such a way that there are slight slopes from the middle of the wall to the edges;
- Before laying, the timber for the bath is thoroughly treated with antiseptics and moisture-repellent compounds. Don't skimp and use used motor oil or other homemade methods. It is better to buy products from well-known, trusted manufacturers, which are available in bulk in stores;
Don't skimp on quality chemicals.
- If a plinth is built between the beam and the foundation, then the laying of euroroofing material is made in two places: between the foundation and the plinth, and also between the plinth and the beam;
- The foundation walls or basement are made higher if possible in order to remove the first row of logs as much as possible from the ground with its insects and bacteria, moisture and fumes;
It is better to make the base higher.
- After laying the walls above the joint between the lower beam and the roofing felt, a casting of galvanized steel or a profile is made, which is a small canopy around the perimeter of the bathhouse that drains rainwater from the gap. Water can accumulate on roofing felt in the form of puddles, so it is better to drain it away as much as possible;
A low tide is made above the joint.
- The space under the floor must have holes for ventilation or vents, which will ensure timely removal of moisture. If there is no base, then vents are made in the lower beam, and one of them is extended with a pipe turned upward and covered with a rain canopy. The height difference provides traction;
Ventilations are made in the basement.
- From the floor side, the beam for the bathhouse can be covered with coating waterproofing for wood, it is still not visible.
Important! Failure to follow these simple rules can lead to damage and expensive labor-intensive repairs to the bottom row of beams in your bathhouse.
Wall repair
If during the inspection areas of heat leakage through the walls were found, re-insulation is carried out.
In this case, the sequence of work will be as follows:
- First, the old insulation is removed from the walls, and to make the surface smooth, bars are attached to the walls.
- After this, a vapor barrier membrane is attached to the bars using a stapler.
- Insulation made of basalt wool in the form of slabs is placed into the cells of the frame.
- A moisture-proof film is fixed over the insulation, and sheathing is made on top.
The cladding on top of the external insulation can be made of hinged ventilated panels, and the internal one - from wooden lining made from coniferous wood. Quite often, when repairing walls in a bathhouse, only caulking is done at the joints of the logs.
There are times when the lower rims of an old log house deteriorate, in which case it is necessary to trim the bathhouse as soon as possible.
Bathroom ceiling restoration
As a rule, the ceiling has to be repaired after the furnace is restored. In this case, the old coating is first removed. All insulation is removed from the attic. To minimize dust rising into the air, the surfaces should be slightly moistened.
Now you can remove the first board. After removing all the covering, they proceed to inspect the beams. Rotten elements are replaced.
If the condition of the attic is such that it does not need repair, only re-insulation is carried out. Polystyrene foam or mineral wool are ideal as insulation. On the attic side, a layer of insulation is placed on a layer of vapor barrier material located between the floor beams. Moisture-proofing material is laid on top, followed by flooring, which is nailed to the beams.
Selection of materials and finishing tools
Before you start repairing an old bathhouse with your own hands, you need to prepare the tools. It is separately recommended to draw up a list of works in order to calculate the required amount of consumables. 10–15% should be added to the resulting amount.
Materials
The required materials can be divided into two groups:
- for cladding;
- for heat and waterproofing.
To carry out major repairs, you will need bricks, metal profiles, beams, boards, foam and gas blocks.
Advantages of using aerated concrete
For cladding
Building materials for cladding:
- tiles, decorative and natural stone;
- lining, plinths;
- platbands;
- paint, putty, plaster;
- linoleum, laminate.
For heat and moisture insulation
Materials:
- mineral wool;
- mineral wool with a foil layer;
- mastic for coating surfaces;
- foil;
- vapor barrier film;
- roofing felt;
- penotherm
Tools
List of required tools:
- Miter saw;
- hand saw for wood;
- grinder with discs for metal and stone;
- set of chisels;
- hammer, nails;
- screwdriver, self-tapping screws;
- chainsaw, jigsaw;
- spatulas, trowel, pry bar;
- set of keys, screwdrivers;
- building level, tape measure.
After preparing the consumables and tools, you can start working.
Bathhouse roof repair
Depending on what material was chosen for roof repair, you will need to perform the following work:
- Slate . If cracks appear in the coating, they are sealed with a solution of cement with fluffed asbestos and PVA glue. Asbestos and cement are added at a ratio of 3:1, and glue is diluted with water in a ratio of 1:1. Everything is combined and mixed until you get a homogeneous paste mixture. After the surface has been cleaned, it can be primed with a solution based on PVA glue, and then all cracks and cracks can be covered with the prepared mixture. Apply it in several layers until the coating reaches 2 mm. Each layer should be given time to dry.
- Metal roofing . The gaps between the sheets are sealed with tow soaked in hot bitumen, and a layer of bitumen mastic is poured on top. If there are more severe damages, they are repaired using patches. The area near the damaged area is lubricated with hot bitumen, and two layers of roofing felt, lubricated with mastic, are placed on top.
- Soft roof . If it is necessary to repair a soft roof, get rid of defective fragments. The surface is cleaned and the nails are removed. After this, the new tile is covered with glue, and it is installed, placing one side under the bottom of the top tile. Next, it is secured with roofing nails, and the joints are filled with a sealing substance.
Prevention of rotting of the lower crowns: protective measures
You can replace old logs in the crown, but after 2-3 years you will find them rotting again. To prevent this from happening, the lower crowns must be properly waterproofed and protected from rotting. Protection measures may be the following:
- Making lower crowns from larch, which is little susceptible to rotting. Instead of solid logs, you can use larch boards. They should be placed under the lower crown. This way, a protective layer that is not susceptible to fungi will be formed between the crown and the foundation. A good alternative to larch are oak logs and boards.
- Coating logs with antiseptic. You can use any water repellent, for example, antiseptics “Pinotex”, “Sadolin”, “Senezh Ognebio”, etc. Another popular “folk” antiseptic is machine processing. Its disadvantage is a sharp odor that does not disappear for a long time.
- Coating the base of the bath with a water repellent.
- Using several layers of roofing felt (2-3) to waterproof the joint between the crown and the foundation.
- Protection of the lower crowns from external moisture using canopies (for example, from galvanized strips).
Such simple methods will help you eliminate the cause of rotting and prevent the need to repeatedly replace the lower crowns of the bathhouse.
List of useful tips for quality bathhouse repairs
It remains to list a few simple and, at the same time, useful tips:
- It wouldn't hurt to completely replace the electrical wiring. If wires with aluminum conductors were previously used, they can be replaced with those with copper conductors. For light bulbs, a wire with a cross-section of 2.5 squares is suitable, and for electric heaters - 4 squares.
- If the doors and windows in the bathhouse are old and there are drafts, you can replace them and provide good insulation. The slopes can be covered with foam plastic.

