What you will need to make your own
The minimum required set looks like this:
- a small amount of suitable fabric;
- sewing machine (you can do it manually if you don’t have one - the amount of sewing is small);
- threads, pins, scissors;
- if desired, decorative elements: ribbons, sewing, buttons, braid, etc.
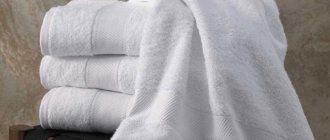
A kitchen towel will have to take on a lot, and the fabric will get washed often. Therefore, practicality is its necessary quality.
ADVICE! Colorful colors are ideal - inevitable stains will be less noticeable.
Cotton and waffle towels cope best with the main requirements - to absorb moisture well and dry quickly . The latter are also a variant of cotton fabric. But, thanks to special processing, they are more hygroscopic: tiny squares do an excellent job of this. Both linen and thin terry cloth are possible .
IMPORTANT! Linen towels will gain the desired softness only after several washes. Until then, they can take on the “ceremonial” function.
Do-it-yourself warming hat for warming up masks
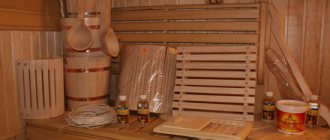
In today’s post I want to tell you and show you a warm hat that I sewed for myself. After reviewing a bunch of offers on Ali, I wanted to order an electric cap, but two things stopped me. First of all, my hair spending limit is more than maxed out this month. And, secondly, I really don’t like waiting. I wanted to experience the effect of the hat here and now, and not wait two months for it to arrive from the Middle Kingdom. To be honest, I doubted for a long time whether to write this post or not. The fact is that I don’t have the skills of a seamstress-machine operator at all. After seeing the photo, you will see this for yourself. In addition, I sewed a hat from improvised materials, or rather from an old towel. And it is incredibly difficult to get aesthetic pleasure while looking at a photo. However, I thought that suddenly someone also dreams of a thermal hat, but cannot fulfill their desire here and now, and it is this person who will find my post useful. Before moving on to the description of the process, it would be useful to mention that I took the idea of sewing from a famous blogger from Instagram. So, let's go.
First, I took the lining fabric and cut out two large circles from it, then pinned them together.
Then I started quilting along the diameter.
Next, it was necessary to slowly fill the resulting corners with the most ordinary round rice. Maybe I’m not explaining it too clearly, but I think it’s clearer in the photo. As soon as one cell is filled with rice, we immediately stitch it.
In the same way you need to make three rows. It took me about an hour and a half and half a kilo of rice.
It turned out a little crooked, but it didn’t have a big impact on the end result. When the so-called “thermal layer” is ready, cut out two circles from a terry towel the size of the first ones, and place our “thermal layer” between the terry circles.
Next, we make a lapel large enough to insert the elastic and stitch it, leaving about 5 cm unstitched at the end. Insert the rubber band.
Sew up the hole and that’s it, the hat is ready!
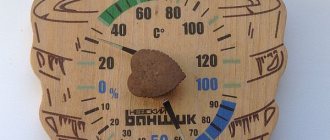
And now, actually, how to use it. Place the hat in the microwave for 1 minute, take it out and put it on. It keeps warm for about half an hour. Just enough. If not, you can take it off, warm it up again, and put it on again. And this is how the hat looks on me.
And now about why, in fact, everything was started. About the effect. I did not change my care so that I could compare the results.
At first it may seem that there is no effect. But, if you look at the “before” photo, you can see that the ends are drier and scratchier than in the “after” photo. Hair is more nourished and pleasant to the touch. In a word, I'm delighted! And now, for greater clarity, a photo of the tips. I think there is no point in signing where is “before” and where is “after”.
Once again I apologize for the unaestheticness of some of the photos, and I really hope that my post will be useful to at least someone!
Beautiful and healthy hair to everyone!
Sew a kitchen towel
Let's take a step-by-step look at how to sew your own kitchen towel.
- When cutting out a product, you need to decide on the shape and size . The standard option is a rectangle 30x60 cm. If desired, you can make a towel of any shape: oval, round, trapezoidal (with a holder).
ADVICE! Natural fabrics shrink, and it is better to wash the cut in hot water before cutting.
- Having decided on the dimensions, add about a centimeter to the allowances
.
Then carefully measure and cut along the contour . - Now carefully bend the edges
ironing them properly . To secure, you can use pins or sweep.
ADVICE
! Got an edge on one of the edges? It is better to cut a small strip of fabric in this place so that all folds have the same thickness.
- Having identified the edges, we sew with a regular seam.
A simple towel is ready. You can limit yourself to sewing a loop (from the edge of the fabric, braid or ribbon), but it’s better to use your imagination!
What does a real Budenovka look like?
The budenovka pattern is very simple. Initially, the hat was sewn in the form of a helmet made of cloth with a cotton lining. The cap consisted of 6 spherical triangles; a metal plate of about 2 cm was sewn into the top. An oval-shaped visor and a backplate with long edges were sewn to the cap so that they could be fastened under the chin. A mandatory element of any budenovka was a cloth star. Its color depended on the type of troops. In the winter version of the hat, the size of the star was 10.5 cm, in the lighter version - 8.8 cm. The star was the location for attaching the badge - the cockade.
As you can see in the photo, the winter budenovka was made of felt and had a quilted insulated inner layer. With minor changes, the budenovka served in the Red Army wars until the introduction of new uniforms with shoulder straps. The last photo of a fighter in Budenovka dates back to 1943.
Decorating a towel
IMPORTANT! From decorative elements, you need to choose shedding-resistant threads, appliqués, and braid. Otherwise, the very first wash will ruin the whole look.
- An ordinary rectangular product can be made into a roll , secured with two buttons (preferably plastic). In this form it is convenient to place it on various holders.
- Appliques are an easy way to create a small home masterpiece. In addition to ready-made applications, designs cut from pieces of fabric are suitable. Having processed along the contour with a zigzag, we attach them to the main fabric of the product.
- A towel used in the kitchen is an excellent field of experimentation for a beginning embroiderer. Feel free to practice seams and patterns on it, gaining mastery!
- Sewing and thread tassels are suitable for finishing the edges of the product . You can also practice crocheting the edges.
Subscribe to our Social networks
Does fleece shrink after washing?
Pattern for children's fleece overalls
How to sew a terry towel and a toy bag
A hood with bunny ears and a muzzle is very easy to make.
Ear pattern format - A4; All dimensions in the drawing are in centimeters
You will need:
- pink terry cloth;
- a piece of black cotton fabric;
- fleece;
- finished pink bias tape;
- pink, white and black sewing threads;
- self-disappearing marker;
- tailor's pins;
- scissors;
- ruler;
- tape measure
Step 1
Cut out: the main part of the towel (round the corners) 1x; hood triangle 1x; eyelet (including 1 cm allowance) 4x. For the eyes, cut out two circles with a diameter of approx. 1.5 cm made of black cotton fabric and fleece.
Step 2
Pin two parts of the ears together and stitch them right sides along the outer edges, leaving the edges at the bottom open for turning. Cut the seam allowances to a width of 2 mm and turn them inside out.
Step 3
Duplicate a piece of black cotton fabric with fleece and cut out the eyes. Place them on the hood parts, iron them and sew them with a zigzag stitch.
Step 4
Using a self-disappearing marker, draw a Y-shaped nose and embroider it with a dense zigzag stitch.
Step 5
Edge the longitudinal (lower) section of the hood piece with bias tape.
How to sew bias tape: 3 ways
Step 6
Pin the hood to the main part and stitch at a distance of 5 mm.
Step 7
Pin the ears on both sides of the corner of the hood from the side of the main part and stitch at a distance of 5 mm.
Step 8
Edge the cuts with bias tape around the entire perimeter.
Step 9
Iron both tabs up and stitch onto the bias binding seam.
DIY baby blanket
The bucket bag is not only fun, but also very practical. Thanks to the drawstring with ties along the top edge, nothing will fall out of it.
You will need:
- pink terry cloth;
- finished pink bias tape;
- a piece of black cotton fabric;
- pink, white and black sewing threads;
- self-disappearing marker;
- safety pin;
- tailor's pins;
- scissors;
- ruler;
- tape measure
Step 1
Cut out: bag detail 2x; ears 4x.
Step 2
Make the eyes and nose as described in steps 3 and 4 for the towel.
Step 3
Make the ears as described in step 2.
Step 4
Overlock the side sections of the bag parts using an overlocker. Pin off the side sections and, stepping back 11 cm from the top section, secure the ears between them. Sew the side seams, leaving one hole in each, approx. 2 cm for drawstring.
Step 5
Press the side seam allowances and topstitch the seam allowances at the holes.
Step 6
Sew the bottom sections together and stitch.
Step 7
Shape the bag. To do this, fold a corner on each side, aligning the side seam with the bottom seam, and stitch it, laying a line perpendicular to the seams to a length of 12 cm.
Step 8
Edge the top edge of the bag with bias tape, then iron the edge to the wrong side for 6 cm and stitch it, laying two parallel lines at a distance of 2 and 4 cm from the fold.
Step 9
For one tie, bias tape is approx. Fold 90 cm in half lengthwise, iron and stitch on both sides. Using a safety pin, thread it through the drawstring (one tie on the left and one on the right). Tie knots at the ends of the ties.
We sew a children's hat from knitwear: master class
Source and photo: Burda. Baby Material prepared by Yulia Dekanova