How to make one solid piece from kitchen salt, is this possible?
It’s possible to somehow make one large piece out of kitchen salt, so that you can then cut out a figure for a salt lamp, how to do this.
There are two options for solving the problem of creating “lumpy” salt:
- To make a salt crystal - for this, one salt crystal is placed (at the bottom) in a very, very concentrated salt solution. In one and a half to two months, a large crystalline piece of salt forms around this crystal. You just need to make sure that the growing crystal is always covered with water until the crystallization process is completed.
- The second method is much simpler and the result is faster: pour the required amount of salt into a cloth bag, spray it with a small amount of water, after which the bag is hung in a dry place for several days. As a result, the salt in the bag becomes compacted, and a figure for a salt lamp can be cut out of it.
I have attached a few photos of these figures.
To grow a salt crystal you will need:
1) — salt.
It should be as clean as possible. Sea salt is best suited, since regular table salt contains a lot of debris that is invisible to the eye.
2) — water.
The ideal option would be to use distilled water, or at least boiled water, purifying it as much as possible from impurities by filtering.
3) - glassware in which the crystal will be grown.
The main requirements for it: it must also be perfectly clean; no foreign objects, even minor specks, should be present inside it throughout the entire process, since they can provoke the growth of other crystals to the detriment of the main one.
4) — salt crystal.
It can be “obtained” from a pack of salt or from an empty salt shaker. There will almost certainly be a suitable one at the bottom that could not fit through the hole in the salt shaker. You need to choose a transparent crystal with a shape closer to a parallelepiped.
5) - stick : plastic or wooden ceramic, or a spoon made of the same materials.
One of these items will be needed to mix the solution. It would probably be unnecessary to remind you that after each use, they must be washed and dried.
6) — varnish.
Varnish will be needed to protect the finished crystal, because without protection it will crumble in dry air, and in humid air it will spread into a shapeless mass.
7) - gauze or filter paper.
Ventilation
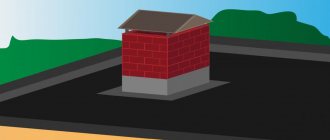
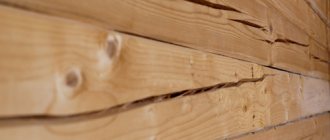
A ventilation system must be in place in the salt room. For this purpose, special channels are laid out of brick in the corners of the room. In this case, under no circumstances should you use various pipes made of metal. Salt reacts with them very quickly, which will only create unnecessary problems.
Ventilation windows must be installed at a distance of one and a half meters from the floor level, and exhaust openings in the wall should be located as close to the ceiling as possible. This condition is important for maintaining the microclimate. You cannot create a room without forced ventilation.
The process of growing a crystal.
The container with the prepared water is placed in warm water (approximately 50-60 degrees), salt is gradually poured into it, with constant stirring. When the salt can no longer dissolve, the solution is poured into another clean container so that no sediment from the first container gets into it. To ensure better purity, you can pour through a funnel with a filter.
Now, the previously “mined” crystal on a string is dipped into this solution so that it does not touch the bottom and walls of the vessel.
Place the container in a dark, cool place and be patient - the visible process will begin in a couple of days, but growing a large crystal will take several weeks.
As the crystal grows, the liquid will naturally decrease, and therefore, approximately once every ten days, it will be necessary to add a fresh solution prepared in accordance with the above conditions.
During all additional operations, frequent movements, strong mechanical stress, and significant temperature fluctuations should not be allowed.
When the crystal reaches the desired size, it is removed from the solution. This must be done very carefully, because at this stage it is still very fragile. The removed crystal is dried from water using napkins. To add strength, the dried crystal is coated with colorless varnish, which can be used for both household and manicure purposes.
And finally, a fly in the ointment.
A crystal grown in this way cannot be used to make a full-fledged salt lamp, since it uses a special natural mineral - halite, which contains many natural minerals.
But from what you got, it’s quite possible to make some kind of craft, for example, a miniature model of the same salt lamp, by inserting a small LED into the crystal, powering it from a battery.
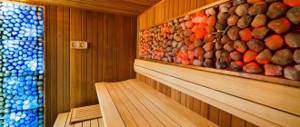
How salt blocks are made for lining salt caves
As reported in the previous article, several decorative options are used for interior design of salt caves:
- Salt spray method (when the walls visually resemble the walls of a cave)
- White salt blocks (bricks)
- Himalayan salt tiles
- Himalayan salt pebbles
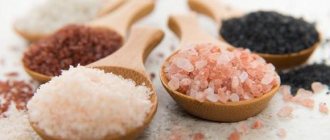
Blocks (bricks) made of Himalayan salt have an interesting, recognizable color, the price for 1 piece is about 150-200 rubles. The material is imported into Russia. The largest deposits are located in Pakistan, India, and Bhutan.
White salt bricks for lining salt caves are made by Russian and Belarusian manufacturers; they are based on Sol-Iletsk salt and salt from other mines. Their cost on the market is actually similar - 200-300 rubles/1 piece.
How and where to use a salt interior
Salt design is good to use both throughout the room and in fragments. This could be a futuristic mosaic of colored salt slabs on the wall in the living room. Or a mural in the bedroom above the head of the bed, made from processed rock salt blocks that create the effect of shimmering mountain peaks. It is quite justified to equip a “salt cave” in combination with a sauna or swimming pool. The combination of halite walls and a seawater pool recreates the positive effects of the sea, while if the proper microclimate is provided, you can get the effect of unique underground salt lakes.
Related article: Which is better laminate or linoleum: is it cheaper to choose in an apartment, pros and cons, reviews in the house, expensive is warmer
Salt bricks can be used both for decoration and for the construction of internal walls, since the material is resistant to external influences, damage, dirt and loads. In nature, there are no two identical salt blocks, because they are mined and processed by hand. This variability allows you to create a unique pattern and design of walls, optical effects. Using different colored types of salt provides an even richer picture.
The natural range of shades of halite block or tiles combines universally with any color palette. Therefore, choosing comfortable furniture that suits the purpose of the room will not be difficult. Figures, panels, bas-reliefs made of salt and, of course, salt lamps are used to decorate the room. The interior will also be decorated with fossil shells, trilobites, imitations of stalactites or stalagmites. That is, everything that brings the interior closer to a natural, natural style - imitation of a cave or the color scheme of the ocean depths, sea landscapes, etc.
Sawing method
It is used to make bricks from Himalayan salt in countries such as Pakistan, India, and Bhutan. This is a labor-intensive process, using a large number of workers. The mined salt blocks are cut, polished and packaged.
A similar method is used to produce lamp blanks from Himalayan salt.
The principle of making lamps from Himalayan salt is similar to the method of making blocks:
As stated earlier, research does not support the benefits of Himalayan salt blocks in preventing respiratory diseases. Therefore, we can only talk about the decorative functions of “Himalayan” bricks.
Pressing
In Russia, the first patent for a method of creating artificial blocks of salt for the internal lining of premises intended for the prevention of bronchopulmonary diseases was issued in 1984. Its authors were S.D. Shipilevsky, Yu.G. Maksimov, A.N. Egorov and G.N. Solomkin (production association “Chuvashstroymaterialy”).
According to him, the blocks were pressed from rock table salt with a moisture content of 5-7%, and then kept at room temperature for a week. This made mass production possible with less labor and the risk of getting defective products.
Production stages
- The harvested crushed raw materials are poured into a wooden box.
- The quality of rock table salt is checked (humidity, grinding)
- Then the mass is loaded into the mixer for 30 minutes, water is added until the material moisture content reaches 5-7%.
- After mixing, the salt mass is unloaded into the compartment, where it sits for 8-10 hours.
- The molding sand, according to the weight of the block, is placed in a steel mold of a hydraulic press and exposed to the machine.
- The molded artificial block is placed in a room at room temperature for 7 days to harden. To prevent the blocks from sticking together, they are separated from each other with plastic film.
This method involves gluing the blocks during laying due to salt crystallization and does not involve the use of binding solutions.
Equipment for the production of salt blocks
The main equipment for making bricks for finishing salt caves using the pressing method is a press. It can be of various brands; the P-125 press is suitable for such purposes. The scope of application of the device is the construction industry (concrete, natural materials, artificial stones, powder metals). Its technical characteristics allow a maximum reinforcement of 125 tons. The hydraulic press has centralized control.
In addition to P-125, you can use other brands of equipment with similar characteristics.
Salt block press.
It's good when the equipment has sufficient performance. So, if a press allows you to produce up to 500 blocks per shift, is automated and safe, then the payback period for a set of equipment in some cases can be up to 1 year.
Salt wall: benefits
The therapeutic effect of a salt wall is achieved provided that there is 2 square meters in the room (approximately 30 square meters). meters of salt surface. For those who decide to decorate the room with natural salt for the purpose of aesthetic satisfaction, it is enough to use salt stones in the quantity in which it is intended. A large number of salt crystals does not negatively affect the body, and therefore only room humidity can limit its use.
In the regions of Russia it is possible to buy salt bricks for finishing from the Himalayan or Black Sea salt. Therapists recommend using the latter option for the reason that it contains more sodium with chlorine and other useful elements.
Decorative component of the material
Buying a salt bar is an excellent choice not only for those who want to improve their health. Connoisseurs of original interior solutions will fully appreciate the range of design possibilities. The unique texture of the stone is amazingly revealed with different types of lighting. The mineral has a slight transparency, which, in combination with background lighting of different colors, immerses you in an atmosphere of comfort and relaxation.
Thanks to the pinkish-reddish hue, a wall decorated with backlit salt elements can imitate a hearth or fireplace. Translucent partitions, walls with hidden lighting, ceiling structures with LEDs can look both luxurious and laconic.
The material will be relevant for interior decoration in a private home, arrangement of premises in sanatoriums, SPA complexes, and recreation centers.
DIY salt wall in an apartment: application options
Options for applying salt to walls depend on the following features:
- The area intended for the application of crystals.
- Room temperature.
- Possibility to install the necessary equipment.
- Wall bases - concrete or brick wall - are the best option.
There are several options for forming a salt wall in a room:
- Soaking the burlap.
- Spray
- Planting blocks with glue.
- Decoration with large crystals.
Walls
How to make a salt room with your own hands? Reviews say that there are only two ways to apply salt to the wall. Firstly, it can be laid out in the form of salt blocks. The latter, after installation, will form a monolithic structure.
Secondly, salt can be applied to the walls in the form of plaster. At first glance, the second method looks more attractive, explaining how to make a salt room at home cheaper.
However, it is worth considering that salt is sticky only when wet. Reviews say that when completely dry, it will certainly peel off and fall off as soon as possible. Thus, instead of the desired preventative zone, the result will be an area of endless repair work. For this reason, a more monumental option is offered for consideration, providing the conditions for how to make a salt room with your own hands for long-term use.
After the floor work is completed, there is no need to take a technological pause. You can immediately start laying the walls. They need to be laid in a row. They start with the largest components, which will make up the first row. Before placing the block in its place, a layer of moistened salt is formed on the floor, forming a seat. To connect the blocks together, prepared salt is also used.
The next row is laid according to the same principle. On a seat of wet salt, proportionate blocks are placed one to one. It is important to consider here that each next row should be slightly smaller in width than the previous one. You need to calculate it in such a way that there is a slope from the floor to the ceiling along the walls.
It is important to remember that every second row must be tied to the wall using wooden crutches. Moreover, it is necessary to fix not only horizontal seams, but also vertical ones. It is best to do this one by one, maintaining a distance of one meter. It is worth making sure that all seams between the blocks are filled with moistened salt. After a certain time, the wet material will crystallize, and the structure will become monolithic.
How to apply salt to walls: instructions and application technology
The technology for applying salt crystals differs in the duration of the work, the service life and the methods used to create the desired salt wall.
Glueless salt wall: installation technology
The use of the glueless method is the formation of a salt wall without the use of special glue.
There can be two methods for glueless design: The first option involves soaking clean burlap in a thick salt solution. In order for the crystals to settle and grow on the fabric, it is necessary to dissolve 1 kilogram of mountain salt in 350 grams. In order for the salt to completely dissolve, you will need to heat the water and only then dissolve the salt in it.
To form the material for wall decoration in the future, it is worth pouring water into a vat made of plastic or ceramics (metal is not used). Place the burlap in such a way that you get either a flat surface or an uneven base for decoration. When the salt builds up and hardens, you can begin to decorate the wall. Attaching burlap to a wall or shelf is possible using self-tapping screws or nails. The carelessly extended salt streaks look original.
Spraying is a more labor-intensive and technically complex process. To build up a salt layer on the surface of the wall, you should first level it with plaster without finishing it. After applying the primer (preferably acrylic), spray on a thick salt solution. The only problem is that each layer of 0.2-0.3 mm must crystallize without the use of hair dryers and other devices. Only after each layer has completely dried in a dry room can the next layer be applied until the required thickness is formed.
How to apply salt to the walls for a salt room with glue
A more practical forming option is gluing salt plates to the base of the wall. This method is not suitable only for plasterboard walls and uneven surfaces. In order to create a favorable climate in your room you will need:
- Align the wall with an error of up to 0.3 mm. If there are more irregularities, they will need to be leveled.
- The tiles are fixed to an ideal, flat and always dry surface using special construction adhesive without water. The glue is applied around the perimeter of the tile: in the center and crosswise.
- Laying with vertical bandaging of seams.
- The width of the seam is at the discretion of the designer; it is permissible to use both installation close to each other and across a gap.
- If necessary, you can seal the seams with salt: add water to the dry mixture until the grout consistency is formed.
When creating a frame base for the blocks, a metal profile system is formed from strong rods to fix the salt slabs. Installation in this way is carried out only by specialists with professional equipment.
If you plan to create a salt panel with internal lighting, then grouting the seam is mandatory for the reason that the light emanating from the cracks will unpleasantly “hurt the eye.”
Other mounting options
Other options for installing salt are used for decorative design of space.
Quite popular is the method of decoratively forming a salt mound near the floor in the form of a fireplace from rough, unhewn stones of coarse salt. Gluing is done with liquid stone nails one on top of the other. There is also the option of designing a mini fireplace with internal lighting made from pieces of salt.
It is noteworthy that salt panels have several shades: from natural gray to pleasant yellow and beige.
Floor installation
The next thing to do is arrange the floor. For this purpose, it is necessary to select salt lumps no more than 15 centimeters wide. If during procurement it is not possible to load a multi-fraction composition, then preference should be given to larger components. Subsequently, large pieces can be separated using a turbine and chisel. To cut salt, you must use concrete discs.
The process of laying salt blocks on the floor is similar to installing paving slabs. A layer of moistened salt is laid on the floor. It should form into a lump when compressed, but not release water. Salt blanks are sequentially laid out on the litter and compacted using a rubber hammer. For this purpose, it is better to purchase the latter with white rubber, since it does not leave marks. The resulting cavities are also filled with a salt composition.
How long does a salt wall last?
Features of the service life of a salt wall depend on the quality of the work performed, as well as on the method used and the humidity in the room.
The main enemy of a salt wall is moisture. If there is condensation in the room, the salt wall moves away and peels off from the base. The material itself is fire-resistant, and therefore it can be used even in a bathhouse if it will be used infrequently, and after each procedure the room is ventilated and dried. The only problem can be that the glue on which the salt block is placed cannot withstand a load of more than 65 degrees.
A wall made of useful material serves depending on the type of application of crystals:
- When applying dust or spray, renewal will be required every 3 years.
- With block installation, restoration is necessary every 5-6 years.
For example, professional wall cladding in the form of a block of the mineral halite is unlimited in use. But not even every wealthy person can afford the use of such material. When certain factors are created, you can observe how the salt layer grows on the blocks.
How to glue salt tiles or bricks
If you have chosen the adhesive method of installing salt walls made of tiles or bricks, remember: it must be done only with special glue. It allows the structure to be firmly fixed to bases made of wood, brick, concrete and other materials, and, importantly, contains substances that prevent the formation of mold and mildew. In this case, it is necessary to mix the glue strictly according to the instructions: only then will it be resistant to changes in temperature and humidity for many years. It must be applied to clean, dry surfaces using a comb spatula.
Features of care
It is noteworthy that different combinations and powers of sodium chloride sources (slabs or salt spraying) provide equally different dosages of negatively charged air ions. According to this theory, there are different durations of stay in a room with a salt wall:
- If the concentration of negative chlorine ions is 5 thousand/1 cm3, then the effect is identical to a walk in a pine forest or near the seashore during a small storm.
- If the concentration is 8 thousand/1 cm3, the effect is identical to a walk in the mountains.
- At 30-35 thousand/1 cm3 the effect is equal to the therapeutic effect, which is controlled by a doctor. But, with a strong desire, it is impossible to recreate such a climate at home.
In order for a room with a salt wall not only to please the eye, but also to serve for a long period of time, it is recommended to monitor the humidity in the room, not drink hot drinks or alcohol in the room, and also limit the number of visitors to 3 people per room of approximately 30 square meters. meters.
A visit to the salt room stabilizes blood pressure, helps relieve stress, increase stress resistance, overcome insomnia and spring fatigue syndrome, and strengthen the immune system. But, in order for the salt wall to serve for a long time, it is necessary to follow the rules of work at all stages, as well as monitor the humidity in the room. For connoisseurs of natural space design, such a salt wall will be a universal way to express themselves.
Preparatory stage
How to make a salt room at home? The first step is to ensure that all materials from the previous interior decoration are removed from the walls. The only exception is cement plaster if it is in good condition. All windows must be blocked, the height of the doorway must be 2.2 meters. In any case, this condition must be observed. Otherwise, a salt room built at home with your own hands will not be functional enough.
Insufficient wall thickness must be compensated for by reliable thermal insulation. If such a need exists, then you need to insulate the outer side of the walls, from the street side. Before you build a salt room with your own hands, the covering from the floor must also be removed. If there is no concrete base, one needs to be made.
Salt materials - what are they?
Interesting from the point of view of its impact on human health, this material can be used not only for decorative finishing of various premises, but also for the full construction of structures. The cost of products of this type is quite high.
To completely make a “salt” room in a bathhouse or house will cost a decent amount. But you can simply decorate the wall, complete individual elements, and this will be enough for a good healing effect.
Salt brick consists of 60% sodium chloride, 35% potassium, the remaining 15% are other chemical elements, which together have a significant healing effect.
By using products made from salt minerals in your home, you can get an atmosphere that will be in many ways similar to the climate of the sea coast.
Advantages and disadvantages of using salt materials
Why are salt bricks and other salt materials so useful:
- The excellent antiseptic properties of salt ensure sterility in rooms, as it has a bactericidal effect.
- Significant impact on human health - salt has a good effect on the condition of the skin, increasing its elasticity and appearance.
- When heated, ions are released into the air, which have healing properties for allergies and pulmonary diseases, and remove harmful toxins from the body. In addition, they have a positive effect on the heart, as well as the musculoskeletal system.
- Aesthetically attractive products will help create a unique indoor interior.
- The environmental purity of the material is ensured by its natural composition.
- Resistance to high temperatures allows the use of these materials in baths, saunas, and bathrooms.
- The strength of high-quality products is high enough to be used as a structural material.
- These parts are easy to install yourself. And the instructions from the material manufacturer will help with this.
- If used properly, salt products will last you a very long time.
But with a large number of advantages, these products have a significant disadvantage. Salt is very sensitive to moisture. A short-term increase of more than 50% will not lead to a change in the positive characteristics of the material. It is advisable to maintain the necessary microclimate in the room using ventilation or air conditioning.
Types of salt products
Currently, a wide variety of salt finishing materials are offered on the construction market.
Depending on the size and type of processing, several types of these products can be distinguished:
- Salt bricks - the dimensions of the elements are mainly 200 x 100 x 50 mm. With this size, they are a very durable and reliable building material, which is perfect for building walls and paving floors. The weight of one element is about 2.4 kg. There are polished elements and products that have a natural texture on one side. The second option is not suitable for flooring, but they can create a very impressive appearance of the finished surface.
- Salt blocks - produced in sizes 200 x 200 x 50 mm. With such dimensions, the installation of walls and floors requires fewer seams, and construction time is significantly reduced. The weight of one block is approximately 5 kg. There are also products with dimensions of 400 x 200 x 50 mm.
- Tiles - usually made in sizes 200 x 100 x 25 mm. Due to their low weight, which is of great importance when finishing large areas, salt tiles are in quite high demand. The price for these products is lower than for bricks and blocks.
- Salt pebbles are produced in fractions from 20 mm to 60 mm.
- Salt panels are made by spraying a layer of salt onto a plastic or wooden base. They are used mainly for purely decorative purposes. The cost of plastic products is much lower than that of wood. But these options are also incomparable qualitatively. Moreover, most often the wood base is made from tree species known for their healing properties.
- Salt crystals are flat in appearance with one or two finished sides. Use in decoration gives an excellent look to the interior.
- Accessories made of salt - various lamps, candlesticks, paintings made of colored salt crystals
Important! Often, instead of products made from a solid mass of salt mineral, the market offers pressed elements made from similar materials. Their healing properties are very doubtful.
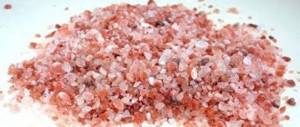
Bricks and other items made from pink Himalayan salt are in great demand in the market. The pink color of the products is given by iron, which is part of this mineral.
In addition to it, salt contains more than 80 microelements, many of which have a significant effect on the human body. They are able to make the microclimate in the room almost indistinguishable from the air on the sea coast.
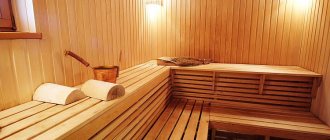
Finishing the sauna with Himalayan salt
An interesting fact is that Himalayan salt and the human body have the same set and the same amount of mineral elements.
When heated in a sauna or bathhouse, salt plates release these elements into the atmosphere of the room. Consequently, when visiting a sauna, a person receives them through breathing and through the skin in a short period of time. The vapors released from Himalayan bath salt normalize blood pressure, metabolism in the body, and calm the nervous system. The iodine released during the evaporation of Himalayan salt has a beneficial effect on the functioning of the thyroid gland. The ability to destroy molecular bonds, so-called “salt deposits” in the human body, makes Himalayan salt an indispensable remedy for the prevention and treatment of cardiovascular diseases (sclerosis, atherosclerosis) and diseases of the musculoskeletal system.
The environmental friendliness and a number of beneficial properties of Himalayan salt have made it a popular material in the design of saunas. As you know, people come to the sauna to improve their health, and the presence of Himalayan salt elements in it contributes perfectly to this. Due to the presence of more than 80 useful elements in Himalayan salt, it is a successful treatment for bronchial asthma, allergic and infectious diseases, diseases of the central nervous system and immune system.
Application area
Salt rooms are not just a beautiful home decoration. Their healing properties are widely used in:
But in residential premises such products can also:
- Decorate any room in the house.
- Cover the fireplace.
- Interior decoration of premises with decoratively beautiful materials is becoming increasingly widespread.
From this material you can not only build walls indoors. Their beneficial properties will be well expressed even when constructing simple fences around heat sources: stove, fireplace, heater.
Advice: it is better to place salt bricks closer to heating devices. Greater efficiency can be achieved by placing a fan nearby or placing a salt element near the air conditioner.
False walls made of salt bricks look impressive in the interior, especially if they are equipped with lighting. Product thickness up to 70 mm allows you to make high-quality translucent material that looks very interesting when finished. If the budget allows, then you can lay out not only the walls, but also the floor with such materials.
An interesting solution could be to install lighting behind the salt lining. Typically, LED strip is used for this. This design move can create a special atmosphere in the room. In addition, such lighting can be used as night lighting.
Salt finishing technology
Have you decided to do this finishing yourself?
Not so simple! It is important to understand that salt bricks are not an ordinary building material. For this reason, the installation of these products must be approached with knowledge of the characteristics of the masonry. It is best to invite professionals for this.
Typically, rooms are finished with solid elements made of salt. This requires a solid foundation, so the total weight of the parts can be significant. The service life of this finish is about 30 years.
But it is also possible to spray it onto existing surfaces - “salt plaster”. This way, spectacular decorative elements are created:
- Grottoes;
- Caves;
- Various forms of stalactites.
The downside in this case is the short service life of the finish. In three years it will need to be updated. This problem is solved by combining two methods. Partial finishing of walls or floors is combined with decorative spraying of salt crumbs. This method is used most often.
Salt bricks have unique properties and have beneficial effects on the human body. It is financially difficult to cover an entire room with these materials. But even one small item in the house can make the atmosphere healing.
The main thing is to place them near heating devices. More complete information about these products can be obtained by watching the video in this article.
Material purchase
Himalayan salt, which has a pink tint, is widely offered for setting up salt rooms. However, in reality, this is only an aesthetic detail that made it possible to create a well-promoted brand. Of course, the market value of one unit reaches 700 rubles, and if we take into account that the proposed technology requires purchasing a special composition for linking the blocks, then the total cost can reach hundreds of thousands of rubles, which certainly will not provide profitable prerequisites.
But in fact, the salt characteristics of material of Himalayan origin are completely indistinguishable from all others. For this reason, it is recommended to find a local manufacturer whose raw materials will have a significantly lower cost.
True, you will have to find your own approach here, since such a manufacturer is set up to implement carriage standards. This means that it will be more difficult to purchase several tons. The composition of the material must be chosen with different fractions, the width of the boulders is from 0.5 to 0.15 meters, plus small crumbs of a fraction of 1-2 millimeters. This will help you make your own salt room correctly.