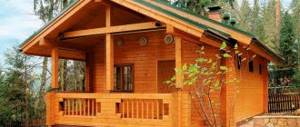
The question of how and with what to repair cracks in timber is relevant for all owners of wooden buildings. Construction from natural wood is not only a tribute to fashion. Structures made from timber are distinguished by their light weight, environmental friendliness and excellent insulating qualities. Their construction is carried out in a short time. For wooden log houses there is no need to build a heavy and powerful foundation. An important factor is their durability. But all this is possible only under the condition of proper operation and timely maintenance of buildings.
Cracks in timber are a sign of violation of the operating conditions of the structure or even its complete destruction.
One of the factors that can lead to a building losing its functionality is cracks in the timber, which can be called the “scourge” of all wooden structures.
Wooden house projects
Number of projects 1654
- 5 rooms
- 2 bathrooms
Taiga House Project
- To favorites
- 162.8² Total area
- 11 x 11m Construction area
from 2,483,000 rub.
Construction period 90 days
- 6 rooms
- 2 bathrooms
Project of the House Chekh-M1
- To favorites
- 104² Total area
- 8 x 8m Construction area
from 1,404,000 rub.
Construction period 56 days
- 4 rooms
- 1 bathroom
Mirage House Project
- To favorites
- 114² Total area
- 9 x 8m Construction area
from RUR 905,363
Construction time individually
- 6 rooms
- 3 bathrooms
Svyatibor House Project
- To favorites
- 199² Total area
- 12 x 14m Construction area
from 2,686,500 rub.
Construction period 100 days
- 7 rooms
- 3 bathrooms
House Project Dresden
- To favorites
- 216² Total area
- 8 x 15m Construction area
from 2,269,900 rub.
Construction time individually
- 3 rooms
- 2 bathrooms
Golden Key House Project
- To favorites
- 105² Total area
- 8 x 8m Construction area
from 1,417,500 rub.
Construction time individually
- 11 rooms
- 6 bathrooms
Zeus House Project
- To favorites
- 691² Total area
- 20 x 17m Construction area
from 12,367,300 rub.
Construction time individually
- 2 rooms
- 2 bathrooms
Ilim House Project
- To favorites
- 41.2² Total area
- 8 x 6m Construction area
from 1,236,000 rub.
Construction time individually
- 5 rooms
- 1 bathroom
Project of the House Konti-158
- To favorites
- 158² Total area
- 19 x 6m Construction area
from 2,133,000 rub.
Construction time individually
- 4 rooms
- 2 bathrooms
Kronverk House Project 11.4x8.6
- To favorites
- 140² Total area
- 11 x 9m Construction area
from 1,890,000 rub.
Construction time 73 days
- 6 rooms
- 3 bathrooms
New House Project
- To favorites
- 284² Total area
- 11 x 13m Construction area
from 5,087,500 rub.
Construction time individually
- 7 rooms
- 2 bathrooms
House Project No. 16034
- To favorites
- 159² Total area
- 12 x 11m Construction area
from 7,160,074 rub.
Construction time individually
Project 14-03
- To favorites
- 325² Total area
from 4,387,500 rub.
Construction time individually
- 3 rooms
- 1 bathroom
Project AS-2000-12
- To favorites
- 81² Total area
from 1,093,500 rub.
Construction time individually
- 3 rooms
- 2 bathrooms
Florida House Project
- To favorites
- 127.9² Total area
- 10 x 9m Construction area
from 1,770,000 rub.
Construction period 90 days
- 4 rooms
- 2 bathrooms
Danna House Project
- To favorites
- 152.8² Total area
- 11 x 8m Construction area
from 3,496,000 rub.
Construction time individually
- 4 rooms
- 1 bathroom
Kama-B House Project
- To favorites
- 71.7² Total area
- 6 x 8m Construction area
from 728,000 rub.
Construction time 33 days
- 4 rooms
- 1 bathroom
Country house project "Ailano"
- To favorites
- 115.7² Total area
- 8 x 9m Construction area
from RUB 1,561,950
Construction time individually
- 11 rooms
- 3 bathrooms
Project AS-1275
- To favorites
- 332² Total area
from 4,482,000 rub.
Construction time individually
Available at the exhibition
- 5 rooms
- 2 bathrooms
House Showroom Project
- To favorites
- 129² Total area
- 12 x 7m Construction area
from 3,500,000 rub.
Construction period 45 days
View all projects
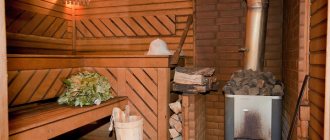
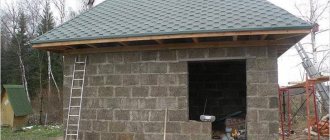
Wood is used to build houses and baths because the material breathes, is safe for health and retains heat well. Destruction of the structure leads to the appearance of cold bridges, destruction and biological damage. Let's consider how to repair cracks in timber indoors or outdoors to prevent the negative consequences of splits.
Splitting a tree Source vocesdelasierra.org
Prevention of cracks
Wood is a material on which moisture has a destructive effect. The array is also breathable. When temperature changes with humidity, it becomes deformed.
The high density of the fibers does not allow the log to dry completely. The process occurs from the surface cover to the center, but the core remains moistened for a long time. As a result, the outer and inner layers have different resistance to mechanical stress: wet ones are more resistant, while dry ones become brittle. Therefore the tree bursts.
The likelihood of cracks appearing is affected by the period in which the cut was made. In summer, sap exchange occurs more intensely, which explains the high level of natural moisture in the material. Therefore, it is recommended to harvest timber in winter for the construction of houses.
Logging Source mainavi.ru
Preventive measures
Freshly cut timber cannot be used to build houses. The material must be dry so that when shrinking the walls do not become covered with cracks. In addition to reducing humidity, production lines carry out screening according to regulations, which are prescribed in state standard 2140-81. According to the rules, defects include the following:
- knots and cracks;
- curvature of the trunk shape and texture;
- damage by fungus, mold, bacteria and insects;
- foreign inclusions and chemical damage;
- deformation from mechanical stress.
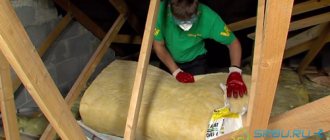
Drying is carried out naturally. This ensures coolness, low relative humidity and shade. It takes at least two years to prepare wood for felling. Then the width of the cracks that will appear one way or another will be 1-2 mm. For comparison: on a one-year-old log, voids 6-10 mm wide will appear, and on a more recent log - 10-20 mm.
Also, before use, the material must undergo primary treatment with an antiseptic composition, a fire retardant and against bacteria and insects. After this, the tree is also dried.
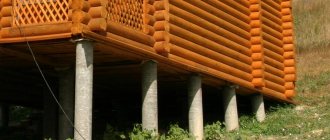
Drying logs in production Source www.lestrade.ru
In order to avoid having to decide in the future how to repair cracks in the logs of a wooden house, the planners often make a compensatory longitudinal cut. It is otherwise called unloading. Its width is 8-10 mm, and its depth is ⅙ or ⅓ of the diameter of the log. The groove is formed by a chainsaw, machine, disk or router. It promotes uniform drying of the wood and speeds up this process. When assembling the log house, the cut is directed upward and covered with the next sheet.
However, not all experts agree with this preventive method. They explain this by the unpredictability of the behavior of the forest after 10 years of operation. Previously, wood was used after two years of aging without cuts or cuts.
Some recommendations
In order for sealing cracks to be as effective as possible, you should follow a number of recommendations when working:
- thoroughly clean surfaces and recesses of debris, dust and grease;
- in winter, remove snow and ice;
- At sub-zero temperatures, carry out work only if absolutely necessary;
- do not carry out work during rain or snowfall;
- Cover the edges of deep cracks with masking tape to prevent sealant from getting on the surface of the log;
- if the sealant gets on a flat surface, it can be removed with fine sandpaper after it has dried;
- To reduce the consumption of the compound, you can insert a special foam cord into deep cracks; it will reduce the volume of the crack and the required amount of sealant; the disadvantage of such a cord is that it does not allow moisture to pass in or out; microorganisms and harmful bacteria can accumulate in the cracks;
- to make the treated surface smooth, the composition after application is moistened and smoothed with a brush;
- After applying the composition, it is advisable not to touch it for 6 hours and to prevent the ingress of any foreign objects, including debris.
It is almost impossible to purchase logs for a log house in which cracks would not form in the future. But you can choose high-quality wood without rot, mold, insects and other microorganisms.
The resulting cracks will not cause any problems other than a negative impact on the appearance of the house or bathhouse. They can be sealed using any of the above methods.
Video description
A little about cuts and protective measures is described in the video:
See also: Catalog of projects of houses made of timber with two entrances for a family.
Why do you need to seal cracks?
Any split is a place for water to penetrate into the flesh of the log. The core cannot quickly release moisture, which increases the likelihood of rotting. This is where bacteria grow, fungus and mold appear. Bark beetles also like to live in cracks and destroy any tree. Among other things, heat escapes through these places. All this can be prevented only by sealing the damaged areas.
Consequences of the bark beetle's activity Source pbs.twimg.com
Methods for sealing cracks: pros and cons
Protecting wood involves preventing water from penetrating into the cavity of the wood. Therefore, the materials used must ensure tightness and adhere well to cracks. Options that will be resistant to operating conditions are also being considered.
Regardless of the material chosen, it is important to prepare the base. It should be dry, free of dust and nicks. Affected areas and damage must be repaired.
A mixture of sawdust and PVA
How to repair cracks in timber outside a house - the answer lies in materials that are resistant to environmental conditions. You can use moisture-resistant PVA glue and sawdust. The shavings are not suitable for the event, as they are large. A homogeneous mass is applied with a spatula. Since the product shrinks after drying, the seal is repeated. It is recommended to treat only minor damage.
Sawdust with PVA Source sbly-web-prod-shareably.netdna-ssl.com
In addition to PVA, it is permissible to use wood glue with a different composition. This will not affect the permissible width and depth of the split, but will have a positive effect on strength, moisture resistance and durability. High adhesion is also ensured. To minimize shrinkage, experts often use wood dust instead of sawdust. The composition is applied in excess; after drying, the excess is cut off and sanded with fine abrasive.
See also: Catalog of companies that specialize in the construction of garden houses and the manufacture of garden furniture.
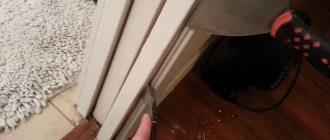
Slivers
Before sealing the cracks in a wooden house with wood chips, you need to sharpen them with a wedge in cross section. The blanks are driven into a split of any width along the entire length. Additionally, to ensure strength and reliability, the cavity is treated with moisture-resistant PVA. If the damage is significant, then a mixture of sawdust and glue is used.
In order to prevent further expansion of the split, butterfly dowels can be installed. These are inserts shaped like an hourglass. This will ensure stabilization of the base. The parts usually have a thickness of 10-15 mm; they are inserted into the prepared groove along with glue.
Butterfly dowels Source www.peredelka.tv
Tyrsa
This material often means a mixture of sawdust and sand. In fact, this is fine-grained crumbly waste after cutting more than two types of limestone. The mass may contain up to 10% clay, which makes the material moisture resistant. The mass hardens quickly and has vapor permeability and high strength.
Wood putty
The requirements for how to repair cracks in timber inside a house are more specific than for the façade. Putty is often made on the basis of acrylic resins. The material can be applied in a layer of up to 3 mm, so it can only be used to treat minor cracks. Exceeding the norm contributes to cracking of the dry residue. Also, shrinkage of the solution can lead to its peeling off from the base.
According to its characteristics, the ready-to-use mass has plasticity. The material can be presented in two forms:
- One-component has one binder. It can be water, alkyd or acrylic resin. The product is ready for use after mixing the paste.
- Two-component ones must first be prepared. They are represented by filler and hardener. They are characterized by rapid hardening (several minutes), increased strength and elasticity, minimal shrinkage, and inertness to moisture and solvents.
Wood putty Source remont-samomy.ru
Epoxy resin
Using epoxy resin is the most reliable method for repairing cracks. Two-component products consisting of resin and hardener are easily modified into adhesive filler. With their help, you can obtain a composition of the desired viscosity and color, which will fill cracks, chips, potholes well and provide strong bonding.
After curing, epoxy resin gains strength that exceeds the strength of wood, and due to its fluidity and good adhesion, it penetrates into all cavities and thus restores the integral structure of the wooden product and prevents the further spread of cracks. This method is often used when working with solid wood, where, due to high internal stresses, the problem of cracks is especially acute.
After complete hardening, the epoxy resin turns into an inert and safe plastic of high strength. Epoxy can be used to repair defects in food contact items, such as repairing kitchen countertops or repairing cracks in a cutting board or dining table.
Epoxy resin allows you to not only fill a crack and hide a cosmetic defect, but also completely stabilize the wood. Often this is the only opportunity to restore life to a workpiece that seems hopelessly damaged by through cracks, as in the example shown below.
#gallery-3 { margin: auto; } #gallery-3 .gallery-item { float: left; margin-top: 10px; text-align: center; width: 100%; } #gallery-3 img { border: 2px solid #cfcfcf; } #gallery-3 .gallery-caption { margin-left: 0; } /* see gallery_shortcode() in wp-includes/media.php */ To ensure good adhesion, all cavities to be filled are cleaned of dust and grease. Before starting work, the workpiece must be completely dry. Through cracks on one side of the board are sealed with masking tape. The resin and hardener are mixed in strict proportions specified by the manufacturer. In containers with dispensers, everything is simpler: one full stroke of the resin pump per press of the hardener gives the desired proportion. The mixture can be tinted with a special water-based dye. Before adding color, resin and hardener are thoroughly mixed. Having achieved optimal viscosity, all cracks and depressions are sequentially filled with the composition. After the epoxy resin has completely cured, the board can be subjected to standard woodworking operations - planing, sanding, etc. 4
Video description
The video shows how and what needs to be done to protect logs using putty and sawdust:
Acrylic sealant
Before sealing the cracks between the logs in a wooden house with sealant, you need to clean the base. A moisture-resistant elastic mass on an acrylic base can be applied in a layer of up to 5 mm. If the depth of the split is large, then a silicone cord or polymer cord is first immersed in it. They are not associated with the production environment, so the placeholder's behavior will not be changed.
Wood sealant Source massivcolor.ru
Experts have differing opinions regarding sealant. The cork practically does not breathe; the mass penetrates into the pores. This leads to a decrease in the ability of the log to release moisture in the damaged area. That is, the risk of rotting and subsequent biological damage increases.
There is a possibility of dust formation under the sealant film. This will cause the aggregate to fall out and cause the split to increase in width. Silicone or polymer cord can affect the creation of a greenhouse effect, which also results in mold, mildew, bacteria and rot.
Traditional methods
How to seal the seams between the logs of a log house from the point of view of the grandfathers - the best solution is moss. Previously, gaps and splits were caulked. More often, a common plant was used as a material. If it was dry, then the moss was pre-soaked in water for 30 minutes and squeezed out before use. The mass must be rolled into rolls and pushed into the crack. In order to compact the aggregate, it is tapped using a caulking spatula and a hammer or mallet. It is important to achieve a spring-like result.
It takes about 72 hours for the moss to dry. During this time, the volume of material increases to 20-30%. As a result, the cracks are clogged, the filler breathes, and the excess is cut off using a petal circle.
Wax correctors
Special sticks made of hard waxes are a simple and convenient solution for cosmetic repairs of small cracks, chips, dents, deep scratches and other defects. Wax correctors have gained wide popularity mainly as a means for cosmetic repairs of furniture and other wooden products used indoors and not subject to heavy wear. Wax correctors are offered in colors that imitate various types of wood. The colors are easily mixed to achieve the desired shade.
#gallery-5 { margin: auto; } #gallery-5 .gallery-item { float: left; margin-top: 10px; text-align: center; width: 100%; } #gallery-5 img { border: 2px solid #cfcfcf; } #gallery-5 .gallery-caption { margin-left: 0; } /* see gallery_shortcode() in wp-includes/media.php */ Before starting work, the area to be restored needs to be prepared: cleaned of dust and dirt, removed chipped nicks. Wax correctors are used at temperatures not lower than 10°C. Wax is applied with force to the damaged area, carefully driving it into all cavities. Using a plastic spatula, remove excess filling material and level the surface. The repair area is polished with a soft, lint-free cloth. 6