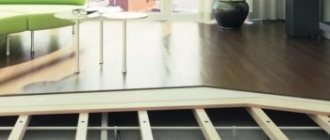
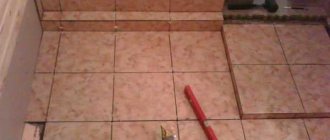
Wooden floors are rarely leveled with concrete. Many experienced builders believe that erecting a heavy monolithic structure on a wood floor makes no sense. Moreover, the concrete layer does not coexist very “friendly” with the wooden base, not only during hardening, but also during operation. In this regard, it is more advisable to use dry leveling schemes. But in cases where it is necessary, for example, to lay tiles in the washing room, you have to look for a way out.
Concrete screed on wooden floor
Let’s immediately say that concrete screed on a wooden floor is a completely feasible task, but here, as in any other matter, there are specific issues.
Description of plank floors
Plank floor - photo
Wood is a special material that has not only a number of technological advantages, but also one significant drawback. It is not static, therefore, even after installation work is completed, it “behaves” according to its own laws, peculiar only to it. Changes in temperature and humidity cause lumber to shrink, increase/decrease in volume, stretch or contract. By the way, it is for this reason that after the construction of the log house, finishing is carried out about 2 years later.
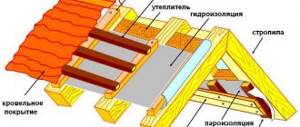
Features of installing a wooden floor
But even after a two-year period of shrinkage, wooden structures are still moving, albeit not as intensely. For example, a wooden floor with underfloor heating moves every time the heating system is turned on.
The graph shows the direction of change in floor dimensions depending on humidity (RH)
Video - Concrete floors in a wooden house
Unlike wood, a monolithic concrete base only slightly changes its geometric parameters when hydrated, and after complete hardening it hardly moves at all.
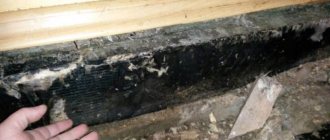
Concrete floor in the bathhouse
And if this base were tightly connected to an unstable wooden surface, then the slightest movements of the latter would lead to the formation of cracks on the surface of the concrete.
One of the reasons for the appearance of cracks is non-compliance with the technology of pouring concrete on a wooden base.
But the leveling technology described here is intended to ensure that both elements cannot harm each other, and its (technology) distinctive feature is that during pouring the base is not connected to the walls.
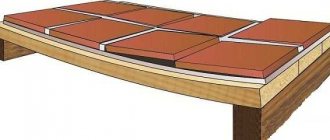
Diagram - an example of arranging a screed on a wooden floor
Laying on joists
This is the most popular technology for arranging a wooden floor, the advantage of which is the camouflage of communications under the floor. Their disadvantage: since the thickness of the base is 10 cm, it is not recommended to lay such a floor in rooms with low ceilings.
The boards are attached to wooden joists, which are beams, beams or thick boards standing on an edge.
Installation of a wooden floor on logs is applicable if the thickness of the boards is at least 20 mm.
The logs are placed on the base perpendicular to the rays of light penetrating from the window, following the step:
- Board thickness less than 35 mm – 0.6 m;
- 35-40 mm – 0.8 m;
- More than 40 mm – 1 m.
The sequence of actions when arranging a wooden floor on joists is as follows:
- Use screws and dowels to secure the joists to the concrete base. Recess their caps by a few millimeters;
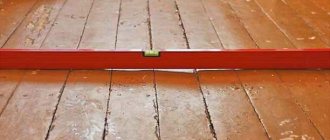
- Level the joists. The deviation should not exceed 2 mm for every two meters;
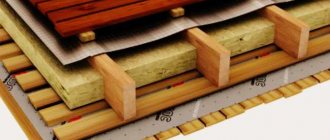
- lay wood-fiber material along the walls for sound insulation;
- fill the niches between the joists with materials for sound and heat insulation (expanded clay, mineral wool, polystyrene foam, etc.);
- secure the floorboards with self-tapping screws.
Laying is done in the direction of the light rays, starting from the wall. In this case, it is necessary to leave a seam 0.7-1 cm wide in case of expansion as the temperature rises.
Technology for attaching floorboards to joists
The joints of the boards should be located in the middle of the joists.
A tongue-and-groove board has a groove on one edge, and a tongue and groove on the other side, this promotes rigid fastening of adjacent boards. It is advisable to drill holes for self-tapping screws in advance and obliquely, which will prevent cracking of the boards. When all the boards are laid, it’s time for the baseboards.
Design features of plank floors
It is hardly advisable to pour a screed on a floor equipped with joists and a floor slab. Such floors often have a thickness of approximately 7-7.8 cm, and the only correct solution in this case may be to dismantle all wooden elements and then pour them over the floor slab. It’s another matter if the logs are high and located on brick pillars. Such pillars have a height of over 0.3-0.4 m, so it is impossible to replace them with a concrete screed. Schemes of such floors are presented in the images below.
1 – base; 2 – waterproofing made of two layers of roofing material; 3 – lower trim; 4 – top trim; 5 – external cladding with tongue and groove boards; b – plate made of non-ferrous metal with holes; 7- outer wall made of boards; 8 – plaster; 9 – plinth; 10 – plank floor; 11 – logs; 12 – brick column; 13 – antiseptic wooden lining; 14 – underground
1 – compacted sand; 2 – concrete preparation; 3 – waterproofing from roll materials; 4 – brick column; 5 – wooden antiseptic lining; c – cladding made of antiseptic boards; 7 – intermediate plank flooring: 8 – thermal insulation; 9 – air gap; 10 – floor; 11 – load-bearing beam
It is precisely such structures that are often filled with screed.
Caring for a poured screed
There should be no drafts or low temperatures in the room with the screed. If you did use a solution from CPS, then cover the screed with polyethylene. The anhydrite self-leveling floor must be protected for 2 days from excessive insolation (direct rays of the sun), too high a temperature, drafts and water. After two days the room needs to be ventilated.
Some conclusions of the article
- Before screeding, evaluate the structure of your wooden floor;
- Cement-sand screed is very heavy and will put a lot of stress on the wooden floor, so you may have to reinforce the wooden floor;
- If possible, replace the DSP with a high-quality leveler for an independent screed;
- DSP screed on a wooden floor is cost-effective only for small rooms, kitchens, and bathrooms;
- Think a hundred times before using a screed on a wooden floor in houses with wooden floors, remember the load.
- And one last thing. If you plan to use tiles as finishing, replace the screed on the wooden floor, if possible in level, by laying cement bonded bonded boards (CBB).
©Opolax.ru
Pouring technology
The essence of pouring a concrete screed on a plank floor is to create a gap between the monolithic surface and unstable wooden elements. For this purpose, the leveling layer is cut off from the walls using a damper tape, and from the plank base - with polyethylene.
Floating screed
This creates a floating floor without connections to any surface. As a result, all lumber elements continue to move in one direction or another, and the screed, which simply lies on top, does not become covered with cracks from permanent changes in the position of the boardwalk.
The technical parameters of the concrete screed, as well as the basic requirements, are found in SNiP 2.03.13-88 and 3.04.01-87.
SNiP 2.03.13-88. Floors. File for download
SNiP 2.03.13–88
SNiP 3.04.01-87. Insulating and finishing coatings. File for download
SNiP 3.04.01-87
Options for installing concrete screed
On the feasibility of using polyethylene
Direct contact with plastic film is known to have a negative effect on wood and leads to the growth of fungus and mold.
Reinforced polyethylene film
Polyethylene film
That is why, instead of film in wooden structures, roofing felt, bitumen-based mastic, glassine, or roll waterproofing with bitumen impregnation are often used. But the cement screed does not stick to the plastic film at all, which is why:
- both plates will be able to move freely along the insulating boundary;
- the screed will not draw moisture from the wood, leading to cracks;
- When moving, the screed will not pull the film, stretch it or tear it.
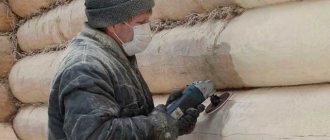
Important information! Before starting work, care should be taken to minimize the negative consequences of contact of lumber with polyethylene. To do this, all wooden elements must be treated with an antiseptic and the Aquastop primer mixture, which has moisture-repellent properties.
Primer concentrate – AQUASTOP
The filling procedure itself consists of several stages, let’s get acquainted with them.
Prices for reinforced polyethylene film
reinforced polyethylene film
Combination paths
A foundation that has many advantages is a screed.
The cement base has many positive features:
- Firstly, this surface is durable, smooth, on which, subject to certain rules, any coating can be placed;
- Secondly, with proper filling, the surface does not require additional leveling even after a period of time, and changing the existing coating will be done with minimal effort with your own hands;
- Thirdly, this is one hundred percent protection of an apartment or house from rodents.
The only unpleasant moment may be that the cement slab is a cold type of base, so it will not be possible to do without insulation.
Covering the floor with a board is a solution to the problem of laying material on a screed, and there are several possible options for this solution.
| Solution options | pros | Minuses |
| Laying boards with glue |
|
|
| Classic laying of floors “the old fashioned way” on joists | Everything is very simple, you need to install joists, run insulation between them, and secure the floorboard on top with nails (you can use self-tapping screws). | This process is labor intensive. There are difficulties and nuances at every stage, but this will be discussed in a separate section |
| Laying on multi-layer boards | The most promising and most successful process in terms of price plus quality. There is no need to precisely level the surface or joists as in the two previous methods. | If the technology is followed, the negative aspects are practically reduced to zero |
Now let's place the wooden floors on the concrete base.
Closer to the glue
This is where we will glue it.
Instructions for using this technique read:
- All work related to laying floorboards with glue begins with leveling the base. This suggests that lumps and cracks in the base are unacceptable. Consequently, the bumps are cut off with milling cutters or abrasives, and the cracks are leveled with special self-leveling mixtures, which are abundant in the construction market.
For your information! Before starting any installation work, it is best to treat the surface of the slab or screed with a bitumen primer. This will allow the necessary impregnation of the cement base from fungus, mold and other undesirable consequences. This product is already included in many self-leveling mixtures. Consider this stage universal for all types of work.
- After impregnation and leveling of the pillow, an additional layer is laid for final leveling, insulation and sound insulation. This is a special fabric base up to 2 mm wide, to which you can glue not only a wooden board, but also parquet or laminate.
- Then glue with a thickness of 2-2.5 mm, up to a maximum of 3 mm, is poured onto the exposed fabric and the wooden floor is laid on a concrete base.
Photo of the gluing process: the glue is applied with a notched trowel.
Advice! In this case, haste is contraindicated. The boards must be perfectly matched and laid 3 at a time, no longer recommended. Care must be taken to ensure that there are no pockets of air or jammed material underneath the wood flooring of the house under the board. You should also pay attention to the absence of gaps between the boards or other connection defects.
This technique is quite labor-intensive and requires skill and patience, so let’s turn to the next technology.
Classic lags
Here are the floor joists.
Everything is simple here, with the exception of the first stage, namely setting up the logs themselves.
More about this:
- Installation of lag. In this step, it is necessary to attach the base beams impregnated with fire retardants and antifungal mixtures to the impregnated cement base.
To the piggy bank! Attaching the joists is a simple and predictable process; for us, the installation step is more interesting. From some sources you will get figures of 30, 35, 50, 60 and even 70 cm. A small practical sketch - the thinner the thickness of the floor board, and this can be 20, 25 and 35 mm, the smaller the lag pitch. A wooden floor over concrete should not sag.
And one more tip! It is recommended to lay mineral wool between the joists as an insulation and soundproofing material. This is justified. In this case, it is better to take narrow mats 60 cm wide and insert them tightly between the joists. But it is still better to use a thicker floorboard.
Leveling is a complex process.
- And then the most interesting thing is the alignment of the logs themselves, since level distortions of no more than 2 mm are allowed. For this purpose, you can use any tools, from a plane to files and sandpaper. Upon completion of this stage and the final impregnation of the beams, insulation is laid. The logs are fixed to the concrete base with self-tapping screws.
- And the final step in this process will be laying the boards and fixing them.
Tile material
Laying squares in “brickwork”.
With all the wealth of choice, I would like to draw your attention to the third way to solve the problem of how to lay a wooden floor on a concrete base. This solution is to lay wood flooring on pre-installed slabs.
The step-by-step instructions look like this:
- Slabs measuring from 40x40 to 80x80 cm are laid on a concrete base with a gap of 2-3 mm between them using the so-called “brickwork” method. The tile material used is either multi-layer plywood, starting from 12 mm and more, or OSB board with the same characteristics. The tiles are fixed to the base with dowels.
Practical observation! Sometimes, while re-reading all sorts of “useful” tips, you will come across recommendations to install plywood or OSB with glue and then fix it with dowels. The purpose of this safety net is not entirely clear; fixation using one method is quite sufficient. The only condition that you still better fulfill is to “recess” the heads of the fasteners flush. Do not forget that all parts of this tile must be impregnated with appropriate solutions that prevent rotting, mold and antipyretics.
- And at the end of the process, a floorboard is laid on the prepared surface.
Stage one. Calculations
There is one standard calculation scheme: for every 15 kg/m² of dry mixture there is a thickness of 1 cm. Even if the required amount of materials is known, you still need to buy them with a 10% margin.
Table. Dry cement mixtures - cost
| Name | Manufacturer | Package | Price |
Universal dry mix, M-150 | "VOS Mixtures" | Bag, 50 kg | 95 rub. |
Universal sand-cement mixture, M-150 | UMIX | Bag, 50 kg | 100 rub. |
Dry universal mixture, M-150 | "Stone Flower" | Bag, 25 kg | 75 rub. |
| Floor screed STs-5 | "Polymin" | Bag, 25 kg | 118 rub. |
Screed Kreisel-440 | Kreisel | Bag, 25 kg | 132 rub. |
Floor screed “Moment” | Bag, 25 kg | 160 rub. |
Stage two. Preparing the base
Having understood the technology and calculated the required amount of mixture, you can proceed directly to work. Traditionally, you should start by preparing the base.
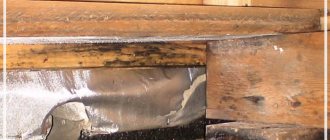
Step 1. First, the boardwalk is dismantled and a thorough inspection of all elements is carried out. Lags are checked. If any of them are unsuitable for further use, they must be replaced.
Checking lag
Recommendations
Step 2. If the logs are installed in increments of more than 40 cm, then auxiliary bars are installed between them.
Strengthening joists with crossbars
Step 3. The boards - if they are still usable - are nailed back together. If slightly damaged floorboards are found, they should be turned over.
A floorboard with a slight defect can be turned over
The heads of the nails are recessed by 2-3 mm, otherwise the plastic film laid on top may tear.
Step 4. The baseboards are removed and thin boards are installed instead (the latter should cover the cracks in the walls). Do not forget that these boards are installed for a certain time, and after pouring the screeds will be dismantled. This will ensure ventilation of the wooden base and prevent it from rotting.
Important information! You also need to seal all the cracks. If they are small, you can fill them with sealant, but large cracks are better sealed with foam.
Sealing cracks with putty
Foam sealed cracks
Instead of sealant, you can use parquet putty made from wood dust, or a homemade putty mixture. To prepare the latter, you need to mix any sawdust with oil paint in a ratio of 4:1.
Sawdust and paint
Mixing repair materials
Technology
If you decide to make a floor screed using joists with your own hands, then you should thoroughly understand the process of its construction, which consists of several stages. For a more visual guide to installation, see the video provided at the end of the article.
Preparatory stage
Before pouring the screed, a complete inspection of the wooden base is carried out.
At this stage, we need to do the following:
- All boards must be removed and inspected. Rotten, damaged or cracked elements should be replaced.
- We also inspect the logs. We replace unreliable beams with new ones.
Tip: pay attention to the lag step. If it is more than 40 cm, then it is better to install additional beams to increase the load-bearing capacity of the floor.
- Reinstall the floorboards. Boards with an uneven, damaged surface can be turned upside down.
- We carefully seal all the cracks between the boards with sealant.
- After the curing period indicated on the package with the sealant has expired, you can begin treating the floor with a moisture-resistant primer. Allow time for the primer to harden.
- Using a laser device, we mark the level of the clean floor on the walls of the room.
Attention: when determining the height of the screed, keep in mind that every centimeter of the thickness of the concrete layer puts pressure on the wooden floor weighing 100-120 kg. Therefore, if it is necessary to perform a high screed, it is worth further strengthening the logs or replacing them with metal beams, for example, from a channel.
Laying insulation
Laying damper tape around the perimeter of the room
At this stage you need to make something, like a trough, from waterproof insulating material for pouring concrete. To do this we do the following:
- First of all, we attach a damper tape along the perimeter of the room to the bottom of the walls. You can use a special strip, a regular board or a strip of polystyrene foam. The tape can be attached with double-sided tape or with a stapler. The optimal thickness of the strip is 1-2 cm, and its height should be a couple of centimeters higher than the height of the screed. This element is needed not only for the deformation movements of the screed, but also as a soundproofing barrier. After laying the face layer, the protruding parts of the tape can be trimmed.
- Now it’s time to lay down the plastic film. Adjacent strips of film should overlap each other by 10 cm. The joints of the film are sealed with tape. Also, the insulating layer must be wrapped on the walls of the room to a height of 15-20 cm. As a result, you will get a waterproof trough made of insulating material onto which you can safely pour the screed.
Attention: Under no circumstances should any holes, cuts or punctures be made in the insulating material. If they appear during the work, they should be immediately sealed with plastic patches.
Installation of beacons
Laying reinforcing mesh and guide beacons
It is strictly forbidden to attach guide beacons using self-tapping screws or nails to the floor. It is best to lay them on flat cakes or beds of mortar. The outer beacons are installed at a distance of 20 cm from the walls (see video). And the step of the guides relative to each other is 1-1.2 m, but not more than the length of the rule.
It is better to use guide profiles for drywall as beacons. Installing beacons along the mortar beds will make it easier to level them to the level of the finished floor. The beacon can be sunk deeper into the solution or raised higher by adding more mixture, thereby achieving the desired mark (see video).
How to make a dry floor screed with your own hands?
Advice: if you do everything yourself, then keep in mind that after preparing the solution, it is better to lay the beacons within an hour.
Screed reinforcement
The installation of a floating screed on a wooden floor along joists requires additional reinforcement, especially if the layer height is more than 5 cm. Typically, screed reinforcement is done using a metal mesh made of wire or reinforcement. But in the case of floors with joists, it is better to use a lighter material that will not additionally load the screed. In addition, the metal mesh can easily tear the insulating layer during pouring. That is why fiber is the ideal reinforcement for a wooden base.
Fiber is added to the solution during the mixing process. This method of reinforcement is suitable for doing it yourself. Fiber fibers randomly located in the screed provide the strength of the layer in different directions.
Pouring concrete mixture
Laying and leveling cement mortar
Regardless of how the mixture is poured, with your own hands or with the help of hired workers, leveling is done in one of two ways:
- If laying will be carried out over a large area, then it should be divided into separate sections (maps) using formwork and the mixture should be poured according to the maps. In this case, it is allowed to take breaks in work when pouring individual sections.
- If the room is small, then the filling can be done at one time, starting from the corner of the room farthest from the entrance. In this case, it is not allowed to take breaks from work, so it is better to do the pouring yourself with an assistant. While one is pouring and leveling the mixture, the other is preparing a new portion.
We lay the solution like this:
- We spread a portion of the mixture between the beacons just above their level and level it using the rule. To do this, place the tool on the guides and pull it towards you from side to side, leveling the mixture.
- A day after laying the mixture, the beacons can be removed from the solution, and the recesses from them are treated with a primer and filled with fresh solution. Level the top with a trowel.
- The surface of the screed must be sprayed with water for the first seven days and covered with plastic film for the first four days to ensure uniform evaporation of moisture. Equally important is constant humidity and temperature in the room.
To learn how to make a screed on a wooden floor, see the video below:
Stage three. Padding
When the sealant or putty is completely dry, thoroughly vacuum the substrate to remove dust and debris. Sanding can be done if desired, although this is not necessary.
Padding
Next, a moisture-resistant primer is applied in two or three layers: it will prevent the appearance of air bubbles and the absorption of liquid from the cement mortar by the surface. The primer will also serve as additional protection for the wood from mold and mildew.
Apply primer in several layers
Prices for primer for concrete floors
primer for concrete floor
Stage four. Marking
Using an ordinary or laser level, a zero level is marked along the perimeter of the walls. The latter can be at an arbitrary height, but on average it is 35-70 cm from the surface of the base. It is necessary to mark several points of the zero horizontal on each of the walls.
Definition of zero level
Equal distances are laid down from these points, and the thickness of the screed itself must be taken into account.
Zero level marking scheme
Important information! The standard thickness of a concrete floating floor is about 5 cm. Moreover, every centimeter of such a floor will create a load on the plank base of 100-110 kg per square meter. It is for this reason that it is advisable to strengthen the logs, although if possible it is generally better to install metal channels instead of them.
The logs are laid on the channel
Stage five. Waterproofing
Further actions involve insulating the wooden structural elements, and the result should be a kind of pallet that does not allow moisture to pass through.
Step 1. A damper tape with a thickness of 10-20 mm and a width slightly exceeding the thickness of the screed is attached to the walls along the entire perimeter. This tape will provide not only damping of sound vibrations, but also the possibility of lengthening/expanding the floating slab. Scotch tape is used for fastening.
Edge tape
Fixing the edge tape
Fixation possible using a construction stapler
Installed deformation tape
Important information! Upon completion of the finishing of the floor, the excess tape protruding on the surface will be cut off, and the resulting gap will be covered with a plinth.
Step 2 . Next, polyethylene film is laid. This must be done with an overlap of 10 cm and with an overlap of at least 15-20 cm onto the walls.
Example of laying polyethylene film
Polyethylene film flooring
Important information! There should be no folds or damage to the waterproofing layer. Subsequent steps must be performed with extreme caution so as not to tear or puncture the film. If this cannot be avoided, the holes must be immediately covered with polyethylene patches.
Secure adjacent panels with tape
Step 3 . Ideally, the waterproofing layer should have no joints at all. If there are joints, then they are all firmly taped with tape. The further operation of the leveling layer will largely depend on the tightness of the waterproofing.
Prices for edge tape
edge tape
Installation methods
Installation with glue
Fixing a wooden floor with an adhesive mixture requires appropriate preparation of the base. There should be no cracks or loose areas on it. If the surface does not meet the requirements, it is strengthened using substrates or priming. Depending on the width of the board, one- and two-component compositions are used. The work is performed in this order:
Boards can be fixed to such a surface using glue.
- Cutting wood according to measurements.
- Apply glue no more than 3 mm thick.
- Laying 2-3 boards.
- Waiting for the adhesive to set.
- Laying the next sheets of wood.
Fixing to joists
The difficulty with this method is the height of the flooring, which is at least 10 cm. This is problematic for houses with low ceilings. The advantage of this method is the ability to hide communications and cables. The logs are laid perpendicular to the sun's rays coming from the window. The width of the step depends on the thickness of the board, the minimum value of which is 2 cm. With this method of laying on a concrete base, the following nuances are taken into account:
The location of the logs should be strictly perpendicular to the rays of the sun entering the window of this room.
- The boards are attached to the joists with self-tapping screws, which prevents squeaking.
- Soundproofing materials and insulation are laid under the wood.
- Butt seams are located in the middle of the joist.
- When leveling the joists, deviations of 2 mm are allowed for every 2 m of floor.
On a plywood base
One of the budget options for laying the floor is to use plywood sheets as a finishing covering, which is secured along the joists.
Often there is the option of attaching plywood sheets to the joists.
The plywood chosen for such work is moisture-resistant. The material is cut into squares with a side of 40-80 cm and polished. The thickness of the products is 12-18 mm. The plywood base is attached to the concrete using adhesives and dowels. The cut floorboards are fixed to the plywood using self-tapping screws. Fastening the skirting boards with any installation method is the final stage.
Stage six. Reinforcement
If the concrete layer is thick enough, it must be reinforced. There are several methods of reinforcement; only the most common ones are discussed below.
Method No. 1. Reinforcing mesh
Reinforcing mesh
The mesh is laid in parallel rows with an overlap of 10 cm
A very common option, which, however, is not particularly suitable in this case. The fact is that the previous layer is polyethylene, which can be damaged by the mesh. It will be quite difficult to move around the fittings without compromising the integrity of the insulation. In addition, the film, as noted above, must be in direct contact with the concrete, so the mesh must be located in the body of the screed.
For this reason, concrete is poured in two layers:
- the first layer is poured - without beacons;
- the grid is laid, beacons are installed;
- the second layer is poured.
It would seem nothing complicated, but the concrete layer will take a long time to dry - the break between layers can be up to 1 month. Therefore, it is better to resort to the second method.
Method No. 2. Fiber fiber
Fiber fiber
The next reinforcement method involves adding fiberglass directly to the concrete mixture during the preparation stage. The polymer fibers that make up this material are arranged randomly, resulting in maximum bond strength in all directions.
Moreover, the total weight of the screed will be noticeably reduced due to the elimination of metal mesh. Further actions are focused on using this particular method.
Reinforcement of concrete screed
Fiber fiber prices
fiber fiber
Material for screeding on wooden floors
To make a screed on a wooden floor you will need the following material:
- Polyethylene film with a thickness of 200 microns, for waterproofing the screed layer from wood and walls;
- Mixture for screed. Read about choosing a mixture a little higher. If you choose a cement-sand mixture, then prepare a reinforcing mesh, preferably with a stainless steel coating. The mesh should not be in rolls. Why not in rolls?
You have to fix the reinforcing mesh on a wooden base, but you must not disturb the waterproofing, that is, do not tear the film. Think about how you will attach the mesh. At the same time, think about how you will attach the beacons for the DSP screed, because there is nothing to attach the beacons to, the base for attaching the beacons is polyethylene.
Why am I making these notes? In my opinion, it is better not to install a cement-sand screed on a wooden base in large rooms. The amount of work and problems will completely overshadow the result. Replace DSP with “Rovnitel” for isolated bases (unbound screed). For example, an anhydrite floor leveler.
Stage seven. Installation of leveling beacons
Lighthouses need to be built especially carefully; there can be no talk of any screws or nails. The foundations for future “beds” are made from the same mortar that will be used for the screed. “Beds” are formed along the entire length of each of the lighthouses.
Installation of leveling beacons
Important information! The distance between the “beds” must be 10-15 cm shorter than the length of the rule (often about 120 cm). The distance between the wall surfaces and the outer “beds” should be 25-30 cm.
The metal profile is laid on the tops of the “beds” and heated in the solution so that the previously noted height (level of the leveling layer) is reached. The installation of beacons must be completed a maximum of an hour after mixing the solution, otherwise it will set.
Stage eight. Mixing the solution
The mixture for concrete screed can be purchased ready-made or made independently. Factory-made dry mixes are sold in bags of 25 kg and 50 kg and diluted with water (6.5 liters per bag or 13 liters, respectively). If necessary, the amount of water can be increased, but not more than 0.5 liters.
Mixture for mixing
Stirring a mixture, example
All components are mixed with an electric drill with a mixer attachment; the finished mixture should be used for a maximum of 15 minutes.
To prepare the solution yourself, you need to mix cement (at least “four hundredth”) and sifted sand (preferably river sand) in a ratio of 1:3. An electric drill is also used for kneading, but the whole procedure is performed in 2 stages. The prepared solution should be used no later than 1.5 hours after mixing.
Important information! The strength and water resistance of the solution can be increased by adding special plasticizers (the proportions are indicated on the packaging). Although there is a cheaper alternative to plasticizer - regular washing powder (a handful for every 100 liters of water).
Prices for cement-sand mixture
cement-sand mixture
Stage nine. Fill
The filling procedure is carried out traditionally, i.e. continuously. You should start from the far corner relative to the front door. The surface is leveled using a rule.
Filling the screed
24 hours after pouring the screed, the beacons are removed, and the remaining voids are treated with a primer, filled with the same solution and leveled using a trowel.
Illustration of dismantling a lighthouse from a screed
The hollows are filled and rubbed
Trimming the damper tape
Clean the screed from excess mixture using a wide spatula and a rule
Video - Screed on a wooden floor
Advantages and disadvantages of wood
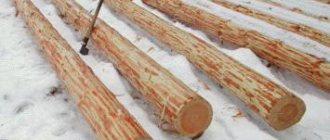
Figure 2. Pine for a wooden floor
Laying a wooden floor at home directly on a concrete base is justified by the excellent characteristics of the natural material:
- natural;
- lasting;
- safe;
- does not deform;
- has good noise and thermal insulation qualities;
- visually attractive;
- suitable for different interiors;
- it is convenient to do the flooring yourself;
- the surface can be varnished or painted;
- wood does not accumulate dust.
The material is not without its drawbacks:
- the cost of the boards is high;
- the condition of the coating is affected by room humidity and temperature changes;
- wood burns well;
- the surface wears out and gradually loses its shine;
- periodically the floor needs restoration.