Home / Waterproofing, vapor barrier / Installation, repair, maintenance / How to properly install a ceiling vapor barrier?
When building a house, the question of vapor barrier of the ceiling does not arise until the very last stage of construction - insulation of all surfaces. But, when it comes to this point, it turns out that not everyone adequately knows the design of a ceiling vapor barrier and the technique of laying vapor barrier materials.
Purpose of ceiling vapor barrier
In any living space: bedroom, bathroom or kitchen, as a result of the life activities of the residents, water vapor inevitably appears in quantities significantly exceeding its content in the external atmosphere surrounding the building. This is especially true for “wet” rooms: bathrooms, steam rooms and kitchens, where technological processes take place imply significant vaporization.
Since the partial pressure of water vapor inside the room is significantly higher than the similar pressure of water vapor in the outside air, it diffuses through the pores in the materials of the walls and ceiling. As it cools and condenses, the steam turns into water, resulting in the insulation getting wet. It is proposed to use various “mineral wool” as insulation, i.e. materials with a fibrous structure that helps retain moisture.
Wet insulation loses its heat-insulating properties and ceases to perform its function. To avoid such developments, various means and methods of protecting it from penetrating moisture are used.
Modern vapor barrier materials can give a positive effect only if certain technological requirements are met. We will talk about how to properly lay the appropriate films and membranes below.
The above does not apply to insulation materials created on the basis of polystyrene foam. These materials, having , are produced in the form of rigid slabs and have almost zero ability to absorb moisture. Their disadvantage is their significantly higher cost compared to fiber insulation. It is the cost that limits their widespread use. When using them to insulate the ceilings of “dry” rooms, you can do without vapor barrier materials.
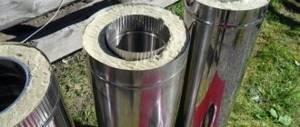
In the case of insulating the ceiling of a bathhouse, vapor protection is still necessary. In addition, in places where chimneys and other communications pass through the ceiling, causing heating of the ceiling, special measures should be taken to protect wooden combustible structures. Here you can use various mineral insulation materials that can withstand heating up to 1000°C.
Materials for ceiling vapor barrier
The most common ones available for ceiling vapor barrier:
- glassine
- foil
- films
- membranes
- mastics and varnishes
Let's take a closer look at each of the listed types.
Glassine is thin construction cardboard impregnated with bitumen mastic. Has a number of advantages:
- preventing the penetration of moisture, it is breathable;
- resistant to low temperatures;
- affordable.
Among the disadvantages, it is necessary to note high flammability and low durability. Produced according to GOST 2697-83. Can be recommended for budget outbuildings.
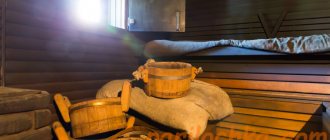
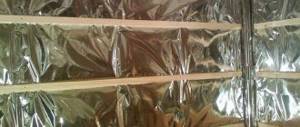
Foil – made of aluminum. It has high reflectivity and low vapor permeability. Usually applied to thick paper or polyethylene foam. The latter can be of varying thickness and serves as additional thermal insulation. As a rule, such materials are used in steam rooms of baths. Manufacturers' claims about the ability of these materials to replace significant layers of traditional wood and brick should be treated with great caution.
Placed inside the room from which the heat flow comes, the foil, working like a mirror, will actually return a significant part of the thermal energy. However, this refers to that part of the energy flow that is transmitted in the form of radiation. Therefore, the use of a foil layer of material in a bathhouse is justified and even necessary, but it is not sufficient and must be supplemented with traditional basalt-based fibrous thermal insulators.
Polyethylene films reinforced with special meshes are perforated - intended for rooms with high humidity and non-perforated - for dry ones. The main advantage of such films is their low price. There are noticeably more disadvantages. These are high labor intensity when installing ceiling vapor barrier, low surface strength and accumulation of moisture on the surface at certain temperatures.
Polypropylene films are free from the disadvantages of polyethylene. They are much stronger. One side is covered with viscose, which prevents moisture accumulation due to the absorption of water and its subsequent evaporation. The higher cost of such films is quite justified.
The most advanced vapor barrier material currently is membrane films, consisting of a layer of micro-perforated fabric, a layer of polypropylene and a polymer film. Double-sided membranes are the most effective.
Concluding our consideration of vapor barriers, let us mention mastics and varnishes with a membrane effect. They are used to treat the surfaces of concrete ceilings. They do not allow moisture to enter the premises and allow it to escape outside.
Is a layer required for ventilation?
At the bottom of the membrane vapor barrier there is a 5-centimeter ventilation gap, which helps prevent the formation of condensation on surfaces and the heat insulator.
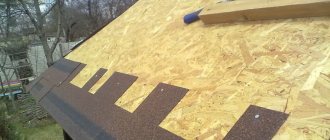
Diffusion membranes can be attached to insulation, plywood sheets or OSB. In a membrane with an anti-condensation layer, gaps up to 6 cm wide are located on both sides.
To create a gap for ventilation when insulating the roof structure, a counter-lattice is used. In the process of fastening a ventilated facade, a technological gap is created when installing racks located perpendicular to the vapor barrier.
Laying of roll materials
Vapor barriers based on glassine, foil, films and membranes are mounted identically. Therefore, the methodology outlined in this section is applicable to all roll materials. She explains how to install a vapor barrier on the ceiling correctly. When laying rolled materials, the general requirement must be observed: the vapor barrier must create a closed loop around the heat insulator on all sides without gaps or gaps. Therefore, when insulating the ceiling, proceed as follows:
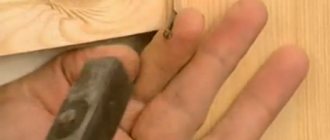
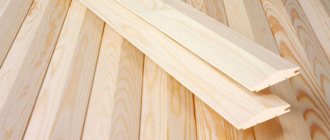
- A 25 mm thick edged board is sewn onto the underside of the floor beams. The distance between the beams should be taken based on the width of the insulation used. Typically this value is 600mm.
- Insulation is placed in the resulting “boxes” in several layers. When the thickness of the insulation slab is 50mm, there can be from two to four or more such layers, depending on the climatic conditions of the area. In this case, the joints of the layers should not coincide with each other.
- It should be taken into account that for proper operation, the vapor barrier layer and the insulation must have a gap of 50mm between each other. The boards according to claim 1 have a thickness of 25mm. Therefore, it is necessary to move the bottom layer of rolled material away from the insulation by another 25mm. Perpendicular to the boards and, accordingly, parallel to the beams with the same interval of 600 mm, we sew a 25 mm thick batten. We fasten the boards and slats to the beams with nails or self-tapping screws of suitable length.
- It is more convenient to install a vapor barrier on the ceiling with two people, if possible three. This way the work is done faster and more correctly. One worker holds the edge of the rolled material, the second unrolls the roll, and the third attaches the material to the slats using a construction stapler.
- The material is laid with an overlap of panels of 150-200mm. The joints are taped with special tape. It is usually offered to be purchased along with film or foil.
When laying, special attention should be paid to which side to lay the material towards the insulation. Typically this point is indicated on the accompanying label of each roll. If such a hint could not be found, then you can follow the general rules: • glassine is laid with cardboard to the insulation; • foil vapor barrier - foil into the room; • films, as a rule, have one smooth surface - it should be towards the insulation, the other - fleecy - this one - into the room.
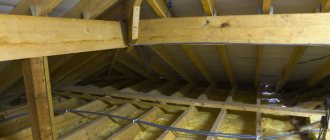
After filing the ceiling from below, we move on to the upper part of the ceiling, which faces the cold attic. The vapor barrier is installed here in the manner described earlier. It is also necessary to maintain a distance of 50mm from the insulation to the insulation. If the height of the beams is not enough, it is increased with a lath and rolled material is laid on top of the lath.
If the attic space is intended to be used for storing something, although fire safety standards do not encourage such use, it is necessary to lay a solid floor made of 35mm thick edged boards on top of the vapor barrier. To prevent the floorboard from coming into contact with the vapor barrier, it should be laid through a counter-batten sewn onto the beams on top of the insulating material. If the size of the attic does not imply economic use, it is not necessary to lay a solid floor. You can use a 35-50mm thick board to lay a passage along the roof ridge.
Questions arising during installation
Many questions arise for those who do not have the opportunity to build a house on their own and decide how to insulate their premises, what material to choose and what to do with the floor?
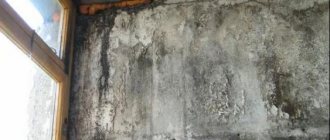
When the question arises about vapor barrier of an existing room with its own initial data, you need to take into account the condition of the ceiling. There are cases when owners stick isospan to a plastered ceiling and expect that condensation will not appear on the loggia or in another room, thanks to the magical properties of the membrane. They make a mistake in advance: isospan does not fit on structures that are already plastered or insulated with mineral wool.
Insulation of this kind does not require a vapor barrier, and plaster is already a type of interior finishing. Flooring will lead to consequences that will then have to be eliminated.
To insulate the roof from the outside, a different type of material, type A, is required. It will be installed according to different principles and reasons. And for insulating the roof from the inside of the room, the flooring technology remains the same.
Izospan in the attic type attic
If the film breaks during installation, you can seal it with construction tape. This must be done very carefully so that the sealed layer is not damaged later.
Izospan under galvanized profiles
In addition to vapor barrier of ceilings, similar work must be carried out on the floor or walls, but for this, completely different types of membrane film and technologies for its laying can be used. The main thing is to understand what type of film is needed for construction or repair work, so as not to purchase something that turns out to be unnecessary.
The use of isospan for ceilings is described in detail in the instructions for use. If you have doubts about the choice of material, it is best to consult with specialists. Installing isospan on the ceiling is easy to do yourself if you study the necessary information in advance.
Application of varnishes and mastics
Mastics and varnishes are applied to concrete floor slabs. Their purpose is the same as that of rolled materials, i.e. they protect the insulation from moisture getting into it. The application technology is simple: using a brush or spatula.
Before starting work, you should carefully read the attached instructions, paying special attention to the temperature conditions for the work. Solvents used in varnishes and mastics are fire hazards, so special attention should be paid to preventing fires.
Range of vapor barrier materials
For each of the considered types of vapor barrier materials, trade offers a wide range of brands. Let's name some of them. Glassine is produced in three grades: P-250, P-300 and P-350. They differ from each other in the thickness of the cardboard and the properties of the bitumen used. Produced in accordance with GOST 2697-83. Foil insulation of the PENOFOL trademark - TU 2244-056-04696843-98. Available in types A, B and C. Type A provides one-sided foiling, type B – double-sided and type C – foil on one side, glue on the other. The thickness of the insulation is from 3 to 10mm. Available in rolls.
Films and membranes:
- ROCKWOOL - two-layer material made of non-woven polypropylene fabric laminated with a layer of polypropylene;
- Axton - vapor barrier, the purpose of which is similar to ROCKWOOL, but cheaper;
- Vapor barrier film Izospan brands RS, B, Bfix, C, RM, D, Dfix, DM are designed to protect insulation in ceilings from the penetration of steam and condensation from inside the room.
Varnishes and mastics. As examples of the range:
- impregnating insulating grade ALP,
- impregnating insulating mineral brand ALP - S,
- insulating normal ALN brand,
- hard grade ALT;
- Atis brand bitumen mastic;
- bitumen mastic of the Alumatol brand.
Which side is the right side to lay the isospan on?
The first question that beginners have is choosing the right side of the material. The main purpose for laying isospan on the ceiling is to protect the insulation from moisture penetration. Therefore, for maximum efficiency in performing the required tasks, the smooth layer of material should always face the insulation. Along with this, external and roofing work with this insulator has some differences. When choosing which side to lay isospan on, remember that for the roof it is more important to ensure unimpeded escape of steam to the outside and protection of the insulation and ceilings from precipitation. In this case, the smooth side of the material should face outward.
Tools for creating ceiling vapor barriers
When starting work on installing a ceiling vapor barrier, you should prepare the necessary tools. To install roll-type materials, you will need carpentry tools: a hacksaw, hammer, scissors, knife, stapler. On a large site, it is useful to supplement this list with power tools: a hand-held circular saw, the design of which would allow for attachment to a workbench, a screwdriver, a pneumatic stapler. The latter will entail the need for a compressor.
Varnishes and mastics are applied to concrete surfaces using brushes and spatulas. Work must be carried out in strict accordance with the attached instructions. To wash the instrument, you will need appropriate containers in the form of cuvettes and glass or plastic jars. Plastic ones are preferable because they do not break and do not pose a risk of injury to workers. In addition to tools, performing work on the ceiling surface requires the presence of stepladders and scaffolding of appropriate height.
You can make scaffolding yourself from suitable boards. It is simpler and easier to use purchased prefabricated scaffolding made from square pipes. At an affordable price, they are very convenient to use. They are light in weight. Quickly assembled and disassembled. Allows you to vary the working height within a wide range. They have wheels for moving around the premises.