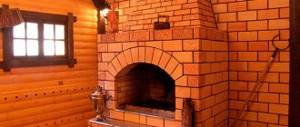
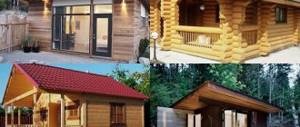
A country cottage, private house, or summer house will only benefit from installing a beautiful stove or fireplace. And what can we say about how the room will be transformed from the lining of the old stove. Of course, today the stove plays more of a decorative role in the interior of a room than a functional one, but the idea of a hearth, embodied in a modern home, will never lose its relevance.
Furnace cladding, in the language of professionals, is the application of a finishing coating to the structure of the heating device. The most popular solution is finishing the stove with tiles. This service is provided by master stove makers. But there is no reason not to do the oven lining yourself. Moreover, when there are step-by-step instructions with detailed descriptions, photos, drawings and diagrams that are understandable even to a beginner.
How to tile a stove correctly and lastingly
The order of work is carried out in a certain sequence; intermediate stages should not be neglected.
Features of tiling different types of stoves
First of all, not all stoves are suitable for lining, and with some types you will have to tinker. There are three types of furnaces:
Metal furnaces
When tiling a metal surface, you need to understand that metal and tile have different coefficients of thermal expansion. Thus, the stove and the tiles on it will heat up and cool down at different rates. This will invariably lead to the decorative tiles peeling off or even cracking. But, even in this case, tiling a metal stove is possible. Professionals recommend installing a movable bond between the tiles and the stove surface using clamps; this technology will help avoid cracking;
Double-circuit heating stoves made of bricks
An ideal option if you plan to tile a brick oven. This is due to the fact that the stove has two circuits: internal (firebox and vaults) and external. The outer contour, which is in contact with the cladding, heats up significantly less than the internal one, and therefore the cladding tile adheres best to such a stove. By the way, an additional advantage of this furnace design is the absence of local overheating. This allows you to clad a fireplace or stove with one material and using one type of mortar for its fastening;
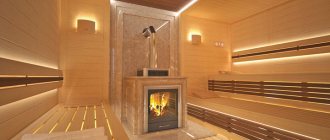
Single-circuit brick kilns
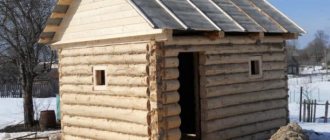
They are often installed in bathhouses, which is why the stoves are called “sauna stoves.” The most problematic option. After all, there is only one circuit, which means that the surface heats up more than in a double-circuit oven. Craftsmen who perform cladding of a single-circuit stove must have certain experience in order to correctly select the tiles for cladding and the mortar that will hold it. Areas of local overheating deserve special attention.
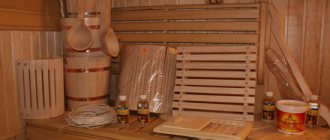
Among other things, a stove installed in a bathhouse is exposed to changes in temperature and humidity. Tiling a sauna stove requires a more careful selection of materials. It is recommended to use porcelain stoneware for it, as it is the least porous material that can withstand the highest temperatures. It is also possible to line the stove with terracotta tiles, but its thickness must be at least 8 mm, and the distance between adjacent tiles must be at least 10 mm.
Note. Knowing what type of oven does not yet give you the opportunity to start working. You also need to consider what type of fuel the stove is heated with. Different types of fuel have different combustion temperatures. For example, when using solid fuel, the facing material must withstand temperatures up to 1600 degrees; wood (firewood) will allow you to expand the choice of facing tiles because burns at temperatures up to 800 degrees.
Cladding works
Cladding work can be divided into several stages.
- Let's begin Large-scale cleaning of the walls is underway. All dirt and dust must be removed. A wire brush is perfect for this type of work. More modern tools can also be used. So, an angle grinder with a special attachment will do the job well. After all manipulations, wipe the surfaces with a damp cloth. Preparing a brick surface for finishing
- We continue Before starting other work, you need to cover the walls with mesh (metal with 150 mm cells). It is better to always do this procedure, and it does not matter at all what finishing material will be used in the future: it can be facing with stone, soapstone or tiles for the stove. The mesh is secured with self-tapping screws in arbitrary places. A metal corner is installed at the corners. These manipulations are needed in order to strengthen the surface of the heat source and avoid further deformation. Stove covered with metal mesh
- Let's not stop Now you need to apply a layer of plaster or putty. To do this, you need to take into account that such material must correspond to the work for which it will be used. You need to get a perfectly flat surface. For greater effect, during the drying process you should light the oven, but do not heat it to the limit. Plaster surface
- Let's take on tiles or stone It should be noted that laying tiles for the stove requires good skills. If they are not there, then it is better to entrust the work to the masters. It is better to stick the stone and soapstone on your own. Before starting work, preparatory manipulations are carried out: all damaged material is removed. They always start gluing tiles (stones) from the bottom. They make the first row and check it with a level. Do not forget about the use of special crosses, which allow you to create even spacing. Next, after each row, a check is carried out using a level. Any deviations are unacceptable, so it’s better to try a little with the first row so that the work will be easier in the future.
Laying tiles - The last stage, but no less important, it is important not only to properly line the stove, but also to carry out subsequent work. Namely, sand the seams and apply a heat-resistant compound to the surface. Before you start rubbing the seams, you need to wait at least two to three days. During this time, the tile adhesive will completely dry and the necessary shrinkage will occur.
Grouting joints
Advice! If you want the work on processing seams to happen much faster and the material to be used more efficiently, then use a gun with which the sealant is applied. This makes it possible to apply the mixture most accurately, and then give it an even layer.
A little secret on how to quickly and efficiently work with soapstone:
- When working inside the furnace, the stone is placed horizontally. This way it will heat up faster and transfer heat.
- On the outside, the stone is placed, on the contrary, vertically. This keeps the oven warm.
- For such material, a special glue based on liquid glass and soapstone powder is used.
Furnace measurement and tile calculation
After the dimensions of the stove have been measured, the type of material has been determined, the exact dimensions of one tile, the presence of decorative elements and their parameters have been determined, you can begin to calculate how many tiles are needed to cover the stove.
To do this, it is necessary to calculate the area of the furnace, including vertical and horizontal surfaces. It should be remembered that laying tiles on the stove requires a joint gap (the distance between the tiles), which ranges from 2 to 10 mm. This area must be subtracted.
Stove makers recommend adding 10-15% to the calculated value for undercuts and chips that appear during cutting.
Note. The more complex the tile layout pattern, the more material goes into trimming. However, the smaller the tile, the less material is wasted.
Users are advised to make a safety stock of 5% of the quantity received. After all, the tiles may fall off or burst during the operation of the stove. Moreover, if there are several types of decorative elements, then you need to have at least two pieces of each of them. This increases the cost of tiling the stove, but eliminates the need to think about how to replace the missing cladding element.
Note. Particularly accurate calculations must be made for tiles.
Methods for laying tiles on a stove
The second aspect that affects the volume of materials purchased is the method of laying tiles when facing the stove (Fig.).
Laying tiles joint to joint in straight rows (joint to joint, seam to seam)
You can lay square or rectangular tiles.
The use of this method is only possible when the tiles have the same geometric dimensions. It is suitable for laying out panels or patterns on the surface of the oven. In this case, it is desirable that the layout begins and ends with whole tiles. It is this nuance that will not allow the method to take a leading position; Laying tiles in a bandage offset (in a bandage)
is the most popular laying method, since when using it, cut pieces of tiles are not noticeable.
You can also vary the thickness of the vertical seam. The method is suitable for those who are going to do the tiling of the stove with their own hands; Laying tiles diagonally Laying tiles diagonally
allows you to create an unusual pattern.
But it is rarely used due to difficulties with surface marking and a significant amount of waste; “Chaos” styling
allows you to implement a wide variety of solutions. Most often used for laying tiles made from natural materials. Using the random layout method forces craftsmen to more carefully calculate the material.
The variety of facing tiles allows you to create your own ways of laying them, combining materials and creating unique designs.
Installing tiles without using glue
Carrying out work on tiling the stove with your own hands without using an adhesive has a number of advantages. Such cladding will not react to temperature changes, and the air cushion formed between the brick and the tile holds hot air well. Stages of work:
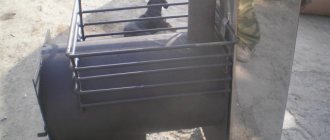
- Measure the oven and make a frame from a metal profile. First, you need to mark the wall along the lower and upper parts, and then divide the resulting internal space with horizontal lines of approximately 3 mm each. The profiles will be fastened along these lines.
- Beat off the lines with colored cord.
- Make a plinth from a galvanized sheet that will be attached to the surface of the brick walls and floor. To make the work easier, you can buy a plinth at a building materials store. Secure the plinth with anchors. Cut off part of the corner that will be installed along the upper marking.
- Cut profiles from galvanized metal, that is, strips approximately 45 mm wide and a length equal to the width of the oven. They will need to be bent to form a corner into which the tile will be inserted. The bend is calculated based on the size of the tile.
- Make a frame around the perimeter of the stove using aluminum corners, which will serve as the basis for attaching the profiles.
- Attach profiles to the corners. The tiles are inserted from the side into the resulting frame. The end is closed with a corner. In this way, all the tiles are inserted into the metal frame.
Installation requires some experience
Please note that this method requires some metal working skills. Otherwise, this is a fairly convenient method of finishing a stove with tiles.
High-quality cladding will make the stove stand out in the interior. This process cannot be called simple, but with a little effort and using good consumables, a home craftsman can get an excellent result by finishing the original stove with tiles with his own hands.
Selecting tiles and tools for oven cladding
A detailed explanation of how to tile a stove is only possible when there is an understanding of what material we are talking about.
For a long time, tiles remained the most accessible option for cladding. Many today consider it as a full-fledged alternative. But, despite the cheapness of the material, tiling the stove is fraught with pitfalls. After all, tiles for lining a stove must meet certain conditions (fireproof, heat-resistant, heat-resistant).
Cladding the stove with ceramic tiles is possible if the material meets the requirements:
- shape and size. Experts say that the smaller the tile, the less likely it is to peel and crack. For example, tiles with a size of 100x100 are more flexible due to the seams than tiles with larger sizes. The shape leaves an imprint on the installation method. The presence of a pattern that needs to be selected also complicates the calculation and layout;
- matching shades of tiles;
- technical properties: strength, fire resistance, fine porosity of the structure, indicative moisture absorption, coefficient of thermal expansion, resistance to mechanical damage;
- environmental safety confirmed by a certificate.
Today, among the materials that satisfy these conditions we can highlight:
- terracotta tiles (terracotta);
- majolica;
- clinker tiles;
- tiles;
- porcelain stoneware
Advice. A beautiful tile layout will be ensured by the use of friezes, borders, inserts, and panels.
In addition to tiles, for cladding you need:
- crosses or patterns. To ensure a seam thickness of 10 mm. users advise using pieces of ceiling plasterboard. Their advantage is easy dismantling;
- heat-resistant grout;
- metal mounting mesh;
- bierbach hardware or nails/screws and washers;
- rubber hammer;
- chisel or hammer drill to remove old coating from tiles;
- putty knife. They need to be prepared in three types. A regular spatula for removing the coating and applying a leveling layer of putty or glue. Toothed - for applying mortar to tiles. And also a special spatula for jointing (grouting joints).
- tile cutter Will allow you to minimize the cost of material from chips on the front surface;
- level and plumb;
- soap solution;
- adhesive solution;
- primer.
Properties of decorative stone
The advantages of decorative stone include:
- Durability and reliability. Due to its strength characteristics, artificial stone is very resistant to mechanical and physical damage.
- Easy to care for. The surface of the coating is easy to wash and clean.
- Moisture resistance. A protective layer on the surface of the decorative stone protects the coating from moisture absorption. Therefore, you can safely wash it with a damp cloth and a mild detergent.
- High temperature resistance and fire resistance. Artificial stone will withstand even prolonged exposure to open fire, since it does not burn at all.
- Wear resistance. Despite constant wet maintenance, the stone finishing of the stove retains its decorative properties for a long time without losing its appearance.
- Resistant to sudden temperature changes. Such a material retains its properties despite changes from very low to high values, and vice versa.
- And the biggest advantage is the ease of laying decorative stone with minimal expenditure of time and materials.
Tile adhesive and mortar for stoves
The quality of adhesion between the tile and the stove surface depends on the solution on which the tiles are placed on the stove. In view of its intended purpose, the adhesive solution must be heat-resistant, fire-resistant, and heat-resistant.
There are three types of mortars for laying stove tiles:
Clay mortar for oven
How to prepare: clay, sand and water are mixed in certain proportions, which depend on the type of clay:
- for oily clay the ratio will be 1 part clay, 4 parts sand, 1 part water. The fat content of clay can be determined in the laboratory or in a traditional way - you don’t feel sand in it, and a ball rolled out of it cracks badly when it dries;
- for normal – 1:3:1
- for skinny people – 1:2.5:1
Cement mortar for furnace
How to prepare: cement and sand are mixed in a ratio of 1:3 and brought to the desired consistency with water. In this case, the cement must be grade M 400 or higher. To improve the properties of the solution, it is recommended to add PVA and asbestos to it. Stove makers advise adding 1 kg of salt. onto a bucket of mixture;
Dry mixture mortar or special adhesives (cement, dispersion, epoxy)
They are ready-to-use mixtures intended for a specific type of tile. They are good because the proportions in them are carefully adjusted, and in addition, various plasticizers are added that improve the properties of the adhesive solution. Such adhesives have proven themselves well: SCANMIX Skanfixsuper (Finland), Plitonit-SuperKamin (Russia-Germany). Budget options: SILTEK T-84 (Ukraine), “Pechnik” (Belarus) and “Plitonit W” (Russia).
Ready-made adhesive solution - adhesive mastic
When choosing this type of glue, you need to pay attention to the markings. It should be intended for lining stoves and fireplaces. Good user reviews for NEOMID SUPERCONTACT (Russia), Terracotta (Russia), “Parad-77” (Belarus). But, in general, the quality of adhesion of the mastic to the surface leaves much to be desired.
In any case, the solution must meet the requirements for heat resistance and coefficient of thermal expansion. Ideally, laying tiles on the stove should be done using the same mortar that was used to level its surface.
All professionals and users agree that it is not worth saving on materials.
How to glue tiles
To install the material yourself, you need to follow some rules. For example, laying should start from the bottom. The line for the first row is first beaten and markings are made, which is impossible without a painted cord. It is placed horizontally, pulled back, and then released. Using the imprint, you can securely fasten a perforated metal corner. It is attached to the surface using dowels, between which a distance of 150 - 200 mm is left. The size of the corner should ideally correspond to the thickness of the tile.
Perforated corners are also secured in the corners to beautifully design the corner joint. After preparing the wall and tiles, you can begin to prepare the adhesive solution. It is mixed with an electric drill and a mixer attachment in a container of a suitable size. After waiting at least 10 minutes, it is permissible to begin laying the first row. To do this, glue is applied with a spatula to an area designed for 5 - 7 pieces. Crosses are placed between the laid tiles in horizontal and vertical joints. They allow you to maintain the same thickness of the seams and often install 2 pieces on each side of the material. Sometimes pieces of drywall are used instead of crosses, for example, when large gaps need to be left during cladding.
How evenly the installation occurs will help control the building level. Later, the joint space is grouted with a special grout. After laying out 4–5 rows, it is recommended to take a break from work for a couple of hours. Next, the masonry is completed and allowed to dry for 24 to 36 hours. Only grouts whose heat resistance is above +200 degrees are suitable for the oven. Modern compositions allow you to match them to the color of the material. It is best to remove any adhesive particles that have fallen onto the surface of the tile immediately.
Tile layout - drawing, cutting
Laying tiles on the stove is carried out on the basis of a prepared drawing or sketch. In this case, professionals provide a specification on the basis of which the material is purchased. For beginners, a visual image and the actual layout of the desired composition will greatly facilitate the process of calculation, purchase and installation.
Note. Layout is made for all furnace walls, taking into account the size of the seams.
The drawing of the furnace with facing material looks like that shown in the figure.
Furnace tiling - drawing
3D visualization will help you evaluate the appearance of the future cladding.
Furnace tiling - 3D layout
Tile layout – simplifies the installation process, as it allows you to lay the tiles on the stove in the exact sequence. In addition, it allows you to select tiles according to pattern, shape, and shade. The size of the tiles is adjusted before laying, taking into account the seams. Products with chips and defects are used for trimming.
Note. Increasing the distance between the seams will help avoid laying tiles in small pieces.
Advice. The most massive (large) tiles are laid on the bottom rows. There are also thicker tiles on the bottom. Otherwise, it will be impossible to make a smooth surface.
The finished stove after lining will look like this
Preparing the stove for tiling
High-quality installation and long life of the stove cladding is only possible when laying the tiles on a prepared base.
The need for cladding can be caused by two reasons, and the scope of work for each will be different. However, the general goal is the same - to give the oven the correct geometric shapes, in which all surfaces are smooth and the corners correspond to 90°.
Note. In addition to the fact that leveling increases the speed of work, it allows you to reduce the consumption of expensive glue for laying facing tiles on the stove.
Option 1: lining a new (freshly built) furnace
Even a structure built in accordance with all building codes will need preparation. In this case, it boils down to the fact that the surface of the base is cleaned of dust, primed, equipped with a grid and markings. These types of work will be discussed in more detail below.
Note. You can start lining a new furnace only after a month of operation. During this time, it will shrink and reveal hidden defects.
Option 2: lining an old (operating) furnace
This option is much more complicated than the previous one, since it involves performing more rough work. Therefore, let's look at the sequence in more detail.
5.1 Dismantling the old coating
Stoves installed in the house, as a rule, already have some kind of lining. Often this is finishing with plaster followed by whitewashing or tiling. Therefore, before installing a new coating, you need to remove the old one.
Dismantling (removing) plaster from the surface of the furnace
Plaster does not last long on a hot stove. High temperatures cause cracks to appear on it or the surface layer moves away from the base. In any case, before you begin cladding, you need to get rid of the decorative coating (remove, clean).
How to remove old plaster from a stove
In practice, two methods are used to remove plaster from the surface:
Force method
. It is used if most of the plaster adheres well to the walls of the oven. Its use involves knocking down plaster using the impact attachment of a hammer drill. This method is quick, but it creates a lot of dust and is likely to damage the brickwork.
Using a grinder can simplify the work. Using a diamond blade, slits are made on the surface of the furnace. Their depth should be equal to the thickness of the plaster layer. There is nothing critical if the disc extends 10-15 mm into the thickness of the masonry. Next, the removal of the plaster continues with a hammer drill, hammer or chisel. If removal is still difficult, experts advise heating the area with a hair dryer and continuing work.
Note. Periodically wetting the surface with water will prevent the appearance of dust or reduce its amount.
Gradual cleaning
. The method is slower and involves soaking the plaster with water and then scraping it off with a spatula.
It is worth noting that some craftsmen recommend leaving the plaster on the stove, provided that it adheres well over the entire area.
Dismantling (removing) paint from the oven surface
Painting your stove is a simple and inexpensive way to decorate your stove. But, the painted surface will peel off under the influence of temperature and can harm human health (release of harmful substances).
How to remove old paint from a brick kiln
Removing paint from a brick surface is not so easy. A thin layer is removed using a metal brush. A good way to remove paint is to use a hair dryer. The thicker layer comes off on its own in some places, and where this does not happen and the adhesion to the surface is strong, notches should be made, for example, with a hatchet.
Note. Special solutions for paint removal have a pungent odor that takes a long time to dissipate, and are also high in cost, so users are not advised to use them.
Dismantling (removing) old tiles from the stove
When tiles peel off or you want to renew the stove lining, it becomes necessary to knock the tiles off the stove.
How to remove old tiles from the stove surface
It is recommended to carry out dismantling work from top to bottom. After removing the last row, go down to the next one. The tile is removed using a chisel that hooks onto the edge of the tile. In this way, the tiles are removed without damage. If this maneuver fails, the tile must be broken. Broken tiles are easier to remove.
Don't be surprised if some brick chips when you remove the tiles. In any case, cleaning a fireplace or stove does not end with removing the old coating.
Attention! Removing old tiles is done strictly with safety glasses, because... During operation, a large number of sharp fragments fly apart.
5.2 Cleaning the surface of the oven walls
After removing the finish coating, the entire surface of the stove must be thoroughly cleaned of any traces of solution. The ideal way to clean brick walls is to use a metal brush.
5.3 Deepening joints between bricks
To ensure that subsequent layers of mortar adhere better to the base, care must be taken to remove the mortar and increase the depth of the brickwork joints. To do this, use a chisel, grinder or spatula to remove the solution from the joint spaces. Cleaning depth 5-10 mm.
Upon completion of the work, the surface is once again cleaned of dust and solution residues with a brush.
5.4 Leveling the oven walls for tiles
To prevent the tiles from peeling off from the base, you need to install a metal mesh on the surface of the oven.
To work, you will need a mounting mesh with cells of 50x50 mm and a wire diameter of up to 1 mm. To secure the mesh, you can use a ceiling dowel with a cap (bierbach).
Or you can simply put washers or pieces of galvanized steel on the nails. The main thing is that the hat holds the mesh securely. Hardware is installed only in seams. In this case, the nail is driven in, and a hole must be drilled for the self-tapping screw. The mesh fastening pitch is 500 mm.
The mesh is installed on the surface with tension. Next, the surface of the walls is leveled with plaster. To do this, you can use glue on which the facing tiles will be mounted or a special solution (clay, cement, sand) in a ratio of 3: 1: 0.2 parts.
Recommendation. Users advise adding PVA glue or any other glue with a low expansion coefficient to this solution.
If the surface that needs leveling has depressions up to 10 mm, then the solution must be applied in two approaches. The maximum permissible layer thickness is indicated by the manufacturer. In practice, it is better not to make a layer thicker than 5 mm, this increases the time and reduces the uniformity of its hardening. In this case, the second layer is applied only after the first has completely dried.
Advice. When starting to level the walls, the craftsmen advise heating the stove. The solution must be applied at a surface temperature of 30-35°C.
An alternative to a grid for leveling walls:
- installing hardware with caps and stretching ordinary wire between them;
- using stretched burlap, previously soaked in a clay solution. When laying burlap, it is important to avoid folds and air pockets.
Note. If the surface of the stove is flat, you can eliminate the plastering step and lay the tiles directly on top of the metal mesh.
5.5 Priming the oven walls
A heat-resistant primer applied with a brush will improve the quality of adhesion of the solution to the surface. When choosing a primer for stoves and fireplaces, it is better to give preference to deep-penetrating compounds. When the primer has completely dried, you can pre-mark the surface.
Advice. You can reduce primer consumption without changing the quality of application if you first walk over the surface of the wall with a slightly damp sponge.
5.6 Preliminary markings before laying tiles
The surface on which the markings are applied is considered fully prepared for cladding. It involves the installation of beacons that allow you to navigate when performing cladding work.
Markings are made using a plumb line and level. It is convenient to mark the horizontal using a cord. A more technologically advanced approach is to use a laser level.
You should be aware that even a perfectly prepared surface may not save the stove from cracking. The cause of cracks can be:
- excessive overheating;
- an incorrectly executed bunch of bricks during the construction of the furnace;
- different thickness of the interbrick joint.
High-quality preparation of the base of the furnace surface will avoid its deformation and will firmly hold correctly laid facing tiles.
5.7 Preparation of the adhesive composition
The mortar for laying tiles is prepared in small portions for 10-15 minutes. before starting work. Moreover, master stove makers do not use any devices for kneading; the work is done by hand.
Preparatory activities before starting tile installation
Before you go to a hardware store to purchase everything you need to carry out facing work, you need to measure the surface area that will be converted and calculate how much tiles, mounting mixture and other necessary materials will be needed to implement your plan. In this case, it is worth taking into account the possible unevenness of the walls of the heating structure (especially in old houses), which requires greater consumption of the mixture in order to level the surface before installing the tiles. Due to the fact that stove walls are exposed to high temperatures, it is better not to use ordinary tile adhesive, but to purchase a heat-resistant adhesive mixture.
The surface on which the mounting mixture will be applied should not have any unstable elements, as this may affect the strength of the tile. Therefore, it is necessary to tear off the old plaster from the stove wall and clean it of everything that may subsequently fall off it. For this work, which is best done with a respirator, you can use an old spatula and a wire brush. Treating the wall with a heat-resistant primer will help complete the preparation of the surface for interaction with the adhesive mixture.
If you have had to glue ceramic tiles to drywall, then you most likely applied the mounting adhesive with a notched trowel, but in this case this method will not work because the surface of the walls of the heating unit is quite uneven. It would be good, before tiling a fireplace or stove, to level the base surface by applying a layer of heat-resistant mounting adhesive. But before this, it is necessary to attach a metal reinforcing mesh to the prepared wall. This can be done by pressing it to the wall with pieces of tin nailed into the seams between the bricks or with fastening dowels into holes pre-drilled with a hammer drill. It is important that the ball net is well stretched and pressed tightly against the wall.
When mixing the assembly adhesive, you can use a regular electric drill with a mixing attachment, but it is better to use a special construction mixer so as not to damage the drill gearbox.
You can continue to implement the plan after the substance of the leveling layer has completely dried.
Do-it-yourself tiling of the stove
The technology for tiling stoves involves choosing a laying method, and the progress of the work will vary accordingly. In this case, in any case, installation is carried out from the bottom up and on a heated (at least 30°) oven.
6.1 Tiling the stove in straight rows or offset
Installation of the first row. Covering the stove with clinker, terracotta tiles or porcelain stoneware starts from the corner of the stove. First, the corner elements are installed.
It is worth noting that if tiling work is carried out before the floor is laid, a gap must be left. In this case, the support for the first row will not be the floor, but a strip nailed to the surface of the stove. The support rail should only be attached to the stove, since the floor may deviate from the horizontal. To draw a horizontal line, you need to mark the upper border of the first row and lay the tiles with trimming from the floor side. With this approach, subsequent rows will be laid out in accordance with the level.
Note. A technological gap of 5-10 mm is left between the floor and the tiles. Its presence will compensate for the expansion of the material when heated.
Please note that the lining of the stove with majolica starts from the corner and continues along the installation. If a whole strip hits the corner, great. If trimming is required, then work should begin from the second row. The tile pieces are installed last. It looks more beautiful if whole tiles are located in the corners, and cut fragments are hidden in places where they adjoin the wall.
Next, an adhesive solution is applied to the prepared tile.
How to apply adhesive to tiles
The adhesive composition is applied in two ways:
- using a notched trowel. This method is suitable for flat surfaces. Then the glue spreads evenly on the surface of the tile and air pockets are eliminated;
Note. Air pockets or bags are dangerous because the air in them heats up faster than the tile or glue and expands. As a result, tiles may peel off.
- using a trowel. The method is used when the surface has deviations along the plane. In this case, the glue is applied to the corner of the tile, which is pressed against the surface in a circular motion. The glue fills all the unevenness, and its excess extends beyond the edges of the tile. If you have difficulty installing the tiles in place, you can hit them lightly with a rubber hammer.
Some craftsmen recommend applying glue not to the tiles, but to the surface of the stove. This method is suitable for surfaces of any quality.
The thickness of the glue application is indicated by the manufacturer and is 2-7 mm. To level out unevenness, it is possible to apply glue up to 10 mm thick, however, after laying the tiles, work must be stopped so that the glue can dry evenly.
How to glue tiles to a stove - tips
- Before applying glue to porcelain tiles, it should be wetted. To do this, brush over the surface or moisten it in water. In no case should the tile be completely immersed in water.
- The heavier the tile, the thicker the adhesive layer should be and the greater the distance between adjacent tiles.
- You can level the tiles on the surface within 10-15 minutes. after installation. If you didn’t make it in time, you need to remove the tile, clean it and the surface of glue, and only then continue working.
The second row is laid after the first one is completely laid. Work also starts from the corner. Crosses, templates or pieces of other materials of the same thickness will help ensure an even gap between the tiles
Joint width between tiles (thickness)
The seams between rows of tiles need to be addressed separately. The width of the seam depends on the type of tile, its thickness and weight. And their absence leads to the fact that the tiles have nowhere to expand and they burst. In order for the grout mixture to lay down beautifully in the future, the seams should not be completely filled when laying the tiles, and the excess mixture should be removed using a spatula.
The craftsmen emphasize that it is not worth laying more than three rows in one approach. In order for the glue to set well, it is better to take a break for several hours. The drying time depends on the type of glue and the manufacturer's recommendations.
In addition, after laying each row of tiles, the horizontal position is checked. If a defect is discovered, there is time to fix it.
6.2 Tiling the stove diagonally
With this laying method, the first row is most often laid straight. This will allow the cladding to be leveled relative to the floor. Next, the layout is carried out in one of the following ways:
- triangles are laid out, wide side down. The upper corners of the tile serve as a guide when checking with a level;
- laying proceeds diagonally, then the mooring cord (marking) is pulled at an angle of 45°.
The penultimate row is similar to the second. The last one goes to the first one, which is also usually laid out in a straight row.
Note. During the tiling process, a certain area in front of the stove is often tiled. This technique allows you to protect the floor covering from sparks and deformation from the heat of the stove from below.
The cladding work ends with cleaning the seams (deepening for better grout application) and washing the lined surface of the stove. After the time required for the glue to completely harden, you can begin grouting.
Advice. It is better to stop work for 5-7 days. During this period, the risk of tiles moving is minimized.
Preparation
The simplest method by which a stove can be faced is to apply plaster to the surface. Instead of the once familiar clay mixture, various types of heat-resistant plaster are now used. Dry formulations are available for sale, which should be diluted with water according to the instructions before use. Experts recommend starting any type of cladding by waiting a month after finishing masonry work. Since during this period the masonry has time to dry well and shrink. Whatever cladding method and cladding material is chosen, the surface must be carefully prepared for the application of plaster and the laying procedure itself. It is these works that directly determine whether the plaster and tile adhesive will adhere well to the surface.
The finishing of stoves with tiles is very durable; it does not have to be renewed every 2 - 3 years. A tiled fireplace or stove not only looks aesthetically pleasing. After all, the tile allows you to preserve the plaster layer, has an increased heat capacity and, when heated, fills the entire room with warmth. It allows you to create an interesting design to suit your taste. First you will need to remove the existing layer of plaster from the surface. In this case, the wall needs to be thoroughly soaked, for which ordinary water is used. A tool such as a spatula will also help you with this. If the solution was not made of clay, but with the addition of cement, you will need to use a hammer and chisel. Next comes cleaning with an iron brush or grinder. The surface is treated with a spray gun, the seams are cleaned to a depth of 10 cm.
After drying, the surface is well primed and left until completely dry. Experts recommend not sparing the primer and applying it in several layers. Immediately before laying the tiles, the walls are checked using a building level and a plumb line for straightness. If differences are detected, you will have to equalize them. Next comes the placement of metal beacons. If, when removing old plaster, broken corners are found, they need to be strengthened by reinforcing them with perforated metal corners. It is recommended to attach a reinforcing fiberglass mesh to the set plaster layer with a thin layer of glue. After drying, another layer of mesh is made.
If you plan to install the tiles using glue, then it is better to coat the dry plastered surface again with a primer.
When the installation of finishing material is carried out on a metal frame, the fasteners of which are made on the old one, there is a high probability that the entire structure will be able to move away from the wall surface. Preparation for decorative finishing includes the purchase of tools and materials necessary for the work.
Jointing tile joints (grouting)
Grouting the joints between the tiles is done with a special mixture or clay-sand mortar with the addition of coloring pigments. The work is done with a rubber spatula. It is suitable for tiles because... allows you to fill small seams. Or with a construction gun, if the stove was lined with porcelain stoneware, terracotta or clinker tiles.
Types of grout for tiles and their comparative analysis are presented in the table (analysis of grout for clinker tiles)
Tile grout - comparison table
After applying the grout, wipe the surface with a damp sponge. This technique will remove any remaining mixture. Be careful not to press too hard on the sponge, otherwise you may damage the seam.
Advice. Users suggest using your hand to form a concave seam. It can be done with your fingers (if the seam is wide enough) or with improvised means, for example, a flexible tube or the handle of a toothbrush.
Final cleaning of the grout on tiles or majolica is carried out after the grout has dried (after 1-2 hours). Visually, this can be seen by the fact that the tiles will become lighter. Cleaning is done with a flannel rag soaked (soaked) in a solution of a cement-grout film remover.
The process of tiling the stove is complete. Now all that remains is to wait 3-4 weeks before trying the stove in operation.
Materials for preparatory and finishing work
Among the materials that will be needed for self-cladding the stove are glue intended for cladding fireplaces and stoves with heat-resistant properties, primer, baseboard, and grout for the seams between the tiles. This list is relevant when you are planning to lay any type of tile with glue.
If a so-called “dry” installation without it is assumed, then you need to purchase galvanized steel sheets, the thickness of which does not exceed 0.6 - 0.9 mm, a steel or aluminum corner to cover the corners, and aluminum strips. The latter are required for the manufacture of the frame; they must have a width of 20 mm and a thickness of about 2 mm.