Platbands are decorative elements used in finishing door and window openings. They are used to hide cracks. Thereby they serve to improve the appearance of doors and windows. There are two types of platbands: external and internal. In this article we will talk about platbands for interior doors. They may vary in material, color, shape and method of fastening.
Types of platbands
In order to make it easier to choose platbands, or as they are also called - strips, let's figure out what they generally are. The first thing they look at is the material from which they are made:
Wooden planks are considered the most versatile, as they can be painted in the desired color. They are attached to liquid nails if the wall is smooth, or to nails without heads.
Laminated platbands made of MDF (fine fraction) are difficult to distinguish from wooden ones. But unlike the previous ones, you won’t be able to paint them, so they choose from ready-made colors. For MDF, any of the possible mounting options. When attaching to nails without heads, it is necessary to drill blind holes in advance.
PVC products are usually used with plastic doors. They are attached either with glue or with a perforated mounting profile.
Metal products are undoubtedly the most reliable and durable. The most common ones are steel and aluminum. However, this type of platbands has a specific appearance and is mainly used on entrance doors.
There are also gypsum, ceramic and polyurethane platbands. But they have an unusual appearance and are rarely used in ordinary residential apartments and houses. They are also not durable.
In addition to the material, platbands differ in the method of fastening: overhead and telescopic. The latter have their own grooves for fastening.
Kinds
Traditional trim strips are secured to the frame with nails. The recently appeared telescopic ones are worth special mention because they do not require additional tools for fastening. They are attached using the “tenon-to-groove” principle.
Invoices
These are flat, curved or slightly curved rectangles 70 mm wide, 8 to 10 mm thick. Nails are required for installation. They are made from different materials. The most common are wood, metal, plastic. The stone and ceramic types presented in stores are used much less frequently.
Plastic
Plastic in door decoration is very popular. It is durable, easy to clean, and water resistant. The material is artificial, therefore it is not susceptible to mold, rotting, or swelling. But the main thing is that the plastic remains bright after many years and does not deteriorate under the influence of moisture and sunlight. It can even be installed on external doors due to its resistance to temperature changes.
Metal
Often installed on street doors. Metal strips made of steel strip are installed on profile boxes coated with enamel or primer. They are attached by welding and covered with paint of the same color as the door. They cannot be called exquisite, because the price is economy class.
Bent metal - elegant, expensive, suitable for powder coated entrance doors. The thickness/width of both types is 20 x 40 mm.
Wooden or MDF
Wood is an environmentally friendly material. Wooden products are durable and reliable. For production, lining is selected from pine or coniferous wood, which is known for its long service life. It is varnished and painted.
The planks can be smooth, semicircular, embossed - sometimes there is a carving pattern. Thickness - 12 mm, width - from 40 to 80 mm. Disadvantages: low moisture resistance, rapid loss of its former luster.
A more expensive option is oak or maple. They are recognizable due to their texture, light, close to gray tint. The advantages include a high degree of resistance to mechanical damage and temperature changes.
MDF products are moisture resistant, because they are coated with a composition that repels water and are not subject to rotting. Thickness 16 mm, width - 70. At a low price they have decent quality.
Telescopic
Unique in their design - they are produced in the shape of the letter “L”, with a curved edge attached to the door frame. This method is called “tenon and groove” - it resembles the connection of Lego parts and allows you to change the size of the box by about 1-1.5 cm without the use of extensions.
Attention! To attach telescopic trims, nails are not needed - they are held only in the grooves of the box. Therefore, their price is higher.
Simple and telescopic slats can be of three shapes - flat, rounded, curly. Curly ones with a round cross-section are cut only at an angle of 45˚, and flat ones are sawn at 90˚. This is justified by aesthetic considerations and texture.
Types of fastening
Before installing the trim on the workpiece, you must mark the cut angle and the desired length. Using this marking, the plank is cut with a miter saw, or, if it is not available, with a hacksaw using a miter box, which will help cut at an angle of 45 degrees. As in any other case, it is better to use a high-quality tool. This will help to avoid unnecessary irregularities, inaccuracies and, accordingly, unnecessary problems.
Flat platbands are attached at an angle of 90 degrees, wooden and MDF - at an angle of 45 degrees. Let's consider possible fixation options.
Trimming trims
Before you install cash on your interior door yourself, you need to cut it to size with a miter saw.
The main feature of the electric tool is the presence of an adjustable table, installed at the required angle. To cut the workpiece without chipping, its side edges are pressed tightly against special stops placed on the frame. If you allow a small gap, you will end up with an uneven cut.
If you don’t have such an electric saw at home, then to get a cut strictly at 45º you need to use a miter box. It is recommended to purchase a quality tool. As a rule, cheap plastic miter boxes are equipped with deformed stops that show the wrong angle. A hacksaw should only be used with fine teeth to prevent chipping of the material.
Finishing nails
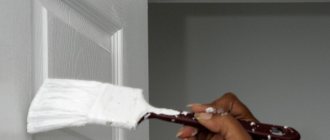
Wooden and MDF trims are easier and better to fasten with nails with flat heads. Then, if necessary, they can be easily dismantled. And so that the platbands do not dismantle by themselves and hold tightly, the nail should be driven into the door frame at least 20 - 25 mm. It is better to make the distance between the nails the same. To simplify the task, you can pre-drill through holes in the lantern. At the end, so that the nails do not disturb the appearance, they can be painted over with a wax pencil.
You can also drive nails into the door frame first. Then use pliers to remove their caps. The length of the visible part of the nail without the head should not be greater than the thickness of the strip. Next, having placed the platband against the nails, a wooden beam wrapped in fabric is applied to the plank at the location of these nails, and with a few light blows of a hammer the plank is pressed onto the nail.
Aligning the plane of the platband with the wall
The first way. The simplest, but, unfortunately, not always applicable. With its help, you can correct the non-parallelism of the planes of the wall and frame within 2÷3 millimeters. How it's done?
| Step | Description |
| Step 1. | Place the trim in the intended place, press it tightly against the box. It will move a little away from the plane of the wall, estimate the width of the gap between it and the wall. If it is within 2÷3 mm, then the gap at the joint is removed without the need for construction work. |
| Step 2. | Place a pad the same thickness as the size of the gap on the work table of the saw or miter box. The lining should be narrow, not the entire width of the casing, just a few millimeters; it should only slightly raise one side of it during filing. |
| Step 3. | Press the platband tightly to the work table in this position, the lower plane of the platband on the stop side should rise slightly above the table. Carefully cut the end in position. The cut end should have a 45° angle to the axis and be slightly inclined towards the surface. Now, in the “broken” position, the joint of the two platbands at the joints will be tight, and there will be no need to seal the cracks with acrylic sealant. |
The second way. Due to a violation of manufacturing technology, wooden platbands may have uneven surfaces or warping. Of course, ideally their quality should be checked at the time of purchase. If the defect is discovered already during the installation of the platbands, then the warping is easily eliminated. Place the vertical and horizontal trims so that the cuts lie evenly. Drive a nail into the end; it will fix them in the correct position and prevent them from moving.
Driven nails
These problems can be considered “trifles,” but what if the wall and door frame have a rather large discrepancy ? There are two ways to solve the issue, both of them are unpleasant and take a lot of time and nerves.
- The door frame is too recessed into the wall. You'll have to chisel the wall - the work is dusty, noisy and dirty. Place the trim against the box and draw a line on the wall. Using a grinder with a diamond blade or a saw (depending on the wall material), cut a line along the wall. And then you need to choose a niche for the platband. This can be done with a grinder, chisel, etc. Constantly check the depth of the groove. If in some places the niche turns out to be too deep, fill the recess with gypsum or cement mortar and immediately place the platband in the desired depth position for a few seconds, this will help you make the niche more accurately. So you need to go around the entire door around the perimeter.
- If you have a frame made of natural wood and has a decent thickness, then you can slightly remove its back side with a plane. Work very carefully, do not rush, it will be impossible to correct the mistake.
Video - How to attach platband without nails
Video - Do-it-yourself installation of platbands on interior doors
Liquid Nails
For a flawless appearance, without visible fixation elements, use a special glue - “liquid nails”. However, this method is characterized by weak fixation and difficulty in dismantling. In addition, it can only be used on perfectly smooth walls. But if you decide that this mounting method is the most suitable for you, then apply adhesive to the back side of the casing and lean it firmly against the wall. In the case of an interior door, it is enough to hold the bar in this position for about a minute.
Methods of fastening platbands
Installation is carried out using finishing, liquid nails, self-tapping screws, and “beaks”.
Using finishing nails
This type of fastener is widely used due to a number of advantages:
- stealth;
- ease of installation;
- no experience required.
For work, use thin nails about 4 centimeters long and up to 1.5 millimeters in diameter. The distance between them should be 50 cm . Points are marked on the slats with a simple pencil.
After fixing, the nails can be puttied to match the color of the wood, so that the nails will not be visible
At the marks, nails are driven in so that they fit 20 mm into the box. If the caps are narrow, then they can be left or, if desired, trimmed with side cutters. The resulting small depressions are masked with a wax pencil of a suitable color.
The disadvantages of working with finishing nails are:
- Difficult to dismantle. Due to the peculiar structure of the head, it is almost impossible to get nails.
- Less strong connection than regular nails.
- When choosing this fastening method, also keep in mind that such nails are intended for finishing where there is no bending load.
Liquid nails
This method is ideal for MDF framing. It is performed quite simply and does not require specific skills or dexterity.
Liquid nails are used to install MDF trims
Liquid nails are applied to the underside of the decorative element and attached to the wall. For the glue to set, you need to hold it for a few minutes and then secure with tape.
This type of fastening is good because it leaves no marks on the outside of the slats. However, the fastening strength is not as high as when using conventional nails .
Fastening with self-tapping screws
This method is characterized by reliability. It is used for wooden products.
Wooden trims are secured with self-tapping screws
Even a beginner in construction can handle a self-tapping screw. To do this you just need to follow the instructions:
- Find self-tapping screws with a diameter of 6 millimeters and a length of 2 centimeters.
- Place marks on the front side of the planks 50 cm wide from each other.
- Drill small holes in the marked places, and then drill them out a little. This will hide the screw heads.
- Screw in the screws. If desired, they can be disguised under putty or decorative overlays.
Fastening with beaks
“Beak” is the name given to the casing, which in appearance resembles the Russian letter “G”.
Beak-shaped clypeus
This method is very simple. It consists in placing the largest section of the part in a recess specially designed for this purpose and snapping it into place.
The disadvantage of fastening with “beaks” is the gradual delamination of the structural element. Under the influence of the fastening itself, the planks begin to collapse at the joints. As a result, there is a need for additional fastening with glue.
Attachment by beaks
This one is different in that it does not use any of the above mountings. The casing itself is equipped with a latch, shaped very similar to a beak. Hence the name. This fastener is inserted into a recess on the door frame. Thus, the fastening is not visible from the outside. But over time, the joints may collapse, and then they will need to be treated with glue.
Mounting features
The service life and appearance of the platband largely depends on how correctly the doorway trim was installed. In order for it to last as long as possible, you need to know the installation rules.
Telescopic trims are the easiest to install; they snap into special grooves. Door trims made of MDF, wood, ceramics and plastic have their own characteristics that must be taken into account during installation.
Door trim with platbands can be done at different angles. The most common and universal is joining the ends at an angle of 45°. This popularity is explained by its beautiful appearance and the ability to hide the cutting ends. At a 90° angle, the ends can be positioned horizontally or vertically. This type of fastening is used mainly for telescopic platbands.
To fix the planks, use special nails up to two cm long with or without a very small head. In this way, wooden trims for doors and MDF are most often attached. Professional installers use an air gun.
Another common installation method is liquid glue. This is how plastic door frames and other types can be attached.
For cutting, special electric saws are used to ensure the most even and beautiful cut, without roughness or chips. In this case, at any angle of attachment, the finish will have a chic look. If such a saw is not available, cutting can be done using a miter box.
Before installation itself, it is necessary to carefully prepare the surface to which they will be attached. For this purpose, remove excess foam and mark the place where the elements are attached. During installation, you need to correctly install the extensions so that their corners coincide with the corners of the casing.
You can increase the tightness of the plank to the wall using polyurethane foam. It is applied to the entire surface of the platbands from the reverse side, left for 3-4 minutes and attached to the wall. If the foam appears, after it has completely dried, it is carefully cut off with a knife, and the gap is sealed with sealant. But if all application recommendations were followed, then this will not happen.
After the cashing of interior doors has been installed, it is necessary to check that nothing interferes with the opening and closing of the doors.
Installation methods
The installation of the trim should begin from the side into which the door opens. This is explained by the fact that the hinges interfere with the fastening of the strip to the door frame. Therefore, you have to make an indent that is the same on all sides.
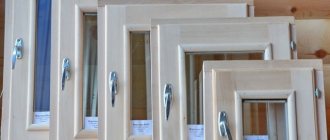
It happens that the door is in a corner, then the platbands are installed only on two sides. Or you can saw off half the width of the plank and install it from the side of the adjacent wall (as in the photo).
There are also cases when the platband is installed only on one side. For example, when the slopes on other sides are finished with tiles or something else.
Size standards
In most cases, door frames come complete with leaves. For this type of product, the standard width of the interior door frame is 7 cm, thickness is 1.2 cm, height is from 190 to 235 cm.
To finish a single-leaf door, 5 elements are required, and for a double-leaf door - 6. Framing the opening on only one side is done using 2.5 strips. It is not necessary that the width of the interior door frame be of standard sizes. A large range of products will allow you to choose the ideal option.
It is only important to follow the general recommendations of specialists. A narrow platband is not suitable for massive doors, because such a combination looks ridiculous. A wide frame on a narrow and small door will look no less stupid. That is why the dimensions of the door trim must correspond to the parameters of the door leaf.
Mounting at an angle of 45
This method is suitable for curly and rounded platbands. The procedure is as follows:
Measure the height of the vertical slats from the floor. They are placed on the floor, therefore, their joints with the baseboards will be on the side. The height of the vertical elements is measured from the floor. The planks from below are placed on the floor covering, which is why the joints of the baseboards and door frames are on the side.
Then the workpiece is cut according to the markings using a miter saw, and in its absence, using a hacksaw and a miter box. The top is cut at 45 degrees on the desired side.
Now the side trims are attached no higher than halfway, so that they bend at the top.
The upper loose parts of the platbands are folded back and the upper part is placed under them. At the joints, lines are marked at an angle of 45 degrees, then the excess part is cut off. Now you can secure the platbands in all remaining places.
What are platbands?
These are overhead strips.
They are designed to decorate window or door openings. They are usually used in wooden houses, but today platbands have a wide range of applications. The main task of the elements is to close the gaps between window or door openings and the frame. Platbands are mandatory elements of exterior decoration. Installing products will reduce the cost of purchasing building mixtures and additional materials. But the final result will depend on the correct choice of cashing.
Installation of plastic platbands
For plastic trims, glue is used extremely rarely, since the connection with it is not reliable. The most commonly used mounting profiles are:
- The mounting profile is cut to the size of the door frame (a little smaller if possible).
- The joints are sawed off at an angle of 45 degrees.
- The profile is fixed with self-tapping screws to the door frame. If the door is cheap (Chinese), then the mounting profile is fixed to the wall, since it will not be possible to securely tighten the screws into such a door.
- The profile is screwed from the middle in two directions. At the same time, they monitor compliance with the level.
- Then measure the height of the side parts and cut off their tops at an angle of 45 degrees. Next, the workpieces are inserted into the grooves of the vertical profiles, where they can move.
- A fastener is inserted into the cut of the planks - corner fittings. The top is measured and cut at 45 degrees on both sides. The product is connected to vertical platbands, fixed in the mounting profile.
Methods for cutting platbands
The appearance of the cash depends on how carefully the craftsman cuts the components of the structure. You can cut using several methods using:
- electric miter saw;
- miter boxes, hacksaws.
To ensure the cut is as smooth as possible, without chips or roughness, experts recommend using a professional electric saw. In this case, the device must be in good working order. If the saw blade is crooked, dull, or there is even a slight runout of the bearing, the result will be far from the desired one.
Using a professional saw you can get a perfectly even cut
However, you need to know that even high-tech equipment from well-known brands allows for small errors. There are certain tolerances for them: the cut angle is 0.3-0.7 degrees, the joint inaccuracy is from 0.1 to 0.5 mm.
Those who refuse to buy an electric saw can use a factory miter box. It is a tray made of metal, plastic or wood. With this tool, products are cut at different angles: 90, 45, 30 degrees.
Home craftsmen most often use a miter box
For overlay strips made of different materials, select the appropriate hacksaw. Metal and plastic frames are cut with a hacksaw for metal, wooden frames with a hacksaw for wood. The quality of the job done depends on the right tool.
Joining the platband with the plinth
Some people think that the trim at the bottom needs to be cut because the baseboard should go there. It is not right. You need to cut the baseboard itself, otherwise it doesn’t look nice. Therefore, at the very beginning of the article, we said that platbands are installed before baseboards.
Plastic skirting boards have decorative plugs that allow you to make the joint of the skirting board with the platband neat.
A 45 degree cut is made on the wooden plinth. This allows you to equalize the thickness of the plinth with the thickness of the platband.
Thus, in this article we examined the topic of platbands for interior doors. By following our tips and recommendations, you can easily choose the methods of fastening and installing the planks yourself and implement them at home.
Installation of platbands with cutting ends at an angle of 90°
Installation of platbands with cutting at right angles
Cutting the ends of the casing at an angle is rare; such a door does not look very nice. Only completely inexperienced masters can do this. It is better to make open ends of the cuts on top of the vertical trims; in this place the cut end is hardly noticeable.
The cuts must be sanded with fine sandpaper. Sanding should be done carefully so as not to damage the laminate on the front surface of the casing. The cut areas should be painted over with carpenter's markers to match the main color. All other operations, except for the angle of the ends, do not differ from those described above.
Sand the saw cut
When attaching the platbands with liquid glue, you should keep them in the desired position for several minutes. Carefully monitor the accuracy of the connection at the joints. Unevenness on the wall or problems with the quality of the platbands can widen the gap. To prevent this from happening, first fix the corner of the joint with a nail or place pads under it, taking into account the size of the gap between the platband and the wall. Only after this can you press the platband to the entire surface and wait for the liquid glue to cool.
Platband installation
DIY door trims
A complete renovation of an apartment ends with the replacement of the door, which cannot be installed without trims, where all the installation features are hidden. When replacing a door leaf, it is not necessary to change the entire door frame, but you cannot do without replacing the old trim with new ones. They must match the new door in style, color and texture. The aesthetic appearance of the door is guaranteed, the savings are tangible, and installing just the trim on the door yourself is a fairly simple task.
Purpose of door frames
Doors are selected according to the overall style of the interior.
They can be purchased in the form of a door leaf and supplemented with appropriate platbands. Buying a fully equipped door frame will cost much more. You can opt for the classics and buy entrance and interior doors in the same style. In the classics, different forms of platbands are used. The general design of a door frame may include: framing the door leaf with a cornice; vertical projections-pilasters imitating a column; capital, reminiscent of a decorative shelf above the upper casing.
However, in most cases, they limit themselves to a simple door with platbands, giving preference to a door leaf made of natural solid wood or eco-veneer. It successfully imitates the noble texture of wood, and any shades are suitable for interior doors - from bleached oak to the chocolate wenge palette. The role of decor is performed by glass inserts or strict overhead elements. However, you can’t do without platbands, under which the junction of the wall and the door frame is hidden. The front door assumes a heavy and solid wooden panel.
Platbands are decorative linings for decorating a window or doorway, made from profiled strips. In the production of platbands, hardwood or coniferous wood is used, and veneering with elite types of wood is also widely used. All these options are used not only for making doors, but also for trims on interior or entrance doors. Door trims are the simplest way to mask the gap between the door frame and the wall of the doorway. A competent choice of profiled planks is made not only in accordance with texture and color, but also taking into account the minimum and maximum width.
Modern door frames are made from different materials; eco-veneer imitating any wood; natural solid wood (wood); laminated plastic that replicates wood texture; MDF coated with veneer.
Installation of platbands on the front door or interior door is carried out at the final stage. It is also important to take into account that after this work it is difficult to carefully paint the walls or wallpaper the room. Finishing work is carried out before installing the door; in extreme cases, masking tape can be used. But it is better to fasten the floor plinth after making the trim on the door.
Tip: Please note that for platbands the texture of the wood is not as important as the color match. Often an interior or entrance door is made of the same material, but the trim is slightly different. And if they were purchased separately, it is difficult to achieve complete similarity. Color is what people pay attention to first, and the shades of the trim and door leaf should be as close as possible. But sometimes the design idea is such that the door frame and baseboard should be the same color. This technique is used when it is not possible to achieve similarity, then the principle of contrast is used, which should fit organically into the concept of the overall design. Types of platbands
The platbands are made independently from solid timber, and there are decorative blanks that are purchased ready-made and the platband on the door is cut to the required length according to your doorway.
There are several types of door frames, for example, telescopic and simple overhead. Telescopic ones, as it were, bend around the protrusions from the plane of the platband, entering the grooves on the frame - platbands on the door photo.
1. In terms of shape, platbands are available in the main varieties: simple overhead, flat processed board, classic version for any style; rounded on the frontal part, they look a little unusual and elegant; curly cut with a milling cutter with grooves of different shapes, unusually elegant and attractive.
2. The difference in the material from which the door frames are made: from different types of wood, most often profiled with cutters, sometimes even hand-carved wood is used; plastic platbands laminated with wood (PVC or polyurethane), reminiscent of the material for plastic windows; profiled or straight metal (steel, aluminum); composite materials from several components (laminated plywood, MDF).
3. There are also varieties for installing platbands: the simplest invoices, which are attached to the door frame; telescopic, have a protrusion, the so-called spout or wing, which allows you to insert parts into the slots of the frame; they are used on some deviations of the door frame from the vertical walls, hiding all defects.
Tip: When the cutting angle at the junction of the side and top casing is inaccurate, a gap will inevitably appear in this place. It must be carefully masked with sealant or acrylic glue with the addition of a suitable pigment. If there is a gap between the wall and the platband, you can fill the void with plaster, using mounting tape so as not to stain the surfaces.
Materials and devices for fastening platbands
The function of door trim is to hide or disguise all defects in the doorway and the gaps that form between the door frame and the opening in the wall. Carefully attached platbands on interior or entrance doors give them a finished look. It is very important to hide all the joints at the corners as much as possible so that gaps with obvious traces of wood glue do not form. You can attach the trim strips in different ways:
1. Ready-made wood trim is easiest to install using glue, for example, liquid nails or another type suitable for construction. This method is used when the walls are perfectly smooth, and the platbands have decorative gutters, and the use of nails is undesirable. Also, extremely hard materials are easier to glue than to nail.
2. Polyurethane foam is used extremely rarely, since it expands wood and plastic from the inside. However, for the installation of metal profiles as platbands, it is possible to use it, but in minimal quantities, taking into account all the precautions of working with this building material.
3. When gluing the platbands is not realistic, then nails are used. It is quite effective to fasten the trim strips with special thin nails, preferably without heads. You can also cut off the tops of long nails yourself. If nails with small heads are used, then their tops are slightly recessed. For maximum effect, they are masked with a wax-based corrective pencil or acrylic sealant that exactly matches the shade of wood or other material.
4. Fastening the platbands and the stud-shooting gun with a construction gun is effective, but you need to have the skill to do it as accurately as possible. This is appropriate where adhesive and other methods cannot be used, for example, if this is a temporary fastening and an Internet cable will be laid under the platbands in the future.
5. If the platbands are made of non-standard dense materials, metal or MDF, then fastening using special methods is possible. For example, sometimes it is necessary to pre-drill holes for nails or screws that will be used to facilitate installation.
6. There is another backup option, when the platbands are installed on special mounts, “beaks” - they are sold in specialized stores with installation instructions attached to them.
Tip: MDF and plastic trims can be simply glued. They prefer to glue plastic trims. The flexibility of plastic gives an advantage - they are suitable for walls with minor defects and unevenness, for example, in an old sagging house. Features of installation of telescopic platbands
In some cases, doors are produced in the form of a ready-made box with the entire installation kit. Detailed instructions eliminate errors and omissions; it is only important to understand the names - what are the extensions, the box and the telescopic casing. This is a well-thought-out patented technology that does not require any special fasteners.
Sometimes additional additions are required, but this is if the width of the wall is larger than expected. Otherwise, small deviations in the vertical and dimensions of the box itself, which does not coincide with the width of the doorway, are easy to make when adjusting the frame.
All the features of installing a door frame with telescopic platbands are clear from the manufacturer’s instructions. Do-it-yourself telescopic door frames are installed strictly according to the technological scheme. A characteristic feature of this design is the rounded shape of the frame and the protrusion-slot, which must be installed in the prepared groove. This fastening can additionally be fixed using liquid nails. Making door frames yourself
To work with wood, the appropriate tools are used: a sawmill for cutting wood; woodworking machine for preparing platband blanks; jointing machine for processing the plane of a cutting board; thicknesser for forcing blanks of the same size; hand power tools; grinder; Bulgarian.
Immediately starting to manufacture a platband using a tool is only possible if you have experience. Therefore, there is no point in talking about the specifics of the work; we are talking about step-by-step technology.
Advice: Choosing the optimal board is an important stage, since the blanks for the platbands require a high-quality, dry board, without knots or defects. It is important to compare the direction of the wood fibers on the side trims, since the appearance after staining, painting or varnishing will be different. It’s a matter of taste to choose wood without a pattern or textured.
The blanks for the platbands are cut and processed in a slightly larger size for subsequent adjustment, so as not to measure. Make sure that the tool is well sharpened and cuts exactly at the measured angles, otherwise the cut will be sloppy and you will have to mask the defects.
After preliminary design of the platbands, high-quality grinding is necessary, which is done in 2 stages: rough processing with a power tool; manually, using fine-grained sandpaper, rubbing the edges of the fibers, circular scratches and small chips.
The 45° angle cut is made after precise measurements, immediately before installation, and not in the carpentry workshop. Please note that you will need 2 pairs of blanks - on both sides of the door frame.
Preparation for installation of side trims
To install door frames you will need: a jigsaw or saw (small teeth);
tape measure, pencil and corner; pliers; furniture nails and hammer. If the installation method is different, additional tools are taken into account.
Platbands are attached to the wall prepared after repair, after installing the door frame and before installing the plinth.
Processing begins on the side where the door leaf should open - from where the door hinges are located. Measurements are taken from the strip covering the box, where the platband begins. The indentation is made the same on 3 sides, taking into account the fit of the door. It is not required on the back side of the door.
It is important to fasten door trims well along the entire perimeter of the door frame, but installation begins from the side where the hinges are attached. We measure the length of the vertical workpiece as accurately as possible, taking into account the indentation, adding to the length. From this point begins the line for sawing off the excess at an angle of 45º. Please note that the second casing is measured not according to the first, but along the wall, applying and measuring in the same way for greatest accuracy. The dimensions often differ, even by 1-3 mm, but this will affect the quality of the joint.
Treated planks with the upper corners cut off are attached with nails at the base, and another after about a meter. This is necessary so that the upper section of the workpiece can be placed under the unfixed tops for accurate measurements. A short casing is carefully placed under the upper corners and the points from where sawing will begin at an exact 45º angle are marked. Next, the workpiece is removed and cut with a miter saw or other tool. It is important to be careful when sawing and at an accurate angle, otherwise you will have to fill the gaps at the joint. Fastening the platbands
1. After 2 long side sections and 1 short section are ready, you can sand the cut a little and begin attaching it to the door frame.
2. In the canvas, measure equal distances for 5-6 nails, mark small recesses for the nails. For the top bar, 2-3 nails are enough, preferably only on the sides. After securing the platbands on one side of the box, you can move to the back side. For this, a second set of platbands must be prepared.
Tip: It is very convenient to mount with self-tapping screws, but you will need to prepare holes for mounting. The head of the self-tapping screw needs to be recessed for camouflage.
3. Fill the cracks on the other side of the door frame with a small amount of foam so that it does not push the wood apart. After the foam has hardened, carefully cut off the protruding fragments so that the surface under the platbands is smooth.
4. We measure and secure all the components, in the same way as we did on the first side of the door frame, but here the indents are not needed.
Tip: If the door is frequently slammed, the step of fastening the nails should be smaller, and if the door is attached for decorative purposes, then the optimal step is 40-50 cm. If a capital is provided, then it is attached after completing all stages of installation, after which they proceed to fixing the baseboard.
watch video on the topic:
- INSTRUCTIONS FOR BUILDING A FRAME BATH WITH YOUR OWN HANDS
- Interest generator for women's VKontakte page
- Installing a door lock
- How to choose a floor plinth: types and options for…
- how to install a door frame
Types of products
There are two main types of wood: solid and laminated veneer lumber. The first option is intended for painting, with the exception of valuable species. But glued ones are covered with other materials such as veneer and laminate.
According to configuration, platbands are divided into the following types of products:
- Smooth. These are standard models, most often flat or slightly convex. They are easy to make with your own hands, even for a beginner.
- Profiled. They have multi-level protrusions and recesses along the entire length of the product. Shaped trims can be made using a router or you can buy the appropriate blanks.
- Curly. Such samples are quite difficult to execute. They are obtained by processing wood with a vertical router or on special machines that are programmed according to a blank template. The most expensive ones are with hand-carved ones.
Types of door frames depending on configuration
Finishing methods
To give a wooden product a decorative appearance, the following methods are used:
- opening with varnish;
- painting;
- pasting with additional materials.
To preserve the natural pattern and color, it is enough to varnish the wood. For the purpose of tinting and imitating valuable wood, stain is used. This composition will additionally create a barrier against the penetration of moisture and pests. After this, it is recommended to varnish the product.
As an alternative, it is permissible to use wax impregnations, but for outdoor structures such treatment is not enough.
Varnishing will preserve the natural color of the wood
It is better to paint pine parts. This way you can protect the soft breed from the negative effects of the external environment for a long time. Let's consider what composition is best for painting platbands. Today there is a huge range of mixtures on the market. It is worth highlighting the following options:
- Water-dispersed . Acrylic compositions are especially popular. They are easy to apply, have a wide palette, dry quickly and have absolutely no odor. For additional protection, it is recommended to coat the painted surface with varnish.
- Enamel . These are more familiar options with a glossy sheen. They form a resistant film that insulates the material from external influences.
- Nitro paints. When painting platbands with this paint, it is recommended to carry out work in the fresh air, since the smell is not very pleasant. However, it is an excellent wood protector.
The surface is first primed with a special compound. Varnish is used as a finishing coat.
Gluing vinyl film, veneer and laminate cladding cannot be ruled out. These decorative options are only possible on a smooth surface.
Necessary tools for work
There is a basic set of tools, it includes:
But with such tools, installation will be quite long. Instead of a saw and miter box, you can use a miter saw. This will make cutting the platbands easier, reducing the required time to 1-2 minutes
To install platbands you will need a hammer
Instead of a hammer, you can use an air gun with pins. Under air pressure, the pin is driven in within a second. The tool does not require any special skills, everything is extremely simple.
Instead of a screwdriver, a screwdriver and a drill will do. The listed analogues will significantly save time, but the entire set is rarely found by the average user; it is not worth purchasing all the tools just for the sake of the platbands alone. You can get by with a basic set.
Materials and tools
To ensure a high-quality and durable product, it is important to choose the right type of wood. The most affordable option in terms of price and distribution to retail outlets is pine. It is easy to machine and can be painted without any problems. However, it is important to consider that this is a soft breed and can therefore deteriorate under unfavorable conditions.
Please note that pine cannot be properly coated with paint without first de-resining it.
For exterior decoration, as well as bathrooms and kitchens, it is better to use oak. It is very durable, which can lead to difficulties when processing the workpiece, but this type of breed can last a long time.
Pine is the most affordable and convenient material
Among other types of wood, it is worth noting the following:
- nut;
- maple;
- teak;
- birch;
- Red tree;
- black;
- alder.
Such platbands do not require excessive decorative processing, as they have a beautiful texture, which is important to preserve visually. It is enough to use varnish and stain if necessary to give the product a shade.
The tools for making platbands will require the following:
- hacksaw;
- milling cutter with attachments;
- cutter;
- plane;
- sandpaper.
Required set of tools
They are used to cut parts, give shapes and polish the surface.