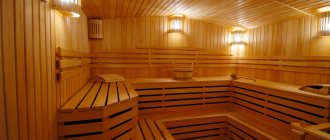
The bathhouse soars, the bathhouse rules, the bathhouse will correct a hundred ailments. This is how a popular proverb characterizes the bathhouse eloquently. Indeed, this is an inexhaustible reservoir of health and vital energy.
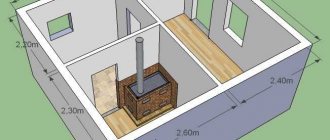
Bathhouse layout diagram.
Therefore, those who have the opportunity to build such a wonderful structure on their own site are truly lucky. However, having a bathhouse is one thing, but building it with your own hands is a completely different matter.
And first of all, because the structure must be strong, durable, and most importantly, capable of retaining heat for a long time. To do this, you need, at a minimum, to know the specifics of construction work and the ability to select the right materials.
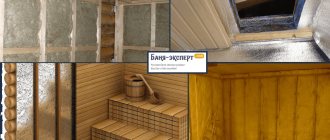
But any knowledge and skills fade into the background when solving issues related to heat conservation. This means that you will have to insulate the walls, floor, and ceiling.
From this chain one cannot exclude such an important element of the entire bath structure as its foundation. It serves as the foundation of the structure, so high-quality insulation of the foundation will significantly reduce heat losses and save on fuel.
Why do you need a warm foundation?
Comparison of the characteristics of thermal insulation materials.
Quite often you can hear the opinion that insulating a bathhouse and its foundation is a waste of effort and money. This work is undoubtedly very labor-intensive and painstaking, so some believe that it is better to spend more firewood once a week in order to properly warm the floors and create a comfortable temperature regime than to properly insulate the bathhouse.
But the premature destruction of the foundation and walls will very quickly make itself known and force one to admit the fallacy of this judgment.
In the warm season, the uninsulated foundation becomes covered with condensation. Air heated by the sun from the street penetrates under the foundation, where it meets a cold wall, cooled by damp soil.
The moisture in the air condenses and falls on the concrete base in the form of dew.
Finishing materials for the base of the bath
To make a building look aesthetically pleasing, it is important to choose the right cladding option. It should not only be attractive in appearance, but also durable, because the durability of the entire structure depends on the quality of the finishing material.
The most common methods of cladding the base of a bathhouse are:
- Plastering and painting
. Suitable for brick buildings. One of the varieties is mosaic plaster. The advantages include good air exchange, simplicity and efficiency of implementation, and various color options. As for the disadvantages, the main one is the fragility of the coating. Such a base will need to be plastered and tinted every few years. - Tile covering
. One of the most popular options for finishing the base of a bathhouse. This material is easy to install, has good thermal insulation characteristics and protects the surface from atmospheric agents. - Facing with natural stone
. A durable material that can be used to implement a wide variety of exterior design ideas, as it comes in a wide variety of colors and textures. Natural stone looks very respectable. - Finishing with artificial stone
. A variety of colors, practicality and durability are the main characteristics of this material. With its help, you can veneer the base of the bathhouse with your own hands. It is produced in the form of regular figures (squares, rectangles) or shapeless elements. The last type is used to create a unique design. - Siding covering
. The use of this material allows not only to give the base an aesthetic appearance, but also to protect it from external influences. Siding is available in different textures. Some of its variants imitate brick, wood, and stone. It is successfully used for finishing the base of a log bathhouse and a brick structure. It can withstand significant temperature changes and mechanical stress. - Finishing with facing bricks
. The masonry is done in half a brick. Any dressing system is allowed. Installation of this material is quite complex and time-consuming. - Available materials
. Despite the emergence of many new building materials, old methods are still relevant. To finish the base of a steam room at a summer cottage, leftover tiles, glass fragments from colored bottles, and broken dishes are often used. These elements are usually combined to create a pattern.
It is important to choose the material for finishing the structure in accordance with the type of base:
- Monolithic, concrete or brick structures are usually installed on a strip foundation, since the base performs a load-bearing function.
- As for columnar bases, a hinged plinth is installed for them, which performs a protective function rather than a load-bearing one.
- In cases with a pile foundation, the structure is laid out of brick or formed as a wall between piles. This allows for thermal insulation of the underground space.
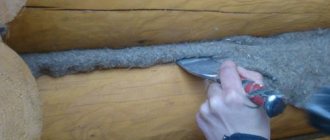
Installation of insulation
As a result, the inside of the foundation remains wet all summer. Over time, the wet surface first becomes covered with mucus, then with mold. And after a few years, the foundation, and perhaps also the walls, will require major repairs.
Scheme of foundation insulation using expanded clay.
In winter, with the onset of cold weather, the situation looks even more depressing. An uninsulated foundation becomes absolutely defenseless against buoyant forces, under the influence of which it swells, warps and quickly collapses, the consequences of which can threaten the entire structure. And then even repair work will not be able to correct the situation.
Taking into account the importance of the problem, its solution should be started at the stage of design and construction of the foundation of the bathhouse. Fortunately, the modern market offers a wide selection of heat-insulating materials produced using advanced technologies.
Their main advantage is their small thickness and excellent heat-saving properties. Therefore, if you wish, spending very little money and without resorting to the help of specialists, you can insulate the foundation of a bathhouse yourself.
Technology for finishing the base of a bathhouse with siding
Siding is easy to install. Anyone can cope with the work, even without special construction skills. Depending on the surface area, finishing the bathhouse base with your own hands will take several days. For cladding, you can use wood, metal or vinyl siding. The latter is made of polypropylene, to which special frost-resistant substances are added, as well as components to increase the strength and elasticity of the panels. In addition, it will not cost much.
Preparing for finishing the bathhouse base
You need to start finishing only after high-quality insulation and waterproofing of the structure.
It is also important to make inspection and ventilation holes. The best option is to install hatches for this at a height of 15 cm from the blind area. It is advisable to cover them with a metal mesh to prevent pests and ice from entering in winter. All wooden elements must be impregnated with antiseptics and fire retardants. If the base is brick or concrete, then level it with adhesive and cover it with a primer solution. It is advisable to treat the surface with protective impregnations in several layers. We start lining when they are completely dry.
Installation of siding frame
When choosing material for lathing, give preference to galvanized metal profiles.
They are more durable and do not corrode. A wooden frame will last much less. We carry out the work in this order:
- We attach profiles to the surface in a vertical position in increments of 10-15 cm. We firmly connect them to each other with galvanized fasteners.
- At a level of 8 cm from the bottom finishing point, we fix the starting rail in a strictly horizontal position.
- We fix the corner slats. Using a building level, we align them strictly vertically.
- We fix the brackets with thermal washers to form a kind of square “network”.
- We install T-shaped moldings to simplify further installation of siding panels.
After installing the sheathing, be sure to check all joints for strength and corners for evenness.
Features of fastening siding to the base of a bathhouse
Having chosen a material that imitates stone, wood or brick, you need to ensure that the overall pattern, if any, is observed.
We perform finishing in the following sequence:
- We attach the first panel to the starting strip and slide it into the corner strip. We secure the individual element with self-tapping screws.
- We insert the second part onto the starting strip and push it towards the first. We fasten it using the tongue-and-groove system. Be sure to leave a gap of a few millimeters between the elements.
- We cover the remaining surface with the material and install the finishing strip.
- Install the last element. If necessary, cut the panel to the required size and insert it into the finishing and corner strip.
- We mask the corner joints of the panels with special overhead parts.
Note! If the structure has a protruding base, then the drain plate must be installed upon completion of the work.
Arguments in favor of insulating the bathhouse foundation
It is known that almost a quarter of the total heat loss of a bathhouse is lost through the foundation.
Its freezing leads to premature aging and destruction of the waterproofing coating. At the same time, insulating the foundation allows you to:
- reduce heat loss and heating costs;
- maintain an optimal and stable air temperature inside the bath;
- prevent the formation of condensation on the inner surface of the foundation;
- protect waterproofing from mechanical stress and damage, and increase its service life
Alternative methods for constructing a plinth
In some cases, craftsmen use non-standard structures to construct a bathhouse base, for example, from ordinary ordinary brick, sand-lime brick, slate, wall stones, and the like. It is also worth noting that it is not advisable to use any wall material as a plinth material, since it is not intended for direct contact with the ground. In this case, it is recommended to build the structures together with the massif from the base.
If the foundation is made in the form of piles, then it is preferable to make the above-ground part in the form of a reinforced concrete monolithic belt. The last and first row of the plinth, made of red brick, should be placed in a poke, and the inner ones - in a spoon. This will ensure a good bond and also give the necessary rigidity. If there are more than 5 bricks nearby, then the base should also be “plugged” on the 5th row.
If the foundation ends at a level that is equal to the ground level, then additional brickwork can be made as a plinth for the construction of wooden walls of the bathhouse. It is recommended to use silicate-type bricks, because they can interact quite well with a humid environment. The level should be raised 500-600 mm from the existing ground surface, however, not less than 250 mm. The thickness of such a wall will correspond to 400 mm for a large bathhouse, as well as 250 mm for a small one-room building.
Ventilation outlets must be provided. It is recommended to make a reinforcing belt of concrete and reinforcement on top of the masonry. Waterproofing is laid under the wall and brick, because in this case three types of materials are used for the walls, foundation and base.
Advantages of extruded polystyrene foam
Scheme of thermal insulation of the foundation with polystyrene foam.
The properties of the raw materials and the closed-cell structure of extruded polystyrene foam prevent the penetration of moisture into the slab, due to which the service life of the insulation is at least 40 years.
Excellent technical characteristics make it indispensable for thermal insulation of baths.
At the same time, this material is less likely to be damaged by rodents than conventional granulated polystyrene foam.
Today, foundation insulation with extruded polystyrene foam is the most rational and gives the best effect. The use of other materials is usually more expensive and less effective.
Advantages of stone finishing.
Indeed, tiles and stone give the building a solid and elegant look. Beautiful, finished. But the material has other advantages that determine its demand:
- Durability, hardness and strength;
- High density to resist high humidity. It is the basement areas of buildings that are “attacked” by water to a greater extent - this is rain, water flowing from the walls, and a puddle directly at the base of the buildings;
- Non-susceptibility to seasonal temperature expansion: the material practically does not change its dimensions in the temperature range from -40 to +50 ℃ - the most relevant range for our climate zone;
- Relatively low cost for this level of quality;
- Easy to install and easy to maintain.
An additional advantage: the material is suitable for cladding various bases, from monolithic reinforced concrete plinths and bricks to wooden structures. Therefore, even wooden log houses can be lined with modern materials that meet the most stringent technical requirements.
Insulation of the foundation from the outside
In the process of preparing the foundation for pouring, the formwork and trench for it are made wider than the calculated value by the thickness of one or two polystyrene sheets, the insulation of which gives the best result.
In this case, the density of the material must be at least 35 kg/m³, and the thickness must be more than 10 cm. The insulation is attached to the foundation.
After removing the formwork, it does not require additional mechanical protection. The part of the foundation that rises above ground level is finished with decorative stone or tiles directly on top of the insulation.
Natural stone: chic and expensive
This is the most expensive finishing material to date. But its cost is justified by its impeccable appearance and durability.
For cladding the base, sandstone, slate, limestone, marble, granite, etc. are used. The finishing characteristics are determined by the properties of the selected stone. So, some of them are hygroscopic and require additional protection from moisture.
The stone can have different shapes and sizes, which determine the final result of the cladding. The masonry methods also differ. Here are some popular options:
Die masonry
From the outside it seems that they are laid out in natural disorder. But in fact, the stones are carefully selected in size so that large voids do not form between them. For such work you need to have professionalism and artistic vision. Although the material itself is quite cheap because it is not subject to additional processing.
Castle masonry
The stones have a rectangular shape, reminiscent of bricks of different sizes with a chipped, relief surface. This type of masonry is reminiscent of medieval castles, which is what its name is associated with (castle, “castle” - English “castle”).
For Castle masonry, limestone, slate, sandstone, marble, and granite are used. The work is not easy, so it is better to entrust it to a professional.
Masonry "Plateau"
This type of masonry is similar to “Castle”, but unlike it, it has smooth edges, and the dimensions of each stone, although different, are multiples of 5 cm. Walls are not erected in this way; “Plateau” is exclusively decorative masonry. Most often it is used to finish the basement of a private house outside.
In order for the façade to look harmonious, the stones are first laid out on a horizontal surface and then transferred to the building. This is a long and painstaking process.
Suitable for “Plateau”: slate, sandstone, limestone, quartzite sandstone, marble and granite.
Masonry "Shahriar"
The geometric shape of the stones is uniform, rectangular. They may differ in length, but have the same height. The edges are processed and have a rustication (border around the outer perimeter). The relief of stones is usually chipped and torn. The masonry is quite simple; it can be done by a home craftsman without much experience.
Masonry "Assol"
The masonry is made from thinly cut sheets of slate or sandstone. They are laid in such a way that their end part serves as the “face” of the finish. The result is a very deep and textured finish.
Laying stones in this way is a labor-intensive process, so “Assol” is often replaced with imitating artificial materials.
"Rondo" masonry
The facade is finished with “rounded” sea pebbles - polished round stones. It can be slate, quartzite, limestone, sandstone. Installing them is quite simple.
“Rondo” masonry is used for cladding not only the base, but also corners, openings and other elements of the facade.
Insulation of the foundation from the inside
Scheme of horizontal insulation of the foundation.
If for some reason problems arise with insulating the bathhouse foundation from the outside, you can insulate it from the inside. True, most experts do not recommend doing this, because in winter this can lead to increased freezing of the foundation walls.
Thus, by protecting the heat remaining inside, through the external defenseless part, you give them over to the power of frost. Increased soil heaving will certainly lead to accelerated destruction of the foundation.
In this regard, it is not necessary to insulate the internal part without insulating the external part.
If there is nothing else left but to insulate the foundation from the inside, then at least first check the ability of the walls to accumulate condensation moisture. Attaching the thermal insulation from the inside is done in exactly the same way as with the external device.
Brand of brick for the plinth
The grade of brick for the basement should be no lower than M200 for a brick house with several floors and no lower than M150 for other lighter wall structures of 1 floor. Why? Because the base is the most loaded structure after the foundation itself. The base will carry everything above it:
- walls
- overlap
- roof
- snow on the roof
- furniture and people in the house
In accordance with SNiP II-22-81 “Stone and reinforced masonry structures”:
1.3. Application of silicate bricks, stones and blocks; stones and blocks made of cellular concrete; hollow bricks and ceramic stones; semi-dry pressed clay bricks are allowed for external walls of rooms with wet conditions, provided that a vapor barrier coating is applied to their internal surfaces. The use of these materials for the walls of rooms with wet conditions, as well as for the external walls of basements and plinths, is not allowed.
It is recommended to use fired clay brick of plastic formation in accordance with GOST 530-2007 “Ceramic brick and stone” M-150 and more, F-50, where:
- M – strength and resistance to bending, compression
- F – frost-resistant (resistance against sudden temperature changes)
Insulation of the foundation with a slight depth
When laying a foundation above the freezing line of the soil, you need to keep in mind that very soon heaving forces will begin to manifest themselves, very often leading to deformation of the structure.
You can reduce the depth of freezing under the foundation by insulating the soil around the perimeter of the bathhouse under the blind area. Thanks to this, it is possible to maintain the frost line in the backfill, gravel or sand cushion.
https://www.pogreemsya.ru/youtu.be/86roPTexbfE
In this case, extruded polystyrene foam is laid with a blind area slope of 2%. The perimeter thermal insulation made from it must have a width no less than the freezing depth of the soil.
At the same time, the thickness of the horizontal thermal insulation should be no less than the thickness of the vertical thermal insulation of a conventional foundation.
Rules for plastering the base of a bathhouse
You can plaster the base of a bathhouse using different mixtures. There is a special mosaic plaster on sale, which contains small grains (0.8-3 mm in diameter). After application, it looks like a multi-colored mosaic. This plaster is a good option for finishing the base of a bathhouse, as it is steam and waterproof. However, before you apply it, you will need a base. The latter is always made of cement or lime-sand plaster.
Preparation for plastering the bathhouse base
Before you begin plastering the base, its surfaces should be prepared.
If plaster is applied to the surface of a long-constructed building, it is necessary to thoroughly clean the base of paint and dirt. After the walls are leveled, they need to be coated with a primer. If there are deep cracks or potholes on the base, they should be repaired using a special repair compound. Remember, if you are going to plaster a base insulated with expanded polystyrene or polystyrene foam, you need to take care to improve adhesion - apply notches and treat with a primer.
Technology of applying plaster to the base of a bathhouse
You can begin work on applying a layer of plaster a couple of days after the surfaces have been coated with primer.
We carry out the procedure as follows:
- We level the surface using a spatula and a special compound. Apply the adhesive composition on top using a notched trowel.
- We create a reinforcing layer: we press the reinforcing mesh to a third of the depth. We smooth the surfaces with a special trowel.
- After several days, we again treat the base with a primer.
- We lay the plaster with a spatula and smooth it using a trowel.
- To ensure that the layer is even and has the same thickness (about 15 mm), we use “beacons” during the application process.
- After the layer of plaster has dried, we grout it. To do this, we select a special metal grater in the form of a mesh. The mashing process must be carried out when the composition is not completely dry, but has already set.
- If desired, decorative mosaic plaster can be applied over the main cement plaster. It is also applied by hand and floated at the end of the work.
Plastering can be done in different ways. The surfaces of the base can be completely smooth, stone-like, with relief patterns.
How to sheathe the base of a bathhouse - watch the video:
A competent approach to plinth cladding will ensure reliable protection of the structure from negative external factors. From the instructions and recommendations we offer, you can learn how to make the base of a bathhouse attractive, functional and durable, how to choose the type of base structure in accordance with the foundation and what material is optimal for each type.
Foundation slab
When insulating the foundation slab, thermal insulation boards are laid on top of the waterproofing.
When reinforcing a monolithic foundation slab in a bathhouse using knitted reinforcement, a polyethylene film having a thickness of 200 microns or more is used to protect the insulation from liquid concrete.
When performing reinforcement work using welding, a protective screed is made on top of a film of cement-sand mortar or low-grade cement. In this case, the film sheets are laid on double-sided tape with an overlap of 130-150 mm.
Only in this way can you save the foundation from freezing and premature destruction. Take care of it today, otherwise tomorrow may be too late!
How to lay a brick plinth
You need to lay a brick plinth over a waterproofing layer of roofing felt.
Several recommendations on how to lay a brick plinth:
- Before the brickwork, a horizontal waterproofing layer of roofing felt must be placed on the surface of the foundation to prevent moisture from penetrating from below. According to regulatory documents in construction, it must be made of 2 layers of roofing felt, with each layer sealed with mastic.
- If the base structure is massive (in width and height), then a leveling screed must be made of a 20mm thick cement-sand mortar over the waterproofing layer, on which a masonry mesh with 50x50mm cells made of 4mm wire is laid. This reinforcing layer will give additional rigidity and strength to the base of the overlying brick plinth.
- For a log bathhouse, the above condition is not so important, because the log house is much lighter than the brick walls of the house and the bathhouse does not require a high base.
- The first row of brickwork must be bonded
- It is necessary to carefully fill horizontal and vertical joints with mortar, because if moisture penetrates, the mortar in the joints will begin to collapse over time.
- if the base is high, then you need to reinforce the masonry every 3 or 5 rows, or at least in the corners.
- Horizontal waterproofing from roofing felt is again performed on top of the top row of brickwork of the plinth.
Since the brickwork of the plinth is that part of the walls that is especially susceptible to the influence of atmospheric influences (rain, snow, ground moisture) and works almost all the time in a humidity regime, then for permanent buildings it must be additionally protected. The best protection is natural stone cladding. Other options are possible: ceramic tiles, artificial stone, plaster).
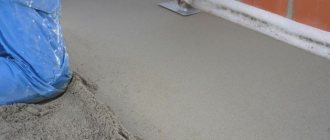
Insulation under the top layer of floor covering
After the construction of the bathhouse building is completed, interior finishing work begins. This is the most convenient moment to additionally insulate the floors in all rooms of the bathhouse.
In the presence of a concrete base, the best materials for insulation are recognized:
The cost of these materials is quite low, and their installation is very easy:
- Having laid an even layer of waterproofing, you need to lay insulation on it and secure it with foam.
- Next comes a layer of waterproofing again.
- Afterwards, you can make a reinforcing screed over it, which will serve as a support for the finishing floor covering.
Video on how to insulate the floor of a bathhouse on stilts:
Which method of insulating the floor in a bathhouse on stilts do you think is the best, and why? Share your opinion or experience in the comments - it’s important to us.
Share this article with your friends:
» data-url=»https://krutopol.com/kak-uteplit-pol-v-bane-na-vintovyx-svayax.html» data-image=»https://krutopol.com/wp-content/uploads /2016/10/banja-na-vintovyh-svajah-uteplenie-pola-450×338.jpg" data-title="How to insulate the floor in a bathhouse on screw piles? Methods and materials">
You will be interested in:
People often strive to set up their own baths on the banks of reservoirs. Those who do not have access to open water prefer to set up a recreation area on the slopes. In such cases, very often...