Currently reading
Sauna plan 4x5 washing and steam room separately
How to line a stove - Building a bathhouse or sauna
How to raise a bathhouse
A bathhouse is a structure that is regularly exposed to moisture, and such conditions lead to rapid wear and tear. To extend the service life of a bathhouse, and often give it a second life, you need to strengthen the old foundation or build a new one. If necessary, you can raise the bathhouse yourself; the main thing is to follow the basic recommendations when lifting it.
Methods and recommendations on how to raise a bathhouse
In order to raise the bathhouse you will at least need:
Prepare everything you need to start lifting the bath. The jack must have a lifting capacity of 5 tons or more. Disassemble the corner of the bathhouse from below and install a jack stand. Thick metal, hardwood timber, or a small concrete slab are suitable. Place the jack on the base under the wall of the bathhouse, place a thick metal plate on top of it and begin to carefully lift the corner of the bathhouse with the jack. After the corner is raised to the desired height, place a beam under it on both sides, mounted on two supports at a distance of about a meter; this beam will serve as a support for the corner of the bathhouse. Once the beam is in place, lower the jack and remove it.
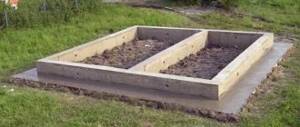
Dig a hole for the foundation at the corner of the bathhouse to the depth you need - in different cases it can be from 0.5 to 1 meter. Pour the concrete foundation and let it cure for two weeks. After the foundation becomes strong, build the base of the bathhouse from the material that is planned - it can be brick, rubble stone, logs, timber. Don’t forget to add a layer of waterproofing if you are laying the base out of brick, or an insulating layer if you are also laying wood underneath.
Place a jack on the side of the poured foundation column and raise the corner of the bathhouse enough to allow you to remove the beam supporting it. Remove the beam and smoothly lower the jack onto the new foundation.
After all 4 corners of the bathhouse are made, securely installed on new concrete pillars, you can lay out bricks or replace the logs in the old base in the spaces between the corners. Do not forget to provide a hole for water drainage, otherwise your bathhouse will begin to collapse again after repair.
Using a jack, you can simultaneously install two corners on the supports and pour the foundation under them, so the time required to lift the bathhouse will be significantly reduced.
Methods and recommendations on how to raise a bathhouse
Preparatory work
At the preparatory stage, before moving the building vertically, the necessary measures should be taken to prepare the structure in order to prevent emergency situations and possible destruction:
- turn off the electrical power supply;
- turn off the water supply lines;
- disconnect the sewer pipes;
- ensure a guaranteed gap between the stove chimney and the ceiling;
- disconnect the heating device installed on a separate basis from the pipes;
- dismantle the floor in the area adjacent to the stove or heating boiler;
- attach metal profiles to the corners of the building to secure the box;
- dismantle window sashes to preserve the integrity of the glass.
Before work begins, a lifting scheme is worked out, which is determined by the purpose of the operation and the type of damage to the structure.
It is also necessary to carry out the following work:
- Assess the level of damage and perform a visual inspection of the foundation. To do this, it is necessary to dismantle the basement cladding, provide access to the base along the contour of the building, and locally go deeper into the soil.
- Check the strength and condition of the support rim. The solid wood should be tapped with a hammer to identify problem areas prone to rotting and cracking.
- Ensure delivery of all necessary materials and equipment to the work site. Timely preparation of jacks, materials for repairs, and temporary supports will reduce the duration of repair activities.
It is important to correctly determine the method of lifting the structure and first analyze a number of points:
- Bath weight. The weight of the box, ceiling elements, external and internal decoration, as well as equipment located in the room is taken into account. By multiplying the resulting value by a factor of 1.4 and dividing by the number of jacks, you can obtain the load capacity of each device.
- Dimensions of a wooden box. By installing additional supports in the areas where logs, beams or wooden frames join, you can significantly reduce the likelihood of box deformation in the area where the elements join.
- Strength and presence of cladding on the inside and outside of the room. The presence of decorative finishing complicates the work. Fixing diagonally spaced bars 5 cm thick will protect the bathhouse frame from deformation and avoid subsequent repairs.
The lifting operation must be carried out taking into account further work
- The nature of the soil. The possibility of immersing lifting devices when moving a building in the vertical direction depends on the characteristics of the soil. Increasing the support area with the help of pads will ensure the immobility of the jacks.
- Lifting height. The design features of the lifting device limit the amount of free play of the rod. The required moving height is achieved by using supports made of durable wood.
- Duration of repair work. Depending on the level of complexity of the repair, the duration of restoration activities is determined. The use of temporary structures made of steel and durable wood reduces the load on the rod.
A responsible approach to repair work will allow you to avoid unforeseen situations, as well as promptly complete planned repairs.
Lifting technology
What to do when it’s time to overhaul a bathhouse with distortions and sagging corners? In this case, the bath structure rises above the surface completely or partially. The video shows clearly and in detail how we raise the bathhouse.
The most optimal option for carrying out such an event is the use of high-power jacks. The lift allows access to the foundation and lower crowns of the frame. The lifting procedure is quite complex and requires special care, because... incorrect actions can lead to destruction of the ligaments and the material itself.
Advice! Before lifting the bathhouse on jacks, it is necessary to assess the load on the mechanisms, which will allow you to correctly select the power of the device.
Jacks are installed, as a rule, in the corners of the structure, and 1 device accounts for ¼ of the entire mass of the structure. Most often, mechanisms with a capacity of at least 4.5-5 tons are used.
We suggest you read: How to treat the inside of a log house after sanding
Before work begins, a lifting scheme is worked out, which is determined by the purpose of the operation and the type of damage to the structure. Typically, at least 2 jacks are used for work. The exception is cases when only 1 corner of the bathhouse sank. To eliminate deformation, only the sagging corner is raised to the required height. For all other work, jacks are used in pairs, lifting the entire wall, which will preserve the integrity of the corner alignment of the logs.
The operation itself should be carried out smoothly, gradually. Precautions must be observed. When the structure is fully raised, work is carried out in cycles:
- slight rise on one side;
- leveling from the opposite side with supports placed under the raised wall;
- repetition of the cycle.
The total height of vertical movement can reach 35-50 cm. Damage is avoided by securely fixing the raised sections of the frame.
The lifting operation must be carried out taking into account further work. In other words, a major foundation repair involves dismantling the previous structure, installing formwork, pouring a new system, i.e. carrying out a complex of works under an overhanging log house. This circumstance requires compliance with all safety requirements, eliminating the risk of subsidence of the bathhouse frame.
The video shows clearly and step by step how to raise a bathhouse onto a foundation. You can use 2 options: alternately lifting the walls using 2 mechanisms or simultaneous lifting of the entire building. The second method is used for small wooden baths, when it is enough to use 4 jacks installed on opposite sides. The first option is more popular, allowing the lifting of any structure, and not just wooden ones.
The procedure for carrying out the lifting operation is as follows:
- Installation of jacks. The mechanisms are fixed in prepared and reinforced holes and rest against the lower crown of the frame. If it is necessary to change the lower crown, then emphasis is placed on the next, undamaged crown.
- Slow, smooth rise of 4-5 cm or until one crown emerges from the nest in the lower crown.
- Providing support under the raised frame in the form of concrete or wooden beams or other strong temporary supports.
- Moving jacks to other points. When lifting a small house, the mechanisms are installed on the opposite wall. If the bathhouse is large, then they are fixed on the adjacent wall. Similar to the previous operation, the raised frame is lifted and secured. This way the entire structure is raised one by one.
- Return the jacks to their original points and raise the log house another 4-6 cm. Similar actions are performed until the total height is 40-50 cm. After this, reliable support for the raised structure is ensured, taking into account all safety requirements.
We suggest you read: How to cut log houses from timber
Further work is carried out depending on the task:
- Placement on the foundation. If the bathhouse did not previously have a foundation, then a trench is dug to make one. Sometimes a decision is made to replace columnar supports with a strip foundation, which involves removing the previous supports and carrying out the entire cycle of manufacturing a new type of foundation. Next, the formwork is installed, the reinforcement is laid and the concrete is poured. To fix the lower crown of the frame, vertical rods are installed, rising above the concrete surface. Waterproofing is being installed.
- Major foundation repairs. If a certain section of the concrete foundation is destroyed, only this part of the foundation must be repaired. In this case, the damaged concrete mass is removed, formwork is installed and new concrete is poured. The condition of the waterproofing layer is carefully checked and its replacement is ensured. The entire surface of the concrete tape is carefully leveled using a building level.
- Replacing a damaged crown. If the foundation does not require repair, but only the rotten basement logs need to be replaced, then they are removed from the log house and new ones are fixed in their place. Regardless of the condition of the waterproofing, it is recommended to replace it and lay a new one.
Lowering the bath into place is carried out in the reverse order, taking precautions and preventing distortion. The jacks are installed one by one in their holes, and the temporary supports are removed. The operation, just like lifting, is carried out in stages, i.e. for 1 cycle by 4-6 cm. It is important that after completion of the operation the lower crown is positioned strictly horizontally and the walls vertically.
Sometimes, to carry out a major overhaul of a bathhouse, operations with the foundation or the basement of the walls are necessary. In this case, you will have to ensure that the bathhouse is raised, which can be done using jacks. This event is quite complex and time-consuming, but if all rules and recommendations are followed, it can be carried out on your own.
How is the preparation carried out?
The entire operation of raising the bath consists of several stages. First of all, preparatory activities are carried out. Work begins with the dismantling of the external cladding of the basement section of the building. After removing the outer covering, the condition of the logs in the lower crowns can be accurately assessed. The issue of the need to replace or repair them is decided, and the installation points for the jacks are outlined. Zones of active decay and the presence of cracks due to soil movement are especially highlighted.
The next necessary step is to dig a trench around the entire perimeter of the foundation. Inspection of the condition of the entire foundation finally forms the overhaul scheme. If the foundation has significantly collapsed, then in this area it will have to be completely removed and concrete poured again. To reduce the load on the mechanisms, all equipment, furniture, and shelves are removed from the bathhouse. Door panels and glazing from windows are temporarily removed. It is advisable to disassemble the floor covering (even better, the subfloor), but this event is carried out at the discretion of the work contractor.
Technology for lifting a log house with a jack
Buildings made of logs and timber are durable; they can last for tens and even hundreds of years. However, time has a destructive effect on even the strongest materials, so sooner or later the foundation will require repairs. Rotting often affects the lower crowns, after which the house will gradually begin to lean on its side.
How can you raise a log house?
Raising the frame with a jack is the only way to provide access to the foundation without dismantling the building itself. With due care, it is possible to raise the building with minimal damage, replace rickety or destroyed pillars, and also remove the lower logs, after which the frame is lowered into place.
The same work is carried out if the building begins to sink into the ground after the destruction of the foundation. In rural areas you can still find old log houses placed on wooden decks: such a foundation has a minimum service life and will still have to be replaced.
To carefully lift the structure, it is better to use several jacks with a load capacity of at least 5 tons. They can be hydraulic or mechanical, and a log jack screw is often used.
It is important to ensure that everything necessary for the work is delivered to the construction site in advance: the sooner the work is completed, the better. It is impossible to keep the log house raised for a long time; this can lead to very serious consequences.
How to lift a log house with jacks? Before starting the ascent itself, several preparatory steps should be completed:
It is also necessary to ensure that the jacks are installed on a durable base that can support the weight of the house and not sink into the ground. This can be a strong metal plate or at least a square wooden shield with a side of at least half a meter.
Log raising technology
Lifting a log house with a jack is not an easy, but completely doable task. It is important to take your time to avoid any serious damage.
If the building has a columnar foundation, it will not be difficult to place jacks under the lower crown, but if the building has a strip foundation, you will have to make recesses in the logs. In this case, you need to make a through hole in the log, into which you insert a lever and lift the wall with a jack.
The main stages of lifting a log house with your own hands:
If a columnar base is used, the destroyed columns are broken and removed, after which they are replaced with new ones. If the house has a strip foundation, you will need to remove the remains of the destroyed foundation, deepen the trench and pour a layer of sand at the bottom.
Lowering the frame after repairing the foundation
When the restoration work is completed, the building must be properly lowered into place. In order not to damage the frame, the jack is also moved gradually: the reverse work is performed. A jack is installed, a support is removed, after which part of the building is lowered a little, a temporary support is placed, and you can move to the next point.
It is important not to rush: it is very easy to damage the structure, but repairs will be extremely difficult. Work on raising a log house should not be carried out alone; it is better to first consult with experienced builders.
How to lift a log house with jacks without destroying the building: technology, recommendations Lifting a log house with a jack: reasons for doing it, preparatory work, main stages and features of self-lifting, screw jack, lowering the log house after repairing the foundation, recommendations
What kind of extensions can there be?
An extension to a bathhouse can have different purposes, and its type depends on what the main bathhouse building consists of. If the original option was a minimal set - a steam room and a dressing room, then there is a need to build a washing room with a shower. The question of how to attach a new dressing room to a bathhouse with your own hands arises when the room can somehow accommodate 2 people, and there is no place to place firewood to maintain the firebox.
The question most often arises is how to attach a veranda to a bathhouse with your own hands or an enclosed recreation room. As a rule, it is the relaxation area that is put off until better times, and therefore it often becomes the target of a bathhouse extension. An interesting and original option: adding a summer kitchen to the bathhouse with your own hands. In principle, this formulation of the problem is quite natural. After all, the bathhouse contains a stove, which is used only when preparing and carrying out the washing procedure. It is quite logical to set the task of using it at other times. Adding a summer kitchen will eliminate downtime of the heat source.
Based on their location relative to the bathhouse, extensions can be divided into several types. They can become a continuation of any bath room with a major reconstruction of the structure, removal of part or all of the old wall. This way you can expand the steam room, dressing room or make a sink. Another option is an extension without violating the integrity of the previously built structure, but with a reliable connection of the extension to the main wall.
Finally, one more method should be noted - the creation of a new room in close proximity to the bathhouse, functionally related to it, but not structurally connected into a single system. Example: a gazebo attached to a bathhouse with your own hands. Such a building is erected at a distance of 0.5-3 m from the bath wall, but serves as a relaxation room.
In addition, extensions may differ in location relative to the entrance. The most common structures are those erected in the form of a vestibule to a bathhouse, i.e. after their construction, a new entrance appears, and the old one is moved deeper. The second type is not connected to the main entrance, and after the construction of the extension, an independent entrance is formed in it. In this case, inside such an additional room there may be a passage to some kind of bath room, or there may be no direct connection with the internal premises.
Bathhouse projects
Number of projects 687
- 1 room
- 2 bathrooms
Bath Slavyanka project
- To favorites
- 53.5² Total area
- 8 x 7m Construction area
from RUB 722,250
Construction period 35 days
- 1 room
- 1 bathroom
Project of log bathhouse 4x6 m
- To favorites
- 4 x 6m Building area
from 190,000 rub.
Construction time individually
- 1 room
- 1 bathroom
Bathhouse project BBm-6
- To favorites
- 38² Total area
- 4 x 6m Building area
from 513,000 rub.
Construction time individually
- 1 room
- 2 bathrooms
Bathhouse project BD-63, Kozino
- To favorites
- 63.4² Total area
- 9 x 9m Construction area
from 977,000 rub.
Construction time individually
- 1 room
- 2 bathrooms
Project Banya Orange 8.5*10.9
- To favorites
- 83² Total area
- 9 x 11m Construction area
from RUB 964,813
Construction time individually
- 1 room
- 2 bathrooms
Sangria Baths Project
- To favorites
- 75.5² Total area
- 11 x 10m Construction area
from RUR 1,019,250
Construction period 40 days
- 1 room
Sanduny Baths Project
- To favorites
- 17² Total area
- 4 x 6m Building area
from 320,000 rub.
Construction time individually
Available at the exhibition
Barrel sauna project “Super-Lux”
- To favorites
- 2 x 5m Building area
from 184,900 rub.
Construction time 1 day
- 2 rooms
- 1 bathroom
Clementine Baths Project
- To favorites
- 120.04² Total area
- 12 x 7m Construction area
from RUR 1,620,540
Construction period 64 days
Log bathhouse project AR-027
- To favorites
- 17² Total area
- 5 x 4m Building area
from 229,500 rub.
Construction period 90 days
- 2 rooms
- 1 bathroom
Acapella Baths Project
- To favorites
- 70.62² Total area
- 6 x 7m Construction area
from 953,370 rub.
Construction period 35 days
- 3 rooms
- 1 bathroom
Bani Sloboda project
- To favorites
- 75² Total area
- 9 x 10m Construction area
from 1,040,000 rub.
Construction period 30 days
- 1 room
- 1 bathroom
Project AS-2000-6
- To favorites
- 48.4² Total area
from 653,400 rub.
Construction time individually
- 1 room
- 2 bathrooms
Bani Khvoynaya project
- To favorites
- 66² Total area
- 9 x 9m Construction area
from 891,000 rub.
Construction period 35 days
- 1 bathroom
Log bathhouse project BO-028
- To favorites
- 36² Total area
- 6 x 8m Construction area
from 486,000 rub.
Construction period 90 days
- 1 room
- 1 bathroom
Olympia Baths Project
- To favorites
- 32² Total area
- 6 x 8m Construction area
from 550,000 rub.
Construction time individually
- 1 room
- 2 bathrooms
Bani Frog Project
- To favorites
- 64² Total area
- 8 x 8m Construction area
from 1,140,300 rub.
Construction time individually
Project Baths Anastasia
- To favorites
- 25.5² Total area
- 5 x 4m Building area
from 355,000 rub.
Construction time individually
- 1 room
- 1 bathroom
Bathhouse project No. 15006
- To favorites
- 43² Total area
- 5 x 11m Construction area
from RUR 1,806,313
Construction time individually
- 1 room
- 1 bathroom
Project AS-2002-14
- To favorites
- 76² Total area
from 1,026,000 rub.
Construction time individually
View all projects
It’s interesting that when choosing a bathhouse, there are a number of little things that don’t immediately come to mind, but later make themselves felt. To do this, our experts interviewed people who already have their own baths, and now share their experiences and ways to avoid common mistakes.
The process of raising a house
Let's say a person has a log house, or a wooden house, which needs to be raised to a certain height. It is ideal to use a jack in this situation. By the way, using this method you can raise not only a wooden house, but also one made of any other material. The technology will be practically no different for other types of buildings.
It is worth remembering that in order to raise the log house to the required height, it is necessary to use only cargo jacks that can withstand a sufficiently large weight. They are easy to use. In addition, such equipment is quite capable of supporting a house of almost any weight.
Don’t forget that the house needs to be raised at the corners of one side.
The use of four jacks is unacceptable, since in this case the house may shift along any axis. The process itself has some nuances that must be taken into account when raising a log house.
Raise only two jacks at a time, which are located on opposite sides of the house.
These include:
- You will first have to hammer in two slats in each corner of the building. Then it is necessary to note the exact height to which the log house will rise. Next, you definitely need to prepare a place for the jacks; it is best to use a rigid support that is installed on the ground;
- Only after this can you slowly begin to raise the house. In this case, this must be done simultaneously and evenly on both sides. Only after the log house has been lifted on one side can we proceed to work related to lifting on the other side. This is how the house is raised to the required height.
Often the process of raising a house is necessary if we are talking about a pile or columnar foundation. Piles have one very unpleasant property: they break very often. They just need to be replaced from time to time.
In this regard, it is necessary to raise the house to a certain height. The easiest way in this case is to use jacks. Raising the foundation is often necessary when repairing it using screw piles. It's worth talking about this process in more detail.
What tools are needed?
Tools need to be prepared not only for lifting the log house, but also for further repair of the walls or foundation of the bathhouse. Next, we will describe only the basics of the technology; in practice, we have to deal with various little things that require one or another tool.
To avoid having to urgently look for equipment, prepare in advance:
- jacks;
- an angle grinder with wheels for metal and wood;
- drill;
- axe;
- hammer and sledgehammer;
- scrap;
- foundation restoration tool;
- shovel;
- measuring ruler;
- level.
Any of these tools may be required to lift the frame and for further restoration. If you have it, you can easily do all the work yourself.
About the need to raise the bath
The essence of the process of raising a wooden structure using jacks is to provide access to the foundation being repaired while maintaining the integrity of the building.
Using one or more powerful jacks, you can carefully lift the structure, the basis of which is:
- wooden beams of square section;
- prefabricated panel structure;
- cylindrical logs.
The basis for making a decision to raise the bath is the visual manifestation of the following signs:
- significant deviation of the building from its normal position with the frame skewed;
- formation of cracks on finishing materials outside and inside the premises;
- subsidence of the entire building along the perimeter of the bathhouse or its individual parts;
- immersion into the soil of parts of the foundation bearing the load from the mass of the structure;
- significant destruction of the foundation with cracking and spalling.
Often, the construction of a small bathhouse is carried out without a foundation, and its base is simply placed on compacted soil and a sand-crushed stone cushion
Raising the bathhouse with the help of modern technical means allows the following types of construction activities to be carried out:
- work to carry out major repairs of the destroyed foundation;
- partial restoration of fragments of the base;
- restoration and replacement of collapsing supporting elements along the contour of the building;
- eliminating distortions of the building frame while ensuring the verticality of the structure;
- antiseptic treatment, as well as protective impregnation of wooden structures;
- elimination of deviations and errors that the builders made during construction.
Before starting construction activities, it is necessary to deliver everything necessary to the construction site in advance, since it is problematic to keep the structure in a raised state for a long time.
The essence of the problem
Theoretically, almost any structure can be lifted from its foundation without destruction or disassembly, as evidenced by the transfer of even multi-story buildings. Frequently encountered problems:
- How to raise an old bathhouse onto a foundation? Often, the construction of a small bathhouse is carried out without a foundation, and its base is simply placed on compacted soil and a sand-crushed stone cushion. Over time, such a structure begins to sag (often unevenly), which necessitates the creation of a foundation; the problem arises of how to raise the bathhouse onto the foundation after several years of its operation.
- How to repair the foundation? It often happens that the frame of a bathhouse can last for many more years, but for some reason the foundation is seriously damaged. This may be a consequence of a violation of technology during construction or natural circumstances. In this case, the possibility of repairing or replacing the foundation is associated with raising the structure itself.
- How to eliminate distortions in the structure as a result of its uneven subsidence? The bathhouse can receive dangerous deformation in the form of subsidence of a corner or wall, which causes the structure to tilt and the risk of destruction.
- How to raise the ceiling in a bathhouse? You can raise a building to increase its height. Often at the time of construction, a minimum ceiling height is set, but over time there is a desire to increase comfort. In this case, lifting will help solve the problem.
How to raise a bathhouse on a foundation, safety rules and technology
The bath is raised smoothly, with the following operations cyclically performed:
- Limited movement in one area.
- Alignment in height with the opposite zone.
- By placing support elements under the raised box.
Work begins from the most damaged corner
The impossibility of subsidence of the bathhouse box, the elimination of cracking and destruction of the structure is achieved:
- reliable fixation of construction areas with stationary supports;
- the size of the total vertical movement is not more than 0.5 m;
- ensuring the height of movement per cycle in the range of 6–8 cm;
- using thick beams to strengthen the box;
- fastening spacer elements into openings;
- correct installation, ensuring a fixed position of the jacks;
- the use of rigid thrust bearings under the rods of lifting devices.
To ensure the safe execution of repair work, it is important to ensure that the structure being lifted remains stationary. The bathhouse lifting technology involves the use of a different number of lifting devices:
The bathhouse lifting technology involves the use of a different number of lifting devices:
Using one jack, you can alternately move different sections of the structure vertically, moving slightly in one cycle. After lifting, the sagging area is fixed with bars, and the lift is moved to the next point;
synchronous operation of two lifts allows you to evenly lift the wall, maintaining the integrity of the corner areas
It is important to lift evenly, place the jacks correctly, moving the walls of the building to an equal height; the simultaneous operation of four jacks located in the corners of the bathhouse allows the wooden structure to be lifted with maximum efficiency. Safety of work is achieved by cyclically moving the rods by 2–3 cm.
When performing work, follow the technological sequence of operations:
- Select the movement pattern and areas for placing lifting devices.
- Thoroughly compact the soil in the area where the lifting devices are placed.
- Create a secure surface by placing support pads.
- Place jacks on the supporting plane and check the verticality.
- Place plates on the top end of the stem to improve the contact area.
- Raise each jack to a maximum height of 3-5 cm per cycle.
- Use shims to secure the position as needed.
- Monitor the stability of the structure when moving.
- Install stationary stops to secure the structure during lifting.
Remember that for the convenience of simultaneous movement of the bath, you can use a steel beam, which, passing under the box, rests on the rod supports.
Preparatory work, necessary materials and tools
At the preparatory stage, it is necessary to inspect the building, assess the degree of complexity and duration of the planned repairs, determine the method of lifting, and carry out work to protect the structure from destruction during movement.
If there are problems with the foundation, there are two options - build a new house or try to restore and replace it
The need for repairs by lifting a wooden building is indicated by visual signs:
- significant skew or tilt of the house;
- the appearance of a network of cracks on the interior and exterior finishes;
- local or complete subsidence;
- deepening part of the foundation into the ground;
- significant violation of the integrity of the foundation.
The vertical movement of the structure is carried out to carry out the following types of activities:
- Performing partial or major repairs of the foundation.
- Preventing subsidence of the structure.
- Replacement of rotted support beams around the perimeter of the building.
- Alignment of box distortions.
- Carrying out protective treatment of wood.
- Eliminating mistakes made by builders.
Most often it is necessary to raise a wooden house when problems arise with the foundation
In order to determine the method by which the house will be raised using special devices, the following factors are analyzed at the preliminary stage:
- mass of the building. Each jack must provide a 40% lifting capacity. To do this, the total weight of the structure is calculated by multiplying the cubic capacity of the box by the specific gravity of wood equal to 0.8 t/m3. The weight of the floor, roofing and finishing is added to the resulting number;
- dimensions of the building box. With a building length of more than six meters, there is a high probability of beams or logs subsiding in the splice zone. Additional installation of supporting elements at the joining areas will be required;
- presence of internal lining. Using plasterboard sheets or plaster to decorate walls indoors complicates the implementation of activities. Installing 50 mm thick boards on the outside of the corners will avoid repeated repairs indoors;
- soil features. Depending on the structure of the soil on which the lower plane of the lifting device will rest, it may be necessary to use concrete blocks or special panels of increased area. This will prevent the jack from sinking;
- travel height. The length of the working stroke of the rod is limited by the design of the lifting device. The use of special pads made of durable square-section timber with a side size of 100–150 mm will allow you to gradually achieve the required moving height;
- duration of repair activities. The duration of the repair is determined by the degree of complexity; if it is carried out for a long time, it is undesirable to rest the structure on the rod. It is advisable to use temporary structures made of metal and wood that have sufficient supporting area.
Sometimes a bad site is chosen to build a building, then they put a new foundation in another place and drag the house
Raising the house to the height required for repairs can be carried out using the following equipment:
- By crane. It is used mainly for the purpose of lifting to move buildings to another site.
- Powerful jacks. A widespread method of moving wooden buildings in a vertical plane.
When planning to raise a house on jacks, you should prepare:
- cut off the power supply;
- turn off the gas supply;
- shut off water mains;
- turn off the sewer system;
- ensure free movement of a stove installed on an independent foundation through the roof of the chimney;
- disconnect the individually mounted boiler from the heating pipes;
- dismantle the floor in the area of the stove and heating boiler;
- secure the immobility of the box with steel plates screwed to the corners.
Use a jack to lift the frame slightly. Only 2-3 cm at a time
To complete the work you will need the following materials and tools:
- Hydraulic type jack with a lifting capacity corresponding to the design value.
- Support panels made of wood, allowing to reduce the load on the ground when installing lifts.
- Set of metal pads measuring 20–30 cm.
- Grinder equipped with a disc.
- A set of tools for detaching the support beam around the perimeter of the building.
How to prepare the building?
Before starting work, you need to make proper preparations. This will prevent damage to the lining and internal elements of the bathhouse, which are suitable for further use. The work algorithm is as follows:
- We completely empty the rooms - we need to take out tables, chairs, benches and other furniture. This will reduce the load on the jacks.
- We disassemble the flooring - this procedure is left at your discretion. If you do not do this, be sure to dismantle the floor near the stove, otherwise it will collapse during the lifting process.
- If there is cladding below, it must be dismantled - this way you can assess the condition of the lower crowns and foundation. After the analysis, a final decision is made on the scheme for further work.
- A trench 20-30 cm deep is dug near the foundation - this way you gain access to the lower level of the foundation. The earth is neatly scattered around the periphery.
As soon as the preparation is completed, we begin to raise the log house. To do this, you need to bring all the tools to the object, select and correctly position the jacks.
Planning the interior of the bath
When the frame is assembled and settled, you need to begin interior decoration and installation of windows and doors. You need to plan all the elements in advance, since the costs for them may be slightly less than the main ones. In addition, you need to think about how the bathhouse will be laid out and install internal partitions.
Windows and doors of the bathhouse
Do-it-yourself wooden door to the steam room.
The doors in the bathhouse and steam room are installed wooden, since this material will not violate the overall environmental friendliness. To prevent them from collapsing from moisture, they are treated with antiseptics and water-repellent compounds. The size of the bath door should be 5-10 mm smaller than the opening on all sides. This way, when it swells from humidity, it won’t jam.
A door size suitable for a steam room is: width 60 cm and height 170 cm. If you make it larger, the steam will quickly leave the steam room and it will cool down. Install the doors so that they open outward. That is, from the steam room the door should open to the washing room, from there to the rest room, from the rest room to the dressing room. It is not worth installing on the contrary, this is contrary to fire safety techniques. You can make the doors to the steam room yourself. For this you need to use wood from non-resinous varieties (linden, aspen), with a thickness of at least 60 mm.
The windows need to be small in size, maximum 400x600 mm, so less heat will escape into the bathhouse. It should be installed at least 1 m from the floors. The frame must be double. Double-glazed windows can be used for the rest room and dressing room. If you install the glass yourself, then you need to use a sealed water-repellent and heat-resistant material for lubrication.
Wiring
Electrical wiring in the bathhouse must be carefully insulated in special corrugations.
It is better to entrust the electrical system in the bathhouse to professionals. The wiring must be insulated, and all luminescence must be protected from moisture and splashes.
You can make protective nets from linden lining, which will become an additional element of the interior. If it is difficult to make protection with your own hands, you can purchase ready-made bath lamps.
The fire hazard level of a Russian bath is second, so the incoming cable is passed through asbestos material. And the overhead line is placed in additional insulation. Switches must not be installed in the flushing and steam compartments.
Planning of interior spaces and partitions
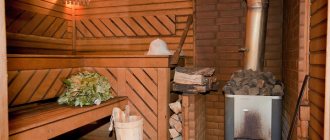
A small steam room lined from the inside with aspen clapboard.
The smallest bathhouse project should include: a steam room and a dressing room. Modern baths are complemented by a washing area and a relaxation room. But it’s better to make a dressing room between the seating area and the front door. This will be an additional obstacle to heat escape. Equip the room with hangers and a bench. This will be a dressing room for outerwear. There may be no windows in the dressing room at all, and if they are planned, then no more than in the steam room.
It takes longer to install the stove and fill the heater; you can read about which stones are suitable for a sauna here.
Pipe and ventilation system
An iron pipe in a bathhouse is easy to install, but has a short service life.
The firebox of the heater must exit into a special pipe, which must have a draft equal to three times the exchange of air for 60 minutes of the firebox. Due to its small size, it is recommended to open the dressing room during the heating of the bath, so there will be better air exchange into the room. This will increase the thrust and the fuel will burn better.
The ventilation system is made of a common steam room, a relaxation room and a washing compartment, so moisture will not accumulate in the wooden building and the bathhouse will last longer. In the steam room, an vent measuring at least 130x130 mm is installed under the ceiling. After the bath procedures, the steam room door is left open and the pipe valve is opened all the way, so that the stove, which has not yet cooled down, will quickly draw out excess moisture. In summer, 1–2 hours are enough for this, in winter no more than 30 minutes.
Planning a bathhouse is important in the same way as installing walls, roofing and stoves. If you don’t think through all the details down to the smallest detail, then during the construction process ideas may appear that will be difficult, and in some cases even impossible, to bring to life.
Plan your own bathhouse in advance and you won’t have such problems.
Elimination of defects in the design of the bathhouse
These elements include: walls, foundation, roof, ceiling, floor.
Scheme for replacing the foundation under a wooden bathhouse
How to carry out repair work correctly? We need to act according to plan.
Base repair
The foundation is subject to repair if:
- there is a strong distortion of the structure;
- cracks, especially if they are deep;
- the beginning of the destruction of load-bearing walls.
If during the inspection these signs were identified, then the first thing to do is to install a storm drainage system, which will help drain rain and groundwater from the base. Once the cause of the subsidence has been eliminated, you can begin to repair the base of the bathhouse, it can be done like this:
- Prepare the building for lifting; for this you need to completely vacate the room; it is worth disassembling the sauna stove if it is made of brick;
- Prepare jacks, beams, boards, small blocks - all this will be useful for lifting. The bathhouse is not as large a structure as a house, but the work ahead is large and painstaking.
Drawing of raising a bathhouse to replace the foundation
The building must be raised gradually so as not to compromise the integrity of the structure.
How to raise a bathhouse
There are several ways to raise a bathhouse yourself:
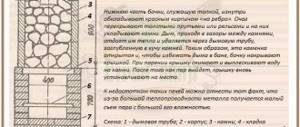
- On the second crown from the ground on one wall, two holes are sawed at a distance of 20 centimeters from the corner, under the timber. They make the same ones on the opposite wall. A long beam is pushed into these holes, which will hold the entire structure. The area under the ends of the beam is cleared, on which a small sheet of plywood is laid to stabilize the jack. Place jacks under both ends of one beam and carefully begin lifting one side of the building. As soon as one side of the building is raised to a small height, you need to place previously prepared blocks under the beams, and do the same manipulations on the opposite side. You need to repeat the manipulations until the bathhouse is raised half a meter above the destroyed foundation.
- You can lift the bathhouse using only one jack. To do this, start lifting from one corner. It cannot be raised to a great height; the structure may change its geometry. Having raised one corner, we move to the other, moving from corner to corner and placing supports under them.
We suggest you familiarize yourself with How to properly plan a summer cottage or personal plot by zones?
What should be on the site of a country house? As soon as the bathhouse is raised to the desired height, you can proceed to the next stage - dismantling the old foundation.
Dismantling the foundation
If the base is severely damaged, it will have to be completely dismantled and the trench cleared. If there is strong subsidence of the old foundation, it is better to dig a trench 20-30 cm deep. If the foundation is partially damaged, then repair work can be carried out without completely dismantling the old foundation; it is enough to remove only the damaged area. You can also arrange a foundation corset around the perimeter of the old base with additional reinforcement of the base.
The process of dismantling the old bathhouse foundation
Preparing for pouring:
- A sand cushion is placed in a deep trench, which must be compacted well.
- Install foundation waterproofing.
- Make formwork from wooden panels or plywood.
- Install a frame made of reinforcement.
- To save concrete, you can lay coarse gravel at the bottom of the trench.
- Pour the concrete mixture.
As soon as the concrete hardens, you need to dismantle the formwork and treat the base with coating waterproofing. The foundation will be ready for use after three weeks, after which the structure can be lowered and repair work can continue. If the foundation has partially collapsed, then the formwork is installed only on the site of the damaged area that was dismantled. Partial pouring is no different from the usual one. If a decision is made to build a concrete corset, then the old foundation is not dismantled:
- It is necessary to dig an additional trench along the outer perimeter of the base.
- Arrange foundation formwork and reinforcement.
- Pour concrete.
Important! A trench needs to be dug 20 cm deeper than the old foundation, and a sand cushion must be built. It is better to use reinforcement with a cross-section of 16 mm. In this case, the width of the trench can reach up to 30 cm.
In addition to the main structure, minor repairs may be needed. What parts can fail:
- It is advisable to completely change the wiring in the bathhouse. Previously, aluminum wires were used; it is better to dismantle them and lay a cable with copper conductors.
Example of power supply for a bathhouse
The cable cross-section is selected based on the use of devices in the bathhouse: for some light bulbs, a 2.5 mm cable is sufficient; - Old windows and doors can cause heat loss; they need to be replaced by first insulating the slopes with polystyrene foam or polyurethane foam;
- The same should be done with the furniture in the bathhouse. Shelves, benches, shelves, tables are replaced with new ones, pre-treated with an antiseptic and water-repellent composition;
- If necessary, you need to change the stove. The old structure is dismantled and a new stove is installed in its place. It can be assembled from brick, or bought ready-made in a store.
The video shows the process of replacing crowns in an old bathhouse.
Selection of jacks and preparatory work for their installation
To carry out the work, it is important to choose the right jacks for lifting the bathhouse body. The estimated parameters of the mechanisms are the load capacity and the stroke of maximum movement
In practical operations, 2 main types of devices can be used - screw and hydraulic jacks. The best hydraulic systems are those that have great power and are reliable in operation. For small wooden baths, you can use cheaper screw varieties.
That is why a solid foundation is built at the site where the equipment is installed.
The installation site is prepared as follows:
- A total of 8 points are outlined (2 on each side), spaced 45-50 cm from the corner of the building.
- In these places, holes are dug with the following dimensions: length (along the log) - 90-100 cm, width - 70-75 cm, depth - 50-60 cm. The bottom of the holes is carefully compacted and covered with a layer of crushed stone, on which a solid wooden base is installed beams or metal sheet.
- Preparation of logs if it is necessary to replace rotten crowns. The diameter of the new logs must exactly match the dimensions of the elements requiring removal. They must first be impregnated with an antifungal composition and fully prepared for installation.
How to build a sauna and get a quality result?
There are several important points that you should pay attention to in order for your bathhouse to serve for a long time and bring as much joy as possible when used for its intended purpose.
- Keep an eye on quality. By purchasing substandard lumber for construction, you risk not only reducing the durability of the building, but also complicating the construction process. In addition, when using waste from a woodworking enterprise, the operation of all premises of the building can be made less comfortable. Unpolished boards for shelves and benches, substandard timber for the construction of walls, and skimping on material for the rafter system are unacceptable. The result can be not only unpleasant, but sometimes even dangerous;
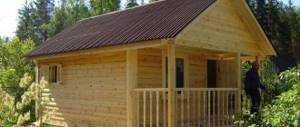
- Carefully consider the location of the bathhouse on the site. The dacha area can be large, so the structure should be small. To obtain sufficient usable space for a building site of modest size, use the design of a bathhouse with an attic floor;
- All wooden elements of the structure, except lumber for finishing the steam room, must be treated with special antiseptics - this will extend the service life of the bathhouse in a suburban area;
- Simply building the structure you need will not work - you need to properly design the bathhouse on the site, otherwise, if you try any action - selling, leasing, reviewing land surveying, it will have to be dismantled.
Another common mistake that leads to unpleasant consequences is failure to comply with fire safety rules when installing a sauna stove. To prevent fire, it is necessary to install equipment taking into account accepted requirements and SNiP. It is imperative to maintain the distance from the stove to the ceiling and walls, and to use special heat-insulating materials when installing the firebox and installing chimney pipes.
How to raise a house with your own hands step by step instructions
The use of wood for the manufacture of cottages and country houses is popular. Many people prefer logs, panel structures and beams, which are environmentally friendly and, subject to special processing and proper installation, ensure the durability of the building. During the operation of houses made of wood, it becomes necessary to restore the foundation or replace the supporting crown. The light weight of wooden buildings allows the house to be lifted using powerful jacks.
Knowing how to raise a house with your own hands, you can move a one-story building vertically and temporarily fix it using concrete blocks or metal supports
At the same time, it is important to prevent collapse, maintain the integrity of the finish, and not disturb the geometry of window and door openings
Before you start lifting the house, you need to do a number of preparatory work
When making a responsible decision to lift a house with a jack without involving hired workers, you should perform a set of works, prepare the tools and materials necessary for lifting, and also carefully study the technology
Particular attention should be paid to observing safety precautions. Let us consider this complex of issues in detail.
Selection and preparation of equipment
Before you raise the sauna with your own hands, you will need to do a little preparation:
- Calculate the weight of the building, taking into account internal partitions, floor material, roof and stove. This is necessary for the correct selection of jack power;
- Determine the installation points of lifting equipment under the lower crown of the building. The places through which it is planned to lift the bathhouse box should not be damaged, and the applied force should be evenly distributed along the perimeter of the building;
- Cross braces are placed into the window and doorway of the bathhouse, window glass and doors are removed, and all accessible furniture is removed from the room;
- If the building of the bathhouse is located directly on the ground, with a slope or flooding into the soil, then a bandage of one-inch boards nailed directly to the walls of the building is put on the box.
If the soil under a log house turns out to be clayey and oversaturated with water, then before lifting it with jacks, and even more so before moving the bathhouse to another place, drainage of top-water water must be arranged around the prepared foundation. If this is not done, the jacks will simply sink in the viscous soil.
On average, the weight of a standard-design log bathhouse with a metal heater and a gable roof does not exceed 4.2-4.7 tons. A modern car jack is capable of developing a force of up to 3 tons, and given the fact that the structure is supposed to be lifted by at least two devices, there are no problems with It shouldn't be a technique.
Experts recommend lifting any buildings - barns, summer kitchens, bathhouses, old houses made of brick and cinder block using two types of jacks:
- Screw lift, also called a sea stop, photo. The jack consists of two working tools and a pair of screws with thrust threads. Maximum force – up to 15 t;
- Hydraulic jacks with a lifting capacity of 10-12 tons, preferably of Soviet production.
Advice! If you plan to lift a heavy log bathhouse, then it is best to rent a 12-ton railway jack for a couple of days. These are extremely reliable and durable mechanisms.
We suggest you familiarize yourself with: Making a stove from a pipe
It is better not to use rack or frame jacks for a bathhouse. Due to severe wear of the locking earring and stopper, the devices often fail before the bathhouse box can be completely raised to the desired height.
In addition to jacks, you need to get hold of lining material on which the lifting devices will rest. The best choice is a steel plate with a thickness of at least 10 mm, or a piece of not very old oak board - forty.
A few tips on the topic
If the house is raised using jacks, insurance must be provided. If the clearance increases by 15 cm when lifting, then a special duralumin gasket is placed under it. In the place where you plan to install jacks, it is imperative to check the quality of the wood. It must be at its best. Otherwise, there is a very high probability that the building will not hold up. This can lead to harmful consequences. Sometimes you have to use narrow jacks. In this case, an additional bracket must be installed at the installation site. It will increase the installation area
This will ensure that the house does not move under its own weight, and the jack will remain in place during all the work. If the house has a brick stove, then when lifting it, you must pay attention to the junction of the pipe and the roof.
Sometimes a situation arises when a house needs to be lifted without fail, but the necessary jacks are simply not at hand. This is where you should think about purchasing them. Although it is currently difficult to obtain sufficiently powerful options, you can always find a way out of the situation.
For example, many turn to the nearest depot. There are probably jacks in stock there. Many employees of such enterprises will gladly accommodate the homeowner.
Summing up the above
Of course, the procedure for raising a house is quite labor-intensive. If a person nevertheless decides to carry it out, it is better to immediately replace all the logs that have rotted or simply become unusable.
Few people would want to lift their own house with jacks again. Some logs are quite difficult to detect. This is due to the fact that on the outside they may appear completely normal, although on the inside they have long been rotten. Calculating such instances is not so difficult:
- It is enough to walk around the entire perimeter with the most ordinary awl. If the log is easily punctured, it should be replaced immediately to avoid subsequent troubles associated with re-raising the structure.
- Sometimes situations arise when, among completely normal logs, there are long-rotten logs. It happens that it is simply impossible to remove them. In this case, you should take an ax and remove all the excess dust from them.
- As a result of such actions, free space is sure to be created. It is worth installing a metal mesh on it, and then pouring the surface with concrete. This action will avoid further destruction of the wood structure. It will become stronger and tougher.
If you plan to raise the house using jacks, then you should clear the space around the stove from the boards. Of course, this should only be done if it is available in the house. This will help you lift much faster.
Thus, this article fully covers the topic of how to raise a house or log house using jacks. Of course, this activity is not as simple as it might seem at first glance. The whole process can take several hours.
The most important thing in the process of carrying out work is to strictly follow the instructions presented above. In addition, use tips that will definitely help every person who decides to strengthen the foundation of their own home.
Size matters! Choosing the dimensions of the future country bath
It goes without saying that, first of all, the size of the structure is determined by the area of your site. But today, land ownership can be completely arbitrary, both in size and shape.
The standard parameters for a medium-sized country bath are 5x5 or 6x4. In such a building, three main compartments are quite comfortably located - a relaxation room, a washing room and a steam room. But if the area of the plot allows and there is a desire, you can build even an entire bathhouse complex with a luxurious relaxation room and a bar counter. Many lovers of country holidays love sauna gatherings with a group of friends.