DIY frame bath photo construction report
And so we have already looked at what inexpensive foundations for frame buildings there are.
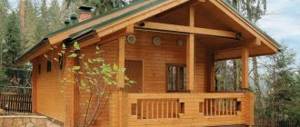
Now we will look at a photo report on how to build a frame bathhouse with your own hands. In our difficult times, not everyone can afford a house with the use of explosion-resistant technologies that can withstand a direct hit from an atomic bomb. And so let's get started.
Constructing a frame bathhouse with your own hands is a completely feasible task. It still needs to be properly insulated and insulated from moisture penetration. It is easier and faster to erect a frame structure than a similar structure made of logs or bricks.
Any home craftsman will be able to cope with such work, since he will not need to order drawings, will not need to equip a serious foundation and will not need to purchase expensive building materials.
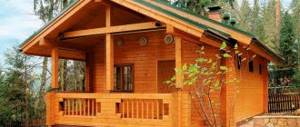
The frame bathhouse in the photo has a significant advantage - the structure is light in weight, which means it will not shrink during operation. Among the disadvantages, it should be noted that during precipitation, moisture penetrates through the cracks of the frame and then accumulates inside it. This problem should be solved in advance.
Using OSB boards for interior decoration of a house
The use of sheet materials in construction and home decoration has long been known. But if in the past it was necessary to make do with only chipboard, fiberboard or plywood, today the ranks of traditional samples have been replenished with new analogues with improved properties, which makes them more suitable for certain types of work.
One example of such products is OSB boards for interior decoration, which will be discussed further.
What is OSB board?
OSB is an oriented strand board. The material consists of panels made from pressed shavings of coniferous and deciduous trees. Chip sizes can range from 60 to 150 mm.
OSB boards have high strength and density due to the combination of several layers. In the middle, the chips are located across the sheet, and in the lower and upper layers - along.
All layers of material are pressed under high temperature and pressure and impregnated with waterproof resins and paraffin. are used as binders . The finished slabs have a uniform structure - without cracks, chips or cavities.
Read more about the characteristics of OSB in our article.
Is it harmful to use slabs for interior decoration?
The possibility of using OSB for interior decoration depends on the labeling of the product, which in turn is determined by the amount of synthetic resins in the material, which emit harmful fumes during operation.
The largest amount of toxic substances (from 10 to 30 mg per 100 g of dry matter) is contained in slabs of class E2 and E3. OSB panels marked E0 and E1 contain a minimum proportion of harmful components - from 6.5 to 10 mg. These are, as a rule, products of foreign manufacturers: Glunz (Germany), Norbord (Canada), Egger (Austria).
Thus, the products of the last two brands are most suitable for use for interior decoration.
Materials of class E2 and E3 can only be used for outdoor work.
To protect yourself from purchasing “hazardous” material, it is worth considering some points that partially determine the correct choice of OSB:
- the smell of stoves. With a high content of harmful substances, the material smells strongly of formaldehyde and cheap plastic;
- products must have a certificate certified by a seal from the manufacturer or supplier. A copy of the document can be requested from the seller;
- It would also be a good idea to inspect the packaging, if available. Products from serious manufacturers are usually labeled and equipped with information inserts.
How to make a partition from OSB inside a house and what screws to use?
OSB is a completely suitable material for the construction of internal room partitions. The strength and light weight of the sheets are clear evidence in favor of this product. OSB boards can be mounted on a metal profile (like gypsum plasterboard) or on a wooden frame.
If the second option is used, the wood should be treated with protective materials against mold and mildew, as well as fire retardants.
Now regarding the partition installation diagram , which will be discussed using the example of a wooden frame:
- Markings are made at the installation site of the structure. Lines are drawn along the floor and ceiling, which will serve as guidelines for installing horizontal guides.
- Beams with a cross section of 4x6 cm are attached along the marking lines. If the wall will be subjected to serious loads (for example, you plan to hang furniture on it), it is better to use thicker bars - 5-8 cm. The guides are attached using dowels.
- Vertical posts are installed, which are fixed to horizontal beams using metal corners and self-tapping screws.
- After installing the racks, OSB panels are installed.
The pitch between the racks depends on the width of the slab, which varies. So, if the transverse size of the OSB sheet is 125 cm (the value characteristic of European brands), then the optimal distance between the axes of the vertical beams is 62.5 cm. In this case, it will be possible to screw the edges and the middle of the slab to the frame.
They are attached using self-tapping screws, the length of which depends on the thickness of the sheets and should be 45-50 mm greater than this value. For example, when using material with a thickness of 12 mm, the recommended length of screws will be 60-65 mm.
In the middle of the slab, self-tapping screws are screwed in increments of 30 cm , along the edges - every 15 cm. The distance from the edge is 1 cm. A gap of 1 cm is left between the slabs and the floor. The same gap should remain between the OSB and the ceiling.
Also, the panels should not be installed closely, but at a distance of 3 mm from each other. This will protect the sheets from deformation due to changes in humidity.
Making a partition from bars and OSB - watch the video:
Internal wall cladding
This process, just like the procedure described above, requires the preliminary construction of a frame, for which the same wooden beams or profile are used. the metal version will serve as an example for arranging the sheathing , since the wooden frame was discussed earlier.
Finishing walls with OSB boards consists of the following steps:
- The first step is, as always, marking.
- Next, vertical CD profiles are inserted into the installed guides and also fixed - to the wall using self-tapping screws and metal hangers, to the horizontal guides - with drilling screws. The pitch between the posts is the same as in the case of a wooden frame.
- To give rigidity to the sheathing, the vertical posts are reinforced with transverse profiles. With a standard ceiling height (2.5 m), it will be enough to install two elements for each span.
If the wall is uneven, you should find the part that sticks out the most, from which you should start. Lines are drawn along the wall, after which the starting UD profile is attached to the floor and ceiling using self-tapping screws or dowels.
The installation of the slabs is carried out in accordance with the rules mentioned in the instructions for the construction of partitions.
How to finish the slab indoors?
The interior decoration of wooden country houses as in the photo can be completely different in cost and design. to finish surfaces made of OSB sheets. Let's consider them further.
Is it possible to attach drywall to OSB?
Can. Moreover, for this it is not necessary to use a metal profile, but simply screw the material to the base with self-tapping screws.
The main thing here is that the level of humidity in the room is not high , since otherwise this can lead to deformation of the OSB and, consequently, the plasterboard sheathing itself. Self-tapping screws are screwed in around the perimeter and in the center of the gypsum board in increments of 10-15 cm.
Designing a future bath
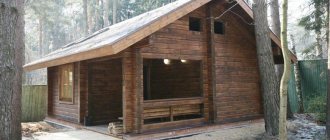
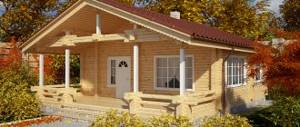
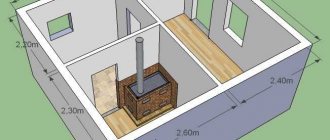
A frame bathhouse project can involve the construction of either a small building consisting of a steam room and a dressing room, or a two-story building on a suburban site. The choice depends on the wishes and financial capabilities of the owner.
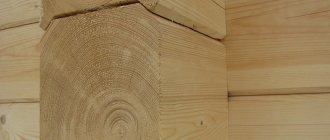
When building a modest-sized frame bathhouse with your own hands, a simple strip or column foundation will be sufficient. You will need to purchase dry timber with a cross-section of at least 20x20 millimeters and an edged board. If the future bathhouse must have at least three rooms, then a more serious foundation will be required.
To save materials, you can install an attached veranda under the dressing room, and then inside the small bath building there will be enough space for a washing room and steam room.
When building two-story frame baths, you need to remember that they are the most fire hazardous and in the event of a fire, the fire will spread very quickly, and getting down from the top floor will become problematic.
Is it possible to sheathe a bathhouse and a garage inside with an OSB board?
OSB sheets are a material that is suitable not only for finishing residential premises. It can also be successfully used for cladding a bathhouse or garage.
In the first case, of course, you need to use only environmentally friendly brands of material.
OSB in a bath should be treated with 2-3 layers of water-soluble varnish, which will add shine to the surface and protect it from moisture.
As for garage cladding, OSB of any marking is suitable here, since in non-residential premises, concern for the environment is the tenth thing and the harmfulness of the material does not matter.
From all of the above, we can conclude that OSB boards are a universal product suitable for use with various types of finishing. This quality, combined with the strength of the panels, makes OSB a worthy representative of the category of sheet materials.
Creating a wooden base
Self-construction of a small frame bathhouse, as a rule, does not require the construction of a foundation due to its lightness. But to prevent the walls from becoming damp, you need to make a foundation.
In the case where you plan to build a bathhouse no larger than 3x4 meters in size, and the walls and roof are light, then it is enough to create a simple wooden foundation, which is secured along the edges with stakes. Such a foundation is considered a particularly good solution when carrying out construction on clayey, seasonally mobile soils that do not have excessive levels of moisture.
Construction of a columnar foundation
This type of foundation for a frame bath is made in the presence of high groundwater. They build a columnar version of the foundation without the involvement of special equipment and a team of workers (for more details: “How to make a columnar foundation for a bathhouse - types of construction options”). You need to have a drill, plastic or asbestos pipes at your disposal and be able to mix cement mortar.
If you are building a frame bathhouse with your own hands, step-by-step instructions for arranging a columnar foundation look like this:
- Level the land.
- Mark the locations for installing the pillars.
- Holes are drilled and waterproofing is placed at the bottom.
- Gradually pour the concrete solution and raise the pipe, which is fixed at the 20-30 centimeter mark. When the concrete hardens, it is reinforced.
- If the base is ready, the pipe is filled with solution to the end.
- Using a strong beam, a grillage is formed.
We suggest you read: How to create a reliable foundation for a bathhouse
Strip foundation
Such a foundation is installed when there is heaving soil on the plot.
The work on its construction is carried out step by step:
- Markings are made on the site and a trench is dug, the width of which is 40 centimeters and the depth is approximately 50 centimeters.
- The hole is filled with sand layer by layer until the ground level is reached, compacted each time and watered with water to ensure compact shrinkage.
- They construct formwork 50 centimeters high and 30 centimeters wide. For greater strength, it is reinforced using rods and metal pipes.
- Pour the concrete solution in several approaches (without allowing the previous layer to dry) or at a time.
- Roofing felt is laid on top of the concrete to waterproof the frame walls.
Projects and drawings of a two-story frame bathhouse provide for the provision of the most reliable support on any type of soil, with the exception of floating ones. The base is a prefabricated strip foundation.
Internal insulation and vapor barrier
Bars with a cross-section of 5x5 centimeters are nailed to the bottom of the logs in the main rooms of the bathhouse building. Rough coating boards are mounted on top of them, then roofing felt (for waterproofing), followed by mineral wool slabs 10 centimeters high or expanded polystyrene. Before laying the final finishing material for the floor, glassine is laid (to provide a vapor barrier).
The floors in the washing area can be arranged differently:
- To ensure that the floor surface is warm in any weather and dries quickly, a separate foundation should be created around the perimeter of the room.
- The soil is removed to a depth of 50 centimeters and a 10-centimeter layer of gravel and sand is poured into the resulting trench. If water enters such a drainage hole, it will go into the ground and a pit will not be required.
- For this floor, it is advisable to use asbestos-cement pipes with a diameter of 10 centimeters. They are laid directly on the foundation and filled with concrete so that they do not move.
- Then a 4-5 cm thick edged round board is laid on the pipes, maintaining a gap of 6-7 millimeters and using rubber gaskets, which are fixed with nails.
- Then the floor material is pressed down with baseboards.
Improvement of the bathhouse premises of a frame bath from the inside involves carrying out work to prevent the accumulation of moisture as a result of temperature changes. The fact is that it is very hot inside the structure in the winter, and the weather outside is cold. Hence the need to install a vapor barrier. The simplest solution to this problem is to lay polyethylene film under the interior trim with clapboard.
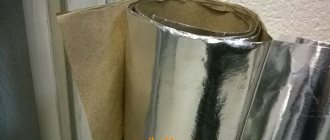
You should approach the work of covering the steam room room responsibly. In this case, you will need a high-quality vapor barrier made of glassine, aluminum foil, polyethylene film, etc.
It is not recommended to use materials such as roofing felt or roofing felt in a steam room, since under the influence of high temperatures they will begin to emit an unpleasant specific odor. Experts recommend using Ursoy roll material 50 millimeters thick for internal insulation of frame baths.
It is laid out between vertical posts, secured with nailed slats. In some places, the heat insulator can be fixed to external boards, but using special nails with a rubber washer above the head.
As a result of the work done, you should get some kind of cake for the walls of the bathhouse from the following layers:
- external lining;
- glassine;
- insulation;
- polyethylene film;
- internal lining.
The main point that should not be forgotten is the need to leave a 5 cm air gap.
Particular attention is paid to the steam room, where it is important to ensure the “thermos effect”. For this reason, it is recommended to place the heat insulator with foil inside the room. On the ceiling you need to use not only foil Ursa, but also regular insulation, laying it in a layer of 5 centimeters.
We invite you to familiarize yourself with: Water containers for a private home
As for the walls and ceiling of the steam room, it is advisable to use aspen lining, which has healing properties, for finishing. Boards, namely poplar or tongue-and-groove linden, are also suitable.
How to inexpensively cover the inside of a bathhouse - practical recommendations
A log, concrete, frame or brick bathhouse in any case requires hydro-, heat- and vapor barrier, as well as internal lining. Traditionally, wooden lining is chosen. It has an aesthetic appearance, is safe for health, and is easy to install and operate. But the modern construction market offers other solutions.
- 1 Steam room finishing
- 2 Bathroom trim
- 3 Arrangement of the rest room
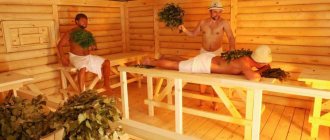
Steam room finishing
As a rule, if the budget is sufficient, the steam room is lined with solid wood - aspen, linden, oak or cedar lining. To save money, you can use pine materials, but in this case you need to check the boards for the absence of “resin pockets”.
What to use besides lining? A cheaper option is cladding with edged or unedged linden, aspen and birch boards. The tree must be prepared for installation: remove the bark, sand the surface and open it with water-based varnish or special biocides.
How to inexpensively cover the inside of a bathhouse? For a brick building, you can use planed boards; it is more affordable, does not require lengthy preparation for installation, and provides greater thermal insulation. The thickness of the material is 1.5 times greater than standard lining.
Foil, parchment, jute, cotton wool, and foamed foil polypropylene are used as thermal insulation materials. The area near the stove is tiled.
The ceiling, in addition to the lining, can be finished with tempered frosted glass. A backlight is installed in it. The result is a rather non-standard, but modern steam room.
Heat-resistant tiles are laid on the floor. Clinker can withstand high temperatures, has an anti-slip coating and is completely safe. But, if you want maximum comfort, it is better to choose wooden flooring; alder, ash, birch or poplar are quite suitable.
If the bathhouse was built from logs, the ceiling and walls inside do not require any cladding. It is enough to treat the log house with a fire-retardant, moisture-repellent and antimicrobial agent.
What material you should not choose for cladding is plastic, plywood, OSB, chipboard and any sawdust-based derivatives. Even with moisture-resistant coatings, when heated, the resin and synthetics that form the basis of the binder will begin to evaporate. And this is already potentially dangerous for the body. The same applies to pine and spruce boards; they cannot be used in the steam room.
Bathroom trim
What material is suitable for tiling a bathroom or sink - tiles or porcelain stoneware. Unlike wood, ceramics will not require constant treatment with moisture-protective and bactericidal agents.
Glass-magnesite boards are no less popular. This is a durable, moisture-resistant, non-flammable, non-toxic material that is not susceptible to the development of fungus or mold.
You can also use decorative moisture-resistant plaster, plastic panels, plasterboard and glass magnesite for walls and ceilings, followed by the application of waterproof solutions. PVC, slatted pebbles and fiberboard are also allowed. However, it is necessary to take care of complete thermal insulation of the steam room.
In addition to tiles, you can lay moisture-resistant laminate or panels based on composite plastic on the floor. But tiles will be more practical and durable. Wooden shields are placed on top of it to prevent slipping. What interior to create in the washing room in the photo below.
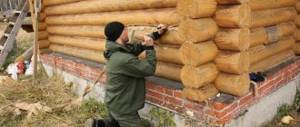
Walling
If we are building a frame bathhouse, after the foundation is prepared, we can begin building the walls. Before doing this, make sure that the wood is well dried. The type of wood used is not particularly important, with the exception of birch, since it will quickly rot. The main thing is that the wood has low thermal conductivity.
When choosing materials for external cladding, preference should be given to pine and larch, while aspen is best suited for interior finishing. After completion of construction, the outside of the building is covered with an antiseptic, for example, Texturol.
Inside, a do-it-yourself bathhouse made from boards, when finishing the walls with clapboard, is sanded and coated with furniture varnish in several layers. The wooden lining inside the steam room and washing room is treated with a special impregnation.
Pros and cons of ceilings made of OSB boards
Despite massive advertising, the attitude towards OSB on the part of developers can be called relatively wary. Despite the fact that the material has been produced and used in construction for more than two decades, including for the purpose of finishing OSB ceilings, pressed particle boards have not been able to completely displace their main competitor - plywood.
The reason for the “cool” attitude lies in the manufacturing technology of OSB panels, most often confused by two circumstances:
- Non-use of special resins and adhesive compositions in the stamping process;
- OSB boards do not have a pronounced fiber or layered structure.
Important! Essentially, these are just shavings and sawdust, pressed at high temperature and very high pressure. The new technology is much like the infamous particle board.
OSB is much better than chipboard, but of course it is not as good as plywood
This means that the structure of OSB and its characteristics may not be as stable as, for example, plywood or ordinary boards, therefore, when deciding to line the ceiling with an OSB board, it is better to know in advance what you will encounter after a couple of years of operation. All this affects the reputation of OSB panels, and many craftsmen still treat good cladding as a temporary or auxiliary solution.
Negative sides
Of the most significant disadvantages, only two can be named:
- The OSB panel does not withstand impact loads, that is, an OSB ceiling cannot be mounted on beams or nailed at the joints. Therefore, assembling a ceiling lining is always a long and tedious process of screwing in self-tapping screws;
- Weak resistance to moisture, even if you buy OSB for a completely dry and protected ceiling, it is better to worry about protection from water condensation in advance.
Those who do not believe in the susceptibility of OSB to moisture can leave a package of several sheets to winter in an unheated garage or shed. This storage method often causes edge delamination and cracks.
Important! Due to the specific structure of the pressed chips, OSB is very difficult to machine, for example, cutting tenons and grooves with a milling cutter. You can cut locks, but the quality of the surface will be incredibly low.
Therefore, if you want to finish the ceiling from OSB boards on tongue and groove, then it is better to purchase panels with already made grooves and tenons.
Positive traits
The material has few advantages, for example, high environmental safety and the absence of irritating fine dust that appears during cutting, like chipboard. The panels are much more pleasant to work with than phenolic plywood; in general, it is a simple, inexpensive and comfortable material, specifically for residential premises.
It is not without reason that OSB is used for wall cladding and ceiling lining in newfangled houses made from SIP panels.
Construction of the truss structure
Typically, boards with a section of 15x5 centimeters are used for floor beams and rafters in frame baths. They are placed on the edge and fastened together. As a result, a distance of 10x12 centimeters is obtained between the rafters. In a vertical position they are fixed with “kerchiefs”, and on top they are combined with a ridge beam of a similar section.
The beams extend outward approximately 40 centimeters. The sheathing is made from boards 25 cm thick, it is laid in the direction from the ridge.
To fasten the rafter forms, special metal plates are used. It is much easier to assemble such a structure on the ground next to the building, and then lift it up and install it there ready-made.
Of the materials for roofing, the best choice would be soft tiles (if a light bathhouse is being built on a conditional foundation) and metal tiles (if a large building is being built). When it is not planned to build an attic, then external roof insulation is required.
How to finish the slab indoors?
The interior decoration of wooden country houses as in the photo can be completely different in cost and design. Various materials are used to finish surfaces made of OSB sheets. Let's consider them further.
Can. Moreover, for this it is not necessary to use a metal profile, but simply screw the material to the base with self-tapping screws.
The main thing here is that the level of humidity in the room is not high, since otherwise this can lead to deformation of the OSB and, consequently, the plasterboard sheathing itself. Self-tapping screws are screwed in around the perimeter and in the center of the gypsum board in increments of 10-15 cm.
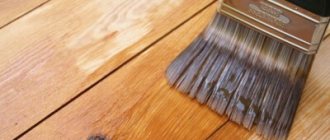
Varnish increases the moisture resistance of OSB boards. This finishing method is good for use in damp rooms. The boards can be painted with any varnish intended for natural wood. The surface is cleaned of dirt, degreased, sanded and treated with a primer. Varnished OSB has a smooth surface, but retains its texture.
Acrylic paint is also a good option for finishing OSB. It rolls well over the surface with a roller and forms a durable and “breathable” coating.
To get the best effect, it is advisable to paint in two layers.
Putty materials do not adhere well to wood. Therefore, it is best to use compounds that have maximum adhesion to wooden surfaces. These can be dry mixtures “Rodband” or “Goldband”, containing polymer additives and most suitable for working with wood. Vitonit KR can be used as a finishing putty.
Before puttying, OSB is primed with a special compound, to which glue, interlining and a little putty mixture are added. If this measure is neglected, the base impregnation may bleed onto the finished surface, causing the finish to become stained.
For plastering OSB, it is best to use a special mixture. For example, Knauf Sevener. The plaster finishing technology itself includes the following steps:
- The joints between the slabs are puttied and covered with sickle tape.
- The surface is treated with a primer (you can take Knauf Tifengrund).
- Apply the first layer of plaster and embed the reinforcing mesh into it.
- A covering and leveling layer is applied on top.
If the slabs are smooth (polished), wallpaper can be glued directly onto them. Otherwise, you will have to plaster and putty the surface, doing this using the technology described above.
Fiberglass wallpaper is glued to special compounds. In this case, the dry mixture “Methylane Fiberglass Premium” and the granular composition “Methylane Granulate Premium” are suitable.
Exterior wall decoration
As practice has shown, the construction of frame baths is best done from OSB boards. The fact is that they are multi-layered and do not move or warp, as happens with natural wood. But a bathhouse made of OSB or other materials needs external finishing. One option is plastering or painting.
The modern construction market offers a huge selection of finishing materials, and therefore it does not matter how simple the design of the bathhouse is from the outside, since it can be given an expensive appearance.
The most popular and in demand of them now are:
- Lining. This decorative finishing material is the most accessible and easy to install for external upholstery of frame baths. Such buildings look very solid. On the external wall, the lining is placed horizontally after waterproofing has been made from glassine, the sheets of which are fixed overlapping and the edges are taped. If the work is done efficiently, unnecessary moisture will not be able to penetrate inside the bathhouse.
- Thermal panels. Often the construction of a frame building requires wall insulation, which can be done with their help. Thermal panels have a three-layer structure. It contains thermal insulation material (mineral wool or polystyrene) between two polyvinyl chloride layers. The surface of thermal panels, as a rule, looks like masonry and is sprinkled with compressed stone chips on top. The panels have mutual grooves, and after they are laid, a monolithic pattern is obtained, reminiscent of brick or stone walls. The finishing of the façade of the bathhouse is carried out using ordinary self-tapping screws - they will fix the material to the profiles.
- Facing brick. Brickwork fits perfectly into the landscape of any garden or summer cottage on which a frame bathhouse is being built. An even row always looks beautiful on a bathhouse building. The cost of facing a frame structure with brick will be much cheaper than building an entire bathhouse from it. In addition, additional insulation can be laid between the brick trim and wooden walls.
- Vinyl siding. This is the most popular modern cladding material used for cladding frame bath buildings. Siding has an affordable price and is easy to install. In addition, the market offers a wide selection of textures, colors and thicknesses of products.
- Block house. A frame bathhouse, the façade of which is lined with this latest material, looks like a log structure. It is almost impossible to distinguish such a building from a real log house.
We invite you to familiarize yourself with: Do-it-yourself aerated concrete bathhouse
Decorative design of the pediment
What is the best way to cover the gable of a bathhouse? The answer to this question depends on what material was used to manufacture it and decorate the facade of the building.
- The wooden pediment is sheathed with any material with preliminary waterproofing of the surface.
- Concrete and brick pediments have no restrictions; the only requirement is leveling the surface and installing sheathing under the cladding.
The pediment cladding is made with the following materials:
- professional sheet;
- siding;
- bitumen shingles;
- block house;
- stucco.
The finishing material is attached to the pediment on a prepared surface, on a wooden sheathing or aluminum posts.
To decide what material to cover the facade of a bathhouse with, it is important to take into account not only your financial and technical capabilities, but also the design features of the structure. At the same time, all the work on installing the cladding can be done independently, the main thing is to follow the basic rules and recommendations.
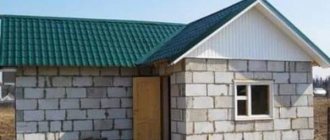
A bathhouse made of rounded logs or laminated veneer lumber looks attractive and does not require additional finishing of the facade. But what if the construction was framed or made of cinder blocks? It is necessary to finish the bath and give it an aesthetic appearance. There are a lot of finishing materials on the market, but making a choice on your own can be difficult. How to cover the outside of a bathhouse, what materials are suitable, their features, pros and cons, we will consider together with our readers.
Do-it-yourself panel bathhouse
The bathhouse has become a desirable attribute for residents of cottages and dachas. A simple wooden structure gives people health and unique sensations. For those who cannot afford to build a bathhouse from logs, there is an alternative option - a frame-panel bathhouse.
This design is a frame made of wooden beams. sewn with insulated shields. This type of construction is different:
- low cost of materials;
- short period of construction of a bathhouse;
- rapid heating and low thermal conductivity of the material;
- minimal shrinkage;
- ease of doing the job.
The disadvantage of the design is the joints between the panels, which must be carefully sealed using mineral insulation and vapor barrier.
A small do-it-yourself panel bathhouse includes three rooms: a washing room, a steam room and a relaxation room. This is an optional arrangement; the number of rooms can be increased or decreased as desired. You can make a room design yourself or use a ready-made one. On the drawing it is necessary to note the location of windows, doors, stoves, communications.
Columnar foundation from the inside
On the site chosen for the construction of a bathhouse, markings for the foundation are carried out using pegs and twine. For light frame construction, a pile base made of asbestos-cement pipes is most often used. These supports will last a long time, they are durable and do not collapse under the influence of moisture. The work does not require special skills or the use of special equipment.
The underground part of the pillars is buried below the depth to which the soil freezes in winter in your region. Their diameter is chosen taking into account the weight of the planned building; for a bathhouse, pillars of 20 cm will be required. Asbestos-cement piles are placed in each corner of the building and at the intersections of walls. All places for pillars are marked with pegs.
Pits for pipes are dug from 1 to 1.5 m, a sand cushion of 20 cm is placed at the bottom. The pillars are leveled, and if there is groundwater, they are coated with mastic for waterproofing. The base of the pipes is filled with concrete. The outer side is wrapped with roofing felt and covered with sand. 2-3 iron rods are placed inside the pillars and concrete is poured.
Base trim
A layer of roofing material must be laid on the installed pillars as waterproofing. Next, the base piping is installed. To do this, take a 120x120 mm beam and soak it with an antiseptic. It is better to use softwood such as pine or cedar. The beam is laid around the entire perimeter and fastened using the “half-log” method - half of one beam is sawn off from the top, and from the second from the bottom. When connected, a flat plane is formed. The piping, checked using a level, is attached to the pipes with anchors.
Tags: bathhouse, inside, possible, sheathing
« Previous entry
Is it possible to build a bathhouse from OSB-3 boards? What are the nuances?
OSB is oriented strand board.
OSB-3 boards are used in the construction of partitions, as well as load-bearing walls; they can be used in rooms with high humidity.
That is, yes, it is possible to build a bathhouse from OSB-3 using frame technology.
You can buy these right away
Such a bathhouse is quickly erected, the structure is light, you can use something like this for such a bathhouse
Cheapness is questionable, because high-quality insulation of such a bathhouse requires significant expenses, which reduces that very cheapness to zero.
The structure is less durable.
In my personal opinion, buildings erected using frame technology can hardly be called capital buildings.
Well, plus, in the production of OSB boards, phenol-formaldehyde resins are used, which in the case of a bathhouse is simply a critical minus.
And the nuances are as follows:
First, a bathhouse design is made.
Next, markings are made on the site.
Then the foundation is made, as an option, asbestos-cement pipes are used (holes are drilled for their installation with a drill), then the cavity of the pipes is filled with concrete.
The entire forest is pre-impregnated with antiseptic and fire-retardant impregnations (timber, boards).
Next, the lower frame is made from the prepared timber, the floor joists are attached, and there is waterproofing between the frame and the joists.
Next is the installation of corner posts, as well as the installation of intermediate posts.
Top trim (installation).
The frame is sheathed with OSB-3 boards, a rafter system is manufactured, and roofing material is laid.
Then they begin the interior decoration of the bathhouse.
The bathhouse is built according to the project, this is the main point, but like any structure, construction begins with the foundation.