Types of chimney pipes for baths
The chimney for a bathhouse is selected depending on the material of the stove - steel and sandwich structures are installed with metal heaters, sometimes old asbestos-cement ones are found. A sauna heater is usually small; neither brick nor ceramic chimneys are used in conjunction with steel stoves. An exception is if an old house with a brick chimney in the center is converted into a bathhouse.
It is allowed to install chimneys of any type on brick stoves: brick, sandwich, ceramic, steel, asbestos-cement. Brick structures are more bulky; brick or ceramic pipes are more often used for them. But you can also install insulated steel pipes or sandwich structures on them. A rather serious drawback of brick and ceramic pipes is that they require a stationary foundation.
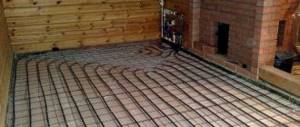
For a bathhouse, it is practical to install steel heaters - they heat up faster, transfer heat faster to the stones, the water in the heating tank, and the bathhouse itself. The sauna is used infrequently and not for a very long time, so it is metal structures that optimally satisfy the requirement of quickly heating the heater and the sauna room.
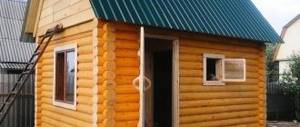
Metal pipes in a bathhouse are easier to bring up through the ceiling and roof, and they can also be used for additional heating. A bathhouse usually does not require long-term heating; there is no need to install modern long-burning stoves. After the bath procedures, the bathhouse needs to be dried - the bathhouse is heated for some time with hot stones (they have a very high heat capacity) and a hot tank of water.
So, the types of chimneys for a bathhouse:
- Indigenous with their own separate foundation, usually brick or ceramic.
- Mounted. The chimney is mounted vertically onto the outlet pipe. Above structures are usually hung on the wall.
- Built into load-bearing walls. A typical example is the installation of a chimney in the wall of old small houses and summer kitchens with stove heating.
- Hanging. Lightweight sandwich pipes are usually hung from the walls of the house.
- Now they have begun to use coaxial chimneys - “schidel”, or “pipe in pipe”. The exhaust gases heat the air entering the fireplace or boiler. A typical example is horizontal pipes for gas boilers. Vertical coaxial structures are used for large heating units; they are usually not used in bathhouses. In most cases, they try to transfer the heat from the exhaust gases to water in a heating tank or to stones in a heater.
Chimneys for baths are made of the following materials (the materials determine their design):
- Brick. They are rarely used; sometimes they use ready-made built-in chimneys from dismantled stoves. The brick box requires installation of a stainless steel box. Old brick hogs in the attic and above the roof surface need to be insulated.
- Ceramic. A foundation is needed; they are rarely used for heaters in bathhouses.
- Asbestos-cement. Installing new asbestos-cement pipes is undesirable, but sometimes old chimneys made of asbestos-cement pipes are found. If possible, they should be replaced with a modern sandwich.
- Steel. Sometimes they install single-layer pipes with homemade insulation, but this is already the last century. It is better to overpay and install high-quality three-layer sandwich chimneys.
Why is chimney insulation necessary?
The chimney is mainly protected from two main negative factors that affect it:
- High temperature in the sauna.
- Moisture ingress through poorly made joints in the roof.
To eliminate negative factors, you can wrap the chimney pipe with a heat insulator. This will help prevent heating of the metal structure, as well as eliminate the appearance of condensation, which also has a detrimental effect on iron elements.
Chimney insulation allows you to:
- Make it safe to cross where the pipe comes into contact with the roof or wall.
- Avoid heat loss.
- Extend the service life of metal structures.
- Use all types of finishing materials to create your own unique style and cozy atmosphere in the bathhouse.
Metal hood in a sauna
In principle, carrying out work on insulating a chimney structure is not particularly difficult, the main thing is to know how to insulate a metal stove chimney pipe in a bathhouse. To choose the right type of insulator that is suitable for you, you need to understand their technical characteristics.
Types of ceiling penetrations
The chimney through the ceiling and roof of the bathhouse passes through protected openings. One of the main conditions for the safety of people in a heated building is heating the roof, ceiling and walls structures near the pipe to a temperature not exceeding 50 °C. Fire safety requirements for the installation of chimneys are set out in SP 7.13130.2013. Heating, ventilation and air conditioning. Fire safety requirements.
To pass the pipe from the bathhouse through the ceiling or roof structure, a through-ceiling assembly is installed - a prefabricated box with flanges. Insulation is placed between the flanges. The box insulates the surrounding structures from the heated surface of the pipe. You can make it yourself, it's not very difficult.
For the speed and convenience of passing pipes through the roof and ceiling, the industry produces ready-made passage units. They are round and square. As a rule, these units are made of stainless steel with a heat insulator, sometimes mineralite - cement boards with fiber fiber (mineral, cellulose). Previously, asbestos-cement slabs (flat slate) were used, but asbestos is carcinogenic, and their use indoors is prohibited by sanitary standards. This is still not a roof or a fence, the asbestos dust from which is washed off by rain and carried away by the wind. Sometimes there are pass-through units made of galvanized steel, but in humid bath air they will quickly rust, so they are used only as a last resort.
Mineral wool is mainly used as insulation (thermal insulator), but expanded clay, clay, and a mixture of clay and expanded clay are allowed. Mineral wool has a very significant drawback - when wet, it becomes thermally conductive (due to water), and after drying it does not completely restore its thermal insulation properties.
If the flange or body of the passage unit is made of steel, and the ceiling structures include flammable elements (wood, foam), then a layer of mineral wool must be laid between the structures and the steel elements. Otherwise, the structures may char or even burn.
Advantages of external installation of chimneys
The external method of wiring the outlet pipe has the following obvious advantages:
- Removing the main part of the drainage channel from the house allows you to increase the usable living space of the room.
- The installation of a combustion product exhaust system can be carried out upon completion of the main construction activities.
- External installation of a chimney will not require you to spend a lot of time and effort.
Easily removable disadvantages of this approach include:
- The need for mandatory insulation of chimney pipes.
- Possibility of significant heat loss with low quality thermal insulation.
- The difficulty of combining the design of the chimney with the architectural style of the building.
Despite all these difficulties, when deciding how to make a chimney through a wall, preference is usually given to its external placement (full or partial).
Rules for installing a chimney pipe
The health and life of your family and friends depend on the fire safety of chimneys and the complete removal of flue gases - carbon dioxide, carbon monoxide, toxic substances, smoke, soot. Therefore, when installing chimneys, you must strictly follow the rules for their installation. These rules are defined by regulatory documentation - SP 7.13130.2013.
The main rules when installing chimneys for a bathhouse:
- Maintain distances to the nearest structures - walls, ceiling structures, roof.
- Sufficient but not excessively high chimney height.
- To determine the cross-section of the internal chimney channel and its height, calculations are necessary.
- Durable fastening to the walls and ceilings of the bathhouse.
- Reliable sealing, good insulation during installation.
- Protecting hot structures from possible contact and burns: this is especially important for a bathhouse with its small size.
- Assembly of modules for condensate. Sandwich pipe elements are appearing, designed for simultaneous assembly of smoke and condensate.
The distance from pipes to combustible structures - wooden rafters, lathing, bitumen materials - must be at least 130 mm, from uninsulated ceramic pipes - 250 mm. The passage unit must be at least 70 mm greater than the thickness of the ceiling structure. The steel structures of the passage unit must be separated from the ceiling structures by non-combustible materials - slabs of mineral wool, mineralite.
Standards for clearances from pipes to walls
SP 7.13130.2013 determines the minimum size of setbacks - the distances between the outer surface of the chimney and the walls. If structures are made of flammable materials, then the offset should be from 260 to 500 mm. If non-combustible or combustible materials are covered with plaster, reinforced with metal mesh, heat-insulating non-combustible materials - from 200 to 380 mm.
The amount of indentation depends on the thermal insulation of the chimney (thickness of the brick wall or insulating layer). Before installing a stove with a pipe for a bath, you need a drawing indicating the exact dimensions of the pipe and the distances to the structures.
Basic methods of insulation
The metal chimney pipe is insulated using various methods.
Method of insulating a steel chimney
The chimney is insulated using a special solution. The composition is prepared from a dry mixture and water. The solution is applied with a spatula to the surface, spreading over the entire area. Then a fiberglass reinforcing frame is attached to it, on which plaster is applied.
Gas boiler flue insulation
Insulation for gas boiler pipes must have a number of enhanced thermal insulation and heat-resistant qualities.
The sandwich chimney consists of a layer of mineral wool and two metal pipes. The upper element, with a larger diameter, is the main sleeve, the smaller one is part of the steam exhaust channel. How to insulate such a chimney pipe with your own hands? Recommendations must be followed:
- Holes are made in the roof and ceilings with a diameter 25 cm larger than the chimney duct.
- At this stage, it is necessary to insulate the chimney pipe with a layer of basalt wool. The thickness of the winding must be at least 5 cm.
- The insulation around the pipe is fixed with steel wire.
- A larger casing is placed on top.
Upon completion of the work, the chimney is connected to the heating source and the surrounding riser is filled with expanded clay, clay or asbestos.
Smoke exhausts for baths
You can insulate a chimney in a steam room using the following options:
- Teploizol is a material made of polyethylene foam hidden between sheets of foil. Rolls of insulation with a thickness of 2–10 mm are offered on the market. The foil surface reduces overheating of the pipe. The insulation is wrapped around the chimney, secured with wire or metallized tape;
- filgoizol consists of two balls: foil, which saves over 90% of heat in the room and a heat insulator. The material is used to cover the walls and ceilings of the sauna, providing the effect of a thermos;
- sandwich pipe consisting of several sections. This option is suitable for saunas and baths with an iron stove.
Insulating a metal pipe means ensuring optimal functioning of the heating system. Correct installation of chimney insulation with your own hands allows you to increase the service life of the structure and the heat generator, and also prevents fire.
The article will discuss how and with what to insulate a chimney pipe. Several practical methods are presented.
Insulation of the chimney pipe is required to avoid leaks and overheating. Simply put, it allows you to increase the service life of the structure. Experts recommend performing complex work, which includes hydro and fire insulation.
How to make a pipe passage through the ceiling and roof: a step-by-step guide from the master
The most common type of chimney for a bathhouse is made from sandwich pipes. It is his installation that I will consider. The sandwich is very easy to install; elements for pipes of any configuration are available for sale. Stainless steel chimneys last for several decades; the calculated thickness of the insulation ensures good draft.
Step 1
Initial installation stage:
- connection to the outlet pipe of the tee;
- connection of a horizontal or vertical section without insulation, transition from an uninsulated pipe section to an insulated one;
- installation from below of an element with revision and a container for condensate drainage.
An area without insulation must be installed - the temperature at the point where the flue gases exit the furnace is very high, any insulation will simply bake and damage the pipe. Often in this place it is necessary to install a heater, coil or container for heating water - to select and rationally use the heat of the exhaust gases. The wall of the bathhouse made of flammable materials near the stove and chimney is covered with non-combustible materials - stone, tiles, mineralite.
The pipe is attached to the wall with special clamps or brackets, the lower part of the pipe is also attached to the wall (you can place it on a special stand). The distance between the clamps should not exceed 1 m, it is advisable to make it smaller - 0.5–0.7 m.
The elements are simply inserted into each other, the connection point is fixed with a crimp clamp. Before connecting two pipes, a special sealant is applied to the joint.
Step 2
Holes are cut or punched in the ceiling of the bathhouse using a hammer drill or grinder. The lower flange of the passage unit is attached, a pipe (or sandwich structure) is laid, insulation is laid, the upper flange of the passage unit is installed on the ceiling and attached to the ceiling structures (occasionally to a bracket). The stage ends with the installation of the pipe in the attic.
Step 3
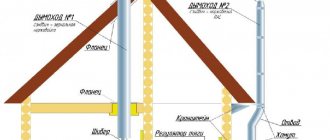
A hole in the roof of the bathhouse is cut in the same way as in the ceiling. It is extremely undesirable to cut the rafters when leading the pipe through the roof, therefore, when designing the installation site of the heater and the passage of the chimney, this circumstance should be taken into account: a curved chimney and set to the side can worsen the draft. In any case, before installing a chimney, it is necessary to draw a diagram of the placement of the stove and pipes in the bathhouse, taking into account the optimal passage of all ceiling and roof structures.
A roof sheet is attached to the underside of the roof. A roof section is fixed on top - an unloading platform with a cone. A chimney is passed through the groove, and the groove inside is filled with insulation. The joint between the cutting and the pipe is covered with a cone-shaped apron. Silicone sealant is used to seal all joints - it withstands the temperature on the surface of the pipe.
The top of the cut is covered with a galvanized sheet or roofing material, and roofing material is placed under the bottom.
Step 4
Lastly, the master flush is installed - an elastic device made of high-quality durable EDPM rubber or silicone. Silicone is less resistant to ultraviolet radiation, so it is advisable to cover the master flush with a steel cap. The master flash is secured with self-tapping screws, they are screwed into an aluminum strip around the perimeter of the flash. All joints are sealed. Usually the roof under the master flush is covered with galvanized steel so that it fits tightly and seals the roof groove well.
The installation sequence of more complex roof trim for all needs is shown in the video.
How to build a ceiling in a bathhouse, sequence of work
Of all the mentioned methods of arranging a ceiling for a bathhouse, we will dwell in more detail on a false ceiling, since this is the option chosen by the overwhelming number of homemade ones.
The work includes the following construction stages׃
Installation of load-bearing beams
The beams are installed along the shortest span of the “box” of the structure with an interval of 0.5–1 m. Their height and width depend on two parameters: loads (permanent + temporary) and the distance between the supporting walls. For selection, special calculation tables by I. Stoyanov are used.
For example:
Span width – 4.5 meters
Load – 250 kg per linear meter
Result: beams with a cross section of 10×20 cm are required
After installing all the beams, a hole for the chimney is formed in the resulting “ladder” - perpendicular jumpers are inserted in the selected place, cutting them into the beams (at 1/2 thickness) and additionally securing them with nails.
Laying vapor barrier
The vapor barrier of the bathhouse ceiling is attached directly to the beams using a stapler, while it is necessary to leave an overlap of 15-20 cm on the side walls. For these purposes, use ordinary film or special multilayer membranes, reinforced with foil and a reinforcing “mesh” (it is recommended to strengthen the thermal insulation above the steam room) . The joining seams are covered with an overlap (15-20 cm) and glued with special tape.
Fitting interior ceiling boards
The boards are attached to the beams with nails (2 pieces for each support), the length of which is twice their thickness. The starting crossbar is adjusted to fit the wall, completely cutting off the mounting groove on one side, and then the sequential laying of the wooden paneling begins, using a mallet to help place the tenon in the mounting hole of the adjacent element.
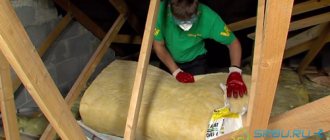
Installation of heat insulator
The selected insulation for the bathhouse ceiling is laid directly on top of the vapor barrier film. Please note that cotton insulators cannot be stored outside without film, as they quickly absorb moisture. We adjust the mineral or glass wool mats so that they fit tightly in the “sockets”, without side gaps. It is better to make a pattern with a reserve and slightly compress the material rather than letting it “walk”.
Laying waterproofing
The waterproofing material is laid in the same way as a vapor barrier, making sure to include overlaps on the side walls. There must be at least a minimum ventilation gap between the cotton insulation and the film.
Arrangement of attic covering
For the floor of the attic, edged boards are used, laying them similarly to the ceiling covering inside the bathhouse.
How to choose thermal insulation material for a chimney
The best option is sandwich pipes. Their high-quality and carefully calculated insulation is covered on the outside with a reliable steel casing to protect against wetness and wind. In all other cases, insulation for chimneys in any case comes down to heat-resistant and non-rotting mineral wool, or even better - mineral wool shells. No plastic insulation can withstand the temperature on the surface of a single-layer steel chimney.
The top of the mineral wool must be covered as tightly as possible with a casing made of galvanized or stainless steel, and the joints must be sealed to prevent precipitation and atmospheric moisture from entering. Mineral wool picks up moisture and loses its thermal insulation properties, and if it freezes it can damage the chimney.
For external insulation of brick chimneys, you can use polystyrene foam or polyurethane foam in the form of sheets or by applying foamed liquid hardening compounds. The temperature on the surface of brickwork is not very high, and plastics can withstand it. But plastics must be protected from ultraviolet radiation and mechanical damage (snow, hail). Pipe cleaning methods
To maintain the functionality of the chimney hog in working condition, it is necessary to clean the hog of soot and tar deposits twice a year (read: twice during the heating season). If you use resinous firewood, such as pine, then you will have to clean the chimney more often.
Methods for cleaning chimney walls from soot are divided into mechanical and chemical. Mechanical - using all kinds of brushes or pipe cleaners. Chemical - using special logs, copper chloride, table salt, PHC (anti-carbon chemical composition) and even potato peelings.
Some chemicals contribute to the shedding of soot from the walls, some - the burning of soot on the walls. In this case, the temperature rises significantly and the chimney may be damaged. Therefore, the mechanical cleaning method is preferable.
Insulation of asbestos cement pipes
To complete the entire cycle of work, you will need to perform several operations:
- we clean off the remaining mortar, dirt, paint from the surfaces; we assemble a ready-made steel protective device (casing), which consists of several parts and is put on the pipeline as a simple clamp of 2 parts; we put on the first part and fill the internal space with a layer of thermal insulation; Example of thermal insulation we install the following sections of the chimney , the work is carried out according to a similar scheme; at a certain distance, the pipes are fixed to the wall with self-tapping screws and dowels; after accessing the roof and before installing the protective canopy, it is necessary to close the internal space between the steel lining and the asbestos-cement pipe.
Why is condensation in a chimney dangerous?
It is known that when one cubic meter of gas is burned, about 2 liters of water are produced in the form of steam. With good draft, it is released into the environment without harm to the design of the smoke exhaust system. The amount of moisture in smoke when burning solid fuel directly depends on its humidity.
Moisture itself is destructive to chimneys, but the resulting condensate also contains acidic compounds. If the problem is not addressed in time, it can lead to serious damage. Moisture is especially dangerous for brick structures. Due to the aggressive environment, condensation can even destroy a stainless pipe.
To avoid having to spend money later on expensive repairs and construction of a new chimney, you will need to protect the chimney from condensation.
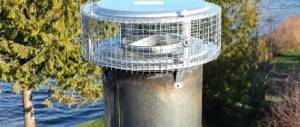
Pros and cons of a house chimney umbrella
The main advantages of the hood are:
- Reduces the likelihood of the draft overturning by preventing wind flow from the street.
- Protection from debris and precipitation.
- The net will prevent birds from building nests.
- Increasing the service life of a brick pipe.
- Appearance.
Attention ! You should not believe the information disseminated in advertising of such devices. The cap cannot increase the efficiency of the boiler or increase the draft in the pipe.
Formed icicles on the canopies Source obustroeno.com
See also: Catalog of companies that specialize in the design, installation and repair of roofs
But there are some reasons that do not allow caps to be used everywhere. The main disadvantage is the creation of aerodynamic drag. The fungus located directly above the pipe will prevent gases from escaping. Subsequently, this will lead to a decrease in traction.
The second disadvantage of the design is the possibility of the formation of icicles. Due to the low temperature of the gases, up to 120 degrees Celsius, water vapor, upon reaching the hood, quickly cools and forms ice, which prevents carbon monoxide from escaping through the pipe from the house.
DIY visor
Before you make a fungus on a tin pipe with your own hands, you need to create a sketch depicting the future structure. In this case, it is necessary to take into account the following nuances:
- slope angle from 30 to 45 degrees;
- the edges should protrude by 50 mm;
- the height from the chimney to the umbrella is at least 100 mm.
Necessary parameters for making a hood Source izhartezia.ru
The easiest way is to create a round mushroom suitable for ventilation systems. This will require standard tools: drill, metal scissors, hammer, rivets. How to make an umbrella for a pipe with your own hands:
- Take a wooden plank.
- Screw 2 screws into it at a distance of more than 15 mm relative to the radius of the pipe.
- Using the created device, draw a circle on a metal sheet.
- Cut out the prepared circle.
- Draw a sector with an arc length of about 120 mm.
- Cut out the wedge and secure the edges of the workpiece in a vice.
- Prepare 3 holes along the edge of the seam to connect the part using rivets or M4 screws with nuts.
The leg for the manufactured umbrella can be a thin sheet, bent 3 or 4 times. For a novice specialist, this will take a little more than half an hour. Experienced professionals will be able to complete the task in 10-15 minutes.
Ready-made version of the manufactured visor Source stb26.ru
What are fungi for ventilation pipes made from?
Before making a canopy for the pipe, you need to decide on the material. Most often, non-ferrous and ferrous metal is used to make fungi; the thickness does not matter. The most widely used products are products made from galvanized sheet metal.
The most common material is galvanized sheet Source by.prom.st
The finished product is painted in color to improve its appearance, since black steel has an unattractive appearance. To improve the appearance, the product can be additionally decorated with forged elements. But caps made of black steel will have a significant disadvantage - weight, which is why the design is not suitable for all roofs.
If weight is an important parameter, then copper and alloy steel mushrooms should be considered. The disadvantage of structures made from these materials is their high cost. Therefore, the second criterion when choosing material for a canopy is the financial capabilities of the building owner. To save money, canopies are often built with their own hands, using high-quality materials.
Where does condensation in the chimney come from?
The formation of moisture in smoke exhaust passages or pipes occurs as a result of a sharp temperature change.
When fuel burns, high temperature smoke is released. As it rises, it cools. If the temperature above is low and the smoke cools very quickly, condensation will form. Droplets of moisture settle on the inner walls.
The appearance of moisture also depends on the moisture content of the fuel used. The higher the percentage of humidity, the more condensation will settle on the walls, since the moisture contained in the fuel enters the smoke during its combustion. When using dry fuel, the likelihood of streaks appearing on brick walls is significantly reduced. Sometimes the appearance of moisture can be caused by a clogged passage. Although protection of the chimney from condensation is sometimes required when using low-temperature boilers that run on natural gas.