A place to relax or just a changing room
There is no bathhouse where there would not be a room in which people will undress and spend time after the steam room. The dressing room, which is exactly what this room is called, is an integral part of the bath house. Many people prefer to treat it with disdain, but in fact this room is much more important than it might seem at first glance.
The dressing room has long ceased to be a simple locker room, although it is here that it is customary to leave your clothes to go to the steam room. If the bathhouse does not have a second floor, then a room for communication over a glass of kvass is made in the dressing room. That is why it is simply impossible to overestimate the importance of this room. And if so, then we will finish it accordingly.
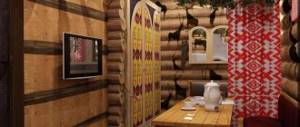
The interior can be modest and stylish at the same time
Like many jobs in a bathhouse, it is quite possible to do a dressing room with your own hands. I will show this with my own example. But first, let's look at what should be in this useful room. As a rule, there is always a window in the dressing room to allow natural light into the room. It can also be used to ventilate the dressing area. But to this source of light and fresh air it is worth adding additional ventilation. It can be brought out through the wall, although many are considering the option of using the roof.
Purpose of a classic dressing room
If we consider the simplest and most compact bathhouse, then even it necessarily has two main rooms. The first of them is, of course, the steam room. The second is the waiting room. And if no one doubts the purpose of the first room, then in the case of the second there are quite often divergent opinions.
Some argue that the dressing room is needed solely to undress comfortably and prepare for bathing procedures. And they are right. Others believe that the dressing room is both a locker room and a rest room. And these are also right. Some even think that the dressing room may be intended for storing equipment and arranging the furnace room.
Naturally, all these opinions have the right to life. In practice, a dressing room can have quite rich functionality. Especially if there are no other rooms in the bathhouse besides it and the steam room. And yet, the dressing room is almost always physically separated from areas such as a shower, toilet, or room with a swimming pool.
Floors - you can’t live without them
You should start equipping the dressing room by installing high-quality and reliable floors. This element of the bathhouse is very important, and especially for this room. The floors must be insulated, since the dressing room should always be dry, warm and cozy. This is the rest room.
Related article: Pencil doors: dimensions, installation and care instructions
Ceramic tile flooring - a practical solution for a dressing room
I will use mineral wool as insulation, as it retains heat well and does not allow cold air flows to penetrate inside the dressing room. In addition, this material is not flammable, which is important for the wooden structure that the floor has. In addition, this insulation is quite easy to install with your own hands.
I will use oak as the flooring in the dressing room, although you can also use larch. Hardwood is more resistant to abrasion, so for the most walk-through room, oak floors will be very useful. Do not forget that oak is resistant to moisture, which causes rot and fungal attack. And since we will leave the steam room for the dressing room with wet feet, this factor is also significant.
Classic of the genre - wooden floor in the dressing room
The floor in the dressing room should be multi-layered. It will look like this:
- Joists or transfers on which the subfloor is reinforced underneath;
- A vapor barrier film that will release accumulating water molecules and prevent mineral wool from getting wet;
- A layer of insulation, the thickness of which is determined depending on the climatic conditions of the area;
- A waterproofing layer, for which you can use a special film, but quite often a simple roofing material is used;
- The flooring is made of oak boards, which are the finishing element of this whole “pie”.
It is important to remember that there should be no fasteners protruding from the boards on the surface of the finishing layer. Self-tapping screws or nails must be installed in a countersunk position. The most rational solution is to fasten the boards into a groove, which will allow you to hide these metal floor parts forever.
The boards should also not have any flaws or knots that could damage your feet. After installation, I simply sanded them properly to give them the proper look.
Related article: The best way to fill a heated floor
Types of wood for dressing the dressing room
- Wood has been and remains a good option for covering a dressing room. This material has a main advantage over other types of finishing materials - environmental friendliness. Naturalness, together with the highest decorative properties and performance data, bring wood products to the first positions.
- The manufacture of lining is made from different species. Each tree has inimitable qualities. Based on this, when choosing, rely on their properties.
Oak
Performance properties
- This type of wood meets all the requirements of a dressing room. Oak panels are first of all strong, as they should be, and durable. The inimitable natural characteristics allow the product to remain in its own constant form for many decades. This property of water resistance allows the use of oak boards in rooms where there is high humidity and other difficult operating conditions.
Utility
- Oak releases the necessary phytoncides, which have disinfecting properties. The smell of wood also lowers blood pressure and has a beneficial effect on the blood vessels of the brain.
Price
- 1,500-2 zero rub./m2.
Abash
Performance properties
- This hardwood, originally from Africa, is distinguished by its low heat capacity, hardness and low specific gravity. Abashi products do not deform and retain their beautiful appearance throughout their entire service life. The wood has a pale cream color, sometimes with a yellow color, and there are no knots in its structure. Abash mixes amazingly with other tree species. This material with cedar panels will create a unique color contrast.
Attention! The Asian abash is offered for sale, which has lower features.
Utility
- Absent.
Price
- 1,500-1 eight hundred rubles/m2.
Canadian cedar
Performance properties
- Canadian cedar is often used to furnish baths and saunas. Wood is resistant to high humidity, temperature changes, and fire. The strong structure guarantees excellent properties for many years. As for the aesthetic component, here the cedar panels are at their best - a wide selection of colors (from golden beige to reddish brown) provide the opportunity to decorate the dressing room to your taste.
Utility
- When heated, wood releases essential oils that have an antibacterial effect. Volatile substances will help get rid of many respiratory diseases and improve immunity.
Price
- 1,900-3 zero rub./m2.
Linden
Performance properties
- Linden products, in addition to the pleasant honey color, have low density and amazingly absorb water and sounds. Unlike coniferous trees, it does not release resin at high temperatures, and therefore there is no possibility of getting burns. Linden boards can be easily machined and sanded. Another highlight of this material is the extraordinary durability of its natural texture and color, even under extreme operating conditions.
Utility
- Linden exudes a subtle pleasant odor with sedative qualities. Wood can raise a person’s current tone, give him vigor, and free him from loss of strength and helplessness.
Price
- 300-1 zero rub./m2.
Aspen
Performance properties
- This lining is impervious to the action of water and has a homogeneous, soft, but strong wood species. Aspen products cannot be deformed; they are simply planed, sanded, and polished. Many say that over time it loses its catchy green color. But a special protective agent, for example, decorative wax, will help maintain the original appearance.
Utility
- It is believed that this tree draws out negativity and diseases from a person. The unobtrusive pleasant smell that aspen exudes eliminates anxiety, strengthening the nervous system.
Price
- 400-700 rub./m2.
Larch
Performance properties
- Larch is particularly durable; in this parameter it is inferior to pine and oak, as a result of which its processing is quite difficult. Coniferous wood stoically withstands the most difficult operating conditions (humidity, temperature differences). Thanks to its natural properties, larch products can last for decades. A pleasant prize is a beautiful appearance with a generous honey color.
Utility
- Natural substances released during the entire period of work are a good preventive measure for colds. The necessary characteristics also have an impact on people suffering from high blood pressure.
Price
- 300-1 zero rub./m2.
Pine
Performance properties
- Pine is perfect for lining a dressing room. This warm material with dense wood species that is resistant to decay and mold fungi will create a comfortable interior. Deformation and cracking are not typical for pine products. Since time immemorial, household utensils have been made from it, which have remained with their owners for decades. During operation, the soft amber color of the wood acquires a red tint due to the huge resin content.
Utility
- The smell of pine has a bactericidal property and helps with diseases of the upper respiratory tract (asthma, bronchitis, etc.). The released essential oils are a delightful means of increasing immunity and the body's resistance to various respiratory viral infections.
Price
- 200 (Russian pine) - three 300 (Finland) rubles/m2.
Walls - beauty and practicality
After installing the floor, the finishing of the dressing room smoothly transitions to the walls. Here everything will depend on the material from which the bathhouse itself is built. If it is brick or blocks, then it is quite acceptable to use plaster followed by painting. But to create comfort and coziness, I will take a wooden lining, which I will use to decorate the dressing room.
Most often, the walls in the dressing room are finished with wooden lining
It is important to remember that comfort and coziness are simply impossible without insulation. Therefore, before you start installing wooden panels, you should take care of installing mineral wool or expanded polystyrene. The latter can only be taken if it has a special treatment that does not allow it to burn. To ensure the fire safety of the dressing room, mineral wool is more suitable. And all wooden structures should be treated with fire retardants.
The material for finishing a given room largely depends on what design of the dressing room was chosen by the owner of the bathhouse. Some people prefer deciduous wood, while others prefer coniferous wood. The direction of the boards is also determined by the owner, but in most cases the lining is attached vertically.
The lining in the dressing room is most often mounted vertically
In addition to wall decoration, this material can also be used for ceilings. But I allow the use of moisture-resistant plywood to give this element of the dressing room a larger visual area. A smooth ceiling framed with a slats will also be convenient when caring for the dressing room. In addition, lighting fixtures can be installed without taking into account the impact on the boards.
To decorate the walls I have to prepare:
- Vapor barrier film;
- Insulation;
- Waterproofing film;
- Lining.
Wood dressing room option
We must not forget about the frame to which the finishing material will be attached. For it you can use timber with a cross section of 50x50 mm. The quantity will depend on the installation, but I do not recommend making the distance between the guides more than 50 cm. As you can see, a dressing room with your own hands is not such a terrible thing.
Related article: Ways to clear blockages in sewer pipes
What should the walls look like in the waiting room?
The question of what the walls should be like is quite complicated. After all, each owner of a plot of land on which a bathhouse can be built has his own preferences and ideas regarding the interior of the dressing room. However, there are some standards that most people prefer:
- Wooden walls with grooved patterns. Such coverings look more than harmonious in a bathhouse. Carved images on wood create a romantic and magical atmosphere in the bathhouse.
- Also, types of wood such as lining are often chosen. Thanks to this material, you can realize a wide variety of design ideas. For example, draw patterns on the surface of the material or simply paint the trim in rainbow colors. This will help create the wonderful, bright atmosphere that should be in the bathhouse space.
An example of insulation and finishing of dressing room walls with clapboard
Features of the rest room
To get a truly stylish and cozy dressing room, you should think about its contents in advance. And here we will not talk about the design of walls or ceilings, but about furniture that will complement the interior of this room. The relaxation room must have all the necessary elements to provide the same comfort that is required after all the procedures that were used in the steam room. This means that a sofa or couch will not be superfluous.
Minimum furniture set - table and chairs
In any case, in addition to this, you need to place a table in the dressing room. Otherwise, drinking and eating, as well as playing cards or backgammon, will be problematic. The presence of chairs or stools made of hardwood is not even discussed. Convenient hangers or even a full-fledged wardrobe will completely fill this room. All that remains is to connect the equipment and relaxation will be what you need.
Furniture from what materials cannot be placed in a bathhouse or sauna
- Plastic
. At high temperatures, the plastic heats up and begins to release harmful substances. And as we know, a steamed human body absorbs all bath odors. So such a bathhouse can backfire.
- Metal
. Metal oxidizes under the influence of steam, humidity and high temperatures. Even a special anti-corrosion coating will not save you here. Under the influence of steam it will quickly come off the surface.
- Painted or varnished furniture
. Again, under the influence of steam, high humidity and temperature changes, paint and varnish will come off the furniture very quickly. It is permissible to use such furniture only in recreation rooms.
- Wicker furniture made from rattan or other natural materials
. No matter how beautiful such furniture looks in a country interior and no matter how it suits your style, temperature changes and high humidity are certain death for such interior items. In this case, it is better to replace it with moisture-resistant artificial rattan furniture.
- Massive furniture made of dense materials ,
which is poorly ventilated
inside . Mold and mildew easily form in such furniture. And for things that will be stored here, this is not the best option.
Bathhouse project
To complete a finished bathhouse at your dacha, you need to follow a certain sequence of actions. First of all, they decide on the project. This step can be left to professionals.
Photos of bathhouses in the country are very diverse and will help you choose the appropriate design.
The choice of the type of modern bathhouse is influenced by your desires, finances and the availability of free territory on the site. According to safety regulations, it is not recommended to place a bathhouse near a house or neighboring buildings.
The 4*5 meter bathhouse consists of a relaxation room, shower and steam room.
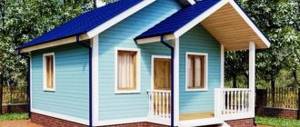
A bathhouse with a terrace is similar to the previous option, but is performed with a terrace. It provides an opportunity to have a great rest with the whole family.
A bathhouse with a dressing room presupposes the presence of a dressing room, to which you can, for example, stack firewood.
DIY bath furniture
Wooden bath furniture is easy to make with your own hands. To do this, you only need some skill in working with wood and drawings for a table, bench, or shelf.
To make a wooden bench or table, you need a hammer, a plane, a drill, a circular saw, cutters, and a sander.
The material for furniture in the rest room is 30*145 and 40*250 mm boards, wooden slats and antiseptics.
Drawings and diagrams for assembling furniture for a bathhouse with your own hands
For a relaxation room, the most important elements are a wooden table and benches. Their design is very simple, but before you start manufacturing, you should calculate its dimensions and create a drawing.
You need to take into account both the area of the room and the number of users. One person occupies a table 60 cm wide. In this case, another 70 cm of area around the table is required so that a person can freely stand up and sit down. As a result, the following sizes of wooden furniture are obtained:
- double table - round or square, 60 cm to the side or in diameter;
- a three-seater can only be round, its diameter is 80 cm;
- the four-seater has dimensions of 85 by 125 cm;
- five-seater - can be round with a diameter of 100 cm, or rectangular with dimensions of 135 by 85 m.
Having chosen the appropriate size, determine the installation method. The surface of a wooden table can be fixed on 1 leg with a cross, on 2 legs if it is a rectangular table, or on 4 legs if it is large enough. In the latter case, the legs can be either straight or crossed.
Taking into account the shape and required dimensions, a drawing is developed. You can use a ready-made diagram with suitable product dimensions. Assembly is carried out according to the drawing.
Manufacturing technologies
Bathroom furniture made of wood is often made by hand. The simplicity of the design allows even a beginner to cope with the manufacture. Well, if you have some experience, you can use a more complex drawing and decorate a wooden product.
The procedure for assembling a table for 6 people with cross-shaped legs is as follows.
- Wooden boards with a cross-section of 145*30 mm are sawn into 4 fragments 1.2 m long. Then oblique cuts of 45 degrees are made on future legs. To do this, step back 10 cm from the edge, mark an oblique line to the opposite edge of the cut and saw off along the mark.
- Wooden parts are carefully sanded. Then the boards are treated with an antiseptic composition.
- The blanks are folded crosswise in the center so that the cut ends of the boards are in the same plane. Then fix it with a clamp and mark the fastening points. A minimum of 2 bolts are required where the boards intersect.
- Holes are drilled for the bolts and the legs are secured. 2 spacers are made from 145*30 boards, which are attached flat to the legs.
- A tabletop is cut from boards with a cross-section of 40*250 mm - fragments 1.75 m long. The boards are sanded and treated with an antiseptic. Then wooden slats 77 cm long are sawn in half and also primed. The boards for the tabletop are fastened together with crossbars. Fasteners - self-tapping screws. The finished wooden tabletop is placed on legs and secured with self-tapping screws. The tabletop can be given any shape using a saw.
A simple wooden bench for a bathhouse is also easy to make.
- For the seat, 3 boards with a cross section of 30*120 mm and a length of 1.5 m are selected. The boards are fixed one by one with a clamp and a groove is made using a cutter, 100 mm deep along the length. On 2 boards there is one groove, on 1 - two.
- A wooden plank with a cross-section of 10*20 mm is cut into fragments and a length of 1.46 m. The slats and grooves are treated with glue, boards are placed on the planks and the resulting wooden panel is clamped with a clamp.
- The bench will require sidewalls. Blanks 420 mm long are cut from a 30*260 mm board, and semicircular cutouts of 50 mm are made on both sides. In the center of the sidewall, select a groove for the longitudinal board - 30*100 mm.
- For a longitudinal wooden beam, 2 protrusions 10 cm long and 10 cm wide are cut out on a workpiece 1.24 m long. The protrusion can be rounded. Wooden boards are sanded, all cuts are rounded with a milling cutter. Then all parts are impregnated with primer.
- The protrusions on the longitudinal beam are installed in grooves on the sidewalls and connected with self-tapping screws. Then the seat is placed on top, leveled, and fastened with self-tapping screws to the longitudinal board.
More complex products will require more time and experience to produce.
Which walls are the most durable for a waiting room?
Considering that there is increased condensation in the dressing room, due attention should be paid to the material’s resistance to moisture. Natural materials withstand moisture best. If it is not possible to purchase just such raw materials, because they are usually expensive, then you can give preference to any material and choose a good product to protect the surface.
Option for decorating the walls in the dressing room with artificial stone. Stylish interior of the dressing room in the bathhouse.
There are quite a lot of similar products in construction stores; you just need to consult with an experienced specialist. Let the bathhouse please you with its aroma and warmth. Only proper preparation for the process of building a bathhouse can make the space complete.
Choosing a place to build a bathhouse
Start by choosing a suitable location for the building. The following recommendations will help you with this:
- the bathhouse should not be located too close to the reservoir - with such a location, flooding may occur;
- The bathhouse can be attached to the house or made into an independent building. Each option has its pros and cons, so in this regard the owner must make his own decision;
- the best place to build a bathhouse is the back yard;
- appropriate conditions must be created in the bathhouse to ensure effective ventilation and waste disposal;
- It is not recommended to choose a place near the road to build a bathhouse;
- It is best to build a bathhouse on the south side of the land. With this arrangement, the area of the building will be sufficiently illuminated by the sun's rays, and the wind will not disturb vacationers;
- If possible, the bathhouse should be built at a sufficient distance from other buildings on the site. If a bathhouse is attached to a house, this must be done in compliance with the relevant fire safety requirements;
- It is best to build a bathhouse at a sufficient distance from adjacent areas so as not to cause inconvenience to neighbors during their vacation;
- It is better that the bathhouse windows face the western side of the site;
- the bathhouse should be built at a distance of no more than 20 m from the nearest well or well.
Do-it-yourself bathhouse in the country
Window installation
You can install plastic windows in a bathhouse yourself. The main thing is to take into account the type of structure, stock up on the necessary materials and tools, and follow the step-by-step guide.
In the dressing room, PVC windows can be installed in any configuration and size
Timber or log house
In this case, problems may arise with the installation of plastic windows. The fact is that wood quickly absorbs moisture and releases it. This leads to changes in the size of the openings, which complicates the installation of the structure. To avoid problems with the installation of products, adhere to the following algorithm:
1. Perform casing of the openings.
This is an independent frame designed to hold the window unit. It is mounted in the wall using special grooves. This frame prevents damage to the product during shrinkage of the structure. To perform casing, proceed as follows:
- a groove is formed on the sides of the opening, which is cleaned, dusted, and treated with an antiseptic solution;
- cut out a block of appropriate size;
- the hole is insulated;
- fix the block;
- fasten the casing frame struts;
- install upper and lower lintels, and fill the space between them and the wall with heat-insulating material.
The casing is ready.
2. Mount the window frame in the usual way. The gaps between the structure and the casing are filled with polyurethane foam.
3. Finish the slopes.
Video - Installing a wooden window with a frame in a log house, bath house
Building made of brick or cellular concrete
To install plastic windows in a bathhouse made of brick or cellular concrete, casing is not required. The procedure in these cases will be as follows:
- Determining the location of the openings. This is done before the construction of the bathhouse begins at the project execution stage.
- Frame installation. They install only the box without glass. It is fixed using wooden spacers.
- Glass installation. They are fixed to the frame with anchors.
- Filling the space between the structure and walls with polyurethane foam. After the material hardens, the protruding parts are cut off with a construction knife.
- Finish the slopes.
Plastic windows in the bathhouse are comfortable, durable designs. They can be installed in a steam room, but under certain conditions. The products are suitable for use in the washing department and dressing room. The structures can be installed independently. The main thing is to know how to do it correctly.

