Before building a bathhouse, it is necessary to select the correct dimensions of the profiled timber. The choice directly depends on the operating conditions of the building and customer requirements. The most common options are lumber in sizes 100x150 and 150x150 mm. They are ideal for providing comfortable conditions during direct operation of the bathhouse, and meet all the requirements for construction in areas where the minimum temperature is down to -30°. Despite this, customers often select a different thickness of timber for their bathhouse.
Choosing timber for bathhouse construction
Wood material can be ordered from the manufacturer or in a specialized store, or you can prepare it yourself. When purchasing, you must inspect each beam to identify defects. Material with the following disadvantages is not suitable for the construction of a building:
- Cracks. They will expand as the log shrinks, which will lead to wood rotting.
- Dark spots on the surface. Their presence indicates that processes of decay or the activity of fungal colonies are already taking place inside the timber.
- Wormholes, signs of being eaten by insects. Such defects will also lead to deformation of the element, and subsequently the entire wall.
The beams offered for sale come in two types: profiled and solid. The peculiarity of the former is the presence of grooves and tenons, which simplifies the process of constructing the structure. A bathhouse built from such material looks more aesthetically pleasing, but requires additional treatment with fire retardants (fire retardant).
It is better to order material with a reserve. If a defect is discovered, do not rush to get rid of low-quality timber. It should be cut into several smaller parts, removing the affected area. The resulting elements can be used to make slats and frames.
When buying wood, it is necessary to evaluate the characteristics of each species. It is recommended that the first few crowns be made from larch, since over time the beams made from it only become stronger, and high humidity does not cause significant damage to it. The remaining part of the structure can be made of pine or spruce, which have high thermal insulation properties. It is better to prepare timber yourself in winter - a freshly cut tree should lie for about a month. After this, you can sort out low-quality logs and begin processing them. Timber preparation process:
- Cleaning the bark. To prevent the log from deforming, you need to leave strips of bark 15 cm wide on both sides. Such logs can be stored by stacking them at a height of 10-20 cm from the ground.
- Giving the required section and profile.
- Grinding.
- Treatment with impregnation with an antiseptic, fire retardant, water-repellent agent.
When purchasing timber, you should not give preference to its glued “substitutes”, since at high temperatures they will emit toxic, poisonous fumes.
How to calculate the required thickness of timber walls
Heat transfer in enclosing wooden structures occurs unevenly - the wave speed is 3 times higher along the fibers than across them, therefore, for calculations, the thermal conductivity coefficient λ is taken for the transverse arrangement of the fibers. The thermal conductivity is also affected by the type of wood and the density of the wood - λ is for:
- pine trees
- 0.15 W/(m°C); - spruce
- 0.11 W/(m°C); - larch
- 0.13 W/(m°C).
The good thermal insulation properties of wood are evidenced by an obvious physical value: the thermal conductivity coefficient of any wood is 18 times less than that of reinforced concrete.
The thickness of single-layer wooden walls is determined by the formula δ=Rtr*λ, where Rtr is the required heat transfer resistance, λ is the thermal conductivity coefficient. If there are layers of special insulation and/or finishing, then their contribution to the overall heat transfer resistance is taken into account. It is necessary to subtract the value Ri=δi/ λi of each layer of material from Rtr and, using the resulting value, calculate the cross-section of wooden structures.
Building standards
Let's look at the example of thermal engineering calculations for a building being built in the climatic conditions of the north-west of Russia (Tver). The required thermal resistance of enclosing structures is Rtr=3.15 m²C/W
(determined according to TSN 23-309-2000).
If the building is built from pine timber, then the minimum thickness according to the standards:
δmin=Rtr* λ= 3.15*0.15 = 0.473 m = 47 cm
We find that according to standards, a wooden house must have walls half a meter thick. In practice, lumber of standard sizes (180-270 mm) is used.
Energy losses occurring through the walls are only 10-15%. The main share of warm air evaporates from the premises through unsealed openings, through the foundation, and the roof. Reducing heat loss is achieved by high-quality insulation of floors, laying reliable floors, installing good doors, installing energy-saving double-glazed windows and choosing an efficient and economical heating system.
Wall thickness of a wooden house for winter living
When building a house that will be used for year-round living, two criteria are usually taken into account: strength and comfort. Both requirements are successfully “closed” by timber with a cross section of 145-150 mm
.
With a rounded log the situation is more complicated.
- If the winter temperature in the region reaches -30℃
, then the diameter of the log selected for construction should be
240-260 mm
. - In winter colds reaching -40℃
, the recommended diameter is
280-320 mm
.
Wood is quite capricious and reacts negatively to humidity and heat. You can cope with undesirable consequences if you choose laminated veneer lumber for the construction of the walls of a wooden house. Glued laminated timber is not only stable (the lamellas are pre-dried before gluing, which reduces cracking of the material), but also has good thermal insulation properties. Heat loss through the enclosing structures will be minimal, since in a structure made of laminated lumber the joints are tight and there are practically no gaps formed.
When building from classic timber, external insulation with mineral wool will help to avoid seasonal swelling and drying out of the wood. A layer of 100 mm is sufficient. The heat insulator has the same vapor permeability as wood, so you can build a house from timber with a cross-section of 160-180 cm, and then finish the exterior with mineral wool, without going beyond the allocated budget.
Wall thickness of a wooden house for seasonal living
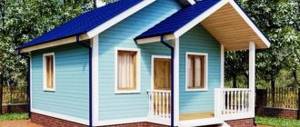
And one more popular question: what thickness of timber should I use to build a summer house? When building country cottages or small houses for summer holidays, it is enough that the walls can withstand the planned loads and remain stable.
- If only one floor
, then the thickness of the timber for the house can be 100-120 mm, and the diameter of the rounded log can be 120-140 mm. - For a two-story
, choose a beam with a cross-section of 140-160 mm or a log with a diameter of 160-180 mm.
Selecting a layout, preparing drawings
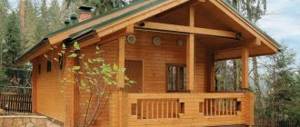
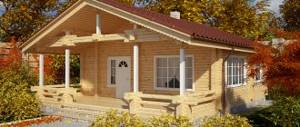
Constructing a bathhouse from timber with your own hands requires careful preparation of the project. The building must include the following premises: steam room, relaxation room, washing room. The presence of a terrace or veranda is at your request. Drawings of standard layouts of one-story bathhouses made of timber:
- 5x3 m is a small bathhouse, the construction of which will be very profitable. This option is suitable for exclusively personal use. 2 people can steam at the same time.
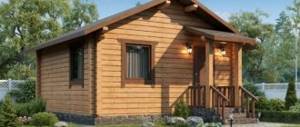
- 4x6 m - a bathhouse for 3-4 people with a spacious terrace on which you can arrange places for relaxing in the fresh air.
- 5x5 m - the steam room can accommodate 2 people at the same time, but the relaxation room can accommodate 5-6 people, and the presence of a vestibule allows you to keep the heat in the room and prevent the cold from penetrating inside the bath.
- 5x6 m - with this arrangement of seats, only 2 people can fit in the steam room.
If you have construction experience, you can build a two-story bathhouse with an attic. The possibilities are limited only by your imagination and skills.
Why calculate the beam cross-section correctly?
The thickness and length of the timber must be optimal. A product that is too thin does not retain heat well and is not suitable for a bath. It is uncomfortable to be in a semi-cold bathhouse; the point of visiting the steam room is lost. And spending too much fuel on heating is not economically profitable.
If you choose too thick timber, problems with a lack of heat will not worry you, but in this case you are overpaying for the material. At the same time, there is practically no gain in heat preservation compared to the optimal option. To find the golden mean, the thickness of the log is calculated. The length of the timber also matters in financial savings - too many scraps, which are used only for firewood, seriously increase costs.
Calculation of the required amount of timber and other materials
The calculation process is extremely simple:
- You need to measure the height of the building and the length of each wall.
- You need to decide what the thickness of the walls will be, that is, choose the cross-section of the beam. Standard sizes: 95x145, 145x145, 195x145, 230x145, 250x194.
- By multiplying the height, the sum of the lengths of the walls and the width (the first digit in the section size), you will get the required volume.
It is better to purchase or prepare material with a reserve, as there is a possibility of detecting a defect. After construction, the building will inevitably experience some shrinkage, and it may require horizontal alignment. In addition to the main material, you will need additional auxiliary, but no less important: insulation, waterproofing, impregnation to protect against insects, fungi, mold, fire.
After the foundation has gained strength and before erecting the wooden structure, double waterproofing made of roofing felt and bitumen is laid on the concrete. If the foundation is of a strip type, then slats are placed on the waterproofing in front of the first crown in order to prevent the material from rotting from below. Insulation and sealing of gaps is carried out using caulking tape - this is a non-rotting heat-insulating material. It is made from flax, hemp tow or bast jute fiber.
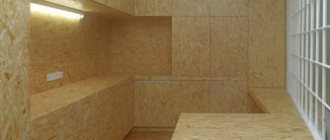
The factory product often comes already treated to prevent fire or rotting. If you prepared the timber yourself, or you have doubts about the supplier, it is better to coat them additionally with special compounds containing antiseptics and fire retardants, and perform final varnishing or priming of the surface. It is important to carefully study the information on the packaging - the substances used must be intended for residential premises, not washed out, and not emit toxic fumes when the temperature rises. In addition to the classic method of building a bathhouse, there is another one - using double timber. This method is economical, since a material of small cross-section is used, and also simple, since caulking is not required.
The technology of construction using the double beam method consists of connecting wooden elements into a double lock and laying insulation between them. This method is characterized by minimal shrinkage, energy efficiency, and the possibility of using a lightweight foundation.
Nuances:
- it is important to connect the crowns tightly so that there are no gaps - after construction is completed, the gaps cannot be eliminated;
- it is necessary to install crosscuts in the walls to prevent warping of the walls;
- the technology is not suitable for large buildings.
It is extremely difficult to make a bathhouse from double timber on your own, without the necessary experience; you can make mistakes that will make it unsuitable for its intended use.
Climatic features of the region where the bathhouse is being built
One of the important factors in choosing the thickness of a bathhouse wall is the region where it will be used. In areas with a warm climate, the steam room will cool down slowly. Therefore, it does not require choosing thick timber. In cold regions, it will be necessary to choose a thick building material to ensure good heat retention in the interior of the steam room. Experts recommend using timber up to 100 mm thick in warm areas. In cold areas, building material made of wood with a thickness of at least 140 - 150 mm is required. But even with such a thickness of timber, if the bathhouse is located in an area where in winter the temperature drops below –30 ºC, the structure will have to be additionally insulated. To do this, you need to use non-flammable insulation.
Stages of bathhouse construction
The project has been drawn up, the material has been selected, and we can proceed to the actual construction. The construction of a bathhouse made of timber includes the following steps:
- foundation installation;
- walling;
- installation of floor and tide;
- ceiling installation;
- roof construction;
- six-month break for shrinkage;
- installation of window and door openings;
- Finishing work.
If you do all of them correctly, the structure will be of high quality and will last a long time.
Foundation structure
There are 2 types of foundations used for bath buildings:
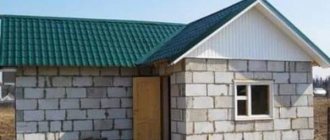
- columnar - suitable for small, lightweight structures, the most economical option;
- tape - used for massive, large-sized buildings.
The technology for constructing a columnar foundation involves the installation of brick or block pillars placed on a concrete “pad” to prevent subsidence in the ground. Along the perimeter of the building, in its corners, as well as in the locations of load-bearing walls at a distance of 1.5-2 m, it is also necessary to install brick pillars. All elements must be reinforced with reinforcement. Technology for constructing strip foundations:
- pit development;
- installation of wooden formwork;
- installation of reinforcement, pouring concrete.
The depth of the excavation pit must correspond to the depth of soil freezing. The height of the foundation above the ground should be 0.5 m.
Walling
After the concrete has gained strength and a double bitumen-roofing felt layer has been laid on the foundation, you can begin installing the first crown of timber. Assembly details:
- Checking the evenness of the horizontal surface using a building level. Neglecting this point will lead to the sauna being skewed.
- For the first row, the thickest elements are used; if among them there are tarred ones, then it is better to take them. Such timber does not require additional processing, does not rot, and over the years turns to stone, becoming even stronger.
- Before laying, slats must be installed on the foundation, the space between them must be filled with insulation.
- The first crown can be placed without fastening; the strength of the structure is ensured by vertical pressure.
When the beginning has been made - the first beams are installed - you can proceed to the construction of walls. Stages:
- First, the entire next crown is laid and leveled.
- Holes corresponding to the diameter of the dowels are drilled through the entire upper beam and half of the lower beam at a distance of 1.0-1.5 m.
- The top row is removed, caulk tape is placed on the bottom row, which covers the previously obtained holes.
- The pins pierce the tape at the holes and are driven in. The length of the dowels must correspond to the 2 heights of the beam.
- The upper crown fits tightly onto the dowels.
- The procedure is repeated all the way to the top.
An important nuance: it is better to place the dowels in a checkerboard pattern to give additional strength to the structure.
A common mistake made by beginners is to fasten beams with metal elements and nails. The use of metal is advisable only if it is completely immersed in wood. Protruding parts and nail heads will begin to rust due to high humidity and spoil the wood from the inside.
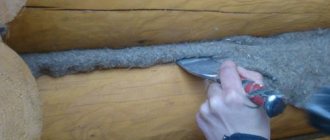
The easiest way to caulk cracks is with a set of jute tape and cord. The tape is laid when installing the crowns, and the building is caulked with a cord. It is important to follow the following sequence of actions: the blind and longest side of the lower crown is processed first from the inside, then from the outside, then the opposite side. Then they pass along the short side without openings of the lower crown from the inside and outside, then work on the side with openings. The procedure is repeated gradually, rising from crown to crown. Another way of caulking cracks is with the help of moss or tow; this method requires waiting for the shrinkage period to expire and carrying out careful work on filling the cracks with the help of professional tools: winches of various shapes and sizes, mallets.
Floor construction
Before installing the floor, it is necessary to install a drainage system. To do this, a hole 40x40x30 cm is dug under the place where drainage will be needed and concreted - this will be an intermediate tank. There may be several of them with a large distance between the drain holes, or several pipes can be installed into one. A drain pipe with a diameter of 20 cm is led from the reservoir into a drainage ditch or septic tank. Floor laying technology:
- the area under the floor is filled with sand, compacted, covered with gravel and compacted again;
- waterproofing is installed - roofing felt;
- insulation is laid - expanded clay or polystyrene foam;
- logs are installed;
- An intermediate floor made of plywood boards is attached to the logs;
- you can lay an additional layer of “waterproofing-insulation-waterproofing”;
- a finishing floor is laid with a slope towards the drain;
- a siphon is removed, the drain is equipped with a valve that does not allow unpleasant odors to pass through.
In addition to this type of floor, there are also concrete (cold) and “leaky” wooden floors. Disadvantages of the latter:
- Possibility of use only in the warm season;
- the need to remove the floor after each procedure and dry it;
- waste water goes into the ground under the bathhouse, which can cause unpleasant odors or make the soil watery, which can make the structure less reliable.
The service life of a “leaking” floor is no more than five years.
Ceiling device
The first thing to do before installing the roof is to check the horizontalness of the last crown using a building level. The permissible error is 1-2 cm per 5 m. Next, you need to lay floor beams with a cross section of 100x100 on supporting structures, their length should be 60 cm greater than the width of the bathhouse, that is, on each side the beams will protrude by 30 cm. The optimal distance between the beams is 1 m. At this stage, you can level the horizontal position by sawing the timber.
Ceiling technology: sheets of mineral wool insulation with a foil layer are placed between the floor beams. They are fastened with a stapler; such material does not require an additional layer of waterproofing. Then the finishing coating is installed (most often lining).
Roof structure
When the floor beams have been laid and the horizontal position has been verified, you can begin installing the rafter legs. It is better to collect them on the ground and serve them assembled on top. A small-sized 5x5 bath allows you not to use additional stops and tie the rafters with a crossbar. To install the rafter legs on the crown, you need to make a notch a third of the beam, place the rafters in it, and strengthen the fixation with a metal corner.
You need to start the procedure from the outer rafters, checking the verticality of the installation and connecting them with threads at three points: at the ridge and on each side. These will be the guides for the intermediate rafters. For the stability of the structure, it is better to connect the rafters together with temporary slats, which can be removed after installing the sheathing. A layer of insulation, vapor and waterproofing must be laid on the rafters. The drain must be installed before the roof is laid.
The distance between the sheathing bars depends on the selected roofing material: for metal sheets, 30-35 cm is required, for soft material - continuous laying. The optimal cross-sectional size of the sheathing bar is 25x50.
The metal tiles are attached to the sheathing using galvanized self-tapping screws. The sheet should extend 40 cm at the eaves. The first is attached to the sheathing with one self-tapping screw in the upper part, the second sheet is laid on the first with an overlap, and also the third. All sheets are leveled, and only then connected to the sheathing. After fixing the sheets, you can install the ridge element, which is also attached to the screws.
An important nuance: the self-tapping screws should not stick out with their sharp ends, otherwise they may damage the waterproofing. The selection of their length must be approached very responsibly.
Installation of window and door openings
Even at the design stage, it is known where the doors and windows will be located, so conditional openings must be left during the construction of the walls. After the shrinkage period of the bath has passed, you can complete the geometry of the openings and install door and window elements. A caveat is that doors and windows should be made of wood, preferably pine. The use of polyurethane foam is unacceptable, since at high temperatures it releases toxic substances. Installation technology:
- to ensure a “floating” effect with minimal deformation of the building, a wooden tenon 6-8 cm wide and a projection height of 4-5 cm is installed in the opening;
- 4 bars are attached to the prepared frame with glue and screws, which form grooves for the tenons;
- the opening is lined with a sealant (tow, jute), and a frame is installed in it;
- the frame is connected to the tenons using self-tapping screws, first from the bottom, leaving a gap at the top, which is tightly filled with a sealant;
- the window itself is installed, which is fixed with screws or nails;
- platbands are installed.
The door is installed similarly to the diagram outlined.
Plumbing, drainage, electrical wiring
All communications must be designed initially. The electrical wiring is placed in a special corrugated pipe or plastic box. It is better to install power lines by air - it is the fastest and most economical compared to underground. It is better to entrust work with electricity to specialists in order to prevent the possibility of electric shock to people.
A convenient option for installing a toilet is an extension with its own cesspool, the walls of which are filled with concrete. This method will prevent unpleasant odors from entering the bathhouse; use of the toilet will be available to visitors who do not want to enter the wet bathhouse. The most successful solution for providing water to a building is to install a winter water supply from a well. Technology:
- development of a trench, the depth of which does not exceed the level of soil freezing;
- laying sand and earth 5 cm thick at the bottom of the trench;
- in the well ring, using a perforator, you need to make a hole for the pipe, located 10-20 cm above the water level;
- in the trench it is necessary to install a wooden box filled with glass wool;
- introduction into the well of an intake pipe with a water intake filter with a check valve;
- connecting the intake pipe to the one lying in the trench;
- It is better to install the pumping station in a special pit, which is insulated with foam plastic and closed with a tight lid;
- inside the bathhouse it is necessary to install a pipeline from plastic pipes;
- Before filling the trench, you need to check the functionality of the pump by pouring water into it and turning it on.
This method of installing water supply is preferable to other existing ones, since it allows you to use the bathhouse all year round.
Criteria for choosing wall thickness
- Ensuring sufficient strength. Building structures, primarily load-bearing ones, which include walls, must withstand the load from all elements and parts of the building, as well as the influence of natural factors (wind, snow, etc.). The calculation of the required wall thickness in this case is carried out in a standard way, based on the characteristics of the materials used and load standards for each region.
- Achieving the required level of comfort. In this case, we are talking about the absence of drafts, freezing, condensation formation and similar issues that negatively affect the level of comfort of staying in the building. The wall thickness is calculated taking into account the climatic characteristics of the region where construction is being carried out and the operational parameters of the materials used.
- Energy efficiency. In the vast majority of cases, this criterion places the greatest demands on wall thickness. The parameters are calculated based on the achievement of the energy efficiency indicators of the building established by regulations. The thickness of the wall depends, first of all, on the thermal resistance of the material used in construction.
Stage I - work on the best layout of the bathhouse
Here the first two points of the proposed action plan are taken as a basis. First, a list of mandatory isolated zones is formed. Then the optimal living space is calculated for each room separately in accordance with the requirements of SNiP. The calculation is carried out by multiplying the recommended quadrature coefficient (selected strictly in accordance with the operational purpose of the room) by the average number of vacationers.
Approximate square meters allocated per person:
- Steam room – 1.5 sq.m.
- Shower room – 1 sq.m.
- Recreation area – 2 sq.m.
These standards are used to calculate the minimum permissible usable area of premises where people stay for a long time. The dimensions of the dressing room, locker room, kitchen and bathroom are determined in a similar way, but if necessary they can be reduced to a reasonable minimum. A small vestibule, if it causes inconvenience, is only short-term - when entering or exiting.
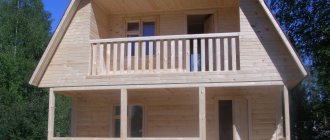
The plan dimensions of the bathhouse, which are in stable demand, are 4×4 and 6×4 m. Starting with the latter size, it becomes possible to arrange a 2nd residential level in the form of an attic. In the case of timber frames, building upwards is somewhat cheaper than expanding horizontally. Which is associated with a reduction in the cost of laying the foundation and installing the roof. Therefore, it is better to increase the internal space of a wooden structure by increasing the number of floors.
Length and width of a timber bath
The external dimensions of a wooden bath range from 4x6 to 9x13 m. The choice depends on the area of the land and the location of the buildings on it. In accordance with the standards of SP 53.13330.2011, the distance from the bathhouse to nearby buildings must be at least 8 m. Also, according to the provisions of the Water Code of the Russian Federation, it is prohibited to build bath complexes and saunas near reservoirs (the minimum distance to them is 20 m). Such requirements are due to the increased fire danger of steam rooms, as well as the large volume of contaminated wastewater that is absorbed into the soil and can penetrate into the water.
If the plot is small, neighboring cottages and outbuildings are located nearby, but you need a full-fledged bathhouse with the possibility of all-season recreation, choose options with compact external dimensions and a second level. The catalog presents a project for a relatively compact, but roomy and comfortable bathhouse with external dimensions of only 6.5x8 m. The two-story building in the classic Russian style is equipped with a dressing room, washing room and steam room, and on the second level there is a cozy bedroom-living room with a covered balcony. Its area is 25 sq.m., and it is easy to install a sofa bed, desk, wardrobe - everything you need for a short stay outside the city.