A well is a technical structure used to obtain water. The design of the well includes a device that serves to lift water from the surface of the earth, and also encloses a recess from which groundwater is drawn.
The well, its recess and outer frame can be made of various materials, which allows you to make the well house in a different form and design style. Anyone can make a well out of wood with their own hands, if they have free time and want to have an original technical structure designed in an individual style on their site.
Planning the location of the well
Planning the location of the well
The location of the well on the site is determined based on the presence and depth of groundwater, as well as the presence of springs in this area.
Groundwater, according to its type, is classified as:
- Verkhovodka - are characterized by a shallow depth and are recharged by water received in the form of precipitation, when snow melts and during floods.
They are distinguished by a low degree of purification, which requires the installation of an additional system for purifying the water used.
- Groundwater - lies in the aquifer of the earth and has a certain reserve of its quantity. There is no pressure in the aquifer, the water level in the well corresponds to the level of the aquifer.
The degree of water purification is higher than with perched water.
- Artesian - lie deeper and are located, as a rule, between layers of rock.
When installing a water supply system using water of this type, water is poured out under pressure formed in the aquifer.
To determine the specific location of the well, it is necessary to collect information about the presence and nature of groundwater, and also contact specialists in the field of hydrology or use traditional methods. Specialists can use hydrological maps or perform the necessary drilling work (exploration drilling), which will make it possible to draw up a diagram of the presence of hydrological layers in the earth's surface.
Traditional methods consist of using metal wires or wooden rods to determine the place where groundwater is closest to the surface of the earth.
It should be noted that using folk methods, the location is determined fairly roughly; the exact location can only be determined using technical survey methods.
In addition, there are standards regulating the location of the well in relation to other buildings and structures, which are reflected in SNiP 3.05.04-85* “External networks and structures of water supply and sewerage (as amended).”
Briefly about the construction of a well at the dacha
The construction of a water intake system is divided into several stages: preparation (choosing a location, interviewing neighbors, collecting information about soil and groundwater), drilling a shaft, installing rings, decorating the ground part.
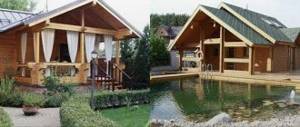
To choose a design option, we advise you to look at photos of wells made in different styles.
Wood selection
Birch for a well
When using wood to construct a well, various types of raw materials can be used, such as oak, birch, aspen, pine or spruce.
The choice of wood is based on its ability to withstand moisture when framing a well and exposure to sunlight and microorganisms when constructing the above-ground part of a well.
As a rule, a log house is made of oak, aspen, larch, elm or alder, which is due to the ability of these tree species not to rot when left in water for a long time.
To make a house, both the above mentioned types of wood and others - spruce, pine, birch - can be used.
From timber or logs
The durability of a log structure depends on the type of wood that was used to make its elements. The owner of the land plot can use cylindrical or square-shaped elements that have been treated with antiseptic solutions and then dried in air. To construct a frame for a well, it is recommended to choose oak or pine that can withstand use for 25 years. Structures made of birch or linden, which have a low price, are destroyed after 5-10 years.
When selecting material, you need to pay attention to the density of the structure and the absence of cracks or knots. The outer surface of the parts should not have any traces of bark. It is forbidden to use elements damaged by insects, as the strength of the material and resistance to rotting are reduced. The logs or beams used in construction must have the same dimensions, without changing the cross-sectional area along the length (camber).
The purchased logs must have a moisture content no higher than 16% and not have a negative impact on the quality and taste of water. Coniferous wood has increased antibacterial characteristics due to the presence of organic resin. If you plan to use larch for construction, then you need to know that this material is characterized by increased resistance to moisture penetration into the deep layers, which increases resistance to rotting.
Materials and tools
When making a log house, timber, half-timber or round timber is used; for the construction of a house, edged boards of various thicknesses are used.
The taste of water taken from a well largely depends on the type of wood used to make the frame, as well as its quality and ability to resist rotting.
To finish the outside of the well, you will need paint or varnish, as well as other finishing materials, depending on the style of the house.
In order to make a wooden well with your own hands, you will need the following tool:
- Chainsaw, two-handed or bow saw.
- Axe.
- Wood saw.
- Plane.
- Carpentry tools.
Exterior design
The upper part of the wooden well is called the head; attention is paid to its construction not only because of the love of decorative effects. The head is made so that its height reaches about 1 meter above ground level; the outside is tightly sheathed with boards to protect it from dust, debris, dirt, and grass.
In harsh climate zones with low winter temperatures, the sheathing of the upper part is doubled, making a second plank layer at a distance of about 150 mm from the first. The niche between the two fences is filled with any available heat-insulating material: sawdust, slag, shavings individually or in a mixture.
The well opening is covered with a wooden lid, which is secured using hinges or special grooves.
A canopy is erected over the lid, which is often called an umbrella, or a house.
Types of wells
Construction of a tube well Wells
differ in the type of recess from which water is drawn. They are of the following types:
- Mine - construction is carried out by digging a mine. In this case, the work is performed manually, using shovels and other hand tools.
- Tubular - construction is carried out using a mechanized method (drilling or punching), followed by the construction of a well.
In addition, wells can be classified according to the type of construction of the water intake part through which water enters the internal space of the mine (well), these are:
- Full immersion - water enters through the side walls, and the bottom is mounted on a water-resistant layer.
- Imperfect - water enters through the side walls and bottom of a well or well.
- Perfect with a sump - a reservoir is installed in the aquifer, which is a water storage tank, into which the frame of the well (shaft, well) is immersed.
- With an expanded underwater part that serves to store water.
How to find the right place
When determining a site for digging, you should study the surrounding area. You can find out from neighbors who have already carried out this kind of work. Naturally, if wells have already been installed near your site, then there is a high probability of finding suitable water on your land.
It should be remembered that clay and sandstone layers have the highest degree of water content.
You can only reliably confirm the presence of water by drilling. But this method is expensive. Therefore, they use indirect methods. A well in a dacha can be placed where:
- there is a large accumulation of moss on the ground, and there are a lot of midges and mosquitoes in the air;
- green spaces are concentrated even during periods of drought;
- flooding of basements is observed;
- There are frequent fogs when there are no bodies of water nearby.
Dowsing will also help you. To do this, take two brass sticks. The length should be about 500 mm, and the diameter should be 2-3 mm. They are bent at an angle of 90 degrees, but so that one end is 100 mm. They walk around the site with these sticks in their hands. If there is an aquifer, they intersect.
How to build a wooden well
Before starting the construction of a well, it is necessary to carry out a number of preparatory activities, which include:
- Determining the location of the well.
- Calculation of daily water requirements, both for cooking and for technical purposes.
- Choosing the type and design of the well.
- Selection and acquisition of materials required for construction.
- Tool preparation.
When the preparatory activities have been completed, you need to think about the technology for performing the work.
The technology must ensure the completion of work in the shortest possible time, with minimal labor costs, as well as ensuring the safety of their implementation.
Assembling a log house
The production and assembly of the log house is carried out on the surface of the earth. The connection of logs is carried out according to the “paw” type, “in the bowl” or with other types of locks (“hook”, Finnish, Swedish or Norwegian lock), and when using timber - “with remainder”, “without remainder”, “straight” tenon, corner tenon or dovetail.
The size of the log house, its height, depends on the depth of groundwater and the required height of the structure rising above the surface of the earth.
The side of the log house, as a rule, is 1.0 meter, but it can be more or less than this size, which depends on the personal wishes of the developer and the buildings located near the well being constructed.
When assembling a log house, the rows are mounted with wooden spikes, which ensure the rigidity and strength of the structure.
The manufactured frame is marked to facilitate further assembly in the well shaft.
Details
Construction Features
It is better to dig a well with an assistant. One will do the work in the mine, the second on the surface, removing containers with soil. To make it easier to lift the container, you need to equip a winch or a tripod installation with a hoist.
Safety precautions should be followed:
1. a worker inside the mine must have a helmet on his head.
2.ropes with ropes must be strong.
3. if a worker is unwell in the mine, determine the level of gas contamination in the mine using a candle. When the candle goes out, use a fan to remove gas contamination.
Tools for manual work:
1. large and small size shovels.
2.buckets.
3. the chain is thick.
4. winch.
5. rope ladder.
In the process of constructing a well, you should check the strength of the equipment: ropes, fastenings, with the help of which the earth is lifted from the pit. The dimensions of the hole for the well depend on the selected ring size. The optimal diameter is considered to be concrete rings of one meter. To install these rings, no additional equipment will be required. The height of the rings should be such as to suit the owner’s parameters.
Attention! Before digging a mine, the area for work should be marked.
When the height of the pit reaches one meter, the first ring of concrete should be inserted. By digging out the earth from the bottom of the pit and placing more rings on top, they will lower themselves under their own weight. The rings are placed evenly on top of each other, fastened with metal staples.
This work must be done before a layer of soil with water appears. This method of installing rings is considered the safest. In some cases, a hole is completely dug, then rings are placed in it. This technology is dangerous because there is a risk of the earth collapsing on the worker inside the pit, which threatens his life.
The water that appears in the mine will initially be cloudy, with admixtures of sand and earth. After installing the filter, the liquid will become lighter in color and can be consumed. Before installing the filter, water is removed from the bottom of the pit. Next, they remove one twenty-centimeter level of soil, compare the bottom, removing dirt.
The bottom is covered with sand with large particles in a layer of thirty centimeters, gravel and crushed stone are poured onto it in a layer of up to twenty-five centimeters. The top layer of the filter consists of coarse gravel, it is equal to twenty centimeters, no more. Before pouring, the gravel should be washed in a chlorine solution with water. If there is a large influx of liquid into the shaft, first a floor is built from boards, holes are left in it, and a filter is placed on it.
All water from the pit is completely pumped out for two weeks. Water can be used to water the garden and wash the car. Over time, the water will clear.
Attention! Clarified water from the mine should be tested in a laboratory for its composition in order to protect yourself and your loved ones. If a well is used on a neighbor’s property, then this procedure is not necessary.
Clay castle
To prevent surface water from penetrating inside the well and clogging it with debris and dirt, a clay castle is built around the perimeter of the device. Around the well you need to dig a trench one meter deep, and clay should be compacted into it. A clay mound should form on top so that water coming from the well structure can drain from it. A concrete blind area is placed on top of the castle.
How to install a well
Installing a well
There are several technologies for installing a shaft-type well using a wooden frame, which determine the possibility of performing such work with different levels of groundwater.
Installation can be done in the following ways:
- Gradual assembly.
With this method of performing work, a pit (shaft) is dug, at the bottom of which the manufactured log house is assembled. This construction method is suitable when the groundwater is not deep, the soil is dense and there is no water recharge from the lateral layers of this soil.
- Submersible construction.
This method of performing work is carried out when groundwater is deep. Initially, a pit is dug, 5.0 - 6.0 meters deep, into which the manufactured frame is installed, after which soil is removed from under the lower crowns of the frame. As the structure sinks, the crowns located in the upper part of the frame are installed.
- Extension of the log house downwards.
This technology is used in the construction of deep wells. The peculiarity of this method of performing work is that the crowns are added from below to the mounted frame.
The installation of a log house is carried out in the following sequence: a pit is dug to the possible permissible depth, after which the log house is assembled, and the height of its assembly is determined by the height of the dug shaft.
The installation of the crowns is carried out in such a way that the upper rows of the manufactured log house are located in the required plane above the ground surface.
The lower crowns are laid on pads, after which the earth is sampled both in the vertical plane (deepening the bottom of the well) and in the horizontal.
Excavation of soil in a horizontal plane is necessary so that it is possible to install supports or jacks that ensure the hanging of the assembled structure.
When the log house is hung and the required amount of soil is removed, the next crown (or several crowns) is installed, after which the supports (jacks) are removed, the installed rows are attached to the previously mounted one.
After the installation of the log house, the soil is backfilled and compacted from the outside, as well as the construction and finishing of the well house.
Choosing a place for a well
When choosing a site for a well, the determining factor is the quality and quantity of groundwater. We’ve already written about how to find places with the best water, so let’s look at a few more points that are worth considering.
- It is allowed to dig a well only away from various sources of household pollution entering the soil. Those. there should be at least 30 meters from the toilet, animal walking areas and manure heaps.
- If you have an autonomous sewer system that does not have a bottom, then you will either have to redo it, making it completely sealed (or better yet, install a factory-made plastic container!), or refuse to build any wells with your own hands. Groundwater will certainly carry household wastewater into the source, and your water will not only become tasteless, but also smelly and unsafe.
- To avoid the appearance of runoff from neighbors, it is better to place the well in a high place, where, according to physical laws, liquid simply will not flow.
- If you keep animals (cows, pigs, etc.) that need to be watered daily, then place the well at approximately an equal distance between the house and the barns. For domestic needs, wells are placed closer to the house (but not right next to each other, but keeping at least 5 meters from the building).
Before you start making a well, wait for the right season, i.e. autumn or winter, when groundwater is at its maximum depth. If you start work in the spring, then there is so much water in the ground at that time that in 90% of cases you will end up on it. Then in the summer your well will constantly dry up.
Safety rules when digging a well
In order to avoid emergency situations and to prevent accidents, when performing well digging work, it is necessary to comply with the requirements of safety rules, which are:
- The site where excavation work is carried out must be fenced, for which a fence or other enclosing structures are installed.
The excavation site is fenced along its perimeter, at a distance of at least 1.0 meters from its completion.
- There should be no heavy objects or structures at the work site that could slide into the pit (shaft) during their manufacture.
- When performing work, you must use proper tools and personal protective equipment.
- Ropes or cables used during work must be tested for strength.
- When using devices equipped with an electric drive, they must be equipped with an automatic stopping or braking device.
A well is a rather complex technical structure, the construction of which is best entrusted to professionals with experience in performing such work. However, if there is a desire and compliance with safety requirements, as well as with certain knowledge, every owner of a country plot or summer resident can carry out the work of constructing a well on his own.
Getting ready to dig: studying TB
Inexperienced owners often forget about basic safety rules, failure to comply with which can jeopardize the health of a person working in a mine. Let's remind them to avoid injury.
- The digger must have a protective helmet on his head. If the bucket being pulled out by an assistant falls off, this will help avoid injury.
- Buckets with soil are lifted on thick ropes, and the rings are lowered with ropes.
- When digging a shaft over 6 meters, 2 ropes are fixed on the bucket: the main and safety ropes.
- To protect against ground movements, the digger must be tied with a rope, the other end of which is firmly fixed to something strong on the surface.
- If the mine turns out to be deep, then be sure to periodically check for gas contamination. To do this, light a candle. If it goes out, it means there is a lot of gas, and it needs to be ventilated. To do this, they climb out of the mine, tie a large blanket to a rope and lower it to the bottom and back several times. Usually gases rise to the top along with the blanket. After this, you can go down again, check the air quality with a candle and continue working. If the gases do not escape, you will have to look for a fan and lower it down.
Construction details
Wood for felling
In order for the well shaft to last as long as possible, it must be reinforced with a frame made of logs. Moreover, both the service life of the structure and the quality of water depend on the choice of wood.
Oak is a reliable, durable, but expensive material
You can compare the available options in the table below:
| Wood | Service life, years | Tendency to rot | Adding flavor | |
| Underwater part | Surface part | |||
| Birch | 10 | 5 | With periodic moisturizing | |
| Elm | 20 | 5 | With periodic moisturizing | |
| Oak | 25 or more | 20-25 | Bitterish, disappears over time | |
| Stained oak | 50 or more | 50 or more | ||
| Larch | 25 | 20 | ||
| Aspen | 20 | 5 | ||
| Alder | 15 | 5 | With periodic moisturizing | |
| Pine | 15 | 5 | Bitterish, disappears over time | |
As you can see, oak is an ideal option. However, this wood is quite difficult to process with your own hands, and its cost is quite high. That is why well frames are often made from more affordable and easy-to-work aspen, alder or birch.
But it is better to protect relatively cheap pine from constant contact with water. For example, wooden covers for wells or exterior finishing parts can be made from pine boards, but nothing more.
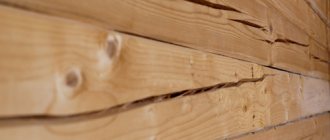
Note! As you can see from the table, over time the wood can rot. Accordingly, at least once every three to four years it is necessary to conduct a full inspection of the walls of the well, promptly strengthening or replacing logs that have begun to rot.
Construction of a log house
Well drawing: main parts and their dimensions
Since our project does not involve the use of other materials, we will make all the parts from the selected wood. Naturally, the most difficult thing to build is a log house, and therefore here we will pay maximum attention to it.
We carry out the work according to the following scheme:
- We cut logs with a diameter of 180 - 220 mm to size, remove branches and remove the bark.
Advice! You should try to keep the top layer of wood intact, since it protects the core and largely ensures the longevity of the log.
- At the edges of the logs we make holes for joining “in a paw” or “in half a tree”. For more reliable fastening, we form longitudinal recesses along the entire length of the logs and drill holes for installing birch dowels. The inner side of each log can be cut flat.
Before staining, we assemble the frame on the surface
- We assemble the log house on the surface, marking each log and marking its location on the diagram.
- After this, we disassemble the structure and immerse the wood in running water for 1-2 years.
Important! If this is not possible, this stage can be skipped, but then the service life of the log house will be significantly reduced.
- We dry the stained logs in the shade, avoiding direct sunlight - this way we will protect the parts from cracking as much as possible.
Assembly process - three options
Note! The use of chemical impregnations and antiseptics is not allowed.
- We use dry logs to build a log house, collecting it either gradually, according to the method given above, or entirely, after digging the well.
- To avoid subsidence of the log house on soft ground, we place supports under the lower rims: halves of oak logs or large boulders. In this case, the lower crown in any case should be below the water level in the hottest summer month, otherwise a large amount of clay, sand and silt will get into the water.
- The joints between the crowns are not sealed. To compact them, after laying each log, it is settled with blows of a sledgehammer - accordingly, upon completion of the work, the structure itself will be buried relative to the initial level.
In most cases, the outer part of the log house is a continuation of the inner one. As a rule, a structure made of logs itself looks good, but if necessary, it can be sheathed with clapboard on a wooden frame. Since the plank lining will not come into contact with water, antiseptics can be used to protect it from rotting.
Surface finishing
For both concrete and wooden structures, the presence of a blind area around the perimeter will be extremely desirable
After completing the main work, we need to improve our well so that we can use it with maximum comfort.
For this:
- In a shallow pit, dug along the perimeter of the log house at the construction stage, we fill the clay with a layer of about 40 - 60 cm. We carefully compact the clay “castle”, forming a waterproof horizon. Now, even if we spill some water from the bucket, it will not fall back into the well, but will flow to the side and be absorbed into the soil there.
Advice! If you do not want to dig a deep pit for a clay castle, then the area around the well can be concreted. A concrete layer 15 -20 cm thick also does an excellent job of drainage.
- We cover the clay or concrete blind area with a roll of boards or slabs, laying them in two layers. The concrete area can also be tiled with ceramic tiles.
If we plan to use a well pump, then it is at this stage that we install water-lifting equipment. To protect the water from pollution, we will need a wooden cover for the well - you can make it with your own hands in just a few minutes by cutting a plank board to the shape of a log house and installing a handle on it to open it.
However, a well is also a design object, so even if a pump is used, it should be properly decorated. We do it this way:
Gate diagram
- On the sides of the log house we install two wooden beams with a cross-section of at least 100x200 mm. We bury the beams into the ground 50 cm and fix them to the walls of the log house for more reliable fastening.
- We make holes in the beams into which we install the axis of the well gate. We make the gate itself from a log, attaching a handle to it for raising and lowering the bucket. We fix the bucket itself on a cable or chain.
Next we need to make the roof.
There is a wide field for imagination here, but two options are considered classic:
- The open design involves installing a gable roof on two support pillars. At the same time, access to the log house is provided from all sides, so a lid must be placed on top - it is needed both to protect the water from contamination and for safety reasons.
Photo of open type design
- If we are not satisfied with the appearance of the log house, then we can build a small wooden house around the well. On the sides we install two pairs of inclined rafters, resting either on the ground or on the upper logs of the log house. We make the roof itself from boards or from metal tiles, and we cover the gable parts of the “house” with clapboard, leaving a door on one side through which we will gain access to the well.
Closed option
Naturally, in both cases, the structure can be decorated with wood carvings, varnished for exterior use, or simply painted.