Why is it necessary to install sheathing under the lining?
Regardless of the material of the lining, whether it is natural or not, the main factor determining the quality of the finish is the degree of evenness of the wall on which it will be attached. Everyone knows that planks can be attached directly to the wall, but each defect (depression, bulge) will cause a slight distortion or difference in the level of the rows, etc. Why will the imperfection move from row to row, gaining more and more visual strength, and in the end your last row will be completely askew, and you won’t be able to close it or correct it in any way.
To prevent deformities from occurring, they first install the sheathing under the lining, and this technique is used in almost 99% of cases, because there are no perfectly smooth walls either in old Soviet houses or in new ones. Even if outwardly you do not see unevenness, test the wall using a level or plumb line, measure its length at the bottom and at the top, and the hidden enemy of a beautiful finish will be revealed. The essence of the lathing is simple: it is a kind of mesh made of wood or metal (plastic is also found today), which helps to raise the lining above the wall, and the evenness and attractiveness of the finish will depend only on the level of the lathing, but the imperfections of the wall will be hidden under this frame.
Stage 3 – attaching the trim
We have come to the main stage and will look at how to properly nail the lining. The instructions consist of the following steps:
- First, let's figure out how to nail the lining vertically. The first element is placed with a tenon in the corner and secured with nails through the groove; they are located at an angle of 45 degrees so as not to interfere with the joining of the next element.
We drive the nail with gentle blows of the hammer
- The work continues simply: the tenon of the next element is inserted into the groove of the previous one, after which the element can be tapped more tightly through a wooden block and secured.
The next plank is nailed in the same way
- Now let's look at how to nail the lining in a horizontal position. The most important thing here is the correct location, the groove should always point down and the tenon upward, then moisture will not accumulate in the recesses. The work is carried out from top to bottom, as you need to drive nails into the groove.
Horizontal trim looks great
- If we nail the lining over the top, the work will be slightly different. Nails are hammered into the panels in advance so that they do not peek out from the back side. After this, the element is put in place, tapped through a piece of lining, and only after that the nails are hammered through a hammer flush with the finishing surface.
Nails are achieved after sealing the joints
Advice! You can hammer the nails so that they are deeply recessed into the surface, and cover the attachment point with wooden pins.
This option can also be used
. I hope you have figured out how to nail the lining and how to do it correctly. To make it even clearer, below is a diagram that shows the correct position of the nail, when it holds securely and does not interfere with the joining of the next element.
This is what the fastening technology looks like
And one more option on how to nail eurolining. As you know, it has a very wide tenon, so you can fix elements directly through it. The mounting area is covered with the next panel and everything looks great.
Eurolining can be mounted this way
Lathing for lining - choosing material
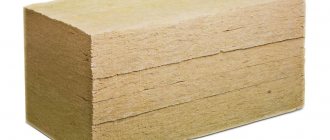
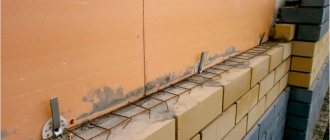
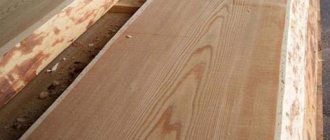
Today, there are three types of materials for sheathing, all of them have their own advantages and disadvantages; we will try to briefly touch on the most important ones. Let's start, perhaps, with wood, as the most familiar and accessible material to us. Bars with a parameter of 2.5-5 cm are used for the sheathing. This range is given to be able to choose the optimal option for different types of lining, because it is also not only made of wood. Basically, you should focus on the fact that the frame must support the weight of the finish and not burden the room, taking up excess space. After all, to fasten light lining it is not at all worth taking the largest bars.
But everyone knows the disadvantages of wood: easy flammability and intolerance to moisture. Of course, today all this can be solved with the help of numerous impregnations, but you can change your habits a little and choose a metal profile. These are galvanized corners, from which the same mesh-like frame is built, onto which the lining dies are then attached. It does not have the disadvantages of wood, but has its own, for example, a high price. The plastic frame is not at all as accessible as the previous two, and is very specific; it is produced more often for special needs than for general use. Therefore, it can be ignored.
The specialists of the site REMOSKOP.RU have prepared for you a special calculator Calculation of lining . You can easily calculate the required amount of lining.
Stage 1 – preparation
To begin with, you should stock up on everything you need, the list is shown in the table.
| Material | Recommendations for selection |
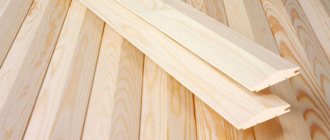
| Lining | Use material with a humidity of no more than 14%, otherwise after fastening you risk finding deformed elements |
| Bar | A frame will be created from it, most often the version with a section of 30x30 or 40x20 mm is used. The material must also be dry |
| Nails | Let's figure out what nails to nail the lining with. For work, a finishing option with a reduced head will be used; the length should be at least 30 mm, if the finishing material is thick, then the entire 40 mm. Galvanized nails are excellent, they resist corrosion well, and the price is lower than other options |
Finishing nails are the best solution when attaching lining.
The technology for nailing lining with your own hands requires the presence of a certain set of tools:
- A regular hammer will be used for fastening. You need to use small options weighing from 300 to 500 grams;
There is a hammer in almost every home
- In order not to damage the lining with a hammer, it is necessary to use a special device - a hammer. With it you can hammer nails without hitting the wood;
Advice! If you don’t have a hammer at hand, you can make one from a nail; you just need to cut off its tip.
A homemade finisher can be made in a few minutes
- The material is cut using a hacksaw with a small tooth size;
- The frame can be attached in two ways. For concrete and brick walls you need a hammer drill and dowels. For wooden surfaces - self-tapping screws and a screwdriver.
How to make a sheathing for lining - methods of fastening
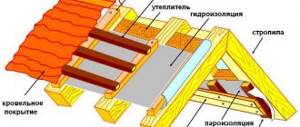
When calculating the amount of material required for the sheathing, they start with the project, that is, what it will look like (the mesh or guides will be in only one plane), what size the lining strips are planned, which will be used for finishing, whether the room will be insulated (then the insulation is placed in the sheathing ). When calculating the geometry, you should remember that first a frame is made around the perimeter, and then intermediate ribs of the sheathing are mounted at the same distance from each other. The distance between them should be such that the lining strips do not bend.
If the planks are long, then several supporting elements of the sheathing should be placed under them. If you use insulation, you should also take into account its dimensions, for example, the parameters of a mineral wool sheet. Moreover, the sheathing cell needs to be made a little narrower (literally a centimeter) so that the insulation fits tightly. At the stage of creating the sheathing, all communications are laid; they will successfully hide under the lining, without bothering the eye on top of the finish; this, so to speak, is an additional bonus of using this frame.
The location of the lathing can be horizontal (the bars are located only parallel to the floor), vertical (perpendicular to the floor) and using a counter-lattice (this is the mesh-like frame). The latter option is rarely used; then another layer of bars is attached perpendicularly on top of one layer, resulting in a grid with square cells. This is done when using insulation or for increased ventilation of the finish. And the direction of a conventional sheathing is determined only by the location of the lining strips; the bars and trim strips must be perpendicular.
If the lining is attached parallel to the floor, then the sheathing bars should be vertical; when the planks are located perpendicular to the floor, then the sheathing should be horizontal.
Claymers, their features and characteristics
In modern construction, lining as a finishing material today enjoys very wide popularity. This is due to many different factors. This material is distinguished by its reliability and quality, and its installation does not cause any particular difficulties for builders. When carrying out external finishing work, hardware for lining, as a rule, is nails and self-tapping screws. However, if it is necessary to perform a neat installation, with the ability to hide all fasteners, clamps become almost irreplaceable. That is why they are used with equal success for both external and internal finishing work.
A house trimmed with “block house” clapboards with fasteners using clamps
What is a kleimer?
A clamp is a special fastening element in the form of a bracket, mounted with nails or self-tapping screws on a prepared base - lathing, or directly on the wall. The clamp hook firmly fixes the lining, while allowing all fasteners to be hidden. This type of hardware is used for the installation of not only lining, but also plastic PVC panels and MDF elements.
Kleimer
Advantages of using clamps
Hidden fastening of lining with clamps has become so popular for many reasons:
- It allows you to significantly speed up the installation process.
- Eliminates all risks of damage to materials, splits or cracks associated with the use of standard hardware - nails and self-tapping screws.
- Individual and precise selection of fasteners corresponding to the type of lining used.
- High reliability of fixation. Boards secured with staples will not begin to play and become loose over time.
- Claimers do not require the purchase of additional components. All that is needed for installation are the staples themselves and nails with self-tapping screws.
- Coating with an anti-corrosion layer ensures durability and a high degree of reliability of fasteners.
- Low cost and availability of clamps, excellent combination of price and quality.
Clamps fixed into the groove of the lining
How to choose the right mounting brackets for lining?
Claypers must be selected based on the type of lining used in finishing the room. It comes in different thicknesses and weights, so the mounting brackets must have the appropriate size and tongue height.
- Plastic products and MDF elements can be fixed with clamps 1-2 millimeters high.
- Fasteners with a tongue of 3 millimeters are used for finishing materials made of chipboard.
- Eurolining is mounted using clamps 4 millimeters high.
- When decorating a house with ordinary wooden paneling, 5 mm staples are used.
- A block house requires the most powerful fasteners. Here you will need six millimeter clamps.
Claymers of different types
The most reliable staples are 0.5 mm thick and made of galvanized steel. Such clamps are not afraid of corrosion and rust, they are durable and can be used with equal success for both internal and external finishing work.
Calculation of the number of clamps required for work
As for the consumption of fasteners, as practice shows, to securely fasten a square meter of lining you will need about two dozen staples. But it’s still better to buy them with a reserve, since the cost of clamps is low.
The exact calculation of the required number of fasteners is carried out using the following algorithm:
- We measure the length of one panel of the lining.
- Determine the pitch of the sheathing frame. As a rule, standard values vary from 40 to 60 centimeters.
- Divide the first number by the second, adding one to the result.
- We multiply the result by the total number of lining panels that are planned to be used for finishing work.
- We calculate the number of packages with fasteners based on the number of staples in one. As a standard, each box contains 100 clamps.
How to make a wooden sheathing - step-by-step diagram
Step 1: Marking the Frame
The frame is considered to be the perimeter, that is, the basis of the foundations, so you will outline the boundaries and know the total area that needs to be covered with intermediate slats located at the same distance from each other.
Already at this stage, all defects in the wall should be carefully leveled, because the frame will be used as a guide for filling and leveling all intermediate support elements. To do this, actively use a plumb line or a building level (depending on the direction of the sheathing). In case of uneven contact of the block with the wall, place substrates (wedges) under it. This way you will achieve a flat surface that will rest securely on the wall and not dangle in the air. Sometimes you will have to proceed in the reverse order, not adding additional material, but grinding off the existing one, making the bars a little thinner in order to level the base. To understand whether to lay down material or cut it off, when marking, you need to determine the nature and number of irregularities in the wall, calculate the most protruding part, the amount of its protrusion, as well as the number and nature of smaller defects. After weighing all this, you can decide what will be more practical and easier to do.
Step 2: Frame installation
Having marked everything and determined how to eliminate defects, it’s time to attach the guides around the perimeter. This is done with dowels and screws, and the fasteners should meet every 25 cm. Having created the edging of the sheathing, check the uniformity of the created plane with a level. The frame also includes fastening the beams around the openings for windows and doors; they also need to be surrounded, as it were, with a wooden border in order to properly secure the lining there.
Step 3: Creating the intermediate part of the sheathing
Now all the remaining material for the planned project is being filled in.
Do not try to place the ends of the intermediate bars close to the frame along the perimeter, and it is especially not worth connecting them. Leave a small gap in case the wood expands or shrinks, so that these parts do not warp each other in case of seasonal changes. They also need to be secured with dowels and screws, so even without fixing them to the frame, the intermediate elements will hold together well. You should start fastening each beam in two places - one screw at the top and bottom. Then examine the entire wall, which defects fall under the fixed beam, determine the type of substrate, level the plane using a level or plumb line, and only then fasten the entire structure with a screw. This is how each batten of the sheathing is verified, and as it is ready, periodically inspect everything to make sure it is in compliance.
Step 4: Finish work
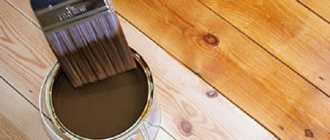
When you have secured all the beams, you should do a final level check. Why do we place such emphasis on this in every step, because this is why the lathing is done, in order to perfectly align the wall. Otherwise, finishing with clapboard will immediately reveal the imperfections of your home, so mistakes here are unacceptable. If the check shows that the wall has become smooth, you need to make the final touch - treat the wood with impregnations against mold, mildew and fire. After they have dried, you can begin the planned finishing of the room.
- Author: Manager Andrey
Rate this article:
- 5
- 4
- 3
- 2
- 1
(8 votes, average: 1.9 out of 5)
Share with your friends!