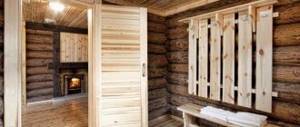
The drain in the wooden floor of the bathhouse is installed under the floorboards. That is, the floor boards are placed at a short distance from each other so that through the cracks between them water flows freely into the underground space and there, falling onto a specially prepared surface, flows into the drain hole. The main advantage of this design is, of course, the warm flooring material, which, when walking on it with bare feet, is much more pleasant than the alternative option of porcelain tiles.
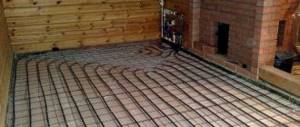
Basic drainage scheme
A fairly complex floor arrangement allows you to avoid the destructive influence of water on the floor base. How to make a floor slope to drain water from a bathhouse with your own hands? Before you begin the process of pouring floors with a drain system, it is worth familiarizing yourself with some technical nuances. According to many experts, installing a floor base with a hydraulic apparatus is advisable exclusively in the washing department. There are several reasons for this:
- Pouring concrete floors in a steam room leads to strong dust formation at a time of increased dryness of the atmosphere;
- Concrete surfaces tend to get very hot, unlike wood. Therefore, the presence of concrete in the steam room cannot be called appropriate;
- Cement screed has low ductility, so during thermal expansion or compression it will crack very quickly.
What should the base structure be like for the water drainage system to work like a clock? In order to evaluate the advantages of one or another method of laying a hydraulic apparatus, we will consider the process of assembling and draining water from the bathhouse. Sloped floors in most cases “work” using the following technology:
- The slope at the base allows you to collect all the liquid at one point in the room;
- A ladder is installed in the corner of the water assembly, through which “waste” water is removed from the room;
- From the drain, the liquid through the background pipe enters the sewer system or a crushed stone filter, which is installed under the bathhouse.
To make a really high-quality system for draining water from a bathhouse with your own hands, you need to take into account many points:
- foundation type;
- type of ladder;
- “seasonality” of the bath;
- floor type (concrete, wood).
A fairly complex arrangement of floors allows one to avoid the destructive influence of water on the floor base. If you make the base with a slope, the liquid will be quickly evacuated from the room during water procedures, which will prevent damage to the concrete screed or wooden boards.
Rough screed
Before making a concrete floor in a bathhouse, it is necessary to perform a rough screed. Typically, the thickness of such a layer is no more than 10 centimeters (optimally 5-7).
Mixture recipe
To prepare the mixture, you will need sand, cement, gravel, crushed stone. When wondering what kind of concrete is needed for the foundation of a bathhouse (base), it is better to choose M400. Saving on materials can cause poor quality coatings.
Concrete mortar recipe:
- Cement M400 – part
- River sand – 1.2 parts
- Crushed stone, gravel fraction 5-10 millimeters - 2.7 parts
If M500 cement is used for pouring, the volume of gravel and sand can be increased to 3.2 and 1.6 parts.
Mixing
All components must be carefully measured and then mixed. The volume of water is determined during the process: the solution must be of optimal consistency: exceeding the permissible volume of water prolongs the hardening period and leads to cracks, while reducing it makes leveling the surface impossible.
When pouring the floor in a bathhouse with concrete with your own hands, you usually add water in portions and mix the mixture until a thick, plastic, evenly moistened consistency is obtained.
Insulation
Before pouring the rough screed, a polyethylene film with a density of 200 microns is laid on the gravel. It will not allow water and solution to penetrate into the gravel, eliminating the risk of a bridge for capillary moisture and reducing the strength level of the concrete screed.
After the insulation layer has been laid, the floor in the concrete bathhouse can be poured. Filling is carried out layer by layer and quickly, carefully leveling the surface with the desired slope. Then they pause in work, waiting for the screed to harden and gain strength (2-3 days). These days the floor is moistened by spraying water or covered with a damp cloth.
Floor requirements
If you plan to use the steam room throughout the year, the base must be insulated.
In order to correctly carry out the hydraulic technical part of the work when constructing a frame bath, you need to pay attention to many technical nuances. The service life of the floor base depends on the quality of the drainage system. Therefore, special attention is paid to this stage of construction work.
The construction of sloped floors can be different, so when laying a hydraulic system with your own hands, it is worth considering several construction technologies. If you do not have any experience in carrying out installation work, you should give preference to the simplest but most reliable water drainage system. But before you begin the process of arranging the base, it is worth considering the following requirements for floors in the bathhouse:
How to properly slope the floor in a bathhouse
- The surface of the floors must be hard and non-slip;
- If you plan to use the steam room throughout the year, the base must be insulated;
- Floors must be quickly dried and cleaned of dirt;
- To prevent the development of pathogenic microflora in the bathhouse, it is imperative to install a water drainage system.
Floor Pie Composition
Before pouring the floor in a concrete bathhouse with your own hands, you need to thoroughly study the technology. In order for the floor to be durable and warm, a structure is made of several layers: the compacted soil is covered with a layer of sand, then gravel, a dense polyethylene film is laid, a rough screed is applied, a layer of waterproofing and thermal insulation is installed, and the process is completed with a finishing screed. This option is suitable for arranging a floor on any type of soil.
Today, there are two methods by which a concrete floor in a bathhouse is poured: directly on the ground or on special logs (creating a ventilated subfloor). The choice of technology depends on the budget, requirements and conditions of the work.
Installation of a concrete floor on the ground
You can make a concrete floor in a bathhouse on the ground with your own hands directly on the base, having first removed a layer 40-50 centimeters thick. After compaction, gravel is poured into the hole in a layer of 15 centimeters, compacted, then sand is poured in a layer of up to 50 centimeters and compacted again. A screed is poured onto the sand at a certain slope, in accordance with the design and markings.
Usually two layers of screed are poured - one rough, the second finishing, always laying layers of thermal insulation and waterproofing between them.
Concrete floor with ventilated subfloor
The concrete floor on wooden joists in the bathhouse is made to create a ventilated space under the floor. Thus, there is no need to install additional ventilation systems in the concrete screed. Wooden logs are pre-treated with special antiseptics, and then mounted in a system of beams with a diameter of 10x20 centimeters in the form of a grid.
A plank subfloor made of boards 2-4 centimeters thick is attached to the joists. A layer of waterproofing and thermal insulation is also performed. Only after this is the concrete screed reinforced with steel mesh poured.
Water drainage methods
Diagram of a filtration system for draining a bath.
The design features of the base and methods of arranging the hydraulic apparatus directly depend on what types of materials the floor will be constructed from. As a rule, wood, cement screed or combinations of materials are used to finish the base. For any type of construction, a system for draining water masses from the bathhouse is prepared in advance.
The design of the drain mechanism can be different and depends on many factors:
- For a bathhouse for three to four people, it is advisable to make a cesspool under the foundation of the structure. The walls of such a pit are edged with brick and covered with sand. As the tank fills with water, the liquid is pumped out of it using a cleaning machine;
- If you are building a bathhouse for a large number of people with your own hands, it is better to make a drain pipe connected to the central sewer system or a separate well;
- To purify wastewater from dirt, it is advisable to install an underground filtration system. It is equipped with a special sump, distribution well and waste pipe;
- A simpler option for water purification would be to install a filter well. Filter material (crushed stone, brick fragments, expanded clay) is poured under the bathhouse. In the process of irrigation with water, the mineral bed is covered with silt, which purifies the wastewater before entering the ground.
Selection of sewer pipes
Choosing the diameter of the pipe depending on the level of the slope
A correctly made slope at the base of the drain does not yet guarantee the rapid evacuation of water masses from the room. In this matter, the choice of sewer pipes is not the least important. Since the bathhouse uses a non-pressure liquid discharge system, it is advisable to use the following pipes to install the hydraulic apparatus:
- The minimum diameter of the pipe should be 50-60 mm, and the thickness of its walls should be at least 3-4 mm;
- It is advisable to assemble the external pipeline from PVC materials, since they are more frost-resistant;
- During the installation process, pipes are laid in the soil at a level that is below the freezing point.
The article presents some of the stages of installing a sewer pipeline with your own hands. To ensure the system is tight, all structural elements are assembled using high-quality seals. Any holes in the water supply will lead to airing and retention of water masses in the system.
Shower floors for baths on columnar or pile foundations
Quite common foundations for Russian baths satisfy most developers in terms of cost and performance characteristics. And for flooring and wooden structures, underground spaces are an ideal option. Provide the maximum possible natural ventilation, reduce the likelihood of developing fungal diseases of wood, etc.
Practical advice. When arranging such foundations, take the necessary measures to ensure that the building area of the bathhouse is on a slight elevation, this will ensure that water quickly flows out of the building. This is especially important on heavy clay soils. Do not allow puddles of standing water to appear under the bathhouse.
We recommend building a bathhouse at higher elevations
Step 1. Calculation of quantities and preparation of materials. Measure the length and width of the steam room, find out its area. For covering, use edged boards 35÷40 mm thick, buy them with a small margin. In addition to the boards, you will need a plinth and nails approximately 100 mm long.
Soak the boards with an antiseptic. Impregnate only dry lumber; carry out work in a shaded place and in calm weather. You need to soak it at least twice.
Antiseptic impregnation of boards
Please note that the boards should absorb the antiseptic and not dry it in the sun.
Floor beams or joists also need to be treated.
The timber is soaked in antiseptic
It is advisable to lay the floors on beams; if they were not installed during the construction of the log house, they will have to be laid on joists. To do this, you need to do preparatory work.
- Mark the locations of the posts for the logs; the distance between them is selected depending on the size of the logs. In most cases, 50x100 mm boards are used for joists; the distance between the posts in this case should be ≈80 centimeters. If the perimeter of the steam room is not a multiple of the distance between the columns, then it should be slightly reduced or increased so that the distance between all the logs is the same.
- Dig holes for the posts. Depth approximately 60 centimeters, size 40x40 centimeters. Be sure to pour sand 15-20 centimeters thick onto the bottom and compact it. The sand will ensure that the posts are positioned at the same horizontal level, regardless of soil swelling in winter. For the middle zone of our country, this is not very important; in a week under a fallow land, the ground is unlikely to freeze to such a depth. But in the northern regions, a sand cushion must be poured.
Support columns for joists
- Make columns from concrete blocks or monolithic concrete.
Example of installed columns
Never use red bricks, they are very susceptible to moisture.
- Using a hydraulic level, mark the floor zero, and align the outer columns using these marks. The height can be leveled with a cement-sand mortar with an increased amount of cement.
- Stretch the rope between the finished outer posts and check again that it is horizontal.
- Use the rope to adjust the height of all remaining posts.
At least two layers of roofing felt must be placed between the joists and posts. After 10-14 days the logs can be laid. The ends of the logs are fixed to the crowns of the log house with metal corners and self-tapping screws.
An example of correct installation of logs on posts
Prices for roofing material
roofing felt
Step 2: Cut all boards to size.
Cutting boards
To avoid deformation, the length of the boards should be 1÷1.5 cm less than the size of the steam room. Before cutting the boards, check the dimensions of the bath; if the width of the room at the corners is not the same, then you will have to adjust each board separately. It is better to cut with a hand-held electric saw. Before working with any electric tool, check its serviceability and the condition of the cutting element.
Schemes for laying floor boards
Step 3. The distance between the boards should be within one to one and a half millimeters; this width of the cracks is sufficient for rapid drainage of water, and small gaps minimize the negative impact of possible drafts. By the way, you should not be afraid of them; a large number of cracks throughout the entire area of the room do not allow too high a speed of air movement through them.
Laying floor boards
It is highly advisable to make the cracks the same throughout the entire floor; for this you should use a template. We recommend using ordinary wooden rulers for these purposes. They are perfect in thickness, and the corners of the boards will not be damaged. Place the rulers vertically along the edges of the board being nailed; after fixing the first ruler, they are removed and installed between the next ones.
Place a ruler or other template between the floor boards during installation.
Start laying the boards from the threshold; as a rule, there is a shelf on the opposite wall, under which you can hide an uneven floorboard.
Step 4: Nail. You need at least two nails for each board; they should be nailed along the edges and only at a slight angle. In this position, the nail passes through several annual rings, which minimizes the risk of cracking of the lumber.
Hammering nails
Important. Floorboards, regardless of width, must be nailed with two nails to each joist or beam. Otherwise, they will certainly warp over time, which causes great inconvenience during bathing procedures.
If the last board does not fit the rail, measure the exact dimensions and saw off the excess part. That's all with the boards, you can move on to the baseboards.
Ladder arrangement
Options for installing drainage drains in a bathhouse
What is a drain? The drain is a plumbing device that plays the role of a water intake. It is equipped with a siphon or water seal, which prevents the spread of unpleasant odors from sewer pipes. The drain performs one important function - it quickly redirects wastewater into the sewer system.
When laying a sewer system with your own hands, the drain must be installed in compliance with certain rules:
- The drain must be located at the very bottom of the floor base, otherwise complete evacuation of water from the bath will be difficult;
- For rooms with high levels of humidity, it is advisable to choose drains or polymer materials, since they are not subject to corrosion;
- In order for the ladder to “work” correctly, during its installation it is advisable to raise the pipe 10 cm from the bottom.
If necessary, you can assemble the sewer with your own hands and without organizing a water seal. To do this you need:
How to make a leaky floor in a bathhouse secured to joists?
- Raise the base of the structure by 3 bricks and install a drain pipe connected to the drainage well;
- From the inside, attach an elbow with a diameter of at least 5 cm to the pipeline, with its upper part located 4 cm below the level of the base;
- Fill the base with a cement mixture, and then make a finishing screed with grooves through which water would easily flow into the drain;
- At the final stage of the work, a rubber ball is placed on the drain elbow, which acts as a shutter valve that prevents the spread of odor from the sewer.
Installation of floor skirting boards
Moldings for finishing a bath
The profile of the skirting boards does not matter, choose which one you like best. Skirting boards are nailed with nails 30÷40 millimeters long, the specific values depend on its thickness and width.
The shape of the plinth and the cutter for its manufacture
Prices for different types of skirting boards
plinth
Step 1. Take measurements of the steam room around the perimeter. Skirting boards have a standard length of two meters, and most paired ones are wider and longer. This means that the moldings will have to be joined. If in ordinary rooms uneven joints can be sealed with wood putty or colored sealant, then in a bathhouse this method of eliminating errors cannot be used; the putty will quickly fall off. Try to make the joints of the skirting boards in inconspicuous places: behind the stove, near containers with water, under a shelf, etc. Of course, be very careful when cutting the skirting boards; the tool must be sharp and in good working order.
Wooden plinth and heat-treated abasha strip
Step 2. Check the corners of the bath, they should all be exactly 90°. File the end of the baseboard at a 45° angle. For even cutting, use a factory-made miter box or make the device yourself.
How to cut a floor plinth
We recommend cutting with a hacksaw - the cut area is much smoother. Always apply the left plinth to the miter box on the left, and the right one on the right, to the side away from you. Otherwise, instead of an external corner, you will get an internal one and vice versa. If you rarely work with a chair, we advise you to write on its sides where to install the left and right ceiling and floor plinths on the outer and inner corners.
The photo shows the joining of skirting boards in the inner corner of the room
Video - How to join skirting boards
It is somewhat more difficult to cut the baseboard if the angle of the steam room is different from straight. If you do not have enough experience, we advise you to try cutting any slats for the first time. Install them in the right place so that they rest against the walls. Use a pencil to mark where the slats intersect.
Example of plinth markings
From these marks, draw straight lines to the corners, make a cut along the lines. Check what you got. Everything is correct - excellent, repeat the same operations with the baseboard. A large gap has appeared in the gley - think about where you made the mistake, repeat all the operations again, taking into account the error. This does not take much time and will save expensive material.
Accurate joining of skirting boards is very important
Step 3. Start nailing the baseboard from the corner of the bathhouse, step back 2-3 centimeters from the cut point, nail the nails at an angle at a distance of 30-40 centimeters.
Step 4. Using the same method, nail the baseboard on all sides of the steam room. Check their position and, if necessary, remove burrs or lint with sandpaper. If there is a noticeable difference in height at the joints, then first remove them with a sharp chisel, and then correct them with sandpaper.
Installation of wooden plinth in a bathhouse
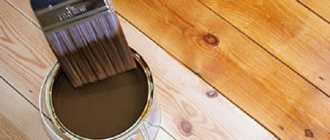
That's all. In Russian baths, as a rule, the floors are not varnished or painted, but if you really want to, apply a topcoat. Just keep in mind that no matter how durable coatings you use, they will still peel off - the operating conditions are too harsh.
Now let's look at how to make pouring floors in bathhouses on a strip foundation.
Installation of leaking floors
Diagram of a leaky floor with a drain
Leaky floors are the simplest option for arranging a floor base in a bathhouse with your own hands. In such a system, it is not necessary to slope the floor, since water easily seeps through the boards and ends up in a drainage hole or well. Leaky floors, unlike solid ones, have one advantage - the absence of sewer pipes.
It should be noted that such a base device is suitable for a frame bath, which is used exclusively in the warm season. If the structure is planned to be used all year round, it is advisable to pour a concrete screed before laying the boards. However, in this case, it is better to make the flooring made of boards removable so that they can be dried if necessary.
When installing a leaky wooden floor, you need to consider the following points:
- To organize the flooring, you need to take well-processed planed boards without a locking system;
- The boards are secured to the floor beams using nails that are driven in at a slight angle;
- The gaps between adjacent boards should be the same and be 5-6 cm.
Despite the fact that there is no slope in the floor, water escapes very easily through the holes between the boards. As a rule, tanks are installed under such a bathhouse to collect water, from where it is discharged through a drain pipe into the sewer system.
In order to prevent the appearance of mold in the bathhouse, during the process of finishing the base, attention is paid to the following points:
- It is best to assemble a wooden floor from coniferous wood boards, since they are less hygroscopic;
- To ensure normal drying of the floor, holes need to be drilled in the foundation for better movement of air masses;
- There must be an air gap of at least 0.5 m between the base and the ground.
How to make a floor in a bathhouse with a drain
Those people who have a country plot at their disposal traditionally have a desire to build their own bathhouse. This task is quite complex and troublesome, but quite doable. In order to carry out all the large-scale work correctly, you will have to “shovel” in advance a lot of information about the construction of this building and the installation of all the necessary communications in it.
How to make a floor in a bathhouse with a drain
One of the first specific questions that arises when planning a building will be - how to make a floor in a bathhouse with a drain? To install such a structure, it is necessary to consider the installation of bath floors, the installation of a drain siphon, the water drainage scheme, the choice of basic materials and some other nuances that will help make the work easier.
Requirements for floors in the bathhouse
When building a bathhouse, special attention should be paid to the floor structure, since it bears the main “wet” load of this “narrow-profile” structure. The main task in arranging bath floors, after their strength, is a complete and unhindered outflow of water. The long-term operation of the entire structure directly depends on the correct installation of the drainage system and drainage pipes. It is this factor that influences the wear and tear of all layers of the floor and the possibility of destructive putrefactive processes occurring in its wooden elements.
When installing floors in a bathhouse, different schemes and technologies are used using modern waterproofing materials or relying on old proven folk methods. If you decide to handle this work yourself, then it is worth considering several options that will help you decide on the complexity and installation and the characteristics of a particular structure. If you have no experience in the art of construction, it is recommended to choose the most reliable, simple, affordable and proven method of drainage installation.
But, no matter what option you choose, the floors must meet the general criteria that determine the normal functioning of the bathhouse and the comfort of visitors:
- The floor must have a sufficiently hard and non-slip surface, both dry and wet.
- The floor surface should be warm, especially in cases where it is planned to use the bathhouse year-round.
- Floors should be easy to clean and dry, as in any sanitary and hygienic room.
- The key condition is the mandatory presence of a rapid water drainage system, in order to avoid the development of unwanted microflora and the appearance of an unpleasant odor in the bathhouse premises.
Variety of designs for bath floors with drain
The design of the floor and the arrangement of drainage in it directly depend on what material it is planned to be constructed from, and how the bathhouse is planned to be used.
Floors in bath rooms are made of planks, concrete, or a combination of several materials.
For any type of floor, a water outlet is prepared in advance - this can be a sewer pipe connected to a certain area of the room, or a drainage hole dug directly under the bathhouse into which drainage is poured. The floor is almost always arranged at a slope towards the drain, and only in one case can it be made level - when a leaky light covering for a summer bath is provided.
The simplest option is to drain water into a waste pit under the bathhouse.
If a sewer drain pipe is installed for drainage, it is located in one of the corners or in the center of the floor of the room. Another option for draining is to slope the surface towards one of the walls, along which a kind of gutter is arranged, which also runs at a slope to the drain hole, to which the sewer pipe is already connected.
It is quite difficult to install a plank floor on a slope, but if it is planned to cover it with planks, then you can turn to the combined option. It includes a subfloor in the form of a concrete screed made at a slope, into which a sewer pipe is embedded. A level flooring of the leaking floor is installed on top of the screed. Water, penetrating between the boards onto the slopes of the subfloor, will rush along them to the drain hole and freely go into the pipe.
A combined floor can be called the best option, since it fully complies with all the above criteria for reliability and comfort, especially since it is quite possible to lay insulating material under the screed, which, with proper waterproofing, will not come into contact with moisture.
Leaking floors
This type of bath floor is quite simple to implement and can be classified as an inexpensive design. To install such a structure, lumber of the first or second grade will be required. The flooring consists of smooth, without locks, well-planed boards, fixed to the floor beams, at a distance of 5 ÷ 7 mm from each other. Thus, there are gaps between them through which water flows out.
Leaky bath floor
In this case, it is quite possible to do without installing sewer pipes, and under the floor, which is raised from the ground by 500 ÷ 550 mm, a good drainage layer of crushed stone or expanded clay and sand is laid, going deep into the ground by about 500 mm.
Typically, a bathhouse with such a floor covering is built on a summer cottage for use only in the warm season, since the leaking floor will quickly cool down the premises and in this case it will not be possible to obtain a good steam room effect at low temperatures outside.
If you plan to use the bathhouse all year round, then a leaking floor is also suitable, but you need to use the combined option already mentioned above, when a concrete screed is placed under the floor boards. With this option, it is better to make the wooden flooring removable so that it can be taken out in parts outside, dried and ventilated.
Installation of leaking floors
To know what kind of leaky floors there may be and how to install them correctly, you should consider the processes step by step.
First option
Installation of this type of floor can be called the simplest, but quite labor-intensive. Drainage begins at the stage of constructing the foundation, which can be strip or columnar. The base under the walls is raised to a height of 500 ÷ 550 mm.
If a strip foundation is being built, then it is necessary to install ventilation holes in its walls at a height of 250–300 mm.
If a strip foundation is used, then “vents” – ventilation holes – must be left.
Fragments of the ventilation pipe for these purposes are embedded during the pouring of concrete into the formwork.
When installing a leaking floor, the drain is installed underground. To do this, a small pit is dug in its center, 600–700 mm deep if a sewer pipe is installed in it, and up to one and a half meters deep, provided that water is drained directly into the ground. The second option is only possible if the soil at the site where the bathhouse is built is loose, with a high sand content.
On the surface of the underground soil, a slope is formed towards the pit, where water should collect and go into the prepared drainage or into the sewer pipe. Any foundation with this method of water drainage must be waterproofed in the most thorough manner - usually bitumen mastic and roofing felt are used for this process.
Leaky floor option
If a strip foundation is being installed, then the underground space, made on a slope, must be concreted or at least a very dense embankment made of crushed stone. When installing a columnar foundation, drainage pads around the supports are usually used.
Prices for bitumen mastic
bitumen mastic
The work takes place in the following sequence:
- If a drain pipe is being laid, then after the foundation pit has been dug, a hole is dug in the middle of the underground space.
- Next, a trench is laid from its bottom through which a pipe is laid that drains water into a sewer or drainage pit. The pipe is installed at a slope of 3 ÷ 4 degrees - the height difference is about 5 cm per linear meter of length.
Laying a sewer pipe
- If the drainage pit is located directly under the floor, then the pit under it should be deeper, and a sand cushion 150 ÷ 200 mm thick is laid on its bottom and then compacted, and on top of it - a layer of crushed stone 350 ÷ 400 mm thick.
- After the pipe is laid or the drainage pit is completed, a foundation is erected, which must be waterproofed.
- Next, along the perimeter of the underground, the soil is removed with a slope of 10 degrees from the walls or foundation pillars towards the pit.
- Then the slopes of this slope can be covered with crushed stone, which must be well compacted, or a reinforced screed is installed over the entire plane. To do this, a reinforcing mesh with cells of about 80×80 mm is laid on top of the crushed stone. A fairly dense concrete solution is prepared, poured, leveled in compliance with the slopes, and then smoothed and ironed.
- If it is necessary to reduce the cost of constructing a structure, then instead of concrete mortar to form slopes, a clay castle can be made on top of crushed stone to retain water. It is moistened and kneaded thickly, and then laid out in a thickness of 80 ÷ 100 mm and leveled well, and as it dries, smoothed, moistening with water.
- After the drain and pit are ready, a strapping belt and floor beams pre-treated with antiseptic impregnation are installed on the foundation walls, covered with waterproofing material. The lower crown beams are attached either to a metal strapping belt (if it is provided for in the foundation design), or using embedded elements - anchors, studs, etc. The connection of the crown and floor beams can be different - using metal corners, cutting, etc.
Installation of basement beams
- Floor boards are mounted on the floor beams at a distance from each other of 5 ÷ 7 mm, which must have a thickness of at least 20 mm. The thickness of the boards is selected depending on the distance at which the floor beams will be laid.
Wooden floor covering for leaking floors
Table of the ratio of the sizes of floor beams, their installation spacing, and the thickness of the flooring boards:
| Board thickness, mm | Floor beam spacing, mm | Board length, mm | Beam section, mm | Pitch of support pillars, mm | Beam section size |
| 20 | 300 | 2000 | 60×110 | 1000 | 50×80 |
| 24 | 400 | 2500 | 70×150 | 1200 | 50×90 |
| 30 | 500 | 3000 | 80×150 | 1500 | 50×100 |
| 36 | 600 | 3500 | 80×160 | 2000 | 60×110 |
| 40 | 700 | 4000 | 100×180 | — | — |
| — | — | 5000 | 150×200 | — | — |
| — | — | 6000 | 180×220 | — | — |
Sometimes the boards are not nailed to the floor beams, but are fastened together with timber and laid on top. The boards are assembled into panels in such a way that the fastening bar is located between the floor beams. This is done so that it is possible to periodically take the gratings outside for proper drying.
Second option
Another, even simpler option, but which is only suitable for a summer bath, is to install a waste pit in the entire underground space, between the foundation pillars. It is completely filled with drainage, consisting of a sand cushion, covered on top with a layer of crushed stone or a mixture of these building materials.
Drainage layer directly under a leaking floor
In this case, water flows freely over the entire surface of the underground. Crushed stone breaks its flows, and sand plays the role of a filter that will absorb and drain it into the ground natural drainage layer. The depth of the pit should be about 450 ÷ 500 mm, and the backfill should be at least 350 ÷ 400 mm thick.
Sometimes, instead of a sand and gravel cushion, a waterproof tray is placed under the floor, which is mounted with a slope towards a drainage hole or ditch located next to the bathhouse, where the water will be drained. The pallet can be formed from several layers of roofing felt, which are hot glued together using bitumen mastic.
Third option
This option can be used in any bathhouse used all year round, since it provides floor insulation. Its installation is more complicated and will require the use of a considerable amount of materials.
- Work on this floor option also begins when building the foundation. The drainage pipe is laid through the underground part of the foundation wall at a slope of 30 degrees into the cesspool or, if possible, connected to the central sewer system. The pipe is buried in the ground below the freezing layer by 100 ÷ 150 mm.
Sewage pit lined with bricks
- The cesspool can be built from bricks laid at a distance of 50 mm from each other, from concrete rings in which holes are drilled or punched to drain water into the ground. And the simplest option is from old car tires.
Drainage well made from car tires
Prices for concrete rings
concrete rings
The size of the pit must be calculated depending on how intensively the bathhouse will be used.
- Before burying the ditch where the pipe is laid, it is recommended to fill it with expanded clay, which will serve as insulation and prevent the water in the pipe from freezing in winter.
Then the trench is filled with soil, which must be carefully compacted.
Video: example of laying a sewer pipe from a bathhouse being built
- Further work is carried out underground. In the area where the drain will be located and where the drain pipe is connected, a pit is made. After it is lined with brick and plastered, it should have a size of approximately 250 × 250 mm, and its depth should be 300 ÷ 400 mm. The walls of the pit should rise to the level of the rough concrete floor of the structure.
- The pipe is embedded in one of the walls of the pit, then covered with soil.
- Then, along the entire perimeter of the floor in the underground space around the pit, a sand-gravel mixture is backfilled, with the help of which they begin to form a slope for drainage on the subfloor. This layer needs to be compacted well - for this it is moistened with water.
- An insulating layer consisting of concrete mortar mixed with foam plastic crumbs is applied to the gravel mixture, or the entire surface is laid out with polystyrene foam slabs 30 ÷ 50 mm thick, maintaining a slope.
- Next, it is necessary to waterproof the joints of the wall and the formed floor of the room. The rolled material is laid on the floor in a strip of approximately 200 mm and raised to the walls by 500 mm. For waterproofing in this case, roofing material is best suited.
- It is recommended to lay a reinforcing mesh on top of the foam and waterproofing, which will make the subfloor stronger and more durable.
- The mesh is filled with a leveling screed made of concrete mortar - its thickness must be at least 50 mm. All work is carried out taking into account maintaining the slope angle from the bathhouse walls to the pit. The screed must be perfectly flat, since it will then be decorated with tiles or other finishing materials.
Finished rough screed with drain hole
- The finished screed can be treated with deep penetration waterproofing impregnation, laid with ceramic tiles or covered with liquid rubber or glass.
- After this, a water seal is installed in the pit.
- The top of the pit is covered with a metal mesh to collect large debris.
- A removable, leaky wooden flooring is installed on the finished floor, which is convenient because it can be lifted and taken out for drying, while the concrete or tiled floor underneath can be put in order at this time.
In this diagram, all layers of the insulated pouring floor are clearly visible. The only point that is not indicated on it is the reinforcement of the screed.
Approximate diagram of a leaking floor with insulation
1 – Bath wall with internal lining.
2 – Vapor barrier layer on the walls.
3 – Waterproofing layer at the junctions of the wall and floor. This material is needed precisely in these places, since moisture that gets into them takes much longer to dry out. Ruberoid used for waterproofing covers and rounds the joint.
4 – Concrete foundation.
5 – A backfill layer of sand-gravel or crushed stone-sand mixture.
6 – Insulation layer.
7 – Subfloor screed.
8 – A layer of ceramic tiles, topping impregnation, a coating of liquid rubber or glass - these materials make the surface smoother, and water drains well along it, and they also additionally waterproof all layers of the floor.
9 – A drain pipe that drains water from the pit into the sewer.
10 – Leaking removable floor.
11 – A grate installed on the pit hole to retain large debris.
12 – A water seal that prevents cold air and unpleasant odors from entering the room from the sewer pit.
13 – A pit for receiving flowing water and directing it into the drain pipe.
The bathhouse foundation needs a special approach.
The specifics of the operation of the bathhouse impose special features on the design of the base of this structure. A lot of useful information on this issue is posted in a special article dedicated to the construction of the foundation of a bathhouse with a drain .
Leak-proof wooden floor
Leak-resistant wooden floors are more difficult to install. Its design consists of two plank layers - “black” and “white” floors. The latter is arranged at a slope towards the drain. Insulation is installed between these two layers, and a sewer pipe and drain ladder are installed through the entire thickness of the structure at the lowest point of the slope.
To cover this type of floor, you will need a good first-grade tongue-and-groove board with tongue-and-groove locks, made from wood with low hygroscopicity, for example, oak, but high-quality pine is also quite suitable. Oak has a high structural density, due to which moisture penetrates minimally into the thickness of the wood of the boards, and pine has good resin, which also inhibits the absorption of water into the material.
High-quality tongue and groove boards for leak-proof floors
In this design, the boards are installed tightly to each other, and the coating should not have even minimal gaps. Water flows along the floor plane directly into the drain hole.
If you choose just such a floor, then the bathhouse needs very good ventilation, since the wood must be able to dry completely. After each use of the bathhouse, the doors to the premises must be opened for ventilation.
Prices for tongue and groove boards
tongue and groove pine board
Installation of insulated non-leaking floor
- The drain pipe in this design is also installed when constructing the foundation, and its pipe rises to the required height, which should be approximately 50 mm below the white non-leaking coating.
Pre-installation of sewer pipe with drain
You can calculate the exact height of the pipe by purchasing a drain ladder in advance and measuring its dimensions. The grate of the ladder should be located on the same level with the “white” floor.
- Next, the underground space is completely waterproofed using roofing material, which is laid on the soil base and walls and the upper plane of the strip foundation, raised to a height of 450 ÷ 5000 mm.
- On top of the waterproofing material, crown beams and floor beams are laid and secured onto the foundation strip.
Waterproofing the subfloor and installing floor beams
- Subfloor boards are fixed to the floor beams at a distance of 50 ÷ 70 mm from each other. In the area where the drain pipe is connected, a round hole of the required diameter is cut out in the floor for it.
With the help of joists installed on the subfloor boards, a slope is formed towards the drain point
- Next, a drain slope is formed on the rough flooring. For this purpose, bars or boards are used, hewn in compliance with the required slope. Usually the slope is made no more than 5°, the height difference will be about 80 mm per linear meter. A steeper slope may no longer be safe for those washing in the bathhouse.
To accurately achieve the required slope, bars are attached to the walls around the perimeter of the room, which will become an element of the sheathing and mark its highest point. Their height usually varies from 50 to 100 mm.
- A vapor barrier film is secured on top of the mounted sheathing with brackets, and it is nailed to the sheathing and subfloor boards.
- Insulation is laid on the vapor barrier, between the sheathing beams - for this it is best to use extruded polystyrene foam. The material must fit tightly between the sheathing elements - if gaps remain, they are filled with polyurethane foam to avoid the formation of cold bridges.
Laying insulation boards between floor joists
Prices for extruded polystyrene foam
extruded polystyrene foam
- The insulation must be covered with waterproofing material on top. Its role can be played by ordinary thick polyethylene film. If you have to lay several of its canvases, then this is done with an overlap of 300 ÷ 400 mm, and the joint is glued together with waterproof wide tape.
- For the drain pipe, holes are made in the insulation and waterproofing. Then the waterproofing film is secured to it with waterproof tape, neutralizing the resulting gaps.
- After this, the finished floor boards are fixed to the sheathing, which are assembled into a single plane using tongue-and-groove locks. Before installation, the material must be treated with an antiseptic agent, which will protect the wood from biological decomposition.
Options for laying non-leaking floor boards
At the joints of the ends of the boards, if they have to be made, the floorboards must be tightly fitted to each other.
The best option is to install the boards in such a way that the water drains along the grain of the wood, and not across it. In this case, the material will absorb moisture less, and water will flow into the drain more intensively.
- To install a drain ladder in the finished floor boards, it is necessary to measure and cut a hole of the required diameter.
Marking for the hole for the drain ladder
- In a non-leaking wooden floor, the drain can also run along one of the walls. In this case, the slope is arranged from one wall to another, and a plastic gutter is installed on the bottom line of the slope, which is also mounted at an angle towards the drain connected to the sewer pipe.
If this option is chosen, with a slope in one direction, then the sheathing under it is done slightly differently - the highest bar is fixed along one wall, the lowest - along the drain groove.
- After completing the installation of the plank covering, baseboards are installed along the walls. The gaps around the sewer pipe are sealed with sealant, and the drain hole of the drain is closed with a grate.
Concrete floor
This type of floor is suitable for a bathhouse in all respects, except for one thing - it is cold, even if there is insulation inside the structure, so very often infrared or cable electric floors are laid under the finishing material, on top of the screed.
Concrete floor covered with ceramic tiles
When installing this flooring option, the sewerage system is laid in advance. The drain can be installed either in the middle of the room or near one of the walls, as well as in the corner. The slope of the floor is made at an angle of approximately 5 degrees, which allows visitors to move comfortably along it and not linger on the surface of the water.
After the screed has been poured and fully matured, it is decorated on top with tiles, the seams between which are sealed with moisture-resistant grout or sealant. Removable wooden flooring, which was already mentioned above, is often simply laid on top of the screed.
Laying a concrete floor in a bathhouse with a slope is a topic for separate consideration in a special publication on our website.
At the end of the article, there is a video about the installation option for a wooden leaking bath floor.
Video: simple DIY bath floor
Pouring a concrete floor
Installing beacons and creating a screed with a slope towards the drain.
How to pour concrete floors correctly? It is worth considering that non-leaking floors must have a slope. Otherwise, the water will not go down the drain without “help.” What should be the structure of the concrete base in the bathhouse? To properly pour the cement mortar and make the desired slope in the floor, you should adhere to the following recommendations:
- In the case of arranging the foundation on a strip or pile foundation, first of all, floor joists are laid;
- The subfloor is subsequently attached to the joists. Skull blocks are nailed to the bottom of the joists, onto which boards are thrown;
- Heat-insulating materials (foam plastic, polystyrene, mineral wool) are placed in the sections between the joists;
- Then a sewage system with a siphon is installed in the washing department;
- After installing the hydraulic component of the floor, the wooden sheathing is sheathed with DSP sheets;
- The slope of the base for normal water drainage should be approximately 30 mm per m2;
- Cement mortar is poured onto the prepared subfloor;
- After the screed has hardened, a drain ladder is installed and a finishing coating (wood, tile) is laid.