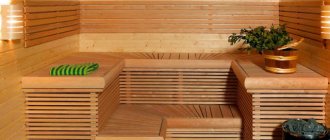
Wooden lining is often used for interior decoration in bathhouses, balconies and loggias, kitchens and even living rooms. However, most often it serves as a decorative finish with minimal insulation capabilities.
To make an insulating coating from a material, it must be installed correctly, first installing thermal insulation. All the work is simple, so even beginners can easily do it. How to sheathe correctly and other tips from the craftsmen - read on.
Thermal insulation of brick housing
Brick walls must be insulated, since in order to reduce heat loss with just a brick frame at home, you will need to use a large amount of this material (the increase occurs due to the thickness of the walls).
Moreover, as in the case of other types of buildings (made of wood and foam blocks), it is advisable to insulate brick walls from the outside.
Overview of suitable materials
- One of the popular options is warm plaster, the thickness of which should be 30 mm. It is attached to a woven mesh, which will provide good adhesion. To achieve high efficiency, you need to insulate the ceiling and floor. If the old plaster begins to crumble, it must be removed so that the installation of a new coating can begin.
- It is not advisable to insulate walls with polystyrene foam from the inside of a brick home, because this material is susceptible to combustion, and, in addition, it is not resistant to moisture
- And expanded polystyrene has all the necessary qualities for highly effective thermal insulation. It does not absorb moisture, is characterized by a low thermal conductivity coefficient and is multi-tasking, as it can also be used to insulate the ceiling, as well as to reduce heat loss when installed outside the house. Polystyrene foam is attached with glue
Another option is mineral wool material. It is freely used for insulating ceilings and for thermal insulation of walls and roofs. This covering is installed between the sheathing profiles. You can use metal or wood material to create the frame. To protect the walls from moisture, a film is used. A vapor barrier is also laid on top of the insulation layer.
The main types of materials used for vapor barrier of a wooden house
Using a vapor barrier can significantly extend the life of a wooden house. The following types of vapor barrier can be selected on the market, which will provide reliable protection of building structures.
Membranes containing a film made of non-woven fiber. It effectively absorbs moisture. There is no need to leave any gap when installing this membrane.
Diffuse films - this material provides high-quality ventilation.
Multilayer film is the optimal solution for providing vapor barrier to rooms that are not heated in winter.
Multifunctional films - the name speaks for itself, in addition to steam, this material protects walls from wind, rain, etc. They are widely used in the construction of ventilated facades.
film for home insulation
Causes of moisture
Dew point offset results
In the winter season, with the onset of frost, the walls of our houses freeze. In a correctly calculated wall thickness, the transition point from sub-zero to positive temperatures, called the dew point, is located inside the wall and condensation does not occur. That is why they used to build houses with walls made of stone no less than 80 cm thick. Today, with the use of the latest construction technologies and innovative materials, it has become possible to build houses with thinner walls, but such buildings require the installation of additional thermal insulation structures.
The question arises: should insulation be carried out from the outside or inside?
The issue of exterior finishing disappears when the house is made of timber and does not require external finishing. If the house is made of stone, then it would be more competent to insulate the facade, but this does not exclude carrying out internal work.
There is the only exception - the internal insulation of the walls of an apartment in a multi-storey residential building, where the use of any type of thermal insulation material will not give tangible results.
Choosing insulation for a bath
Insulation of a bathhouse, and a steam room in particular, is carried out in order to create and maintain the necessary comfortable temperature and microclimate for bathing procedures and steaming.
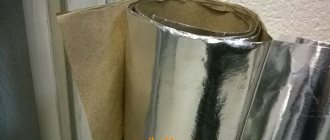
The insulation must be environmentally friendly, not release harmful substances when heated, must conduct steam and moisture without accumulating them in its mass, and be non-flammable. Such insulation is stone wool, additionally protected by a layer of vapor barrier made of metal foil, as well as expanded clay for insulating floors or ceilings.
To choose the right insulation for a bath, you need to know:
Frequency of use of the bath , temporary use or constant maintenance of a comfortable temperature in the bath building. In the latter case, it is necessary to approach the issue of insulating a bathhouse in a comprehensive manner, as when insulating a residential building, taking into account high humidity and vapor formation.
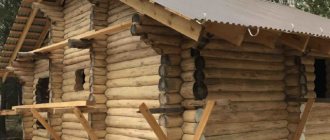
What materials are the walls of the bathhouse made or will be made of ? As a rule, a bathhouse is built from solid wood (timber, logs), less often from brick and expanded clay concrete blocks; recently, frame bathhouses have begun to be built.
Advice! If you do not plan to use the bathhouse all the time (you do not intend to maintain above-zero temperatures in the winter), then the optimal and inexpensive solution for the walls would be timber with natural humidity, followed by sanding and caulking with additional insulation of the steam room with 10 cm rock wool with an overlap of 5 cm, and foil vapor barrier.
- Why not profiled timber costs more, caulking is difficult to do.
- Why is it not laminated timber that costs much more, environmental friendliness is questionable, since it contains glue.
- Why is a non-rounded log more expensive, and further finishing and insulation is more difficult?
- Why not manual cutting, only because of the cost and difficulty of finding good performers.
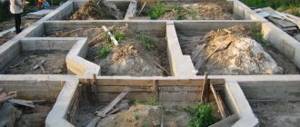
What type of foundation was used during construction or will be used. For an inexpensive bathhouse for non-permanent use, a good solution would be piles with a grillage made of timber and insulation of the subfloor with 20 cm of stone wool or expanded clay with the organization of waterproofing in the steam room and sink, cladding the floor with DSP, organizing a drain and facing with frost-resistant porcelain stoneware. If you are making a shallow foundation with floors on the ground, then expanded clay in the steam room area and EPS in other areas can be used as insulation under the screed.
What a roofing pie the building has. The best solution for a bathhouse is a roof with a cold, ventilated attic, insulated with 20 cm stone wool or expanded clay insulation with easy access to it to monitor the condition of the insulation and chimney.
So, how to insulate a bathhouse:
- For the walls we use stone wool with foil vapor barrier.
- For the ceiling we use expanded clay or stone wool with a vapor barrier in the steam room area made of foil and in other areas from a high-quality vapor barrier roofing membrane.
- For the floor we use insulation: for wooden subfloors we use stone wool with the organization of waterproofing in the steam room and sink. For floors on the ground in the steam room, it is better to insulate them with expanded clay; in other rooms we use EPS
Finishing and ventilation
Both outside and inside the house, after the insulation work has been completed, most likely, all surfaces will have to be finished. Depending on the insulation used, different types of decorative coatings can be used. For example, finishing is not necessary for cork material, as it looks quite attractive. The same applies to warm plaster.
Mineral wool coating, polystyrene foam, polyurethane foam must be covered with decorative material, since walls without finishing, in this case, will look bad. The most common way to “sheath” walls is with drywall.
Considering that multi-layer vapor barrier is used for thermal insulation from the inside of the room, so that the air in the house does not stagnate, a forced ventilation system is equipped. Since the option of private housing is being considered, it is possible to hide the ventilation duct system before performing insulation and finishing.
Thus, the same materials can be used for the ceiling, walls and floor, but for each building the most suitable option for installing thermal insulation should be selected.
Do you need a vapor barrier inside a timber house?
The question of whether a vapor barrier is needed inside a log house is still the subject of heated debate among builders. One camp, foaming at the mouth, proves that it is quite possible to do without it, as our ancestors did, the other believes that with its help it is possible to improve already good wooden buildings, make them more comfortable and durable.
As practice shows, the latter are much closer to the truth, since the formation of condensation is a real risk when using modern building and finishing materials.
Those who advocate the old-fashioned approach forget that realities have changed, and if our ancestors had the walls of a log house in their original condition, and nothing prevented evaporation, today all kinds of decorations block the way for moisture.
The need for vapor barrier
Of course, wood has unique properties: it allows air and moisture to pass through, retains heat, and regulates the level of humidity in the house.
The ability to absorb steam depends on several factors - the number of cracks in the wood, the method and quality of sealing of the crowns, the type of lumber, its size. Experienced builders take all these indicators into account when building log houses, and this information helps them avoid making mistakes.
The structure shrinks as the wood dries, the humidity level changes very significantly, and these fluctuations do not remain without consequences for the log house.
Cracks, deformations, reduction in size - all these phenomena are observed in the first year after assembly, and therefore it is unlikely that anyone in their right mind would want to carry out finishing work immediately after the house is roofed.
It needs to stand for at least a year - after this period, fluctuations in size become less noticeable, and the log house stabilizes.
A prerequisite for this process is protection from moisture - in this case, atmospheric, since there are no people living in the house yet, and there is no evaporation from inside.
What will happen next, when the builders finish the decoration and the owners celebrate their housewarming party? Human activity is accompanied by the release of water in vapor form.
Cooking, drying clothes, cleaning, biological processes - all this contributes to an increase in humidity inside the house. The wood of the walls is dry, which means it will intensively absorb moisture if you do not create reliable protection from getting wet.
Damp walls become a source of food for fungi and microorganisms; they rot, let in heat and become unusable much earlier than planned.
Awareness of these processes makes debate about the need for vapor barrier unnecessary - it becomes clear that we cannot do without it.
Vapor barrier installation in a timber house
You can start creating a vapor barrier immediately after shrinkage is complete, before finishing work begins. The installation of a vapor barrier is often complemented by insulation of the log house, which in harsh climatic conditions is never superfluous.
To install a vapor barrier today, specialized materials are used - membranes or films; they are laid between the wall and the inner lining, on a layer of insulation, if one is provided. The created barrier separates the finishing materials and the wall, insulated or not.
Now moisture will not be absorbed into the timber, leading to its rotting, and in order to remove it from the room, a ventilation system, natural or forced, is connected.
In this form, the safety of a timber house is guaranteed for several decades, and the inhabitants of the home receive warmth, comfort and a reduction in maintenance costs.
10 / 07 / 2019
When building a log house, there are simply no insignificant stages. Each of them contributes to the aesthetics and practicality of the structure, and must be completed to the highest level of quality. This also applies to finishing - it turns out that many do not know why...
Read more…
10 / 07 / 2019
Frame construction is rapidly gaining momentum, however, some refuse to take this technology seriously, explaining their opinion by the presence of many disadvantages. However, upon closer examination they turn out to be either the results of errors and blunders...
Read more…
10 / 07 / 2019
Log houses are becoming more and more popular every year. This is explained simply - this material combines many advantages, including environmental friendliness, durability, the ability to retain heat, and of course, an affordable price.
Read more…
Source: https://www.Postroeczka.ru/statji/paroizol-brusovy-dom
Installation of insulation in a timber house
Considering that wood, of all building materials, is most susceptible to moisture, it is very important to protect the walls. Insulation of a log house from the inside is carried out only after surface preparation
At this stage, the following actions are performed:
- Regardless of whether housing is being built or an existing structure is being modernized, you need to check all wall surfaces for cracks and leaks. In a private house made of wooden beams, all joints must be filled with jute fiber. If larger cracks have formed over time, then tape tow is used. Then the surfaces are treated with a special composition, which reduces the risk of mold and mildew formation
- In wooden housing, it is necessary to take care of moisture protection in order to avoid rotting of the frame of the house in the future. To do this, a film waterproofing material is fixed before installation.
- Do-it-yourself insulation of walls from the inside in a wooden house is done using a mineral wool coating. This option is the most preferable, as it allows the house to “breathe”. It is also used to insulate ceilings and floors. Thermal insulation with mineral wool is carried out between the beams of the sheathing
- The frame is made of a wooden block with dimensions of 5x5 and 5x10. This is quite enough for reliable fastening of mineral wool. It is better to start installing the sheathing from the corners of the room, and you should use a building level
- The distance between the vertical bars should be slightly smaller (1-2 cm) than the width of the mineral wool roll. This is due to the fact that this material is elastic, so this trick is used to increase the density. But insulation with mineral wool should not be carried out with excessive pressure on the material, due to which it loses its thermal insulation properties
- Another layer of film coating is fixed on top
If you choose the method of insulating a wooden house with mineral wool, it is better to play it safe and glue the joints of the waterproofing material with construction tape. In addition, the film strips are laid overlapping.
Additionally, mineral wool should not be attached; this may damage the waterproofing layer located under the insulation.
Vapor barrier of the walls of a timber house - rules and methods
Comfort and indoor microclimate depend on proper insulation. Vapor barrier for the walls of a wooden house is selected carefully, and all work is carried out in stages according to technical requirements.
Remember, the moisture content of wood changes even during use, especially at first.
Changing the humidity level increases the risk of deformations: shrinkage of load-bearing walls, formation of gaps, violation of the geometry and size of corrugated timber or logs.
Some of the deformations appear even 5-6 years after the building is put into permanent use. As a result, the tightness of the grooves and joints between beams/logs is broken, which is problematic to correct in the future. The walls of residential buildings made of corrugated timber or rounded logs are less deformed, but work is also necessary.
Vapor barrier materials are:
- aluminum foil;
- film made of polyethylene or polypropylene;
- diffusion membranes.
When building a house from laminated veneer lumber, there is no need for such measures, because the properties of the building material prevent the penetration of steam. The manufacturing technology of laminated veneer lumber involves removing moisture from the wood, which minimizes shrinkage processes.
Methods of internal and external vapor barrier
Due to a violation of the tightness, steam penetrates into the insulation, which becomes soaked and deteriorates before the specified service life. Often the interior walls are sheathed before the wood has completely dried, so it is impossible to eliminate the shortcomings of caulking and sealing seams. Let us consider below effective methods for solving the problem that has arisen.
Method 1
Such vapor barrier of external walls is simple, but not all owners of log houses use it. Here it is important to wait until the wood is completely dry, and only then begin finishing activities.
The method includes carefully processing all joints and filling the cracks with sealant, as well as caulking the grooves.
For thermal insulation, dense insulation is used that has undergone special hydrophobic treatment in production.
When performing vapor barrier work, the walls will have low thermal resistance values, and steam will flow from the rooms to the insulation.
An increased degree of vaporization increases the risk of damage to the seal during its operational life.
This option preserves the ability of the walls to “breathe” and leaves an optimal microclimate, but is not suitable for long-term living in the house.
Method 2
The vapor barrier of the walls inside using this method is done using a polyethylene film or diffuse membranes. The thickness of the polyethylene film is up to 0.1 millimeters.
This method minimizes the penetration of steam into wall structures, that is, it protects the thermal insulation material from the influence of moisture.
In addition, the level of thermal resistance increases, which increases the service life of the structure.
Remember that the vapor barrier layer in the walls, basement and attic floors is a single contour. The advantages of the method are obvious, but among the disadvantages we note the destruction of an acceptable microclimate due to the lack of “breathing” ability. The insulating layer is created from a special foil building material that completely reflects heat.
It is attached between the frame itself and the finishing. The side covered with foil faces the inside of the rooms. At the beginning of the event, do not forget to seal the joints with special tape to increase resistance to heat transfer.
Method 3
This method consists of placing a vapor barrier layer (membrane) between the log house wall and the thermal insulation material. Remember to organize a 4-5 centimeter ventilation gap on the side of the walls, which is combined with the basement rooms below, as well as with the vents above. Ventilators allow you to regulate the temperature near the ventilation gap to equalize it with that in the rooms.
For effective thermal insulation, extruded polystyrene foam and sometimes polystyrene foam are chosen. To increase fire resistance, it is recommended to line the outer part with brick.
Do not forget that installing thermal insulation on an external wall encourages the formation of condensation on the side of the membrane that faces directly to the wall. This solution will lead to frequent wetting of the wood.
This method of arranging a vapor barrier layer is used without taking into account the thermal resistance of the walls, which subsequently causes an increase in the thickness of the thermal insulation material.
Note that the use of thermal insulation in the form of foamed polymers frees the home owner from installing a special ventilation gap.
The disadvantage of this method is a decrease in the environmental friendliness of the microclimate due to the installation of a vapor-proof membrane around the entire perimeter of the rooms. Among the advantages are versatility and ease of installation.
The material is applicable both to new timber and log houses, and to log houses that have been in use for a long time.
Source: https://strojudacha.ru/articles/paroizolyaciya-sten-brusovogo-doma-pravila-i-sposoby/
Materials for thermal insulation
Materials for thermal insulation
As a result, several main conclusions can be drawn:
When installing thermal insulation on the inside of the walls of a house, the dew point inevitably moves to the inner surface of the wall. This will happen even taking into account the correct calculations of the thickness of the heat insulator. As a result, the service life of the entire thermal insulation structure is reduced. The thermal insulation structure must include a vapor barrier membrane. As a result, it is necessary to resolve the issue of normalizing humidity in the room (increasing costs for heating and ventilation systems). Indoor insulation reduces the volume of rooms. Since the entire structure is installed inside the house, the issue of human life safety becomes the most important
It is important to understand which insulation material best satisfies this requirement. Materials made from natural raw materials are the best choice
Soft slabs or rolls of mineral wool, which have high heat-protective and sound-proofing properties, are well suited. All materials that have good vapor permeability and are capable of absorbing moisture will lose their functional properties over time. The use of expanded polystyrene or polystyrene foam, as materials that practically do not absorb moisture, is more profitable. In this case, it is necessary to consider a tight fit of the plates to each other. The main disadvantage of this option is that it is a completely synthetic material, and they will have to breathe. Today there is a lot of talk about polyurethane foam, which hardens when applied to the surface and, of course, gives strong adhesion to the inner surface of the wall. Condensation does not form, but to carry out the work it is necessary to construct technological formwork. This process is quite long, and the wall does not breathe.
There are many wall insulation materials, there is plenty to choose from, but the right decision must be made. People will live, work and breathe in this house.
Insulation of walls or how to insulate a bathhouse from the inside under the lining
I’ll say right away, to answer the question of how to insulate a bathhouse from the inside under the lining, you need to understand that we are talking about a steam room.
Attention! It is not worthwhile to insulate wooden buildings from the inside, including bathhouses; if possible, do only external insulation. This is justified by the fact that a dew point will form on the inner surface of the walls, the wooden surface will become waterlogged and it will begin to rot.
But, when it comes to additional insulation of the steam room in the bathhouse, then with proper organization of ventilation in the steam room and in the bathhouse as a whole, it is possible to carry out measures to insulate the internal walls and ceilings from the inside.
It is better to insulate the steam room starting from the top and going down, first the ceiling, then the walls. It is necessary to clean the tree from dirt and fungal formations, if any. You can impregnate a wooden surface with an antiseptic, but choose a water-based antiseptic for interior work, it is less toxic.
Procedure for insulating a steam room.
We insulate the ceiling
Since the main heat loss occurs through the upper enclosing structures (warm air tends upward), if possible, insulate the steam room ceiling on both sides, from the attic and from the steam room side.
- On the rough ceiling we lay out the vapor barrier film with the side facing the insulation as indicated in the instructions; this is very important. Close all cracks and joints tightly, make overlaps on the gables and rafter system.
- Now you can pour and level a layer of expanded clay or lay stone wool of the required density in a layer of 20 cm.
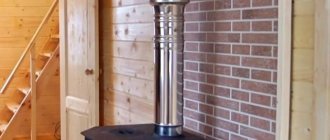
- Pay special attention to the exit point of the stove pipe; make the passage with a sandwich pipe using a special element for passing through the floors and filling it with stone wool, and insulate the points of contact with the pipe using heat-resistant sheets for the stove.
- After insulating the attic space, insulate the steam room from the inside. If the ceiling is smooth below, then make a frame, and if there are already ribs, then make a frame if you want to lower or level the ceiling.
- Attach a vapor barrier to the frame ribs and again pay attention to the side that should face the insulation
- Place stone wool tightly between the frame ribs and cover them with a layer of vapor barrier again.
- Now, in order to protect the insulation from excess moisture and at the same time retain maximum heat, make a protective layer of foil. Glue the joints of the foil with aluminum tape. Attention! Take special control of the places where the ceiling and walls come into contact.
- Attach a counter rail, maybe 20 to 30, to the frame, you can screw the finishing lining to it, it is needed for the ventilation gap
Secret! To obtain a special microclimate in the steam room, before covering the ceiling with clapboard, you can additionally sheathe the ceiling with a dry board 5 cm thick made of coniferous wood. Thus, the heat and steam will remain in the steam room for as long as possible, the solid wood will pick up moisture and gradually release it.
We insulate the walls
If the walls of the steam room are made of stone materials, then you first need to waterproof them; cement or acrylic-based waterproofing is suitable for this; I do not recommend using bitumen-based waterproofing in the steam room. If the walls are made of wood, then proceed to how to insulate the bathhouse from the inside under the lining and in what order.
We attach 50 by 50 bars vertically to the walls at a distance of the width of the stone wool mats, use a construction stapler to attach a vapor barrier membrane, wrapping it around all the bars
Between the sheathing we place stone wool tightly in one layer of 5 cm.
If you decide to insulate the steam room in two layers of 5 cm, then we make a counter lathing from a 50 to 50 bar and lay the insulation in the second layer.
Then we make a finishing layer of vapor barrier from aluminum foil, fasten the foil end-to-end, and cover the seams with aluminum tape.
Now you can screw the finishing strip onto the block to create a ventilation gap and begin covering the steam room with clapboard.
Advice! Do not use foam-based foil insulation in the bathhouse as a vapor barrier for thermal insulation. Remember, the less chemicals there are in your steam room, the better for you and your family.
We insulate the floor
Floor insulation will depend on the type of foundation and ceilings of your bathhouse.
For wooden floors and subfloors, we use stone wool to provide waterproofing in the steam room and sink.
For floors on the ground or a monolithic slab, the steam room is better insulated with expanded clay; in other rooms we use EPS.
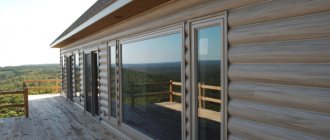
Lining for interior decoration of a wooden house
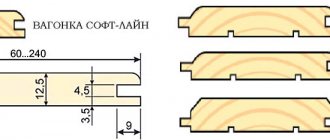
Manufacturers offer a variety of options for facing materials for interior decoration. However, to decorate a wooden house, they often resort to lining. It allows you to maintain the overall style and atmosphere of a wooden building. This material can be used for both exterior and interior finishing (only the methods of processing differ). Lining comes in a variety of types. Moreover, we are not talking about the wood from which it is made and not about its size. The profile of the lining, depending on the wishes of the customer, can be modified. There are wavy or even design of the material, as well as imitation of timber or logs (block house).
To finish the walls inside a wooden house, lining 15-20 millimeters thick is used. Its cost is less than that of thicker analogues, but such material fulfills its tasks. You can arrange the lining boards in any order: horizontally, vertically, at an angle. Those with remarkable patience and hard work are able to create entire paintings from lining.
When fixing the lining to the sheathing or to the walls, do not forget about possible shrinkage of the house. To compensate for possible changes in wooden walls, leave a gap of 20-40 millimeters near the floor and ceiling.
Features and types of lining for house cladding
Cladding a house with clapboards inside and outside is used very widely. Wooden lining is an edged board made of wood up to 22 millimeters thick.
This is a universal material with many advantages. These include:
- Environmental safety for humans.
- Low cost.
- Availability of several quality classes.
- Long service life.
- Attractive appearance, which allows you to create original patterns from wooden slats.
There are several types of wooden lining:
- Regular . She may be:
- classic;
- standard;
- calm.
This type of cladding lamella has a short ridge and is not subject to primary processing. The disadvantage of the material is the difficulty of installation.
- Block house. In appearance it imitates rounded timber and is widely used for the outer cladding of buildings. There is a groove on the inside of the lamella, and a tenon on the side.
- Eurolining. The panels are made with more precise geometric parameters; production requirements are quite strict; the lamellas have an elongated ridge. Most often used for interior cladding. The panels can be laid vertically and horizontally.
- American . Its difference lies in the absence of a tongue-and-groove system. The material is mounted horizontally and is used for external wall cladding.
Preparing for installation of the premises
Cladding inside the house with clapboard is carried out after purchasing the necessary materials and tools:
- Wooden slats.
- Material for thermal insulation.
- Fastening elements – dowels, screws.
- Electric jigsaw.
- Nails, staples, clamps.
- Hammer.
- Screwdriver.
- Electric drill.
- Building level.
- Materials for coating: antiseptic, primer, varnish.
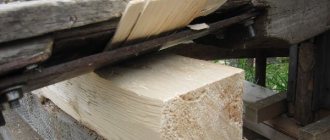
Before installing it yourself, you need to prepare the lining.
- Boards of the required size are selected.
Tip: Fresh or damp boards should be thoroughly dried first.
To cover the room, boards of the same width are selected, usually from 6 to 10 millimeters.
- Places for cutting are marked on the board. A factory part can serve as a stencil.
- Excess edges are sawed off.
- Grooves are made on both sides of the board using a milling cutter.
- The outer side of the panel is chamfered.
- The material is treated with a special solution to increase its moisture resistance and durability.
What is the best way to cover the walls of a wooden house inside?
A wooden house is the dream of many. And therefore, when the opportunity arises to buy it or build it yourself, you want it to delight you with its warmth and comfort for many decades. And for this you need to carefully approach the finishing of the structure.
Particular attention needs to be focused on the questions: what can be used to cover the walls of a wooden house inside and how to do it correctly
Now on the market you can find many offers for the sale of houses and cottages that already have interior decoration. But not all of them can be trusted. It often happens that for the sake of economy, walls are sheathed in violation of all technologies. This will not become clear immediately, but only after a certain period. Therefore, the best option would be to cover the walls of a wooden house yourself.
Insulation from the inside
Thermal insulation of the house from the inside avoids the need for exterior finishing. With this approach, you can maintain the attractive appearance of a building made of timber or rounded logs. But the technology has a number of disadvantages that you should prepare for:
- the interior spaces, but not the walls, are protected from the harmful effects of cold;
- the useful area of the building is reduced;
- There are certain restrictions on the materials used.
Which insulation to choose
What is the best way to insulate a house? It’s worth starting from the material of the walls. The tree has gained well-deserved popularity due to the fact that it is able to “breathe”. Wood allows air to pass through well, providing excellent ventilation in rooms.
To preserve the beneficial properties to the fullest when working from the inside with your own hands, you need to use materials that are similar in breathability to wood. To insulate a house, it is better to abandon such heat insulators as:
- Styrofoam;
- extruded polystyrene foam (or more simply “Penoplex”);
- penoizol.
They are highly airtight, so they can create a greenhouse effect in a building. This will require expensive forced ventilation or installation of air conditioners.
The best material for thermal insulation is mineral wool.
Its advantages include:
- high efficiency;
- the ability to pass air without interfering with natural ventilation;
- safety for human health and the environment;
- non-flammability;
- ease of installation;
- availability;
- low cost.
But when using cotton wool, it is worth remembering its disadvantages. The material absorbs moisture well, but ceases to perform its main function. To avoid getting wet, it is also worth purchasing a vapor barrier and wind-waterproofing.
Layer diagram for mineral wool insulation
There are several types of mineral wool. The best option would be basalt (stone) insulation in slabs. You can also choose glass wool, which is available in the form of mats rolled into a roll. The second option may cause installation difficulties. The material is very itchy, and particles getting into the lungs or on the skin cause itching. To avoid unpleasant consequences, all work with glass wool is carried out in special clothing and masks.
The most undesirable, but inexpensive option would be slag wool. But when insulating your home, it’s better not to save money. Cotton wool is made from industrial waste. Manufacturers are responsible for safety, but it is not always possible to check which slags the insulation is made from. You can easily come across low-quality material or a fake, with which insulating a wooden house from the inside will be dangerous to health and life.
Preparatory stage
Before insulating a wooden house from the inside, you will need to prepare the walls. This is especially true if it is necessary to insulate an old wooden house. In this case, the material that was used for caulking had time to cake. The main task at this stage will be to eliminate cracks - sources of drafts, cold and moisture.
Work begins by cleaning the base. You will need to remove dust and dirt that has accumulated on the walls. Before insulating an old house, it is worth checking the strength of the wood. It should not be damaged by various pests. Otherwise, it is better to strengthen the walls.
To prevent problems with insects and microorganisms in the future, the surface is treated with antiseptic compounds. You can also treat with fire retardants, they increase the material’s resistance to fire.
Treatment with antiseptics will protect the wood from rotting
Wood shrinks over time. Because of this, cracks may appear in the walls. Before starting insulation work, it is worth caulking the old walls. Currently, jute is most often used for these purposes. For large cracks, it would be wise to purchase tape tow. The material is hammered between logs or beams using a chisel.
It is necessary to carry out the work until the material no longer fits into the space and begins to hang outward. High-quality caulk is the key to a warm home.
Wind-waterproofing of walls
Mineral wool is afraid of moisture. Before you insulate the walls of a wooden house, you should take care to protect the insulation. On the outside of the mineral wool, a layer of wind-waterproofing is fixed. It prevents weathering and penetration of atmospheric moisture. There are several types of suitable materials, but the best option is a vapor diffusion membrane.
Description and characteristics of the windproof membrane
This modern material reliably protects against water, but does not interfere with the movement of air and steam. This allows you to maintain the ability of the walls to breathe, as well as ensure the removal of moisture from the insulation.
The waterproofing is attached to the walls using a construction stapler. The joints of the canvases are made with an overlap of at least 10 cm and are taped with tape or special tape.
Installation of insulation
Internal wall insulation is carried out along the frame. It can be made of wood from a metal profile. The easiest way to insulate a wooden building is to use wood for the frame. It is important to correctly select the geometric dimensions of the frame:
- The pitch of the racks is selected taking into account the width of the insulation. It should be approximately 2 cm less than the width of the mats or slabs. This is necessary for a tight fit of the material. For mineral wool, the spacing of the posts is most often used so that there is a clear distance of 58 cm between them.
- The overhang of the frame must take into account the thickness of the insulation and the required ventilation gap. It is needed to remove condensation from the surface and allows you to keep the material dry. The thickness of the ventilation gap is usually taken to be 3-5 cm.
Mineral wool is placed between the sheathing posts. With the correct choice of the last step, the heat insulator will be held in place due to friction. For additional fastening, you can use special plastic dowels; they are usually sold together with insulation.
Vapor barrier
How to properly insulate the walls of a wooden house from the inside? It is important not only to choose the right insulation, but also to protect it from all types of moisture. Interiors are characterized by fairly high humidity; water in the form of steam can easily reach the mineral wool and reduce its effectiveness.
In what cases it is impossible to carry out insulation on the outside of walls
It is always better to install a layer of thermal insulation coating on the outside, unless there is a visible reason not to do so. These include:
- The proximity of the house to an unheated room where insulation is problematic
- Decorative finishing has been done on the outside of a wooden, brick house or foam block building, which is expensive and labor-intensive to dismantle
In all other situations, insulation along the outside of the walls will be preferable. The only option that requires high-quality internal thermal insulation, laid at the construction stage, is frame construction.
In other cases, it is better to select materials that are characterized by vapor and waterproofing properties, and are also installed without seams.
DIRECT UPHOLSTERY OF THE FRAME WITH CLIPPING
Here are several options for attaching the lining to the frame:
Option No. 1 - cut off the head of the nail so as to make it almost invisible at the attachment point, and then drive the nail in from the tongue side at an angle. Then the cladding will be more uniform and attractive.
Option No. 2 is fastening using a special clamp (“clip”). A very convenient way, since you can remove the lining at any time and secure it in another place.
Option No. 3 - when a nail is driven into the inner latch, the outer latch must be short.
Wall upholstery with clapboard. Three types of fasteners
If you want to get a neat and beautiful appearance of the walls, then remember that the lining must completely cover the fasteners.
The essence and problems of internal insulation
When insulating a house from the inside, you need to take into account some features.
Most experts really believe that insulating the inside of a house is only worth it as a last resort, recommending insulating the outside. What is meant in this case by the word “inside”? This refers to the direct covering of the walls of rooms with any materials. And if floors, ceilings and some other areas can be easily insulated, it is with the insulation of walls that many problems arise.
The main difficulty is the transition of the wall surface to the cold zone. Typically, if there is no insulation of any kind, warm air from the room passes through the walls, heating them. If insulation is laid from the inside, air masses will collide with them, unable to escape outside. In this case, all walls remain cold, and there is a risk of cracks.
For this reason alone, it is worth considering whether it is necessary to insulate a private house from the inside instead of insulating it from the outside. It’s logical: why waste money and your energy if the result is only cracked walls and a cold room? But this is only part of the difficulties. In addition to damage to insulated surfaces, there is condensation and other troubles that will appear in a minimum time if even a small mistake is made during the insulation work.
Frame for clapboard cladding
Frame for lining
Wall paneling does not just apply to a bare wall. The lining is attached to a frame prepared in advance.
For this, wooden beams of rectangular cross-section with dimensions of 15 by 20 cm, as well as 20 by 40 cm, are used. Further actions depend on the existing conditions.
Absolutely flat wall
- this is the most ideal option. For this purpose, beams of small thickness (1-1.5 cm) are used. They are attached to the wall using glue or nails. In this case, they need to be fastened not end-to-end, but at a short distance - this will ensure air circulation under the upholstery. If moisture was previously noticed from the wall, then the walls are upholstered with clapboard and pre-treated with waterproof protection.
Advice! If you do not treat the wood in the presence of moisture, then the underlying frame may become weak and deformed over time, and at the same time the wall itself is deformed.
Air circulation between bars
The wall is uneven or has small flaws
- in this case, a larger cross-section of the beams is used. With this option, you should be guided by the building level indicators and use a plumb line. It is worth placing wedges in places where there is a defect. The beams are placed at a short distance in order to save space for the insulating material. You also need to treat the wood with a protective liquid against beetles and worms. A wall made of lining is an excellent home for them (How to treat lining so that it lasts for many years - read this article).
Example of wedge placement in this situation
Wall cladding with clapboard is done purely at your request. It can have a horizontal, vertical and diagonal direction (see Wall decoration with clapboard: technology and installation details)
The frame should be planned and secured so that it is perpendicular to the board itself. The distance between the frame bars should be within 40-50 cm.
Directions for lining and frame
Advice! It is worth covering the doors and windows with beams so that the lining ends on them, and not on the window and door openings. This is done for the purpose of aesthetics and durability of the upholstery. After all, it will end more beautifully on its lining than on an opening of a different height. And the strength will be better. There is an opinion that circulating air from windows and doors can pass under the casing, which will lead to a change in the temperature microclimate and deformation of the upholstery.
Features of the thermal insulation process
Insulation for walls in private housing, as in the case of any other object, is best laid on the outside. If thermal insulation is installed from the inside, the walls will remain cold, and due to the shift in dew point, condensation will form on the internal surfaces. This will lead to the constant presence of moisture, which is especially dangerous for a wooden house.
In a situation where the main frame of the building is made of brick or other material, for example, foam blocks, it is the thermal insulation that will suffer to a greater extent, especially when it comes to mineral wool insulation. But even under such conditions, it is possible to build the safest possible structure that will trap heat in the house.
Why is vapor barrier necessary?
For the walls of a wooden house, a layer of vapor barrier (also called waterproofing) is necessary in almost all cases. The reason is in the characteristics of wood as a building material: it allows air to pass through well, but at the same time absorbs a lot of moisture, which is why it swells. If timely measures are not taken, this can lead to negative consequences:
- the walls will begin to curve or heave;
- the structure of the house will inevitably begin to sag due to increased wood density;
- finishing materials (lining, drywall and others), as well as wall coverings (wallpaper, MDF, PVC) can be damaged due to wall movement;
- mold may grow in the thickness of the walls and corners, which will create an unpleasant odor in the house;
- if water freezes during the winter cold, it will increase in volume, which will cause cracks and microcracks in the wood to increase, and the material will wear out faster;
- an increase in cracks also has another negative effect - over the years, the walls will freeze much faster, which is why you have to spend more resources on heating the room;
- finally, when moisture is absorbed into the insulation material, this quickly leads to its softening and deterioration - eventually you will have to dismantle the wall and install a new layer.
All these consequences can be easily avoided if, after completion of construction, a vapor barrier layer is laid, which follows immediately after the finishing material (for example, lining) and is tightly adjacent to the insulation, as shown in the diagram.
NOTE. Sometimes a vapor barrier layer is understood as a material that does not allow moisture to pass through, but allows air to pass through, and waterproofing is a material that does not allow either water or air to pass through. In a practical sense, the words are often used as two synonyms.
The most complex type of fastening is fastening using a clip.
There is a specific order in which this method is executed:
- Cut off the edge of the plank.
- Place it in a corner at a distance of 0.5 cm from the ceiling.
- Check the vertical.
- Secure the plank, while nails must be driven close to the corner, in the projection of each backing block.
- At the required height, attach the groove with a ready-made clip. The clip can be secured with construction staples or nails on each block.
- The second plank fills the height of the wall.
- Having connected the edges of the planks, attach them to each other with nails.
- Secure the remainder of the second to the first plank.
- Having pulled both parts together, secure them with clips on all the backing bars.
- Cut and fasten part of the third plank.
Then continue to do everything in the same order until the entire wall is covered in this way.
Example of overlaying planks
Need to know:
- The clapboard wall should be upholstered from left to right.
- Use a wooden backing when driving nails to protect the lining from deformation.
- Consult with specialists about the prices and characteristics of the lining you need.
- Leave a small space between the paneling, ceiling and floor so that air can circulate well, for which you can temporarily attach a thin wooden strip.
- Sockets and switches should be dismantled, the places where they are located should be marked on the lining, and then the holes should be made with a flared saw. If they need to be moved to another place, then you need to run the wiring in a tube under the frame beams.
Types of vapor barrier materials
The most common vapor barrier material is polyethylene film. It is available unperforated and perforated. The second option is more suitable for waterproofing. Film is the cheapest material, is easy to install, has good qualities, and has a long service life.
Polypropylene film is a more durable material compared to the previous option. When used, condensation forms on the walls of the film, so now it is produced with an additional layer of viscose and cellulose, which is designed to absorb moisture.
Diffuse membranes are the highest quality and most expensive vapor barrier material. Made from artificial fibers, the main advantage of the material is the ability to “breathe” - which is more typical of natural products.
Liquid rubber - this material has recently become more famous. Essentially it is a water-based liquid bitumen-polymer emulsion. It applies well to almost any surface, even uneven surfaces. The surface treated in this way becomes impenetrable to steam and water, and heat and sound insulation also increases.
Selection of material for insulation and finishing of the loggia
The huge selection of finishing materials, however, has not in any way affected the popularity of lining - due to its environmental friendliness, it is still as highly valued as it was several years ago.
Before you start work, you need to decide on the material with which the balcony will be finished. The most common types of wood are oak, ash, alder, cedar, linden, pine, spruce.
It is worth considering that cedar and oak lining are the most expensive, while pine combines popularity and affordability. If the installation technology is followed, it looks natural and beautiful, but has one significant drawback. When the temperature rises, pine releases resin, so it is most advisable to use it in places where the likelihood of exposure to sunlight is quite low.
It is equally important in the process of selecting material to pay attention to the price and class of the lining.
Premium Extra is the highest class of lining. It has a smooth, uniform surface and is ideal for doing the cladding yourself.
Class “A” lining has a small number of knots. On average, no more than two per 1500 mm of material surface.
The third class “B” is lining with significant flaws, microcracks and resin pockets that spoil its appearance.
Class “C” refers to types of technical lining that have various mechanical damage, through cracks, and chips. It is not suitable for interior decoration.
As a rule, the first two classes are used for finishing balconies; “B” can be used in cases where the walls will subsequently be covered with paint.
Installing the floor when insulating a loggia with your own hands
First you need to cut the 40x50 timber into pieces 1300 mm long. When laying, the distance between them should not be more than 600 mm. Each must be secured to at least two anchors. The timber should not be too close to the walls, otherwise a so-called cold bridge will form.
Next, longitudinal logs are installed. To do this, you need to find the top point, which will play the role of a level, i.e. it is along this that the first joist will be laid. The second lag is installed on the opposite side at the level of the first. Next, a thread is stretched between them, according to the tension of which all other logs are installed. Wooden spacers can be used to adjust the height. All logs are attached using 60 mm wood screws. To insulate the floor, the entire surface up to the joists must be foamed with polyurethane foam.
A sheet of chipboard is laid on top of the logs with a gap of 50-100 mm from the walls. The chipboard is also fastened with self-tapping screws. All joints and gaps formed during the installation process are also foamed.
Insulation for balconies
The final decision on the choice of specific insulation is made by the owner of the apartment, taking into account all existing individual characteristics. A short list and comparative characteristics of performance indicators will help you make the best choice.
Glass wool (glass fiber)
Traditional insulation has been used in construction for many years. It is made from glass industry waste and has good heat saving properties. Disadvantage - existing domestic production technologies do not allow reducing the diameter of the fibers, and relatively thick ones injure and irritate the upper skin. You have to wear special clothing and gloves when working with glass wool. The coefficient of thermal conductivity is somewhat inferior to more modern types of insulation.
Mineral wool
It is made from volcanic glass (basalt), has very thin fibers - the thermal conductivity coefficient decreases, skin irritations disappear.
It can be pressed or rolled; some types have external surfaces coated with heat-reflecting aluminum foil, which improves performance. The main disadvantage is that it is very afraid of moisture; when wet, thermal conductivity increases significantly. Requires reliable steam and water protection. Wet mineral wool takes a long time to dry; with prolonged contact with wooden elements, the latter quickly fail. Another drawback is the rather high cost. As for the environment, both mineral and glass wool are completely safe; no harmful chemical compounds are released into the air.
Polyurethane foam
Sprayed insulation has high heat-saving properties. The main advantage is the complete absence of cold bridges, the insulation is hermetically sealed, does not shrink, and is not afraid of moisture. In terms of cost, it occupies an average position. Disadvantage: insulation requires special equipment; work is performed only by specialized companies. Has a high adhesion coefficient with all building materials. Simultaneously with insulation, polyurethane foam fills and seals cracks.
Styrofoam
The most optimal material for insulating balconies, it is not afraid of moisture and does not shrink. In terms of cost, it falls into the budget category. Modern types are low flammable and do not support open fire. In terms of environmental friendliness, they meet the current requirements.
There are many other more expensive insulation materials; they have increased physical strength and can withstand significant dynamic and static loads. But for insulating balconies, their use is considered inappropriate from an economic point of view.
When choosing the type of insulation, you need to take into account the requirements of fire safety organizations for flammability. In first place among all insulation materials are mineral wool and glass wool. Due to their high resistance to high temperatures, these materials can be used as fire barriers. It must be borne in mind that according to the latest government regulations, only non-combustible materials are allowed for external cladding of buildings, including balconies.
Source: svoimi-rykami.ru
Insulation of the internal walls of bathhouses is rational, and arguments are unnecessary here - if the bathhouse is heated, then the heat must be preserved. Choosing insulation for bath lining is not so simple, since many nuances need to be taken into account. The main selection criterion is the ability of the insulation to work in aggressive environments, or, in simple terms, not to get wet, not to deteriorate from water and heat, and to keep warm. But only those insulation materials that are safe, odorless, do not evaporate or emit anything into the air will be cast, that is, they are completely environmentally friendly.
More details about the requirements for insulation under lining:
- There are no harmful, toxic or dangerous substances in either the production technology or the raw materials of the insulation.
- The material is heat-resistant and will not become a risk factor for fire when heating a bathhouse or sauna.
- Good thermal protection, or low thermal conductivity properties
- Low moisture absorption, ideally zero
- The insulation is resistant to high temperatures and its fluctuations
Several insulation materials suitable for a number of parameters - foam glass, peat blocks, modern mineral wool and new generation glass wool, polyurethane foam, polyethylene foam and foiled mineral wool.
Insulation on a foil backing
The advantages of such insulation are excellent resistance to temperature changes, low water absorption, good waterproofing and thermal protection, ease and speed of installation. Heat insulators with a metallized layer are not subject to corrosion and are suitable for baths and saunas. Features of foil materials that can be classified as disadvantages are the ability to heat up and transfer heat to the metal layer, and then to the outside environment. It is necessary to design the walls in such a way that the aluminum coverings do not overheat. This problem is solved by installing an air gap from inside the premises. The air gap will prevent the metal from overheating from the direct heat of the steam room, and the infrared radiation will be reflected from the foil layer and return to the bathhouse.
For baths and saunas it is recommended to use the highest quality materials, including insulation. Of the foil types, some of the most popular are modern Finnish-made insulation materials. They are used for insulation of almost all structures built not only from wood, but also brick, block and lightweight concrete. Insulation for saunas with double-sided foil coating meets all the requirements: complete environmental friendliness, zero water absorption, heat-shielding properties almost twice as good as mineral wool, plus “built-in” vapor barrier. Mold or mildew on this insulation is excluded. The thickness of the foil-coated polyurethane foam is small, and allows the installation of a wooden frame of the sheathing for fastening the lining. The sheets are rigid and light enough for gluing to walls made of almost any material, without creating a frame. It is possible to remove one layer of foil and finish the facing tiles by gluing them onto the polyurethane foam core. Installation is carried out in a short time, and the quality of insulation is decent.
Foam glass insulation
One of the most durable materials. To insulate the walls of baths and saunas, not granular, but block foam glass is used. Advantages of blocks:
- Stable shape, low weight with high strength
- Completely safe and environmentally friendly, do not emit or evaporate when heated
- Foam glass is classified as a completely non-flammable insulation material, group NG
- Foam glass is chemically and biologically inert and does not absorb water
- Thermal resistance, sound insulation and thermal insulation are high
The disadvantage of foam glass blocks is their low impact resistance; due to the fragility of the blocks, installation can be difficult. Requires greater care and more time to install. There are options for blocks with double-sided protective reinforcement to eliminate fragility.
A special place is occupied by insulation materials called peat blocks. This is a modern material based on crushed peat. The additives are natural components - straw, small shavings and sawdust, manufacturing technology - grinding, mixing and molding under pressure. Excellent thermal insulation, sound insulation and noise protection. The main advantage of peat blocks for insulation is their completely natural, eco-friendly composition, breathable properties and the ability to maintain optimal comfortable humidity for a person in a specific bath environment. The peat block absorbs water easily, in large quantities, without any harm to its structure and with full preservation of its heat-shielding properties. And it just as easily releases moisture into the air at the end of bath procedures, maintaining optimal humidity in the air. Microflora does not live on peat blocks due to natural antibacterial properties; this insulation does not require additional antiseptics. But in terms of flammability, this insulation has a minus - it is classified as the average group G2 - low-flammable.
Mineral wool insulation
Modern types of glass wool with chemically neutral acrylic have few properties in common with the traditional type of glass wool of the old generation, and URSA fiberglass mats are quite suitable for a bathhouse. In terms of environmental friendliness, there have been no bad reviews about this insulation, and the material is certified as absolutely environmentally friendly and harmless under any operating conditions. Complete chemical inertness, non-flammability, ease of installation with excellent thermal protection. There is water absorption, since this is the structure of the material, and both hydro- and vapor barrier must be taken into account in the wall pie.
Traditional mineral wools are often used and are in demand, but not all of them are suitable for saunas and baths. In the production technology of mineral wool, types of phenol-formaldehyde resins, which are far from harmless to humans, are still used as astringent components of the fiber structure of mineral wool. When heated, these substances are capable of releasing toxins that are considered the most dangerous to health. When deciding to insulate under the lining with mineral wool, you should responsibly choose the manufacturer and check all quality documents and compliance with sanitary and epidemiological standards. You should not purchase mineral wool from an unknown company, regardless of the degree of savings, since health is more expensive. Inhaling fumes that may contain substances with a poisonous effect, which manifests itself only when heated to a high bath temperature - this deprives the idea of a bath as such. Banal, but no less reliable recommendations are to choose basalt mineral wool from a trusted manufacturer and check the certificates when purchasing. ROCKWALL insulation based on basalt fiber, as one of the most popular, is used for baths and saunas and is adapted for difficult bath use. The mats have partially hydrophobic impregnation, and in some modifications also have foil layers.
Source: stroyfora.ru